Friday, April 29, 2011

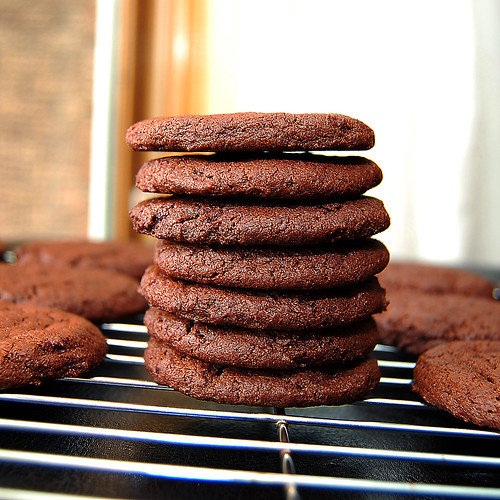
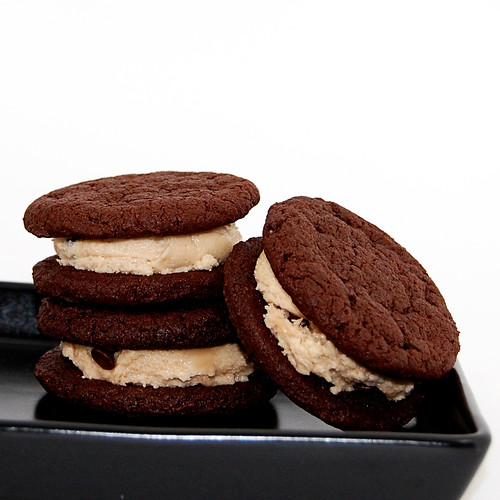
brownie cookies with chocolate chip cookie dough filling

I was asked to make fancy treats for a trade show. I posted about lemon truffles a little while back, these made the cut, and I'm sending custom colored marshmallows, because, who doesn't need a hit of pure sugar while standing around trying to sell things at a trade show. Pop one of those in your mouth, and you're good to go! But I wouldn't call these treats fancy. Neither are these brownie cookie dough sandwiches, but they are certainly over the top. So they are rounding out my little sugar care package. I hope the ladies like them!


Making them I remembered why cookies are not my favorite thing to bake - a thing my husband knows only too well. I rarely make them, and he always craves cookies. I only have one good baking sheet. So that means, 12 cookies at a time if i'm lucky, more often just 9. And they have to cool on the baking sheet a bit, so I can't just put another batch in the oven. And the baking sheet has to cool to prevent spreading. So for this recipe, 5 batches, at 10 minutes each, then a cooling time of 5 minutes, and an extra 5 minutes to let the sheet cool down, is almost two hours of baking cookies! And just as my last batch was finishing baking, we had a power outage... I lost my oven timer so I didn't know when to take them out, or if my gas oven was even still on... Yeah, I left them in too long. They were definitely on the crispy side of things. Good thing they were the last 7!


brownie cookies with chocolate chip cookie dough filling
recipe source: Heat oven to 350

Brownie Cookie:

1 cup unsalted butter
1 cup white sugar
3/4 packed brown sugar
2 eggs
1 tsp vanilla
1/2 tsp salt
1 1/4 cups unsweetened cocoa powder
1 3/4 cups all-purpose flour
1 tsp baking powder
1 tsp baking soda

1. Heat oven to 350 degrees.

2. In a large bowl, cream together the butter, brown sugar and white sugar until light and fluffy. Add the vanilla extract and then the eggs one at a time, beating well with each addition. Combine the salt, cocoa, flour, baking powder and baking soda and gradually stir into the creamed mixture.

3. Shape dough into 1 tbsp sized balls and place on a baking sheet. Flatten cookies slightly with the bottom of a drinking glass or your palm.

4. Bake 8-10 minutes or until the cookies are puffy and the tops are cracked, but still soft. Allow cookies to cool on baking sheet for 5 minutes before removing to a wire rack to cool completely.


Cookie Dough Filling:

1 cup (2 sticks) unsalted butter, softened
2 tbsp brown sugar
2 1/2 cups flour
1 13 oz container marshmallow creme
1 tsp vanilla
1/2 tsp salt
1/3 cup mini chocolate chips

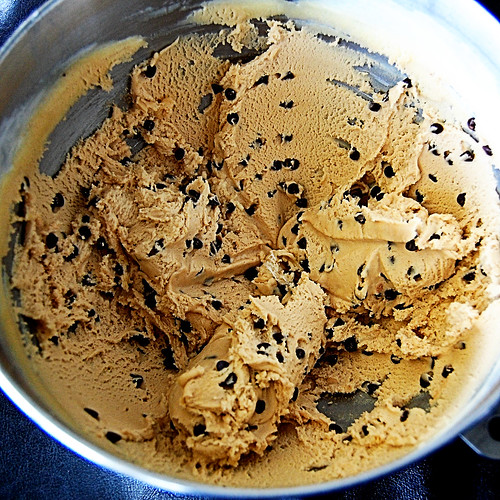
1. With an electric mixer, cream butter until fluffy. Add sugar and beat well. Add flour and beat until all the flour is incorporated. Add remaining ingredients and beat until mixture is smooth. (It will be fairly thick).


Assembling the sandwiches:

1. Scoop about 1 tbsp of filling onto to bottom of a cooled cookie. Top with another cookie and eat.

Yield: About 24 medium cookie sandwiches.


The cookies had a really strong cocoa taste, and definitely reminded me of brownies. The texture was just right. Strong enough to sandwich the filling, but soft and tender when you bit into them. This recipe is a keeper! Roll the dough balls into sugar, and you have great chocolate sugar cookies.

Although the filling was really good, it didn't scream chocolate chip cookie dough. And I might of messed with it a bit. I've never seen more than one size containers of marshmallow fluff, so I just bought the one jar, but I realized too late that I should of put closer to two jars in the filling recipe. I added light corn syrup to try to get a better consistency. I thought of adding sweetened condensed milk instead, but decided that having an open can of eagle brand near me was bad for my health, so decided to go with the corn syrup. Maybe a better option would be a modified version of cookie dough truffles for the filling?

I wouldn't want these cookies any bigger. If I had a smaller cookie scoop, I would have made them a bit smaller. Let's just say that you're not going to eat the whole tray of these in one sitting! Have a glass of milk handy!

In any case, I'm sure they'll be enjoyed, as the ones we kept disappeared fairly quickly! 

Wednesday, April 27, 2011

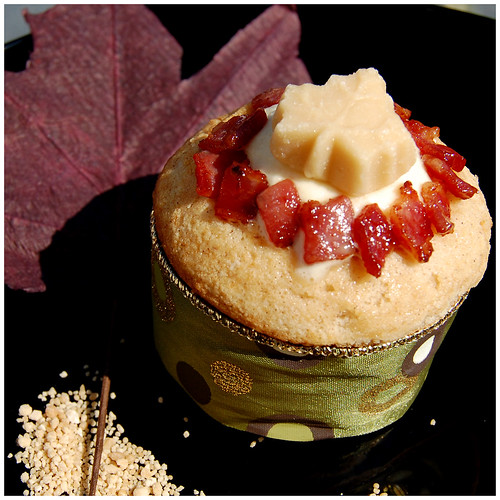
maple mousse in french toast cupcakes

Last month, I spent countless hours trying to conjure up creative fillings for the meringue filled coffee cake we were challenged with at the Daring Kitchen. This month, it was edible containers. Possibilities I had going through my mind: Waffle cones, eclairs, popovers, banana bread...


The April 2011 Daring Bakers’ challenge was hosted by Evelyne of the blog Cheap Ethnic Eatz. Evelyne chose to challenge everyone to make a maple mousse in an edible container. Prizes are being awarded to the most creative edible container and filling, so vote on your favorite from April 27th to May 27th at http://thedaringkitchen.com!

Since Evelyne is from Montreal, and this is April, I had a pretty good idea that she would challenge us with maple syrup. I can image the headaches that caused for some of my fellow Daring Bakers, since maple syrup - the real thing - is not easily found in all areas of the world, and if it is, it's terribly expensive! Luckily for me, maple syrup is produced right here. And it's pretty darn good maple syrup! I went shopping for inspiration.


And look at the goodies I found. Most of them I've previously picked up and put right back on the shelf because I couldn't justify the expense. But for the challenge? Anything goes! And my mom surprised me by paying for my bill on top of hers! Merci mom! So we've got maple syrup in cute touristy mini plastic jugs, maple syrup in a nice clear bottle (2011 syrup! Score!), maple syrup in a can that I probably bought on special at my local pharmacy (yes, the pharmacy sells maple syrup...), maple sugar that's crazy expensive, maple butter that's 100% pure maple syrup (no clue how to get that texture, but boy is it ever creamy! So good!), maple jelly!!! (I know, that was a first for me, and it's incredible. And expensive.), and soft maple candies. I bought a maple lollipop too, but Cha got a hold of it before I could hide it...

I'm so ready for this challenge!

So I stuck with the mousse recipe we were given. Boil maple syrup, temper egg yolks, bloom gelatine in some cream, dissolve gelatine, combine with syrup and eggs, let thicken while whisking once in a while. Whip remaining cream, lighten maple syrup mixture with some of it, then fold in the rest. Chill

Maple Mousse

1 cup pure maple syrup
4 large egg yolks
1 package (7g/1 tbsp.) unflavoured gelatine
1 1/2 cups whipping cream (35% fat content)

Bring maple syrup to a boil then remove from heat.

In a large bowl, whisk egg yolks and pour a little bit of the maple syrup in while whisking (this is to temper your egg yolks so they don’t curdle). When mixture is warm, add remaining hot maple syrup while whisking.

Measure 1/4 cup of whipping cream in a bowl and sprinkle it with the gelatine. Let it rest for 5 minutes. Place the bowl in a microwave for 45 seconds (microwave for 10 seconds at a time and check it in between) or place the bowl in a pan of barely simmering water, stir to ensure the gelatine has completely dissolved.

Whisk the gelatine/whipping cream mixture into the maple syrup mixture and set aside.

Whisk occasionally for approximately an hour or until the mixture has the consistency of an unbeaten raw egg white.

Whip the remaining cream. Stir 1/4 of the whipped cream into the maple syrup mixture. Fold in the remaining cream and refrigerate for at least an hour.

Remove from the fridge and divide equally among your edible containers.


For my edible container, I chose a french toast cupcake. A good while ago, Food Network Magazine had put a french toast cupcake with maple frosting and a slice of bacon on the cover of their magazine. I didn't make it then, but I thought that now would be the perfect opportunity. But when I looked at the recipe, I didn't have a lot of the ingredients, so I found another recipe that I had bookmarked around the same time. I blogged about them earlier this month, when I actually made the challenge.

And I topped the finished product with bacon that I cooked in maple syrup, and a maple candy or maple sugar.

Very simple, but super tasty! The bacon is an absolute must to counter the super sweet mousse, and I love the chewy texture it brings to the dessert.

Monday, April 25, 2011

easter sugar cookies

We were heading to the cottage Easter weekend, but had a bunch of stuff lined up too. My in-laws were moving and Cha had her last dance class on Saturday morning. My SIL was also having an Easter brunch on Sunday, but it became clear that there was no way we were going to make it back for brunch if we went to the cottage. It is a 3 hour drive after all.

We were going back and forth all week trying to decide if we were leaving on Friday or Saturday. We finally decided to skip dance class, leave on the Friday, and kinda told Cha last minute so that she wouldn't ask us when we were going for days on end. The plan was for my husband to help his parents pack and move in the morning, and then leave after lunch so the girls would sleep in the car on the way there. The packing and moving took longer than expected, so I had to tell Cha we would leave the next day, and  not when Daddy got home like I had said.

It did not go over very well. There were tears. Lots of tears, and screaming, and crying. She was not a happy camper. Long story short, I had not intended to make Easter cookies, but I had to distract the crying child, so yeah, I broke out the cookie cutters, and the icing sugar, and the food color... Even the sprinkles!


And it was fun! She made a huge mess of her cookies, and I got to have fun decorating mine, and most important of all - no more crying! She actually said that she was to busy to leave for the cottage and we would leave after her dodo. Score!

I used this recipe to make the cookies, and the Wilton recipe for the royal icing, adding way more water than what the recipe calls for so that the icing consistency is that of soft toothpaste. Yeah, that sounds yummy allright!

My cookies weren't as good as the last time I made them, but i'm pretty sure it's because I added to much flour. I also had to use some plain yogurt because I was short on sour cream. They were still delicious, but not as soft as I like them.

Sunday, April 24, 2011

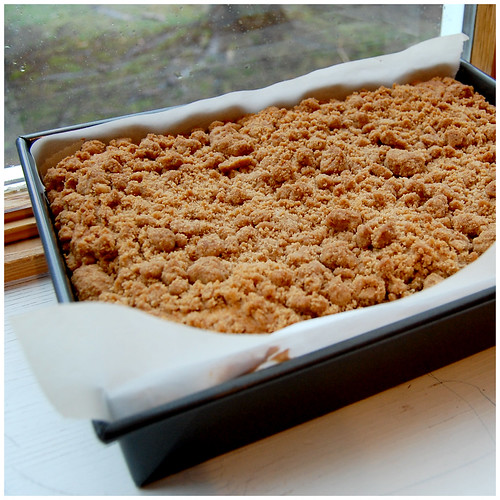
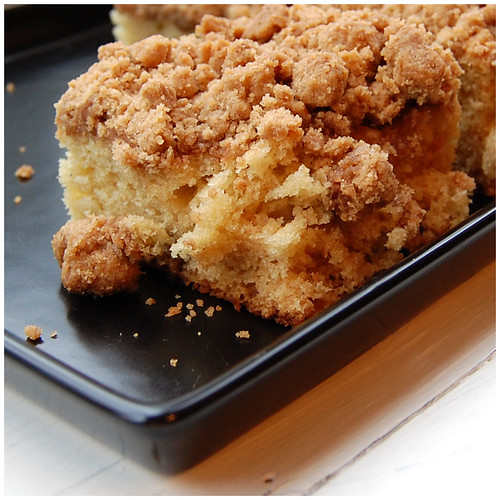
baked new york style crumb cake

For this edition of Baked Sunday Mornings, we made a New York Style Crumb Cake featured on page 43 of Baked's latest cookbook. I hear they are testing recipes for a third one... can't wait!


I was considering baking this recipe into muffins, and then into 2 square pans so I could share one, but I decided to stick to the 9 by 13 pan, not knowing how the cake would hold up underneath all these "crumbs". The author actually referred to them as boulders...


The topping was easy enough to make. Didn't even have to cut butter into dry ingredients. Basically mix sugars, salt and cinnamon together, add melted butter (a whole cup!) and fold in flour. I finished "folding in" the flour with my hands and basically formed the crumbs at that point in the recipe.

The batter comes together easily too: cream butter, add sugar and mix until fluffy, add eggs, the sour cream and vanilla. Mix in dry ingredients. Spread into a pan, and top with "crumbs". 

I was happy to see that the batter was quite foolproof. As usual, I forgot to take my ingredients out of the fridge to let them come to room temperature except for the butter). So I added cold eggs and sour cream to my creamed butter and sugar without too much damage.

It bakes for quite a while - mine took 55 minutes. And you have to rotate the pan 3 times. Not sure why, but I did it anyways.

It smelled really good while baking, and I was happy to realized that I had just made a sour cream coffee cake! They can call it whatever they want, but that's what it is. The flavor was really good, the cake being vanilla-y and the topping cinnamon-y. Texture of the cake was nice and moist and the topping was crunchy, crumbly, with the bigger pieces being a bit hard. I'm glad I made my crumbs on the smaller side. I'm not a big fan of crumbs in general, but they really added to the cake.


It makes a lot of cake! So I brought it to the cottage to share, and 4 days later, it was still very yummy. It kept surprisingly well. I'm glad I made this recipe, and will be trying it in muffin form, with tall liners to help contain the crumbs!

Thanks to the Baked Sunday Mornings bakers for encouraging me to make this one. See how they fared here!

The recipe can be found here!

Wednesday, April 20, 2011

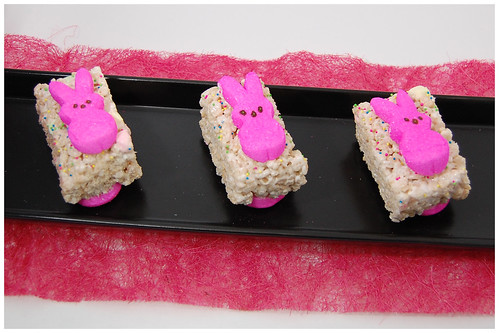
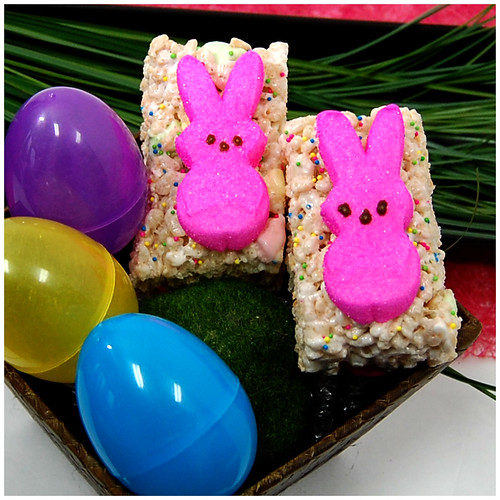
peeps rice krispies squares

Yeah, I know the blog isn't even 3 months old and this is the second rice krispies square post... But everyone loves rice krispies! And how cute are these for Easter? When I saw them here and here, I  just couldn't not make them for Cha's classmates.


I went crazy the other day at the grocery store and bought 3 boxes of vanilla flavored rice krispies, so this used up one box, two to go. I didn't add any vanilla extract and they were definitely vanilla-y enough. I also added some fruit flavored mini marshmallows. I thought they added a nice easter color touch. And sprinkles. I can't send a treat to school that doesn't have sprinkles on it... The recipe can be found on the box, or here... I made them in a 9x13 pan, and I though they were still pretty thick, especially once you added on the peeps. They were cut using kitchen shears and they just bounce back into shape. Just sandwich the rice krispies treat between the two halves of the bunny.


For Cha's classmates, I put the treats on a stick, wrapped it up in a clear treat bag and tied it with a pink ribbon. Too bad I ran out of ink, because I had cute tags in mind too... And of course, I was too lazy to take out the camera before I gave the pretty ones away! Oh well! Happy long weekend!

Friday, April 15, 2011

compost cookies for earth day

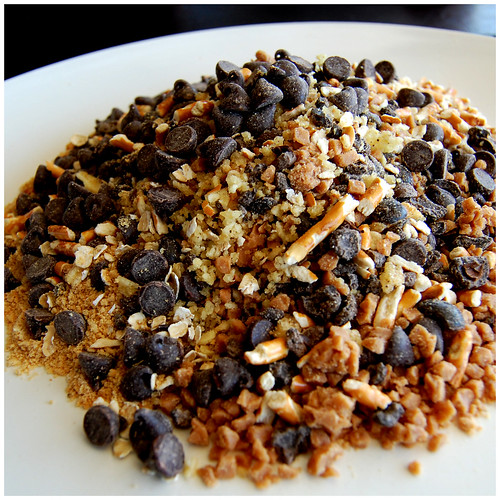
I know I'm kinda late jumping on the compost cookie bandwagon, but they've been all over the internet, and when I was trying to think of something to make for earth day, compost cookies seemed like the natural thing to bake. Because of the name, not because they are any good for the planet or anything like that, so earth day, perfect time to make compost cookies!


I'm scared of bugs, and... nature basically, so I don't compost. I think I would if there was a city run program where they collect the bins of compostable material and they would compost it for me, but if it means collecting my trash and adding it to a pile of trash in my backyard that I have to turn over a few times a year and add brown compost or something to it, uh. no. I'm not doing that.


But I'll gladly add a bunch of yummy snack food to a cookie dough to make compost cookies. I read Momofuku's book a while back, and although I'd like to eat some of what they make at the restaurants, the cooking style is not really for me. Their recipes are really interesting... and complicated! Even the baking ones I found on the web. They are really out there, and seem awesome! The crack pie, the cereal milk ice cream, the chocolate malt cake... They seem like a lot of work with a lot of components, so I think the cookie is a good place to start... Even that recipe has had mixed reviews from bloggers who've tried it. They come out super flat for most people.

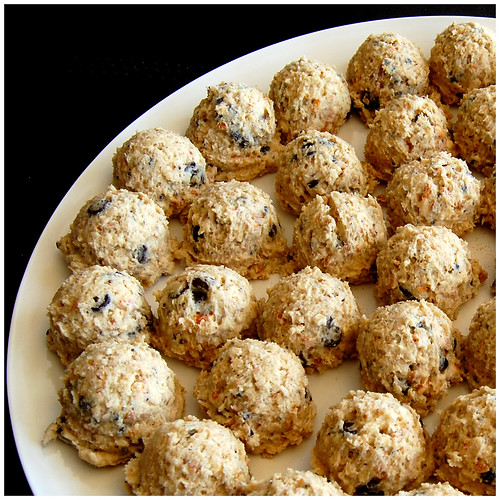
I thought of just using my regular cookie dough and adding a bunch of stuff to it, but decided to try the milk bar recipe, even if it was doomed to fail. So beat butter and sugars, add eggs and beat for 10 minutes. Yeah. 10 minutes. Add dry ingredients, now make sure you don't over beat. 10 minutes was enough! Mix in a bunch of baking stuff and snack food. Portion out. Chill. Bake. Enjoy.


Momofuku Milk Bar's Compost Cookies Recipe
Adapted from the recipe that used to be available on the Live! with Regis & Kelly website
Yield: 40 cookies

1 cup butter
1 cup sugar
3/4 cup light brown sugar
1 tbsp corn syrup
1 tsp vanilla extract
2 large eggs
1 3/4 cups all purpose flour
2 tsp baking powder
1 tsp baking soda
2 tsp kosher salt
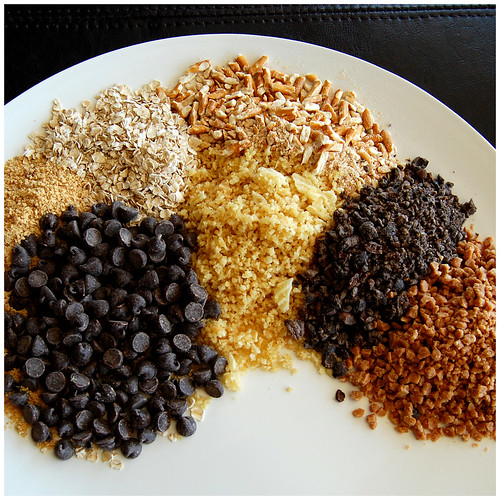
1 1/2 cups baking ingredients (1/2 cup chocolate chips, 1/4 cup skor bits, 1/2 cup oats, 1/4 cup graham crumbs)
1 1/2 cups snack foods (3/4 cup pretzels, 1/2 cup potato chips, 1/4 cup dark chocolate covered coffee beans)

1. In a stand mixer with the paddle attachment, cream butter, sugars and corn syrup on medium high for 2-3 minutes until fluffy and pale yellow in color. Scrape down the sides of the mixing bowl with a spatula.
2. On a lower speed, add eggs and vanilla to incorporate. Increase mixing speed to medium-high and start a timer for 10 minutes. During this time the sugar granules will fully dissolve, the mixture will become an almost pale white color and your creamed mixture will double in size.
3. When time is up, on a lower speed, add the flour, baking powder, baking soda, and salt. Mix 45-60 sec just until your dough comes together and all remnants of dry ingredients have incorporated. Do not walk away from the mixer during this time or you will risk over mixing the dough. Scrape down the sides of the mixing bowl with a spatula.
4. On same low speed, add in the baking ingredients and mix for 30-45 sec until they evenly mix into the dough. Add in the snack foods last, paddling again on low speed until they are just incorporated.
5. Using an ice cream scoop, portion cookie dough onto a parchment lined sheet pan.
6. Wrap scooped cookie dough tightly with plastic wrap and refrigerate for a minimum of 1 hour or up to 1 week.
7. DO NOT BAKE the cookies from room temperature or they will not hold their shape.
8. Heat the conventional oven to 400F.
9. When the oven reads 400F, arrange the chilled cookie dough balls on a parchment or silpat-lined sheet pan a minimum of 4" apart in any direction.
10. Bake 9-11 min. While in the oven, the cookies will puff, crackle and spread.
11. At 9 min the cookies should be browned on the edges and just beginning to brown towards the center. Leave the cookies in the oven for the additional minutes if these colors don't match up and your cookies stills seem pale and doughy on the surface.
12. Cool the cookies completely on the sheet pan before transferring to a plate or an airtight container or tin for storage. At room temp, cookies will keep fresh 5 days. In the freezer, cookies will keep fresh 1 month.


The cookie dough came together really nicely. Chopping up the add-ins took some time, and since I was eye balling the quantities, when I added them in the batter, I found I was short about 1/2 cup of stuff, so I added in more oats to make up a full 3 cups.

I used my 2-3 tbsp cookie scoop to portion them, and I think they were the perfect size. In my oven, they took 10 minutes. I thought I had under-baked my first batch because I split one open the minute they were out of the oven and it was still raw in the middle, but while the rest of them cooled on the baking sheet, I guess they finished cooking, because they were perfect.

Because of the reviews I read, I was scared of the spreading factor, but baking 9 on my baking sheet was perfect. And although they are thinner than say, my regular chocolate chip cookies, they were not crisp. Nice and chewy, not crumbly. A very nice texture actually. I'm happy I tried this recipe.


I'm glad I didn't add more chips or pretzels because they were salty enough. I found they were really good, my parents loved them, Mme Sophie liked the coffee in them, but my husband though they were too salty (they were really salty...). These cookies are definitely more for grown ups than for kids, especially with the addition of the chocolate covered coffee beans, but it didn't stop my daughter from eating them. As if she needs the caffeine...

Sunday, April 10, 2011

carrot coconut scones for baked sunday mornings

I’m so happy I got to participate in this edition of Baked Sunday Mornings. I really wanted to two weeks ago, but the recipe wasn’t for us then. Wasn’t sure it was going to be this time around either, but at least scones are a bit less involved than a four component tart! Let’s just say that whenever I read the Baked cookbook cover to cover one night, the Carrot Coconut Scones were not on top of my to bake list. Kinda of a weird combo I thought. But scones are easy, so I thought I’d try it anyways. And I was happy to see that the recipe called for carrot purée instead of grated carrots. If the recipe didn’t turn out, at least I was going to have leftover purée for the baby.


The recipe came together quickly, especially since I took a shortcut and made the entire recipe in the food processor. Basically, you pulse together the dry ingredients, add the cubed butter and pulse until the butter is cut into small pieces and incorporated in the flour mixture, add the dry ingredients, pulse until the dough comes together, and then shape into a round. I divided the dough into two rounds, and cut 8 scones out of each round. Brush on an egg white wash, and bake for 18 minutes.


While it was cooking, Cha said it smelled like eggs, butter and honey. I’ll trust her nose, since I can’t trust mine. I was kinda disappointed by the color of them when they came out of the oven, but I was going to cover it with a glaze anyway, so I didn’t dwell on it too much.

The glaze was powdered sugar, orange and lemon juice. Simple.


I was pleasantly surprised by the outcome. It was really good. I think the most dominant flavors came from the glaze, but the texture of the scone was very good. It wasn't dry, or oily, or heavy or anything. My husband said that it wasn't as cakey as he would of though, and more like a scone (!). Not sure what that meant, but he said it was a good thing. I was sure my daughter would have liked the glaze in particular, since she loves lemon, but that's what she didn't like about it.

Would I make it again? Probably not, since it's not a flavor profile I regularly crave, but I'm glad I made it, if only because it's a chocolate-free, peanut and nut free snack that I'm allowed to send to school. And I got baby purée out of it. Score!