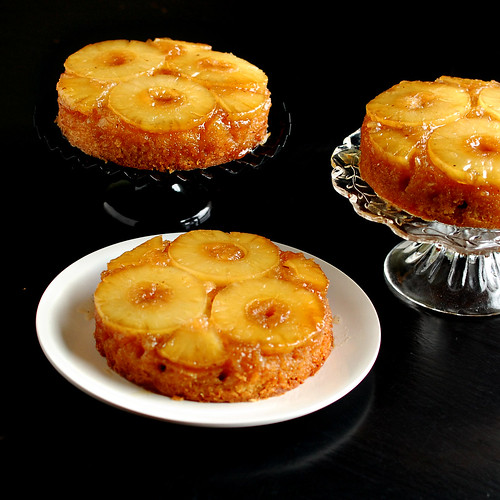
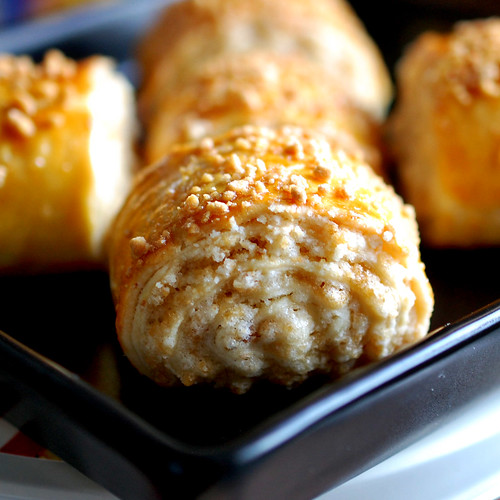
Although I really wanted to make both, I had a weird month, so I made the nazook early on, and am saving the nutmeg cake for when I have more free time.
Although a few months ago I would have been totally stressed out by this recipe because of the rolling pin involved, but I think my skills really evolved recently, and this recipe was fairly easy. The dough came together just fine and didn't behave like a yeast dough. After chilling in the fridge overnight, it rolled out without tearing and I don't think I even cursed once!
For the filling, I substituted a cup of the sugar for maple sugar, added 1 tsp maple extract instead of the vanilla called for in the original recipe below. I also sprinkled a bit of maple sugar on top of the egg-washed pastries before baking.
Nazook
Pastry dough
3 cups all-purpose flour, sifted
2½ teaspoons active dry yeast
1 cup sour cream
1 cup softened butter (room temperature)
Filling
1 1/2 cups all-purpose flour, sifted
1 1/2 cups sugar
3/4 cup softened butter (room temperature)
2 teaspoons vanilla extract
Wash
1-2 egg yolks
Make the pastry dough
1. Place the sifted flour into a large bowl.
2. Add the dry yeast, and mix it in.
3. Add the sour cream, and the softened butter.
4. Use your hands, or a standing mixer with a paddle attachment, to work it into a dough.
5. If using a standing mixer, switch to a dough hook. If making manually, continue to knead for about 10 minutes, or until the dough no longer sticks to the bowl or your hands. If it remains very sticky, add some flour, a little at a time.
6. Cover the dough and refrigerate for 3-5 hours, or overnight if you like.
Make the filling
7. Mix the flour, sugar, and the softened butter in a medium bowl.
8. Add the vanilla extract.
9. Mix the filling until it looks like clumpy, damp sand. It should not take long. Set aside.
Make the nazook
10. Preheat the oven to moderate 350°F/175°C/gas mark 4.
11. Cut the refrigerated dough into quarters.
12. Form one of the quarters into a ball. Dust your working surface with a little flour.
13. Roll out the dough into a large rectangle or oval. The dough should be thin, but not
transparent.
14. Spread 1/4 of the filling mixture across the rolled-out dough in an even layer. Try to spread the filling as close as possible to the edges on the short sides, but keep some of pastry dough uncovered (1 inch/2.5 cm) along the long edges.
15. From one of the long sides, start slowly rolling the dough across. Be careful to make sure the filling stays evenly distributed. Roll all the way across until you have a long, thin loaf.
16. Pat down the loaf with your palm and fingers so that it flattens out a bit (just a bit).
17. Apply your egg yolk wash with a pastry brush.
18. Use your crinkle cutter (or knife) to cut the loaf into 10 equally-sized pieces. Put onto an ungreased cookie sheet.
19. Place in a preheated moderate oven for about 30 minutes, until the tops are a rich, golden brown.
20. Allow to cool and enjoy!
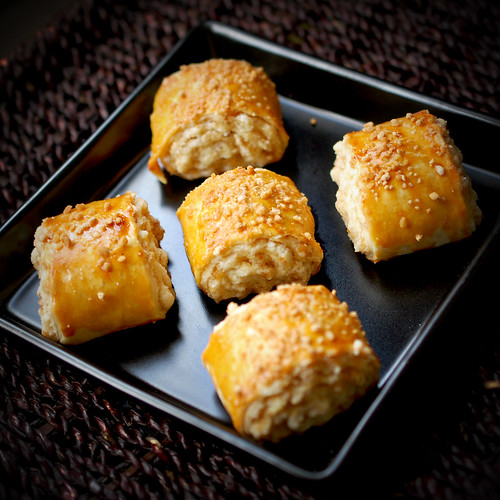
Pastries were good. I'm not a big fan of pastries in general, but I had a lot more than I should have, then gifted the rest... the containers came back empty! I'm glad to have discovered desserts from another culture! Can't wait to see what the Daring Bakers have up their sleeve for us next month!
UPDATE: Flower is royal icing, not butter :) Can it be done with butter?! If so, totally want to learn!
UPDATE: Flower is royal icing, not butter :) Can it be done with butter?! If so, totally want to learn!