Showing posts with label breakfast. Show all posts

Sunday, March 1, 2015

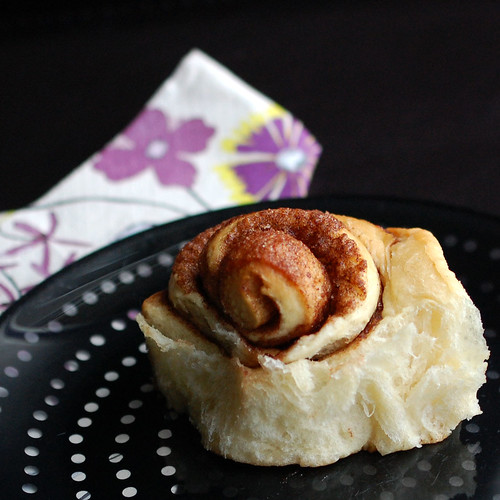
pineapple sweet rolls

This was the very first recipe that caught my eye when I flipped through Joy Wilson's Homemade Decadence.


After weeks (weeks!) of craving pineapple anything, I finally got up early enough to make this and not have to wait until dinner time to eat it! 

Made the simple yeast dough with the addition of pineapple juice in the stand mixer that gave it its last gear :(  

Once the dough is mixed and kneaded, it has to double in size. So we relaxed next to the fireplace for an hour and half. Not really. I did other things... 

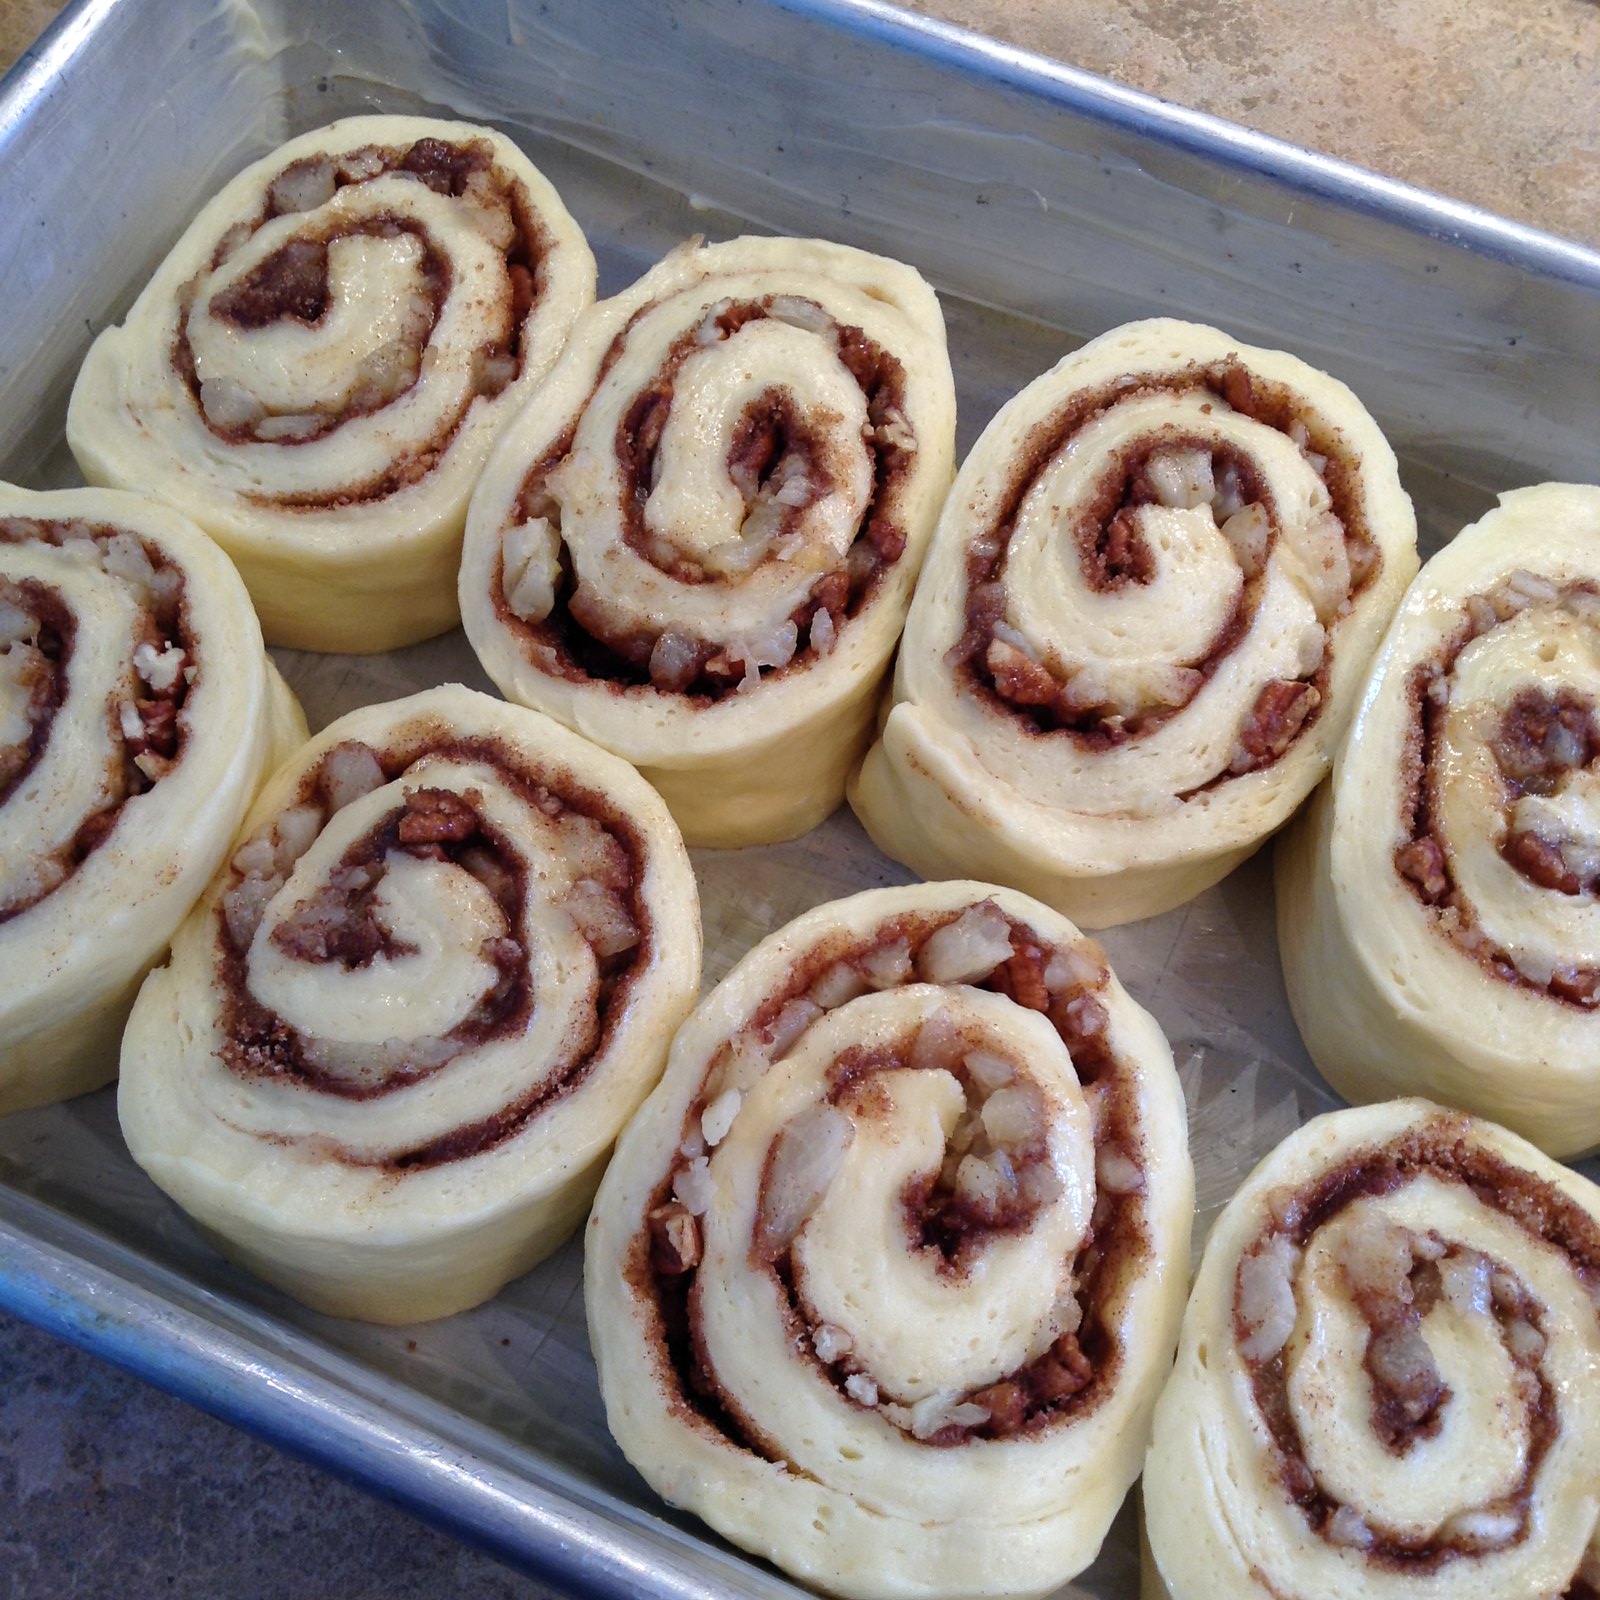
Then, the dough has to be rolled out 1/3 thin in a 10 in square. I had so much dough, that without even rolling it out, it stretched into a 10 inches square, but it was a good inch high! I rolled it out some but my counter was not big enough to handle this much dough, so I ended up with a 14 x 18 rectangle that was much thicker than needed. I trimmed off some of the dough to even out the edges. So I had enough dough to make 4 small plain buns on top of the 8 rolls and the scrap ends.


I had too much melted butter, and not quite enough filling. Once rolled, I trimmed off the edges and cut the log in 8 portions. They were massive. I fit all 8 of them in my 9x13 pan, but decided against that plan since they had to rest for another hour and were going to get bigger then, then even bigger as they baked. So I baked 6 rolls plus the ends in the 9 x 13, 2 of the bigger rolls I have ever seen in a 8 x 8 pan along with two buns and 2 buns in 2 ramekins.


That's a whole lot of dough I just cannot resist eating! 

So next time : 1.5x the filling. Split the dough in half to make two logs to be cut in 6 portions each, bake in 2 9x13 pans. Also, replace pecans with macademia nuts? Otherwise, super awesome breakfast rolls! 


These rolls were so good! Recipe available in Homemade Decadence!

Monday, June 30, 2014

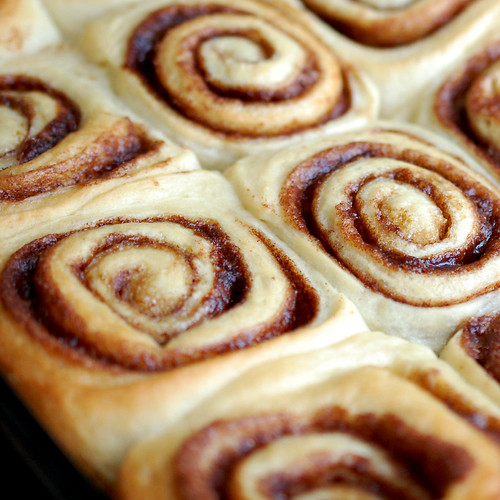
cinnamon buns

This month the Daring Bakers kept our creativity rolling with cinnamon bun inspired treats. Shelley from C Mom Cook dared us to create our own dough and fill it with any filling we wanted to craft tasty rolled treats, cinnamon not required!
I had never made cinnamon buns before, so I stuck to the provided recipe and made the classic pastries filled with cinnamon sugar.


Although whenever we buy cinnamon rolls, we get the kind frosted with a thick layer of cream cheese frosting, I glazed these with a powdered sugar, milk and vanilla mixture, and we quickly ripped into them, effectively ruining our dinner.

Cinnamon Buns
(from The Bread Baker's Apprentice by Peter Reinhart)
Makes 8-12 large or 12-16 smaller buns

Ingredients
6½ tablespoons (100 ml) (3 oz) (90 gm) granulated sugar
1 teaspoon (5 ml) (6 gm) salt
5½ tablespoons (85 ml) (2¾ oz) (80 gm) shortening, unsalted butter or margarine, at room temperature
1 large egg, slightly beaten
1 teaspoon (5 ml) lemon extract OR vanilla extract OR 1 teaspoon (5 ml) grated lemon zest
3½ cups (840 ml) (16 oz) (450 gm) unbleached bread (or all-purpose/plain) flour
2 teaspoons (10 ml) (¼ oz) (6 gm) instant yeast (active dry worked as well)
1 1/8 – 1 ¼ cups (270-300 ml) whole milk or buttermilk, at room temperature
½ cup (120 ml) (3½ oz) (100 gm) cinnamon sugar (6½ tablespoons (100ml) (3 oz) (90 gm) granulated sugar plus 1½ tablespoons (20 ml) (1/3 oz) (10 gm) ground cinnamon)

In a stand mixer fitted with the paddle attachment, cream together sugar, salt and shortening. Add the egg and extract to the creamed sugar and shortening and mix together until smooth. Add the flour, yeast and milk to the mixer and mix on low speed until the dough begins to form a ball.

At this point, switch to the dough hook attachment and knead for 10 minutes. The dough will be silky and supple, but not overly sticky. You may need to add a touch of flour if your dough is too sticky.

Lightly oil a bowl, turn the kneaded dough out into it, turning to coat, then cover the bowl with plastic wrap.
Allow the dough to rest (ferment) until it has doubled in size, approximately 2 hours.

Once the dough has rested and risen, you are ready to shape the cinnamon buns. Prepare your a sheet pan by lining it with parchment paper.

Spray your work surface lightly with cooking spray and turn the dough out onto the work surface. Using a rolling pin, roll the dough, into a rectangle about 2/3 an inch (15 mm) thick, 14 inches (350 mm) wide and 12 inches (300 mm) long (for large buns) (or 18 inches (450 mm) wide by 9 inches (230 mm) long for smaller ones). You may need to sprinkle the dough and/or work surface with a bit of flour to keep the dough from sticking. Sprinkle the cinnamon sugar filling over the surface of the dough.

Starting with a long end, roll the dough, creating a spiral, into a log shape, making sure to end with the seam side down. Cut the dough into pieces approximately 1¾ inches (45 mm) thick (for large buns) (1¼ inch (30 mm) for smaller buns).

Place buns approximately ½ inch (15 mm) apart on the prepared pan. They shouldn't be touching at this time.

Allow the shaped buns to proof at room temperature for 75 – 90 minutes until they have nearly doubled in size. They will now be touching each other.

If you are not planning on baking the buns the same day as you are preparing them, you can place them into the refrigerator after they are shaped (before this rise) for up to 2 days. If you do so, you will need to allow them to return to room temperature prior to baking, which means removing them from the refrigerator about 3 or 4 hours before baking.

Preheat the oven to moderate 350°F/180°C/gas mark 4 degrees at the end of this proofing time.

Bake the buns for 20 – 30 minutes, until golden brown

Allow the buns to cool for 10 minutes in the pan, then drizzle with glaze (recipe below). Remove the buns from the pan to a cooling rack and allow them to cool for at least 20 minutes before eating.

White fondant glaze

Sift 4 cups (500 gm) (17½ oz) of confectioners' (icing) sugar into a large bowl. Add 1 teaspoon (5 ml) of lemon, orange or vanilla extract and between 6 tablespoons to ½ cup (90 to 120 ml) warm milk, whisking well until all of the sugar is dissolved. (Add the smaller amount of milk first, whisking briskly, then add slowly until you have the consistency you want for drizzling over the buns.)


I used lemon extract in the dough, and next time, I'll use vanilla instead. I also used shortening in the dough, mainly because I was too lazy to let the butter reach room temperature. I used 1/3 cup of white sugar, and 1/3 cup of dark brown sugar, plus 2 tbsp cinnamon for the filling. I also spread some butter on the dough before rolling it up.

It's a good thing it takes a good part of the day to make cinnamon roll, because fresh out of the oven, they are amazingly soft and delicious! I'm very happy the Daring Bakers pushed me to make this! Another item off my to bake list!

Thanks Shelley for an amazing challenge, and for compiling all of this month's variations on Pinterest! I loved seeing how every Daring Baker interpreted this challenge differently!


Saturday, June 28, 2014

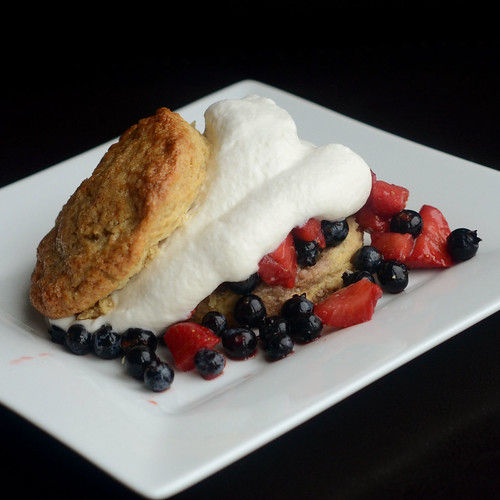
brown sugar shortcakes

Last year, I had the pleasure of testing some of the new recipes in Matt Lewis and Renato Poliafito's newest cookbook: Baked Occasions. All were awesome, as expected, but of the recipes I tested a few of them really stood out, including these brown sugar shortcakes.


They are soooo good! We used to buy shortcakes from the strawberry farm where we go pick berries every year, but no more. This is THE recipe. So delicious, and the texture is perfect.

Can't share the recipe just yet, but be sure to pre-order the new book so you can make these shortcakes, and other insanely delicious recipes when the book comes out in October. I can't wait to get my hands on this one!

Monday, March 10, 2014

Cinnamon Roll Cake

I needed a dessert to bring to my parent's house for dinner after the kids had invited themselves over this weekend. I was all set to make Classic Creme Brulée as part of Baked Sunday Mornings, but when I poured the cream in a saucepan, it came out.... not quite liquid.

So.... Spent a couple of hours trying to decide what to make and waited until the very last minute to make this cake.


It's not real pretty, not fancy and not complicated, but it was so good! It hung out on the stove top while dinner was cooking so was still warm and gooey when we had it for dessert with a scoop of vanilla ice cream. The cake itself was moist and light and the topping created gooey swirls of cinnamon and brown sugar yumminess.

This is a very simple 3-bowls and no mixer cake. The batter itself is simply flour, sugar, baking powder, salt, eggs, milk and vanilla whisked together like pancake batter. Melted butter gets poured in the batter and gently combined. The resulting mixture gets spread in a greased 9x13 pan.

The butter for the topping was supposed to be room temperature, but mine was fridge cold, so I simply cut it into some brown sugar, cinnamon and flour. Once it seemed combined enough, I poured it on batter and used a knife to swirl the topping into the batter as best as I could.

My cake baked for way longer than the recommended 30 minute average. Maybe, 45 to 50 minutes total.

Once I got around to it, and while the cake was still warm, I made the quick glaze out of powdered sugar, milk and vanilla, and poured it on top of the cake where it quickly seeped into the nooks and crannies to settle.


Not much to look at, but it made for a homey satisfying dessert, that could totally be considered breakfast.... cause you know: cinnamon!

Cinnamon Roll Cake
recipe source: Rumbly Tumbly

Cake:
3 c. flour
1/4 tsp.salt
1 c. sugar
4 tsp. baking powder
1 1/2 c. milk
2 eggs
2 tsp. vanilla
1/2 c. butter, melted

Topping:
1 c. butter, softened
1 c. brown sugar
2 Tbsp. flour
1 Tbsp. cinnamon

Directions:
Mix everything together except for the butter. Slowly stir in the melted butter and pour into a greased 9×13 pan. For the topping, mix all the ingredients together until well combined. Drop evenly over the batter and swirl with a knife. Bake at 350 for 28-32 minutes.

Glaze:
2 c. powdered sugar
5 Tbsp. milk
1 tsp. vanilla

While warm drizzle the glaze over the cake.


Friday, September 6, 2013

jam filled muffins

These muffins taste like my childhood. My mom used to make them often when I was a child, and I have been craving them for a while now, ever since I made strawberry jam I think. I just knew I had to use the jam in these muffins.


But I couldn't find my falling-apart Muffins Mania recipe book to save my life. So I asked my mom for a copy of the recipe and finally got to kill my craving.

Tasted just like a remembered them! A moist vanilla scented muffin with a jam center. And I still had some leftover crumble topping from back when I made Strawberry Swirled Muffins, so I went ahead and topped the muffins with some of the crumble topping. Added a nice crunch and extra texture to the muffins.


Jam Filled Muffins
Recipe source: Muffins Mania

1 1/2 cups all purpose flour
1/4 cup white sugar
2 tsp baking powder
1/2 tsp baking soda
1/2 tsp salt
1/4 cup butter, melted
1 cup plain yogurt
1/4 cup milk
1 egg
1/2 tsp vanilla
jam or jelly

Preheat oven to 375.

Blend dry ingredients. In a separate bowl, combine melted butter, yogurt and milk. Beat in egg and vanilla.

Add butter mixture to dry ingredients and stir until moistened.

Spoon half of the batter into 9 well greased muffin cups. Place about 1 tsp jam or jelly in each muffin and top with remaining batter.

Bake for 15 to 20 minutes.


This recipe only makes 9 muffins, but they don't keep very well. So find a few friends, and devour as soon as they are cool enough to handle.

Monday, July 1, 2013

strawberry swirled muffins

It's strawberry season again! The kids and I went strawberry picking with their cousins and my sister-in-law last week. I got amazing pics of the kids from the outing plus, the best strawberries, sweet biscuits to make shortcakes and pie!

I had planned on making balsamic basil strawberry jelly, but didn't get have all the supplies on hand. Then I realized that we had a huge basket of strawberries to eat before leaving for the weekend, so I used up some of them in these muffins.


Chopped strawberries get folded in the muffin batter, then a dollop of strawberry jam gets swirled in. Just before they go into the oven, the top of the muffins get sprinkled with a mixture of butter, flour, powdered sugar and cinnamon.


Strawberry Swirled Muffins
Recipe adapted from A Cache of Recipes by Laura Cole via The Galley Gourmet

1 1/2 cups unbleached all-purpose flour
1/2 cup granulated sugar
1 1/2 teaspoons baking powder
1/4 teaspoon baking soda
1/4 teaspoon kosher salt
8 Tablespoons (4 ounces) unsalted butter, melted
1 cup sour cream
1 extra large egg
1 teaspoon vanilla extract
1 cup small diced fresh strawberries
2 Tablespoons strawberry jam, divided
3/4 cup streusel topping (recipe below)

Preheat the oven to 350º F. Line a standard 12-cup muffin tin with paper liners. In a large bowl, whisk together the flour, sugar, baking powder, baking soda, and salt. In a separate bowl, combine the butter, sour cream, eggs, and vanilla. Gently mix the wet ingredients into the dry ingredients just until the mixture comes together. Fold in the strawberries. Evenly fill the muffin tins. Swirl 1/2 teaspoon of strawberry jam into each muffin. Top each muffin with 1 tablespoon of the streusel topping. Bake for 30 minutes. Allow the muffins to cool in the tin for 5 minutes. Remove the muffins and cool completely.

Streusel Topping
makes 1.5 cups, enough for 2 batches of muffins

3/4 cup confectioners' sugar
1/2 cup unbleached all-purpose flour
1/2 teaspoon ground cinnamon
6 Tablespoons unsalted butter, cold and cubed

Combine all the ingredients using a pastry cutter. Store any remaining streusel in an airtight container in the refrigerator or freezer for another use.


These muffins were also fun to make for little hands as there was a bunch of steps they participate in: putting the liners in the cupcake mold, mixing the dry ingredients, cracking the egg in a bowl, whisking the wet ingredients, swirling the jam in the batter, sprinkling on the streusel... a perfect recipe for kids wanting to learn how to bake!

Saturday, June 22, 2013

breakfast banana cake with banana mousse

I made this week's Baked Sunday Mornings Banana Mousse recipe and used it in a father's day cake for my dad.


As we were going over to my parent's for brunch, I was looking for a cake that was not too rich and heavy. I made a banana cake and stuffed it with a bunch of breakfast-y things.


Banana cake, bananas being a breakfast fruit, obviously. I then slathered nutella on the cake layers. Topped the nutella with a very addicting cornflake crunch, a momofuku recipe that combines cornflakes, milk powder, sugar and butter. And used Baked's Banana Mousse to tie everything together.

I only had a very small slice after a very copious brunch, but loved the different flavors and texture contrasts!

Mousse recipe can be found on the Baked Sunday Mornings blog. And since I know some of the BSM bakers topped their banana mousse with granola, I'm sharing the Cornflake Crunch recipe, via Martha Stewart. This stuff is dangerous to keep around, and I can't wait to eat for breakfast with vanilla yogurt and local strawberries!


Cornflake Crunch
recipe source : momofuku milk bar by Christina Tosi

1/2 (12-ounce) box cornflakes (about 5 cups)
1/2 cup milk powder
3 tablespoons sugar
1 teaspoon coarse salt
9 tablespoons melted butter

Preheat oven to 275 degrees. Line a baking sheet with parchment paper or a nonstick baking mat; set aside.

Place cornflakes in a medium bowl. Using your hands, crush to one-quarter of their original size. Add milk powder, sugar, and salt; toss to combine. Add butter and toss to form small clusters.

Spread cornflake mixture in an even layer on prepared baking sheet. Transfer to oven and bake until clusters are toasted and smell buttery, about 20 minutes. Remove from oven and let cool completely.

Tuesday, January 15, 2013

spiced apple coffee cake

This is one of my favorite breakfast cakes. Yes, there is such a thing.


It's super easy to make, extra moist, and full of apple flavor and goodness. Seriously, the best texture ever! This cake is almost creamy.

The only thing is, it takes forever to bake. I bake my cake in a 8 by 8 glass pan, and it takes about 85 minutes to fully bake. The resulting cake puffs up over high over the edge of the pan, but then settles and cracks a bit to accept the yummy glaze.


Spiced Apple Coffee Cake
recipe slightly adapted from Williams Sonoma

For the apple cake:
1 3/4 cups all-purpose flour
1 1/2 tsp. baking powder
1/4 tsp. salt
4 small Granny Smith Apples, 1 lb. total, peeled, cored and coarsely chopped
2 tbsp. apple juice
1/3 cup firmly packed light brown sugar
1 1/2 tsp. ground cardamom
1 tsp. ground cinnamon
8 tbsp (1 stick) unsalted butter, at room temperature
8 oz. cream cheese, at room temperature
1 1/2 cups granulated sugar
1 tsp. vanilla extract
2 eggs

For the vanilla glaze:
3/4 cup confectioners’ sugar, sifted
2 tbsp. milk or cream
1/2 tsp. vanilla extract

Preheat an oven to 350°F. Grease and flour a 9-inch round springform pan or square baking pan or baking dish.

To make the cake, in a bowl, stir together the flour, baking powder and salt.

In another bowl, toss the apples with the juice. In a small bowl, stir together the brown sugar, cardamom and cinnamon. Add to the apples and toss to coat. Set aside.

In the bowl of an electric mixer fitted with the flat beater, combine the butter, cream cheese, granulated sugar and vanilla and beat on medium speed until light and fluffy. Add the eggs, one at a time, beating well after each addition. Add the flour mixture in 2 or 3 additions and beat well until smooth. Using a large rubber spatula, gently fold in the apples just until evenly distributed, no more than a few strokes. Do not overmix. Spoon the batter into the prepared pan and spread evenly.

Bake until the top is golden brown and a toothpick inserted into the center of the cake comes out clean, 60 to 70 minutes. Transfer the pan to a wire rack and let cool for 5 minutes.

Meanwhile, make the glaze: In a small bowl, whisk together the confectioners sugar, the 2 tbsp milk and the vanilla until smooth and pourable. Adjust the consistency of the glaze by adding more milk, a few drops at a time, if needed.

Remove the sides of the springform pan, if using, and place the cake on a wire rack set over a piece of waxed paper to catch any drips. While the cake is warm, drizzle with the glaze. Let the cake cool to room temperature. Cut into wedges or squares to serve. Makes one 9-inch cake.

Note: If using a glass baking dish, reduce the oven temperature to 325°F.

Friday, December 28, 2012

eggnog muffins with cranberry filling

On boxing day I was confronted with a massive amount of leftover food from Christmas parties. I had a carton of eggnog that was about to expire, so I had to find creative way to use it before then. I made eggnog waffles, and then turned to the internet to find a muffin recipe that I could make and freeze for lunches when we go back to work and school in January.


I was looking for a muffin recipe that didn't require the use of a mixer, since it was being used for something else, and I didn't have any softened butter I could use for these muffins, so I found what I was looking for at Annie's Eats.

As I was spooning the batter in the cute little baking cups, I thought that I could make use of other leftovers, and added a spoonful of cranberry sauce in each of the half filled baking cups before adding a bit more batter on top.


Eggnog muffins with cranberry filling

recipe lightly adapted from Annie's Eats

Yield: one dozen

1 1/3 cups all-purpose flour
¼ tsp. baking soda
½ tsp. baking powder
½ tsp. salt
¼ tsp. freshly ground nutmeg
1 cup eggnog
¼ cup vegetable or canola oil
1 tbsp. apple cider vinegar
1 tsp. vanilla extract
1 cup sugar

1/4 cup cranberry sauce

Preheat the oven to 350˚ F. Line cupcake pans with paper liners. In a medium bowl, combine the flour, baking soda, baking powder, salt and nutmeg; whisk to combine. In another bowl combine the eggnog, vegetable oil, vinegar, and sugar. Whisk until well blended. Add in the dry ingredients and mix just until incorporated.

Divide the batter between the prepared cupcake liners, filling the cups 1/2 full. Add a spoonful of cranberry sauce to each liner, and fill each liner 2/3 full with the rest of the batter.  Bake 22-24 minutes, or until a toothpick inserted in the center comes out clean. Allow to cool in the pan 5 minutes, then transfer to a wire rack to cool completely.


They came out absolutely delicious! My mom used to make muffins filled with jam, and these totally brought back memories. The muffin itself is sweet and flavorful, and very moist. The cranberry sauce complemented the muffin nicely. A nice burst of freshness in the sweet muffin.


It was my first time using the rigid kind of baking cups for muffins. I was happy to see that they kept their shape while baking on a rimmed baking sheet, and pleasantly surprised that did not become discolored while baking by the fat in the batter. So glad I stocked up when I saw them a little while back! So cute!

Wednesday, December 26, 2012

Eggnog waffles

Leftover eggnog about to expire = boxing day breakfast!


Eggnog waffles
recipe source: Coconut and Lime

2 1/4 cup flour
1 tablespoon sugar
1 tablespoon baking powder
1/4 teaspoon salt
1/8 teaspoon nutmeg
1 cup milk
1 cup eggnog
2 tablespoons canola oil
2 teaspoons vanilla
2 eggs

Whisk together the dry ingredients in a large bowl. In a small bowl, whisk together the wet ingredients. Add the wet ingredients to the dry and stir to combine. Follow the instructions included with your waffle iron to complete the waffles. For most large, Belgian-style waffle irons you would use 1 cup of batter for each waffle and cook it for about 4 minutes.

Saturday, December 1, 2012

mini vanilla bean scones

I usually bake something for my colleagues' birthdays, but this week, I was running around, working too much and not home very often. So when Thursday rolled around and I had to stay at the office until 9, I knew birthday cake was not going to happen.

But when my daughter woke me up in the middle of the night and my mind started racing, there was no way I could fall asleep again. So I went to the living room and worked on a few gumpaste flowers I hadn't had a chance to finish when I realized that I *did* have time to bake.

I didn't have any butter that was soft enough to cream, and I didn't want to use the mixer and wake up the rest of my family, but I remembered that my colleague had asked for vanilla bean scones with vanilla glaze that Starbucks used to make but apparently no longer sells.


Scones are very doable in the middle of the night. Ingredients have to be straight out of the fridge cold, no noisy equipment... So no time for a birthday cake, but birthday scones did happen! And the birthday boy was very happy!

They came together pretty quickly, but I had to add extra cream because the mixture was a little dry. I had to work the dough much more than I wanted to so that I could form 4 circles, then cut each into 8 wedges. I was scared that they would come out tough from all the handling, but they we absolutely fine. Delicate and melt in your mouth tender.

They are very, very vanilla-y though, and the glaze is really sweet. I think next time I would cut back on the vanilla beans (use one instead of two) in the dough. The glaze is a must though. You're eating a scone with a sugary glaze on it... of course it's going to be sweet!


Mini Vanilla Bean Scones
recipe source : the pionneer woman

Prep Time: 20 Minutes | Cook Time: 20 Minutes | Difficulty: Easy | Servings: 12

3 cups all-purpose flour
2/3 cups sugar
5 teaspoons baking powder
1/4 teaspoon salt
2 sticks (1/2 pound) unsalted butter, chilled
1 large egg
3/4 cups heavy cream (more if needed)
2 whole vanilla beans
5 cups sowdered sugar, sifted
1/2 cup whole milk, more if needed for thinning
1 whole vanilla bean


Preheat oven to 350 degrees.

Split the vanilla beans down the middle lengthwise and scrape out all the vanilla seeds inside. Stir seeds into cream. Set aside for 15 minutes.

Sift together flour, 2/3 cup sugar, baking powder, and salt.
Cut cold butter into pats, then use a pastry cutter or two knives to cut the butter into the flour. Keep going until mixture resembles crumbs.

Mix vanilla cream with egg, then combine with flour mixture; stir gently with a fork just until it comes together.

Turn dough onto a floured surface and lightly press it together until it forms a rough rectangle. (Mixture will be pretty crumbly.) Use a rolling pin to roll into a rectangle about 1/2 inch to 3/4 inch thick. Use your hands to help with the forming if necessary.

Use a knife to trim into a symmetrical rectangle, then cut the rectangle into 12 symmetrical squares/rectangles. Next, cut each square/rectangle in half diagonally, to form two triangles.

Transfer to a parchment or baking mat-lined cookie sheet and bake for 18 minutes, removing from the oven just before they start to turn golden. Allow to cool for 15 minutes on the cookie sheet, then transfer to a cooling rack to cool completely.

VANILLA GLAZE

To make the icing, split one vanilla bean in half lengthwise and scrape out the seeds. Stir seeds into milk; allow to sit for awhile. Mix powdered sugar with the vanilla milk, adding more powdered sugar or milk if necessary to get the consistency the right thickness. Stir or whisk until completely smooth.

One at a time, carefully dunk each cooled scone in the glaze, turning it over if necessary. Transfer to parchment paper or the cooling rack. Allow the glaze to set completely, about an hour. Scones will keep several days if glazed.

Sunday, October 14, 2012

oatmeal peanut butter chocolate scones

I was very excited to get the third Baked book, as I've been baking from the first two for years. As we were headed for the cottage for the long weekend, I quickly baked the oatmeal peanut butter chocolate scones for breakfast, and to bring along with us on the car trip.


I like to bake scones because they take no time at all, and no advanced prep. Butter, buttermilk and egg straight out of the fridge, one bowl, minimal handling, and no standing mixer to wake up the sleeping husband.

In this recipe, the flour, dark brown sugar, salt, baking powder and baking soda are mixed together, then the butter gets cut in. You make a well in the middle of the dry ingredients, and pour in buttermilk, an egg yolk and peanut butter. The mixture gets lightly combined, then chocolate chips get folded in. I also added chopped peanuts, because the Baked guys recommended chunky peanut butter for texture, and I didn't have any. So I used about 1/3 cup of chopped peanuts, and 2/3 cups of mini chocolates chips.


The resulting dough is then turned out on a baking sheet lined with parchment paper and quickly shaped into a circle, and brushed with egg white, and sprinkled with raw sugar. The scones are cut before baking, and after they come out of the oven, so their edges are nice and soft.


1/8 of this recipe make for a filling breakfast, and I would totally serve mini versions of these to my girls for breakfast, with a glass of milk and a banana. Yum!

I really enjoyed making, and eating these! I'm sure it's not the last time this recipe gets used!

I baked these, mainly because I wanted to eat them, but also as part of Baked Sunday Mornings' quest to bake all the recipes in all three BAKED cookbooks. For the recipe, and to see how the other members of this group liked this recipe, click on through to the Baked Sunday Mornings website! And feel free to buy the book and join us! We bake out of Explorations every second Sunday.

Sunday, May 27, 2012

pulla

May’s Daring Bakers’ Challenge was pretty twisted – Ruth from The Crafts of Mommyhood challenged us to make challah! Using recipes from all over, and tips from “A Taste of Challah,” by Tamar Ansh, she encouraged us to bake beautifully braided breads.

But really, the mandatory item was to make an enriched bread which is braided or shaped, so I took this opportunity to make Pulla for the first time. Pulla is a braided bread, enriched with eggs, butter and milk, and flavored with cardamom. My husband's mom's family is from Finland, and although I've had pulla a couple of times over the last decade, but my husband fondly remembers his papa making it and having in the afternoon with his grandparents. So I thought it was about time I learned to make it myself.


When I was about ready to make this, my in-laws were moving house, so I didn't think it was the best time for me to ask for a recipe. Back when I first joined the Daring Bakers, we had made a yeasted coffee cake that had a similar texture to pulla, and Audax, one of the most active members of the group had suggested a recipe for pulla, the one I used for this challenge, with slight modifications.

Pulla
recipe adapted from allrecipes.com

2 cups milk
1/2 cup warm water (110 degrees F/45 degrees C)
1 (.25 ounce) package active dry yeast
1 cup white sugar
1 teaspoon salt
2 teaspoon ground cardamom
4 eggs, beaten
9 cups all-purpose flour
1/2 cup butter, melted
2 egg yolks, beaten

Warm the milk in microwave. In the bowl of a stand mixer, dissolve the yeast in the warm water. Stir in the lukewarm milk, sugar, salt, cardamom, 4 eggs, and enough flour to make a batter (approximately 2 cups). Beat until the batter is smooth. Add about 3 cups of the flour and beat well; the dough should be smooth and elastic in appearance. Add the melted butter or margarine, and stir well. Beat again until the dough looks glossy. Stir in the remaining flour until the dough is stiff. Let rest for 15 minutes. 
Knead the dough until smooth and satiny, about 8 minutes with the stand mixer. Place in a lightly greased mixing bowl, and turn the dough to grease the top. Cover with a clean dishtowel. Let rise in a warm place until doubled in bulk, about 1 hour. Punch down, and let rise again until almost doubled.
Turn out onto a floured surface, and divide into 2 parts. Divide each half into 4. Roll each piece into a 12 to 16 inch strip. Braid 4 strips into a loaf. Lift the braids onto greased baking sheets. Let rise for 20 minutes. Brush each loaf with egg wash. Bake at 350 degrees F for 25 to 30 minutes.


Now going over the recipe, I realize that I didn't let the dough rise twice, but without ill effects, as we thought this bread was close to being perfect! I used Ruth's method to braid the dough with four strands, which was way easier than anticipated, especially when singing the process to myself: over, under, over, next, over, under, over next... 


I made two loaves, and learned the hard way why you need to taper the ends of the dough strips: my second loaf came out pretty misshapen, with the middle being nice straight and skinny, and the ends being thick and round. I stuck it in the freezer so we could enjoy it later!

Way too sweet to eat it alongside a meal, I love it toasted, with butter, honey or nutella! Thanks for the challenge Ruth!


To see what other Daring Bakers thought of this challenge, check out the www.thedaringkitchen.com


Sunday, May 6, 2012

malted waffles

I really like making waffles. Much more than making pancakes. I find it simpler, and they are so much more impressive. So I leave the pancake flipping to my husband and haul out our massive waffle maker whenever it's my turn to make breakfast.


It's the second time I've made the malted waffles from the Baked Explorations book, and both times, they were  gobbled up in no time! I have to admit that I didn't divulge that they contained malted milk powder because my husband thinks that he hates malted anything...

I like that the recipe is really easy. No separating eggs, and whipping whites to lighten the batter... nope! Just  mixing the dry ingredients in a large bowl, the wet ingredients in another, then combining the two until the mixture just comes together! Easy!

We topped them as suggested, with chocolate chips and maple syrup! And then downed a big glass of milk!


For the recipe and to see how the other Baked Sunday Mornings bakers did, click on through to the blog!

Wednesday, May 2, 2012

espresso banana muffins

I had bananas ripening on the counter and they were past their prime eating out of hand stage. So they quickly became banana muffins. To be frank, I had wanted a healthier recipe than this one, but there was no moving my daughter from in front of the computer. She was lost on youtube... So I had to fall back on my collection of neglected cookbooks, and remembered this banana muffin recipe from the first Baked cookbook.


The Baked guys include espresso powder in these, and it totally boosts the flavor of these incredibly moist muffins.

In typical quickbread fashion, the dry ingredients are mixed in one bowl, and the wet ingredients in another, then they quickly get mixed together until just combined. It is one of their easier, less involved recipe, and you've got to love the simple, simple method that get you the most ridiculously moist muffins!

Baked’s Banana Chocolate Chip Espresso Muffins
Recipe source: Baked: New Frontiers in Baking, by Matt Lewis and Renato Poliafito

1-1/2 cups mashed, very ripe bananas (about 4)
1/2 cup sugar
1/4 cup firmly packed light brown sugar
1/2 cup (1 stick) unsalted butter, melted
1/4 cup whole milk
1 large egg
1-1/2 cups all-purpose flour
1 teaspoon instant espresso powder
1-1/2 teaspoons baking soda
1 teaspoon salt
1 cup (6 ounces) semisweet chocolate chips

Preheat the oven to 350 degrees. Spray a 12-cup muffin pan with nonstick cooking spray.
In a medium bowl, stir together the bananas, sugars, butter, milk, and egg.
In another medium bowl, whisk together the flour, instant espresso powder, baking soda and salt. Make a well in the middle of the dry ingredients. Pour the wet ingredients into the well and stir just until combined. Fold in the chocolate chips.
Fill each cup about 3/4 full. Bake in the center of the oven for 20-25 minutes, until a toothpick inserted in the center of the muffin comes out clean.
Move the muffin pan to a cooling rack, and let cool for 15 minutes. After 15 minutes, remove the muffins from the pan and let them finish cooling on the cooling rack.
Muffins can be stored in an airtight container for up to 2 days.


I was too lazy to melt butter, so I used vegetable oil instead, with no noticeable change in the final product. I also almost never measure mashed banana and use what I had on hand, in these muffins, 3 medium ones. And switched out the cup of chocolate chips for half a cup of miniature ones. Super yummy! I love keeping those in the freezer for buzy mornings.

Sunday, April 1, 2012

pineapple upside-down cake

I have been craving this cake for weeks! WEEKS! And holy hell it was good! It's a good thing I decided to share and made three small cakes instead of one big one, because I totally would have eaten most of this recipe all by myself.


I'm not sure I have ever made an upside-down pineapple cake before, but in my head, it was so much more complicated than in reality! I think it might be why I waited so long to make it after the craving struck. Really, the hardest part is waiting for the butter to soften.

I combined two recipes and made three six-inch round cakes.

The first component of this cake is the butter sugar mixture that will turn into beautifully gooey glaze when baked with the pineapple and melt into the cake. Some recipes called for boiling the sugar and butter together, but I went with a recipe adapted from Thomas Keller’s Ad Hoc at Home that called for creaming butter, brown sugar, honey, and vanilla together. The original recipe called for dark rum too, and if I had had some, I would have added some, but all I could find was rye... For some reason, I don't think that would have worked. And instead of vanilla extract, I scraped half a vanilla bean in the mixture. I love the look of the tiny vanilla seeds all over the pineapples!

The cake part is just as simple. I didn't even wash the mixer bowl... just creamed butter and the sugars in that same mixing bowl, added eggs, then alternately added the dry ingredients and the milk/pineapple juice. Spread that over the pineapple, and bake.

I strongly recommend adding a baking sheet under the cake pans in case it boils over. Will save you from having to clean the oven, and air out the kitchen!


Pineapple Upside-Down Cake

For the pan schmear
Recipe adapted from Thomas Keller’s Ad Hoc at Home via Jun-blog

8 Tbsp (1stick, 4 oz) unsalted butter, at room temperature
1 1/2 tbsp honey
1 cup packed light brown sugar
1/4 tsp scraped vanilla bean seeds
pinch kosher salt

12 pineapple rings, juice reserved

For the cake
Recipe adapted from Better Homes and Gardens

2 cups all-purpose flour
2 teaspoons baking powder
1/2 teaspoon salt
1/2 teaspoon ground nutmeg
1/2 cup (1 stick) butter, softened
1/2 cup granulated sugar
1/2 cup packed brown sugar
2 eggs
1/2 cup reserved pineapple juice
1/2 cup milk
1 teaspoon vanilla

Preheat the oven to 350 degrees F.

Grease three 6-inch cake pans. In the bowl of a stand mixer fitted with the paddle, combine the butter, honey, brown sugar, vanilla seeds and salt and beat until smooth and well blended. Divide the mixture between the cake pans, and spread evenly over the bottom.

Arrange pineapple rings over the butter mixture.

In a medium bowl, whisk together flour, baking powder, salt and nutmeg. In the same bowl used to make the butter-sugar mixture, beat softened butter, granulated sugar, and 1/2 cup brown sugar on medium speed for 2 minutes, scraping sides of bowl occasionally. Add eggs; beat until combined. On low speed, beat in half the flour mixture. Pour in reserved 1/2 cup pineapple juice and the milk; beat until combined. Beat in remaining flour mixture and vanilla.

Spread batter carefully atop pineapple slices in pan. Bake 35 to 40 minutes or until toothpick inserted near center comes out clean. Cool in pan on wire rack 10 minutes. (If you invert the coffee cake too soon, the pineapple rings may stick to pan.) Place a serving tray or baking sheet over coffee cake; carefully invert. If any pineapple sticks to pan, gently replace on cake top.


I'm pretty sure that this cake could be made in a 9x13 pan instead of the three smaller pans. Just be sure you have people to share this cake with if you bake it that way... or else you might end up eating way more of this cake than you intended! 

Saturday, March 17, 2012

peanut butter & jelly snack cake

I skipped last week's Baked Sunday Mornings recipe for Peanut Butter Bars because, although I was totally craving a peanut butter and jelly dessert, the recipe, with it's pie crust, peanut butter mousse filling and oaty topping just didn't appeal to me. What I really wanted, was this:


A cakey peanut butter bar drizzled with strawberry jam and topped with chopped peanuts for some crunch. And it didn't disappoint! The textures in this cake are totally my thing, and I could eat an entire pan!

Plus, it dirtied exactly two bowls! Did not have to spend an afternoon washing dishes like I would have if I had made the Baked recipe.


Peanut butter & jelly snack cake
recipe adapted from Dawn Finicane

1 3/4 cups all purpose flour
1/2 cup brown sugar
1/2 cup sugar
1/2 tsp ground cinnamon
1 tsp baking powder
1/2 tsp baking soda
1/2 tsp salt
1/2 cup butter, room temperature
3/4 cup buttermilk
1 large egg
1 cup peanut butter

1 jar of strawberry or raspberry jam/jelly

Preheat oven to 350F. Line an 8x8 square baking pan with parchment paper.
In a large bowl mix the flour, brown sugar, sugar, cinnamon, baking powder, baking soda and salt.
Beat in the softened butter until mixture resembles wet sand. Do not over beat. 
Remove between ¾ - 1 cup of the mixture to a medium bowl and set aside.
Add the buttermilk and the egg to the remaining mixture. Pour into the prepared pan, spreading evenly. Take the remaining flour mixture that was set aside and mix in the cup of peanut butter.
Drop the peanut butter mixture onto the cake by tablespoons, spacing it evenly. Do not press the mixture into the batter; just let it sit as is.
Bake for about 30 -35 minutes, until a tester inserted into the center of the cake comes out clean. 
When the cake has cooled slightly, warm the jelly in the microwave and drizzle it over the cake.  Cool on a wire rack before slicing.


I don't know if it's the weather or the week vacation that makes me want to bake, photograph and blog again. It was so nice taking pictures outside today! Hoping to get blogging regularly again soon!

Sunday, November 6, 2011

pumpkin cheddar muffins

I totally wasn't feeling this week's Baked Sunday Mornings recipe. I mean pumpkin and cheese? In a muffin. With cayenne and black pepper. In the breakfast section of the Baked book. Right... So I consulted my husband who said I should probably try it, since there hasn't been very many bad recipes in the book so far.


So I sent him to the store to get a can of pumpkin puree, and aged cheddar. Since this was one of the few recipes in the book that are "two bowls, mix wet ingredients with dry ingredients and bake", I quickly whipped these muffins up. Interestingly enough, they were baked in a 400 degree oven, for 20 minutes, and when I pulled them out, they were a tiny bit over baked. They smelled really interesting in the oven. I tasted one right away, and was really intrigued by the flavors. This muffin was surprisingly good! It has spicy end notes that are quite pleasant. Although I did eat it for breakfast, I think it would pair really well with a hot bowl of tomato soup! Perfect fall food!

To get the recipe and see how the other Baked Sunday Mornings bakers thought of this one, click on through to the new www.BakedSundayMornings.com page!


Thursday, November 3, 2011

pumpkin apple streusel muffins

I know it's now November and I said that I only bake with pumpkin in October, but this recipe is just too good not to share!


Many years ago, I made these so often that we actually got totally sick of it. It took a few years before I could make it again, and I swore that I would only make it in the fall. So now I totally look forward to the cooler weather so I can bake these.

Although I usually bake this batter in muffin tins, this time around, I baked it in a 9x13 pan. A round pan works too... very forgiving recipe!


Pumpkin Apple Streusel Muffins
recipe source: allrecipe.com

2 1/2 cups all-purpose flour
2 cups white sugar
1 tablespoon pumpkin pie spice
1 teaspoon baking soda
1/2 teaspoon salt
2 eggs, lightly beaten
1 cup canned pumpkin puree
1/2 cup vegetable oil
2 cups peeled, cored and chopped apple

2 tablespoons all-purpose flour
1/4 cup white sugar
1/2 teaspoon ground cinnamon
4 teaspoons butter

1. Preheat oven to 350 degrees F (175 degrees C). Lightly grease 18 muffin cups or use paper liners.
2. In a large bowl, sift together 2 1/2 cups all-purpose flour, 2 cups sugar, pumpkin pie spice, baking soda and salt. In a separate bowl, mix together eggs, pumpkin and oil. Add pumpkin mixture to flour mixture; stirring just to moisten. Fold in apples. Spoon batter into prepared muffin cups.
3. In a small bowl, mix together 2 tablespoons flour, 1/4 cup sugar and 1/2 teaspoon cinnamon. Cut in butter until mixture resembles coarse crumbs. Sprinkle topping evenly over muffin batter.
4. Bake in preheated oven for 35 to 40 minutes, or until a toothpick inserted into a muffin comes out clean.


These are insanely moist and flavorful. It is a sweet cake, especially the streusel, but I still enjoy it for breakfast one in a while. And the perfect recipe to use up leftover pumpkin puree, as it calls for only a cup of the stuff. So if you buy a big can, make the whoopie pies, you'll get just enough leftover to make this recipe!