Showing posts with label pies and tarts. Show all posts

Saturday, July 27, 2013

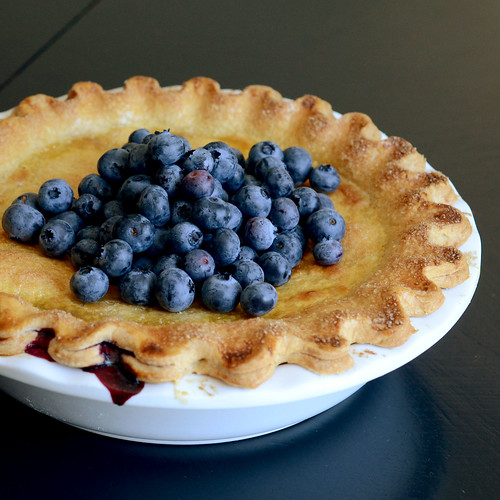
blueberry pie

For the Daring Baker's July challenge, Lisa asked all of us to search through the Daring Kitchen archives and pick any one we'd like!

I've been a member of Daring Bakers since March 2011, and since then, I've made : Yeasted Meringue Coffee Cakes, Maple Mousse served in an edible container, Marquise on meringue, Baklava, Fraisier, Candies, Povitica, Sans Rival, Quick Bread, Dutch Crunch Bread, Armenian Nazook, Challah (Pulla), Battenburg Cake, Crackers, Filled Pâte à Choux Swans, Empanada Gallega, Pannettone, Gevulde Speculaas, Muffins with Hidden Veggies and Swedish Princesstarta.

I skipped the Fresh, Fluffy, French Croissants challenge, because I'm not patient enough and I don't like croissants. I didn't make the scones (biscuits), because I ran out of time that month, but I've made them before and make scones frequently, so I don't feel too bad about missing this one. The Mille-Feuille/Napoleon challenge is one I feel bad about missing and that I will make up one of these days. Although I had made piped shortbread, I skipped the Christmas cookies challenge because they just didn't turn out as I had hoped and I didn't want to take pictures of an ugly cookie. I skipped the Crisp Crackers and Flatbreads because it was too similar to the other Crackers challenge, and although I have made Savarin once before the actual challenge, I didn't get around to it that month. The last challenge that I skipped was Life of Pie, and this is the one I chose to do this month in a "celebration" of past Daring Baker challenges. 
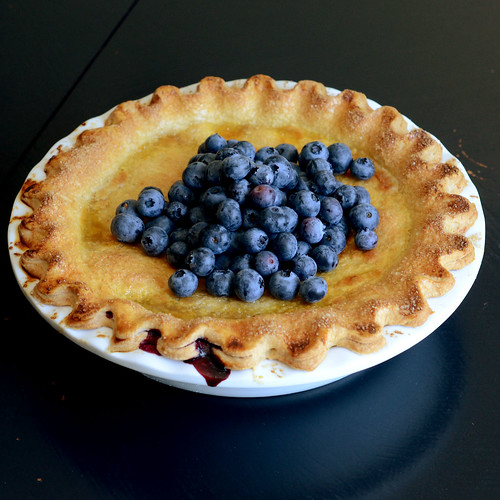

I think pie is my husband's most favorite dessert, and yet, it's a real challenge for me. I did make a tart last month when the Life of Pie challenge was actually on, but the top crust gave me issues, I got frustrated and chucked it in the garbage. So although we ate the tart, I didn't post it. So I took this month's challenge as an opportunity to face my fears and make pie.
 
As blueberries are in season, I picked that fruit as the filling of my pie. My last attempt at berry pie left me with a lake of berry juices at the bottom of the pie plate, so I went on a search for a different recipe. I picked a recipe where the filling is cooked before being placed in the pie crust, hoping it would result in a firmer filling.

I made a basic all butter pie dough recipe from Baked, but it seemed quite sticky when I got it out of the food processor, so I'm pretty sure I screwed up there somewhere. I put it in the fridge to firm up some, and had no trouble whatsoever rolling it out, so that also tells me I did something wrong. Isn't pie dough supposed to be fragile and delicate? Mine looked more like cookie dough...

The filling came together nicely, but I added a bit too much nutmeg to the mixture, and I forgot to add butter to it. Oops.

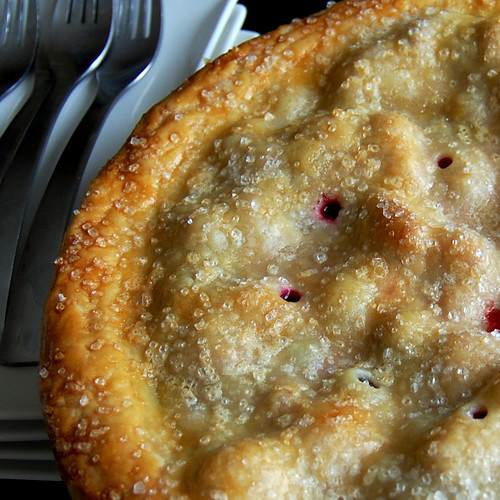
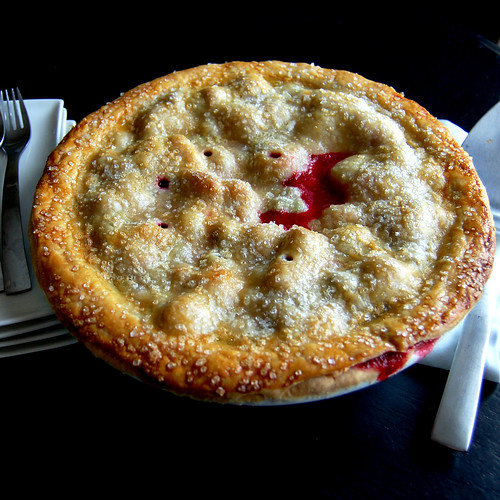
I was about to attempt a lattice top when my husband whispered "baby-steps" in my ear, so I went with a standard pie crust for the top. A quick brush with egg wash and a sprinkling of raw sugar before going into the oven.

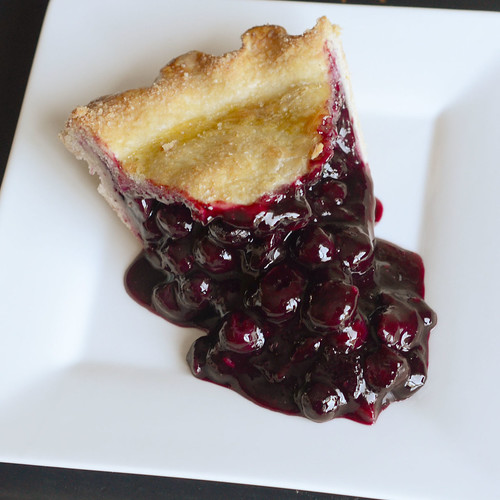
I was pretty happy with the golden pastry once out of the oven. We waited until the next day to dig into it, and when we did... the filling oozed all over the place. But I have to admit that I loved the texture of the filling. It was a great blueberry sauce!


And it was too nutmeg-y. And the crust was tough (although, I really liked it, but I don't like flaky pastries, so my opinion doesn't count apparently). But still. I made pie, and my husband had seconds. So I win anyways. Now I can go back to not making pies.
Classic Pie Dough
Recipe source Baked Elements, page 161

Yield: 2 9-inch single crust pies or 1 double-crust pie

3 cups all-purpose flour, chilled
1 tablespoon sugar
1 teaspoon fine sea salt
8 ounces (2 sticks) cold unsalted butter, cut into ½-inch cubes

In a medium bowl, whisk the flour, sugar, and salt together. In a measuring cup, stir 3/4 cup of water with several ice cubes until it is very cold, discarding any remaining ice.

Toss the butter in the flour mixture to coat. Put the mixture in a food processor and pulse in short bursts until the butter pieces are the size of hazelnuts.

Pulsing in 4-second bursts, slowly drizzle the water into the food processor through the feed tube. As soon as the dough comes together in a ball, stop adding water.


Remove the dough from the food processor and divide it in half. Flatten each piece into a disk and wrap each disk first in parchment paper and then in plastic wrap. Refrigerate the dough until firm, about 1 hour.

Blueberry Pie Filling
Adapted from Nick Malgieri via That Skinny Chick can Bake

2 pints blueberries (4+ cups), rinsed
3/4 cup sugar
3 tablespoons cornstarch
3 tablespoons water
1 teaspoon grated lemon zest
1/2 teaspoon cinnamon
A few gratings of fresh nutmeg
2 tablespoons butter

Combine 2 cups of the blueberries with the sugar in a saucepan. Bring to a simmer, stirring occasionally, till sugar is melted, about 5 minutes. Combine the cornstarch and water in a small bowl and whisk the blueberry and sugar mixture into it. Return mixture to the pan and cook, stirring constantly, over low heat, until it boils, thickens and becomes clear. Pour into a large bowl and mix in the lemon zest, cinnamon, nutmeg and butter. Mix in the rest of the blueberries. Cool.

Assembly
Egg wash: 1 egg well beaten with a pinch of salt
Sugar to sprinkle over top before baking

Preheat to 400º. Roll out the bottom crust and place in bottom of pie plate. Trim the edges, then add the blueberry filling. Roll out top crust and place over fruit filling. Seal and crimp the edges as desired. Sprinkle the top of the pie with sugar.

Place the pie on a parchment lined baking sheet (to catch drips) and put on a lower shelf of your oven. Immediately reduce the temperature to 375º. Bake for about 40 minutes, until the crust golden and the filling is bubbling. Cool the pie on a rack.


For more information about the Daring Bakers challenges, click on through to the Daring Kitchen.

Thursday, September 27, 2012

empanadas

Patri of the blog, Asi Son Los Cosas, was our September 2012 Daring Bakers’ hostess and she decided to tempt us with one of her family’s favorite recipes for Empanadas! We were given two dough recipes to choose from and encouraged to fill our Empanadas as creatively as we wished!

I wasn't very creative. I filled my Empanadas with apple pie filling. Brushed them with some an egg wash, sprinkled on some raw sugar, and baked them.


I had spotted this cute mini apple pie cutter/maker at the store and couldn't help but using it for this challenge! I don't like to make pie dough, and as i'm more comfortable with yeasted dough I thought this would be perfect. Turns out that yeasted dough doesn't really like to be rolled thinly and cut using a plastic cutter. The dough tends to shrink back. It did work out, but it was a bit finicky.

We weren't big fans of this, but it's probably my fault. Maybe I should have sweetened the dough more. Or flavored it in some way. I did use butter instead of oil, thinking it would impart it with a buttery taste. I cut some of the salt and added a tbsp of sugar. But it wasn't enough. I also used a mixture of all purpose and bread flour because I didn't have enough bread flour. So that probably had an impact on the texture of the baked dough.

I'm sure my fellow Daring Bakers fared much better than I at this challenge! Hop on over to the Daring Kitchen and have a look at what they came up with!


Sunday, June 17, 2012

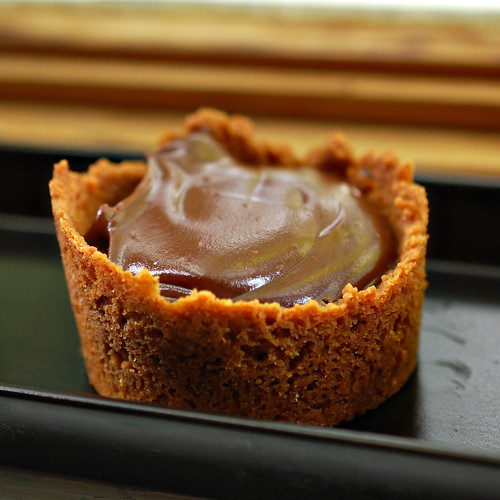
chocolate pudding cups

I'm not a big fan of graham cracker crusts. I don't like crumbs in general, and the graham cracker crusts that I make, always fall apart on me (thinking of *you* magic bars that are impossible to cut or eat cleanly). So I was only mildly interested  in this week's recipe for Baked Sunday Mornings, Aunt Sabra King's pudding bars. They sound intriguing, but really, it's just a spiked chocolate pudding on a graham cracker crust.


So I made the crust in individual molds, and in the chocolate pudding, I used Frangelico instead of Whisky, since that's what I had on hand. I started eating the delicious pudding on its own, but eventually paired it with the graham cups I had made and was very surprised at how much it added to the dessert. They were nice and chewy, and not at all crumbly! I'm assuming the massive amount of butter that went into the crumbs had something to do with it!

For the recipe and to see how the other members of the group fared with this one, visit the Baked Sunday Mornings site!

Sunday, June 3, 2012

strawberry pretzel salad

When I offered to bring dessert to a mother's day bbq a couple of weeks ago, I didn't have a clue what to bring. So I looked ahead on the Baked Sunday Mornings recipe schedule, and decided to kill two birds with one stone, and make the Strawberry Pretzel Salad scheduled for this week.

In the book, Matt explains that there are many, many variations of this. In my family, there are two. One of which I've blogged about before (and my personal favorite) made with a pretzel crust, sweetened condensed milk, vanilla pudding and cool whip, and topped with raspberry pie filling. The other has a graham cracker crust, some kind of creamy filling (i'm sure cool whip is involved) and topped with jello.


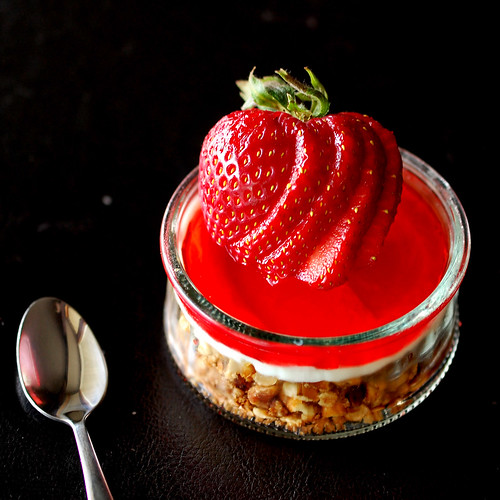
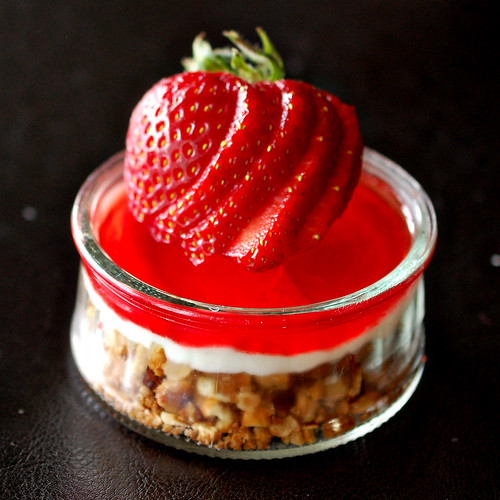
This Baked version is a combination of the two. A pretzel crust, whipped cream and cream cheese filling, and strawberry jello. Although the crust and the filling is pretty fool proof, I had never made the one topped with jello and struggled with the instruction to wait until the jello is partially set before pouring it over the dessert. I guess I waited to long, because my jello was slightly lumpy. I took a blow torch to it, thinking it would melt down a bit and get smoother, it helped a bit, but it didn't have a significant impact on the over all look. My jello layer remained lumpy.


I waited until we cut into it and served it to whip out the camera, but it was a mess. A delicious mess, but a mess nonetheless. It was basically impossible to cut neat squares of this dessert. The jello layer was way too soft, and was sliding everywhere.


So I decided to make it again, but in a way I could get cute pictures out of it. I made a half batch and got 10 servings out of it. And again, I screwed up the jello layer, letting it set too much before pouring it on the creamy filling. So I started over, and as soon as the liquid jello was cool I poured it on the dessert to get a nice, smooth final layer. I let it set, and added sliced strawberries to the top.

I'm a huge fan of desserts using pretzel crusts (see this insanely delicious tart, here), and you really can't go wrong with a filling of whipped cream, sugar and cream cheese, although, I'm not a big fan of the jello. Ever since my first pregnancy, I have had a weird thing with artificial flavors. So that's basically all I could taste. Still, I thought it was a refreshing dessert, perfect for a summer bbq!


The recipe can be found on the Baked Sunday Mornings website.


Sunday, May 20, 2012

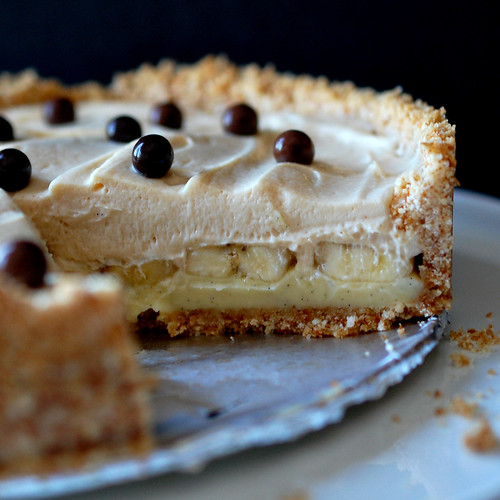
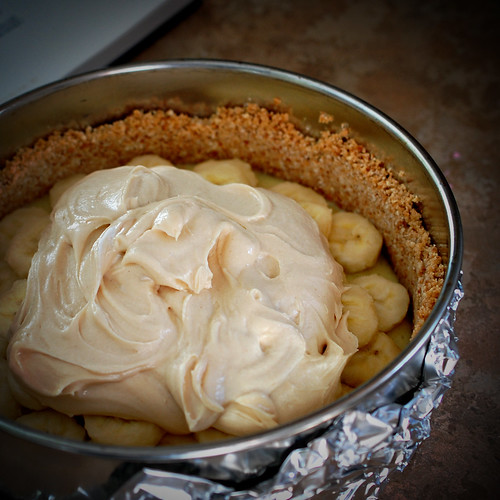
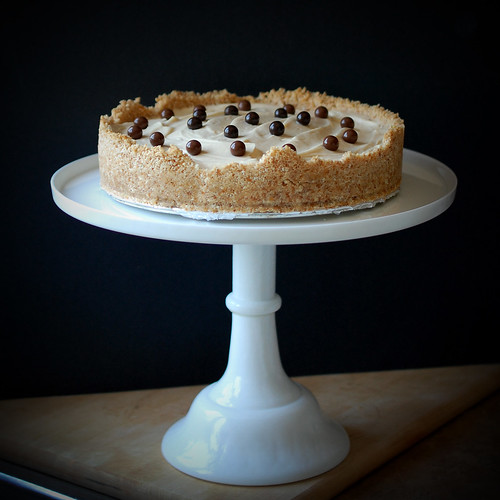
banana peanut butter pie

When mother's day rolled around, it just so happened that the next recipe on the Baked Sunday Mornings recipe schedule was perfect for my mom, who has a banana with peanut butter on it for breakfast almost every single morning. I had fully intended to make if for her, but life got in the way, and I brought morning glory muffins to breakfast instead. (My dad's favorite, kinda weird, the breakfast being for mother's day...)


Although I don't think I ever had banana pie, I still wanted to make this recipe because I skipped a lot  of Baked Sunday Mornings recipes, and felt bad. And it was straightforward enough. Plus it wasn't banana flavored pudding, which sounds gross, but vanilla pudding topped with bananas.

Made the crust one morning, the pudding in the afternoon, and the banana layer and peanut butter topping the next morning.


The crust was easy enough, but dirtied the appliance I most hate washing, the food processor. I was scared that the crumbs wouldn't hold together to make the crust, but of course, they did. The pudding was next, and I must have read the directions wrong, as I was fully prepared to boil the mixture for 5 minutes. I was surprised to see that it took no time at all to make. But with pudding, you really have to go with your gut. And when the pudding is thick enough, it's time to take it off the heat!  I always love being reminded how easy it is to make pudding from scratch.I loved the look of this one, with the vanilla bean seeds throughout.


The peanut butter topping gave be a bit more trouble, as it was a bit too thick to easily accept the folding in of the whipped cream. I'm sure I lost some airiness with my vigorous "folding" but I managed to get it fully incorporated, eventually.


I topped the pie with Godiva chocolate pearls, mainly because in between the time I decided to make the pie and bought chocolate covered peanuts, and when I actually made the pie, we had eaten all the peanuts. But I really like the look of the chocolate pearls! Too bad they are so insanely expensive!


Turns out, it's a pretty yummy pie! I was test tasting a tiny slice before lunch, and gave a bit to the toddler who, when she got around to putting the spoon in her mouth, immediately demanded more, then pointing up at the pie wanting a slice of her own. She had a big piece after lunch too! I liked that I was able to cleanly slice it. (Presentation is important!) The peanut butter topping was much richer than I would have expected, but was quite good. The only thing is those chocolate pearls... did absolutely nothing for this pie! Wish I had left them off completely!

To see how the other Baked Sunday Mornings members thought of this pie, click on through to the blog! Oh, and the recipe is posted here!


Sunday, January 15, 2012

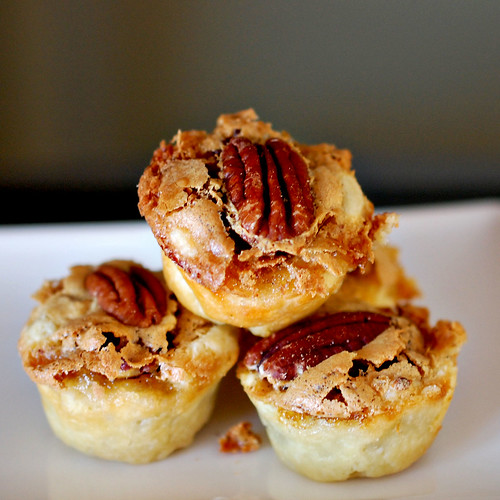
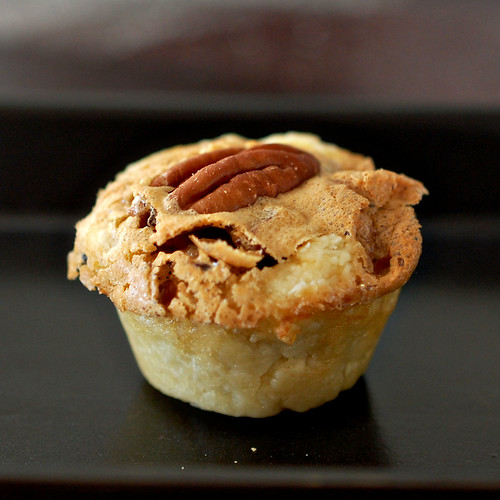
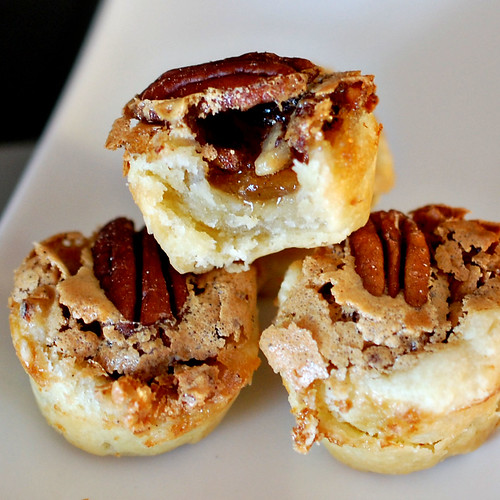
pecan tassies

I don't like crust. Not a big fan of pie or tarts. I'll happily eat the filling and leave the pastry behind. So I wasn't overly excited by this week's Baked Sunday Morning recipe. I considered skipping it, but I thought my husband would really enjoy these, so I made them.


Turns out, if I had a choice between making mini tartelettes like these, or a full pie, I'd make pie any day! Although the dough isn't complicated to make (butter and cream cheese creamed in the mixer, add a tiny amount of sugar and some flour, done), the process of dividing the dough between the wells of a mini muffin tin sucked. I have no patience. But I eventually got the hang of it, using the handle piece of my mortar and pestle to press a ball of dough up the sides of the molds.

The filling is just as simple, mixing eggs with brown sugar, vanilla and some salt. I couldn't find my vanilla (probably in a toy box somewhere, as the baby loves to steal the bottle), so I scraped the seeds of a vanilla bean in the mixture. Now I followed the recipe where it said to add half the nuts to the filling, and to sprinkle the remaining nuts in the pastry shells, but next time, I would totally put all the nuts in the pastry shell, put my filling in a squeeze bottle and fill the tartelettes that way. Would have been so much neater!


I was surprised to see the final result out of the oven. I guess I didn't expect the sugar to crystallize like that. I don't think I left them in the oven too long, as the crust was *just* cooked. I wish there was more gooey filling inside, but I have to admit that they were really good. Not so pretty, but they go from platter to mouth pretty quickly, so it doesn't matter much.

Interested in seeing what the other Baked Sunday Mornings members thought of this recipe? Head on over to the site for their takes on the tassies, and for the recipe!


Wednesday, January 4, 2012

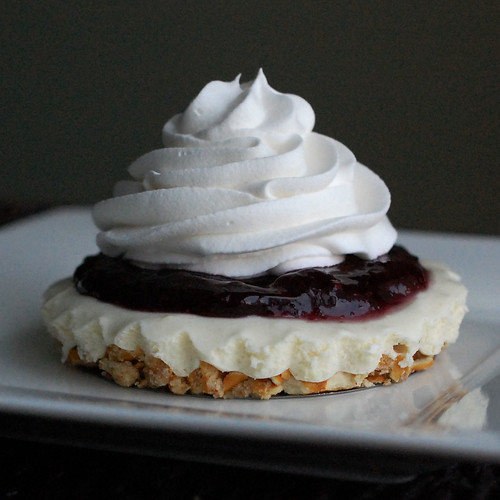
raspberry pretzel delight


This falls into the category of perfect desserts. It's creamy, crunchy, salty and sweet, fruity and cool... It has everything! Unless you are craving cake and/or frosting (many, many options on this blog), or something chocolaty, in which case, I recommend this dessert. But when you have a pan of this stuff in front of you, it's the perfect dessert. And it's in part why I made it in small tins... automatic portion control!

It's not a very challenging recipe. In fact, it's pretty easy. Especially when you already have crushed pretzels. I usually run an entire bag through the food processor, so when I need them for these, or these, or the aforementioned perfect chocolaty version of this dessert, there's one less step involved. I don't make this dessert very often mainly because it relies on boxes of stuff, and cans, and tubs... but I should, because everybody loves this!


In any case... A layer of crushed pretzels, butter and sugar, pressed in a pan, and baked, then cooled. Then, a creamy layer consisting of sweetened condensed milk, water, vanilla pudding mix, and whipped topping. And on top, canned pie filling, in this case, wildberry, because apparently, according to my husband, there's a shortage of raspberry pie filling in our area. They had everything but raspberry. Wildberry did just fine... It was delicious!

I have the recipe written down in a recipe journal, so no idea where it came from, but when I did a quick google search for it (because I was too lazy to find my copy of the recipe), I found it easily.

Raspberry Pretzel Delight

Crust:
1 1/2 cups crushed pretzels
1/4 cup sugar
1/2 cup butter, melted

Filling:
1 (12 oz) can sweetened condensed milk
1/2 cup water
1 pk (3.4 oz) instant vanilla pudding
1 3/4 cup frozen whipped topping, thawed

Topping:
1 (21 oz) can raspberry pie filling

Heat oven to 350 degrees. In a large bowl, combine all crust ingredients; mix well. Press into ungreased 13 x 9 inch pan. Bake at 350 degrees for 8 minutes; cool.

In a large bowl, combine condensed milk and water; blend well. Add in the pudding mix and beat for 2 minutes. Refrigerate 5 minutes. Fold in whipped topping. Spread on cooled crust. Refrigerate until filling is firm, about 1 hour.

Spoon fruit topping over filling. Cover; refrigerate until serving time. Store in refrigerator.


I guess it would be a dessert more appropriate in the summer, but we had it new year's eve after a dinner from hell, probably the worse dinner in 2011. So glad that's over! Looking forward to a great 2012.

Sunday, July 17, 2011

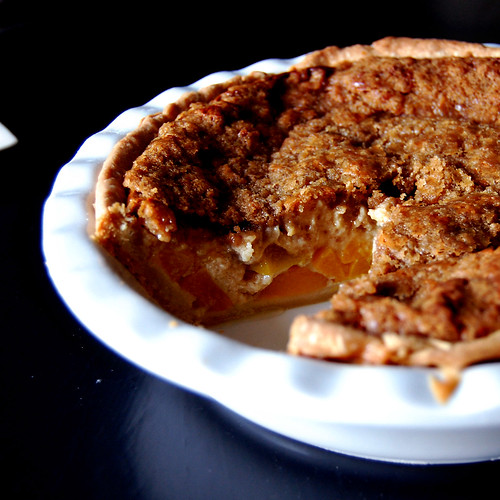
peaches and dream pie

I really didn't want to make this pie. After the last Baked bumbleberry pie fail, I was afraid that this one would suck too (plus I don't like making pies in general). Since the Baked pie dough is really easy to make and work with, I thought that if I had some stashed in the fridge ready to go, I'd be more inclined to make this Peaches and Dream pie. I still waited until the night before this post for the Baked Sunday Mornings baking group was due to make the rest of it.


I did have a bit more trouble with the dough than the last time I made it. It was harder to roll than I remembered, and I couldn't get it to roll in a circle shape big enough for my pie plate. So I had some patching to do in one spot, and frankly, it didn't look great. I have very little experience with pie dough, and don't know how to make the edges pretty, especially with this pie plate... Am I just supposed to place the dough in the plate, cut off the excess and press the dough in the dents? In any case, I didn't even have enough dough to do that. Anyway, since my hopes for this pie weren't very high, I didn't dwell on the imperfect crust too much, and put it in the fridge while I made the other components.


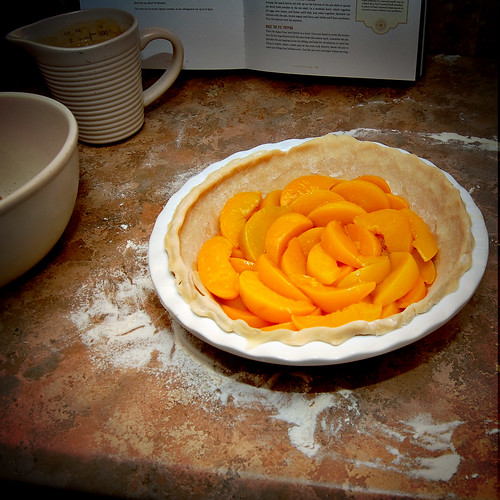
Opening a can of peaches and arranging it on top of the pie crust was pretty straightforward. The recipe called for peach halves, but I didn't like that idea, so I went with canned sliced peaches in fruit juice, that I drained as well as I could, hoping to avoid making pie soup again.


The creamy filling is simply a cup of sour cream, two eggs, quarter teaspoon salt, half a cup dark brown sugar and flour. The recipe called for two tablespoons, but I put three. I was really trying to do everything I could to make this work.

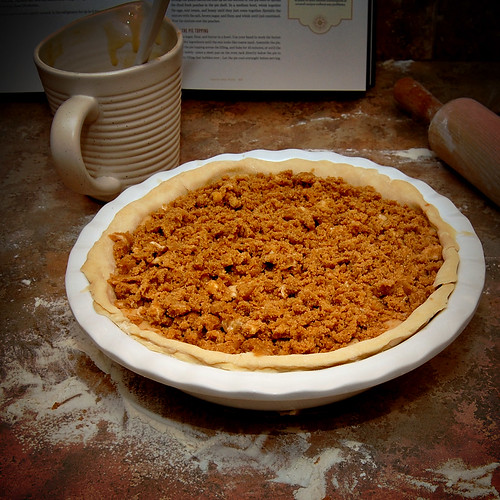
On top of the pie is a streusel type topping made of flour, dark brown sugar and butter. Not quite sure if I got the texture of it right, as there was no picture of the pie in the book to refer to. It was supposed to be like "coarse sand", whatever that means.


In the oven it went, for 45 minutes. When I checked on it, the filling wasn't bubbling and it didn't seem set, so I put it in 10 minutes longer. My oven is slow, so I had a pretty good feeling I was going to have to bake it longer. After checking on it numerous times, I finally baked it for a total of 70 minutes.

After letting it cool overnight, I had a piece for breakfast. (It counts! It has fruit in it!)


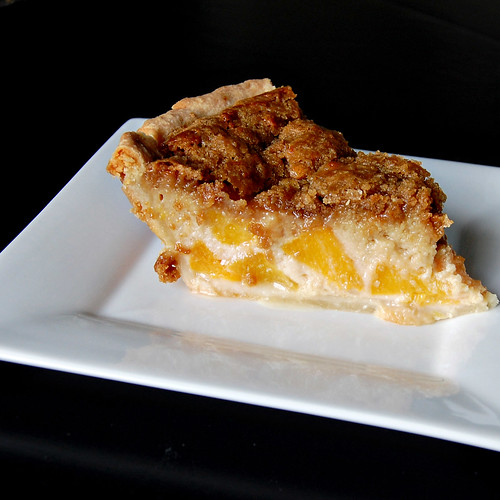
And it was good! I was so happy that it set properly! I managed to get a really clean slice. The topping is awesomely sugary, and it goes really well with the peaches. The bottom crust is not crisp, just the way I like it. The creamy filling is... okay. Not my favorite part, but the pie as a whole is very good. I've never had peach pie before, so I can't compare, but you can be sure I'll have another slice of this one. And then another one... I might have to find someone to share it with actually, so I don't eat the whole thing.

For the complete recipe, and to see how the other Baked Sunday Mornings bloggers fared with their Peaches and Dream pie, head over to the blog.

Sunday, July 3, 2011

bumbleberry pie

Early last week, I bought a bunch of different kinds of berries because they were on sale. I also had other fruits on hand, so the berries weren't eaten as fast as they should have been. Then I remembered that I was supposed to bake a blackberry pie for this edition of Baked Sunday Mornings. So I decided to use the berries to make a bumbleberry pie instead, to the great delight of my husband, who 1) love pie more than any other dessert in the world, and 2) has fond memory of, and still talks about, a bumbleberry pie he ate at least 4 years ago.

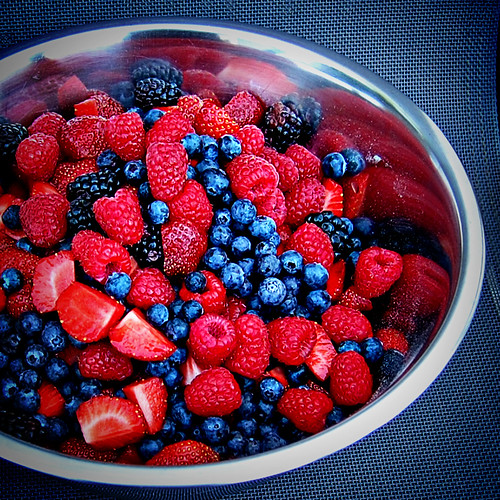
So, I set out to make the pie as per Matt and Renato's recipe in Baked Explorations, replacing the 7 cups of blackberries for 7 cups of a mixture of blackberries, raspberries, blueberries and strawberries. Yes. 7 cups of berries! (I never make pies, so this seems outrageous to me.)


I'm not a big fan of making crusts of any kind (although joining this baking group has me practicing), but, with my husband cheering me on, I'm happy to report that the crust part of this pie went really well.


While the crust was chilling in the fridge, I made the fruit filling, adding sugars, flour, lemon juice and lemon zest to the berries. Plopped the filling in the pie crust, dot the top with butter, cover the whole thing with the top crust, egg wash the crust and sprinkle it with sugar. Shoved it in the oven with instructions to my husband to take it out when the timer went off.


When I got home and checked on the pie, the little pool of berry juice that had collected on top if the crust hinted at a thin filling, but I was not expecting the mess that was this pie when I cut into it. Berry Soup. It might have been because I substituted other berries for the blackberries. Or the wrong thickener for berry pies. In any case, I don't recommend this recipe.

We ate some, and it was ok, if you could get over the look of it, but it wasn't spectacular. After it sat uneaten for a little longer, (and after I caught my daughter with a straw trying to drink the filling) I actually "drained" it by tilting the pie into a sieve, and returned the fruit to the pie, discarding the liquid. Still, it didn't scream "eat me, I'm delicious".  It's the first time I had to throw out pie because no one ate it. It was good, especially the crust, but it looked awful! I'm sorry to say that this little adventure did not encourage me to start making more pies. I'm actually a little bit apprehensive, since the next recipe for this baking group is another pie... We'll see if I get to it. If you want to check out how the other members of the group fared with their pie, please visit the Baked Sunday Mornings blog!


Sunday, June 5, 2011

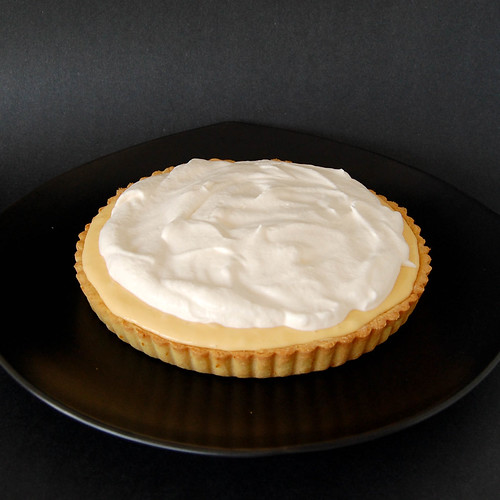
orange creamsicle tart from baked

For this edition of Baked Sunday Mornings (an online group where bloggers are baking through Matt and Renato's Baked Exploration and blogging about it every second Sunday morning), we were to bake the Orange Creamsicle Tart on page 74.


I thought my husband was going to be excited about this one, but when I told him what was on the baking calendar, he just gave me the "I like tarts, I like creamsicles" but I don't necessarily want to eat them together line he give me when I try to combine two foods that he likes. Bah. Charlotte was excited since she had asked for a lemon pie a few days before. We decided that this tart was going to do just fine instead.

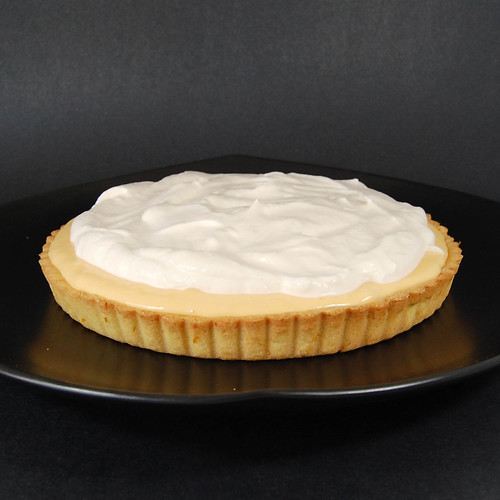
Even though making this tart is a day long affair, I really did enjoy making it. You start by making the orange filling, by zesting two lemons before juicing them and sprinkling 1 1/4 tsp  gelatine on the juice to soften. Then there's the zesting and juicing of three oranges, the juice of which is added to orange pop (soda) to reduce by half. The zest of the lemons and oranges is mixed with 3 eggs and 2 egg yolks and 3/4 cup sugar. Then that mixture is tempered with the reduced orange juice/pop mixture and poured back in the saucepan to cook until the curd coats the back of a spoon. The gelatine goes in next, and the whole thing is poured in a fine mesh strainer over 1/2 cup cubed butter. Then you have to whisk like crazy to incorporate air into it. I'm sure minimal air was incorporated in mine since, well, I'm lazy. A piece of plastic wrap goes directly on the curd and it chills in the fridge for 4 hours.

The tart dough was really easy and smelled so good! I don't often bake with orange, so the dough reminded me of scented playdough. It was that silky too. 


For the orange tart dough, 1/2 cup of butter, 1/4 cup of sugar and 1/4 tsp salt are mixed together until fluffy, then we add an egg, and once that's incorporated, 1 1/2 cups all purpose flour until the dough comes together. The dough is then shaped in a circle, wrapped in plastic and stashed in the fridge to chill for half an hour. Then I covered my counter with a piece of parchment and rolled out my dough between that and the piece of plastic I used to wrap it. It went super easy, no flouring, no sticking anywhere. You then peel off the parchment, and put the dough plastic side up in the tart pan. You can easily nudge it in all the nooks and crannies of the pan with the plastic still in place. Then the dough goes in the freezer for 30 minutes. After it's nice and cold, the plastic gets replaced with a piece of foil, and the tart is filled with dried beans, and baked for 15 minutes at 375. Remove the foil and beans, and bake it for an extra 10 minutes until it starts to get golden.

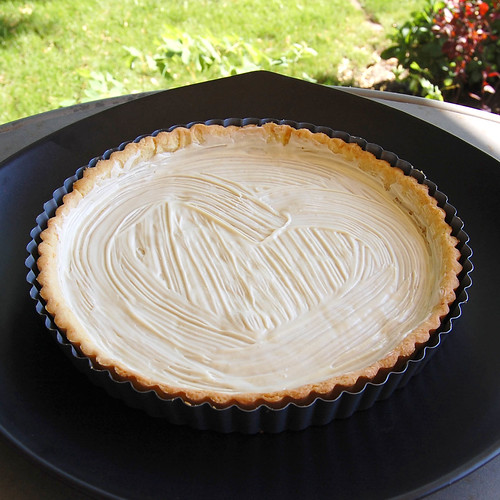
As a note, Matt and Renato said to brush melted white chocolate on the tart before filling it to add a bit of sweetness and to keep the tart crisp. So I did just that.


After that, because you haven't dirtied enough dishes as is, the curd get poured into the bowl of a stand mixer and whipped for 5 minutes before going in the pastry shell. And into the fridge it sits for an hour. Mine was really liquidy, and I had too much to fill the tart pan. I wasn't looking at what I was doing, and almost over filled it. It sets again in the fridge for one hour before being topped with whipped cream (one cup whipping cream, 2 tbsp sugar, 2 tbsp orange pop).


With the filling being so liquidy, I was afraid of it running all over the plate when I cut into it, and it did just that. Although after spending the night in the fridge, the filing did firm up quite a bit, and we were able to get clean slices when we went for seconds.

We really enjoyed this dessert. My husband gave it a 8 out of 10, mainly because of the texture of the filling that he found too soft. The crust was probably the best part of this tart. I'll be using it again to make lemon squares. It was flavorful, and crispy in a good way, and most of all, easy to work with. The orange filling was quite sweet, and the whipped cream was needed to cut through the sweetness.

For the complete recipe and to see how the other bakers liked this tart, visit the Baked Sunday Mornings group. And feel free to grab a book, and join us!  

Monday, March 28, 2011

chocolate dulce de leche pretzel tart

Yesterday was Baked Sunday Mornings. Not the first, but the first since I became aware of this baking group. Basically, they are baking their way through the second Baked book, Classic American Dessert Reinvented, and every second Sunday, all the bloggers that participated post their dessert before noon. Simple enough, right? I love the Baked recipes, so obviously, I joined the group. And for the past two weeks, everybody's been baking the Malted Crisp Tart.

I fully intended to bake it too. I was going to make it into individual tarts. And I was debating whether to buy little tart pans, or use the mini cheesecake mold pan that I have. And then I realized that no one I know likes whoppers or maltesers. And I don't really enjoy Rice Krispies, especially dry. *shudder* In all the post I read trying to figure out how many mini tarts the recipe would make, all the bloggers were saying how this recipe dirties every single dish in the house. And as we know... the Bourbonnatrix doesn't do the dishes. So I decided to skip this recipe.

But I had read about tarts for a good week, and now... I wanted a tart! And I actually have a pan that I've used exactly once, at the only Christmas dinner I ever hosted, 5 plus years ago. So a tart I was going to have. Thankfully I found a nice tart picture on one of the food pics galleries. Amandeleine to the rescue! An amazing looking pretzel-chocolate-caramel tart. You've got crunchy and creamy, salty and sweet, chocolate and caramel. What else could you want?


The recipe is simple enough, but there's a lot of waiting for stuff to chill. Combine ingredients for the crust. Chill. Roll it out. Chill. Bake it. Let it cool. Brush with melted chocolate. Chill. Prepare ganache, fill the crust. Chill. Now here, she would make caramel. I'm just going to open a jar of Dulce de Leche. Spread on ganache, sprinkle with more pretzels and drizzle with leftover ganache, and then, guess what? Chill. Then you can eat it. And apparently, it keeps for 2 days covered in the fridge!

Chocolate Dulce de Leche Pretzel Tart

Adapted from Amandeleine

Pretzel Crust
1/2 cup unsalted butter, softened
1 1/4 cups coarsely crushed thin pretzels plus an additional 1/4 cup for topping
3/4 cup powdered sugar
1/2 cup all-purpose flour
1 large egg
2 ounces bittersweet chocolate, melted
Ganache
3/4 cup whipping cream
6 ounces bittersweet chocolate, finely chopped
1/2 jar Dulce de Leche

Directions
Crust: Beat the butter with 3/4 cup of the pretzels and the powdered sugar at low speed until creamy. Beat in the flour and egg. Add the remaining 1/2 cup of pretzels, being sure to leave some pretzel pieces intact. Flatten the dough between 2 sheets of plastic wrap (dough will be very sticky) and refrigerate until chilled, at least 30 minutes.

Roll out the dough between the sheets of plastic wrap to a 12-inch round. Peel off the top sheet and invert the dough over a 11-inch tart pan with a removable bottom. Leave the plastic wrap on to press the dough into the corners and patch any tears by trimming the overhanging dough and pressing it into holes. Refrigerate the shell for 30 minutes or until firm.


Preheat the oven to 350°. Line the shell with parchment paper and fill with pie weights (or dry beans in my case). Bake for about 30 minutes, until nearly set. Remove the parchment and weights and bake for 10 to 15 minutes longer, until the tart shell is firm; cover the edge with foil if it darkens too much. Let the shell cool completely. Brush the melted chocolate over the bottom and up the side and refrigerate for 10 minutes, until set.


Ganache: Meanwhile, bring cream to boil in heavy small saucepan. Pour over chopped chocolate, let stand a few minutes and whisk until smooth. Spread 1 cup chocolate filling in prepared crust. Refrigerate until firm, about 45 minutes. Reserve remaining filling.

Spoon Dulce de Leche over ganache, leveling with a spatula. Sprinkle 1/4 cup crushed pretzels over caramel. Pipe or drizzle reserved chocolate filling decoratively over caramel and pretzels (if chocolate is too firm to pour, warm slightly over low heat). Refrigerate tart until caramel is firm, at least 1 hour.