Tuesday, May 31, 2011

buns

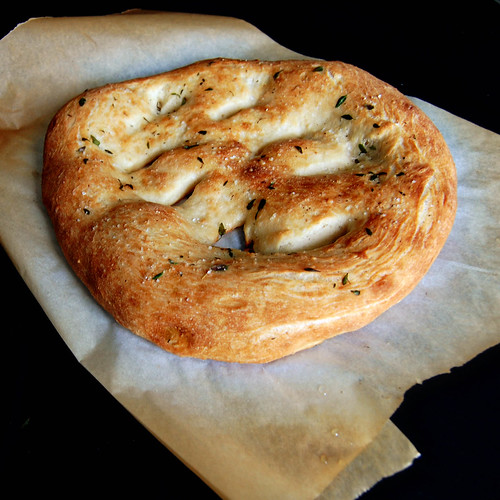
Up until recently, I didn't even know I could make bread. Yeast used to scare me. My mom never succeeded at making bread, so in my mind, that meant that I couldn't either. Then my dad jumped on the no-knead bread bandwagon with much success. His bread is beautiful. Then came pizza. Homemade pizza is nothing like the take out stuff. Thousand times better. So I though if he could, maybe I could too. Turns out I can make no-knead bread, but not as good as he can. Then came the Daring Bakers and my first challenge, the yeasted coffee cake. Yeah, that was good. A few days ago, I made a fougasse. Yep, success again.

And tonight, I made buns. Homemade buns are ridiculous. I had no clue how good they could be. And so easy! Start them mid afternoon, and you'll have them baked and sampled in plenty of time for dinner.
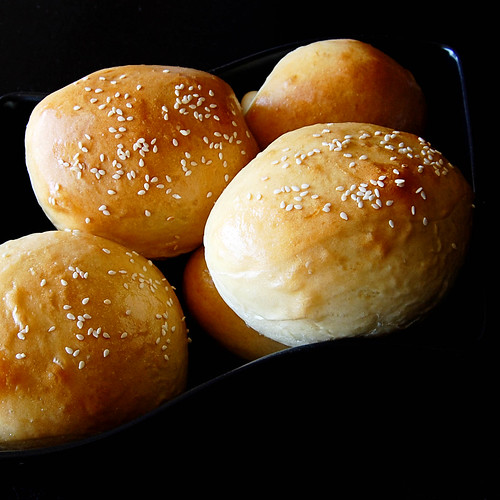

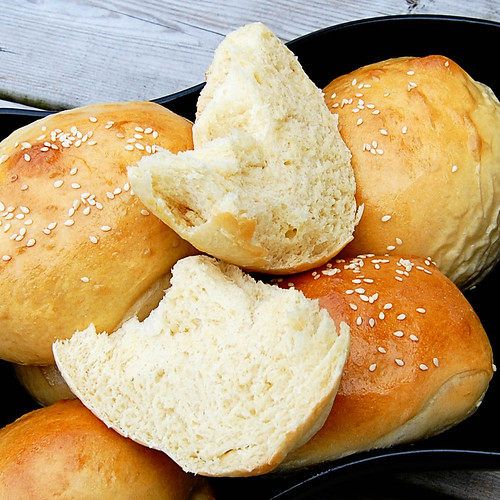
They are something else. After having split one open and sampling it, I went out on the deck where my husband was doing yard work. I offered him a sample, he took one look at my face and said, "they're that good"? I guess I looked pretty proud of myself. He took one bite and closed his eyes. Yeah. That good.

That means that buying buns at the grocery store will result in a mediocre experience from now on. What am I going to do when I have to go back to work? No more starting dinner at 2 o'clock. Guess we'll have to save those meals for weekends!

So yeah, this weekend. Make buns! They are insane!

Soft Buns
recipe source: taste and tell

makes 12 buns

1 cup milk
1/2 cup water
1/4 cup butter
4 1/2 – 5 1/2 cups all-purpose flour
1 (.25 ounce) package instant yeast
2 tablespoons white sugar
1 1/2 teaspoons salt
2 eggs, (one for the dough, one for the egg wash)
1 tablespoon water
sesame seeds, optional

In a small saucepan, combine the milk, water and butter. Heat until very warm, but not boiling.

In the bowl of a stand mixer with the paddle attachment, or in a large bowl, combine 1 1/2 cups of the flour, the yeast, sugar and salt. Mix together. Mix in 1 of the eggs. Add in the warmed milk mixture. Continue to add in the flour, 1/2 cup at a time, until the dough comes together. It should pull away from the sides of the mixer, but should still be tacky. If using a mixer, change to the dough hook and knead for 5-8 minutes. If making by hand, turn dough out onto a lightly floured surface and knead until smooth and elastic, about 8 minutes.

Cover the dough and let rise for 30-40 minutes.

Shape into 12 balls and place on a greased cookie sheet. Flatten slightly. Cover and let rise for 30 minutes.

Preheat the oven to 400F. Combine the remaining egg and the tablespoon of water. Brush gently on top of the buns. Sprinkle with sesame seeds, if desired. Bake in the preheated oven for 10-12 minutes, or until golden brown.

I warmed my milk, (I used whole milk), water and butter in the microwave for 2 minutes, and when I took it out, I was sure it was too hot, and would totally kill the yeast, but stirring it once or twice, I decided it was going to be ok. (And it was)

I used 4 1/2 cups of flour total, and I think it was perfect for me. I let the stand mixer work its magic for 8 minutes, and turned out the dough into a clean, lightly oiled bowl to let rise for a good 45 minutes. The dough handles beautifully.

Now I can't count, so I divided my dough into 8 pieces before I realized I was supposed to have 12. So I made 6 huge buns, and divided the two that were left into 4 pieces, to make 10 buns total. Next time I'll be sure to make 12, as the small ones were a bit too small, and the big ones, well, they were too big.

I baked them in two batches, on parchment paper. I'd say that sesame seeds are a must, look wise. These buns come out so soft, they are wonderful. You really, really, must try them. We made chicken burgers out of them, but they would be awesome hamburgers.

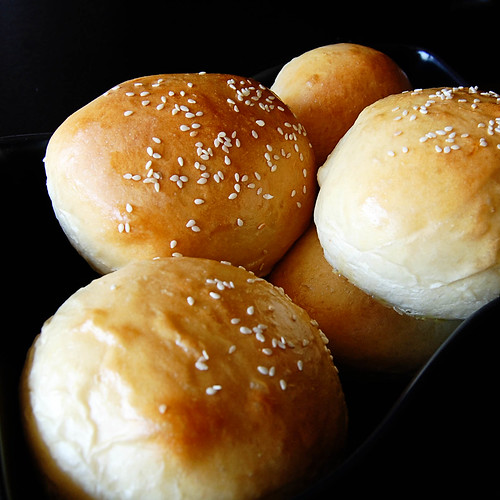
This recipe is another keeper!

Saturday, May 28, 2011

fougasse

I launched a new blog last week, to showcase more savory recipes. I'm very original, so I called it Bourbonnatrix COOKS... yeah. I know... But now I have a dilemma. Today, I made this fougasse to serve with a roasted garlic, onion and bacon relish. The fougasse definitely falls in the baking category, as for the relish... well it's savory, so doesn't really have any business being on this blog. So anyways, if you want to check out the fougasse, (and you should, it's a great pizza dough recipe), check out the new blog and let me know what you think. http://bourbonnatrixcooks.blogspot.com

Friday, May 27, 2011

chocolate marquise with hazelnut garnishes

Now this is why I joined the Daring Bakers.

I was eagerly awaiting news on the challenge on the first day of the month, and after I finished reading it that afternoon, I just shook my head. So much to take in. And I read it again. Then I had to research it, because I couldn't wrap my mind around this dessert.


The May 2011 Daring Bakers’ challenge was hosted by Emma of CookCraftGrow and Jenny of Purple House Dirt. They chose to challenge everyone to make a Chocolate Marquise. The inspiration for this recipe comes from a dessert they prepared at a restaurant in Seattle. The girls flavored their chocolate marquise with cayenne, tequila and black pepper, nestled it into a torched meringue nest, drizzled on a tequila caramel and sprinkled on some cayenne almonds and cacao nibs. Wow!

Sounded great, I mean what's not to love: some kind of frozen chocolate concoction on top of a toasted meringue, with some crispy garnishes and a sauce... that sounds good to me! Although we were free to play around with the flavorings, we had to make the chocolate marquise and the meringue. The garnishes were optional.

I knew right away that I was going to have to change the flavoring if anybody but me was going to eat this dessert. The flavor combo the girls picked sounds interesting, and I would gladly taste it, but I'm not going to make 18+ servings of a spicy/boozy chocolate dessert that people are going to be afraid to try. The people I feed are not very adventurous eaters.

So here goes the possibilities I considered:
  • Chocolate and Coffee Marquise, Toasted Meringue, Espresso Caramel, Crushed Chocolate covered Coffee Beans
  • Chocolate Marquise, Toasted Meringue, Blackberry/Rasperry coulis, fresh fruit
  • Chocolate Marquise, Toasted Meringue, Dulce de Leche drizzle, Toasted Graham Cracker bits
I finally went with a Chocolate Marquise resting on a cloud of toasted hazelnut flavored Meringue sitting on a schmear of Nutella, sprinkled with candied hazelnuts and drizzled with Frangelico caramel.


Chocolate Marquise

Servings: 18 2"x2" cubes

Chocolate Base
12 oz ( 1½ cups) bittersweet chocolate (about 70% cocoa), chopped finely
1½ cups heavy cream
1/2 teaspoon salt
1/4 cup light corn syrup
3/4 teaspoon vanilla
1/4 cup cocoa powder, sifted
1 oz (2 tbsp) unsalted butter, softened

Place the chocolate in a small mixing bowl.

In a double-boiler, warm the cream until it is hot to the touch (but is not boiling). Remove from the heat and pour over the chocolate.
Allow it to sit for a minute or two before stirring. Stir until the chocolate is melted completely and is smooth throughout.
Add the remaining ingredients and stir to combine.
Set aside until cooled to room temperature. Do not refrigerate, as the base needs to be soft when added to the marquise mixture. If you make it the day before, you may need to warm it slightly. Whisk it until it is smooth again before using it in the marquise recipe.


I made this component first, because I could let it cool while making the egg mixture. It's basically a ganache, so pretty easy to make. I was worried because mine had little lumps of cocoa that I couldn't fully incorporate to get my chocolate base smooth, but it didn't affect the final result of the dish. I let it sit on the counter for a couple of hours, and had to warm it briefly in the microwave before I could use it. (Maybe that took care of my cocoa problem?) I used half power for about 30 seconds, so I wouldn't burn it. I used a mixture of 70% chocolate, and 72 % chocolate, and it was delicious, with a strong chocolate taste.

Marquise

11 large egg yolks at room temperature
4 large whole eggs
2/3 cup ( 4 oz.) sugar
1/3 cup water
2 cups (16 fluid oz./ 500 ml.) heavy cream

In the bowl of a stand mixer, combine the egg yolks and whole eggs. Whip on high speed until very thick and pale, about 10 - 15 minutes.

When the eggs are getting close to finishing, make a sugar syrup by combining the sugar and water in a small saucepan. Bring the syrup to a boil and then cook to softball stage (235F/115C).

With the mixer running on low speed, drizzle the sugar syrup into the fluffy eggs, trying to hit that magic spot between the mixing bowl and the whisk.

When all of the syrup has been added (do it fairly quickly), turn the mixer back on high and whip until the bowl is cool to the touch. This will take at least 10 minutes.

In a separate mixing bowl, whip the heavy cream to soft peaks. Set aside.

Prepare two square 8-inch pans by lining them with parchment paper. I used one 8-inch square, and one loaf pan.

When the egg mixture has cooled, add the chocolate base to the egg mixture and whisk to combine. Try to get it as consistent as possible without losing all of the air you've whipped into the eggs. I poured the chocolate base into the eggs while the stand mixer was running on low speed.

Fold 1/3 of the reserved whipped cream into the chocolate mixture to loosen it, and then fold in the remaining whipped cream.

Pour into the prepared pans and cover with plastic wrap (directly touching the mixture so it doesn't allow in any air).

Freeze until very firm, at least 2 - 4 hours (preferably 6 – 8 hours).


Now this was the main part of making the marquise. It's pretty straightforward if you follow the steps in order. My simple syrup was a bit hotter than soft ball stage ( I could hear lazy bubbles pop at the surface while I was busy taking pictures, and removed it from the heat promptly when my thermometer hit 235. I know it would of climbed much higher than that, based on the hard as rock sugar I had to scrub off surfaces where it had dripped.) I don't think it affected the final product. Also, when I added the syrup to the eggs, the mixture didn't get very hot, and it didn't take 10 minutes to cool back down.


After reading a suggestion by a Daring Baker in the private forums, in addition to the square pan and the loaf pan, I used 3 baby food cubes, to see if they could be unmolded easily instead of cut into cubes. - They can.


While the marquise was in the freezer, I worked on the garnishes.


Frangelico Caramel

Servings: Makes about 1 cup of caramel

Ingredients
1 cup (8 oz.) sugar
1/2 cup (4 fluid oz./ 120 ml.) water
1 cup (8 fluid oz./ 240 ml.) heavy cream
1/2 teaspoon salt
2 tablespoons Frangelico

In a heavy-bottomed saucepan, combine the sugar and water on medium-high heat. Boil until the water completely evaporates and the sugar caramelizes to a dark mahogany color.

Working quickly, add the cream to the darkened caramel. It will bubble and pop vigorously, so add only as much cream as you can without overflowing the pot.

Return the pot to the stove on low heat and whisk gently to break up any hardened sugar. Add any remaining cream and continue stirring. Gradually, the hard sugar will dissolve and the caramel sauce will continue to darken. When the caramel has darkened to the point you want it, remove it from the heat. Add the salt and Frangelico and stir to combine. Set aside until ready to serve.

This caramel is sooooo good. I was a good girl and had the leftovers with some granny smith apples, but my parents had some with ice cream and raved about it. (Yeah, I gave half my batch away, so I wouldn't be tempted to drink the stuff!) Absolutely delicious. And very easy to make. Just make sure to use a large enough pot, and there won't be any problems. I was expecting a thicker caramel, but it's quite thin, even when chilled for a few hours. Perfect for drizzling or dipping.


Caramel-Dipped Hazelnuts
recipe source: Martha Stewart
24 hazelnuts, toasted and skinned
3 cups sugar
3/4 cup water

Gently insert pointed end of a long wooden skewer into the side of each hazelnut. Place a cutting board along the edge of a countertop; place newspaper on the floor, directly under cutting board.

Prepare an ice-water bath. Heat sugar and the water in a heavy saucepan over medium heat, stirring occasionally, until sugar is dissolved and syrup is clear. Stop stirring; cook until syrup comes to a boil, washing down sides of pan with a wet pastry brush to prevent crystals from forming. Continue to boil, gently swirling occasionally, until medium amber. Plunge pan into ice bath to stop the cooking; let stand until thickened, about 10 minutes. (To test: Dip a skewer in caramel and lift a few inches; if a thick drip slowly forms and holds a string, the caramel is ready.)

Dip a skewered hazelnut into caramel, letting excess drip back into pan. When dripping syrup becomes a thin string, secure opposite end of skewer under cutting board. Repeat with remaining hazelnuts. (If caramel hardens before all hazelnuts have been dipped, rewarm it over low heat.) Let stand until caramel string has hardened, about 5 minutes; break each string to desired length. Carefully remove skewers. Candied hazelnuts should be used the same day; store, uncovered, at room temperature until ready to serve cupcakes.


Oh how I messed up this component! Sure, it looks great, but one lick of the caramel, and you'll know that I badly burnt it. See, Martha says to prepare an ice bath to stop the cooking. And I was lazy, so I just poured the caramel in a cold bowl, thinking it wouldn't be in the hot pan, and wouldn't keep cooking. Right. In the picture below, the light caramel is the color it was when I stopped cooking it. The dark caramel is the color it was, 10 minutes after I poured it into a bowl to let it "cool".


Even if it was burnt, I was still able to dip the hazelnuts so I didn't bother redoing the caramel. I was doing it more for fun and plating than anything else anyway. I was also happy to see that the dripping caramel had a nice spun sugar thing going on. I've been really curious about spun sugar, and this little experiment makes me want to try it even more now that I see it's really not that complicated, if it can happen "by mistake".


Torched Meringue

Servings: This recipe is half of the original (original yield: 4 - 5 cups) to make enough meringue servings for 1 x 8” square pan of the frozen chocolate marquise.

Ingredients
5 large egg whites
1/2 cup + 3 tbsp (6 oz.) sugar
Splash of apple cider vinegar
1 tbsp Frangelico

Combine the egg whites, sugar and vinegar in the bowl of a stand mixer. Using your (clean, washed) hand, reach in the bowl and stir the three together, making sure the sugar is moistened evenly by the egg whites and they make a homogeneous liquid.

Over a saucepan of simmering water, warm the egg white mixture. Use one hand to stir the mixture continuously, feeling for grains of sugar in the egg whites. As the liquid heats up, the sugar will slowly dissolve and the egg whites will thicken. This step is complete when you don't feel any more sugar crystals in the liquid and it is uniformly warm, nearly hot.

Remove the mixing bowl from the saucepan and return it to the stand mixer with the whisk attachment. Whisk until you reach soft peaks. In the last 10 seconds of mixing, add the frangelico to the meringue and mix thoroughly.

When you're ready to plate the dessert, spoon the meringue onto a plate (or use a piping bag) and use a blowtorch to broil.


My last step before plating was to make the meringue. I think I might have used that method once to make buttercream frosting, but still, swirling egg whites and sugar with your hands is pretty... gross. It does make a beautiful meringue though. I just spooned some onto a plate, and used my blowtorch to lightly toast it.

Plating

Dutch process cocoa powder
Torched meringue
Frangelico Caramel
Candied Hazelnuts
Caramel Dipped Hazelnuts

When you're ready to plate, remove the marquise from the freezer at least 15 minutes before serving. While it's still hard, remove it from the pan by pulling on the parchment 'handles' or by flipping it over onto another piece of parchment.

Cut it into cubes and roll the cubes in cocoa powder. Or sift cocoa powder over the cubes.

Plate with the torched meringue and drizzled hazelnut sauce, and toss candied hazelnuts around for garnish. You want to handle the cubes as little as possible because they get messy quickly and are difficult to move. However, you want to wait to serve them until they've softened completely. The soft pillows of chocolate are what make this dessert so unusual and when combined with the other elements.


I've had the opportunity to serve (and eat) this dessert a few times since I made it earlier this month. First my daughter and I shared the serving I had plated to photograph. We we both eating as fast as we could so the other wouldn't eat it all. We fought over the last bite. It was that good. I gave my mother the other "pratice" serving, with untoasted meringue and marquise without cocoa, and all I could get out of her were yumm, mmmm, um... yum.

I served it again for a mother's day dinner for my in-laws. I used the leftover meringue that I had frozen, and unfortunately, the meringue wept badly. It still tasted very good, and toasted beautifully, but I know for next time to make it fresh. Now my mother in law is a very classy lady, but that didn't keep her from scraping her plate. Her reaction was genuine. She loved this dessert.

My parents, my brother and his wife also had some the next day for mother's day. The biggest surprise was my meringue hating, mousse fearing husband. He's had this dessert twice so far, and ate it all.

I've been sneaking squares of the marquise from the freezer, eating it plain, or with caramel, or with whipped cream or with ice cream... It's freaking awesome. Much better when fully soft and not half frozen, but I'm not always that patient.

I'm really glad it makes a lot, and that you can store it for up to 6 months in the freezer. I'll be serving it again and again. And then, I'll be making it again. Although the entire dessert had many components and is time consuming, it's not difficult. And the Daring Bakers had many great plating ideas that I will be stealing. Head over to the Daring Kitchen and have a look at all the wonderful creations!

Thursday, May 26, 2011

chocolate strawberry truffle layer cake

A chocoholic friend of mine asked me to make a cake for two of her coworkers that were celebrating birthdays this month. See, at her new workplace, the last Friday of every month, they celebrate the month's birthdays, and since they celebrated hers last month, she was in charge of bringing the cake this time around. Isn't that a great concept? So fun!

So I had a blast putting together a board of ideas for her to chose from. And in the end, she asked for a chocolate cake. Of course, I should have known. I've been looking for a reason to make this recipe for a little while. I mean, how moist and delicious does that cake look! Seriously, go take a peek. Here.


Moist Chocolate Cake
recipe source: foodess

2 cups sugar
1 3/4 cups flour
3/4 cup cocoa
1 1/2 tsp baking powder
1 1/2 tsp baking soda
1 teaspoon salt
2 eggs
1 cup buttermilk
1/2 cup butter, melted
1 tbsp vanilla extract
1 cup hot coffee (or 2 tsp instant coffee in 1 cup boiling water, or simply 1 cup boiling water)

1. Preheat oven to 350 degrees. Line the bottom of two 9-inch baking pans with parchment paper and lightly oil the sides, set aside. In the large bowl of a standing mixer, stir together sugar, flour, cocoa, baking powder, baking soda, and salt. Add eggs, buttermilk, melted butter and vanilla extract; beat 2 minutes on medium speed. Stir in hot coffee. Pour batter evenly between the two pans and bake on middle rack of oven for 30 to 35 minutes, until toothpick inserted in centre comes out clean. Cool completely on wire racks before frosting.


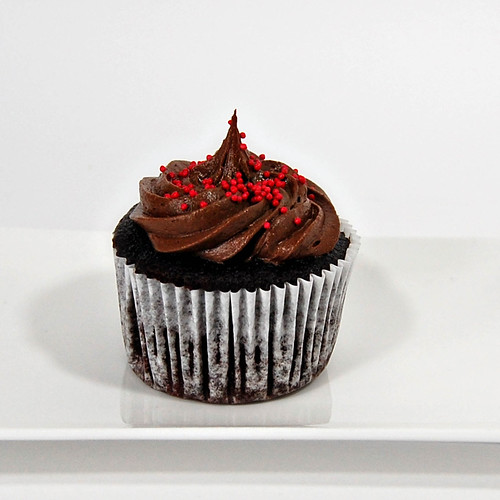
I doubled that recipe, poured it into three 9-inch round pans, and made the rest of the batter into a dozen cupcakes for our enjoyment (selfish, I know) and so my friend's husband and son could have taste too. That's the worse part of bringing cake to work, the people who smelled the cake baking, and licked the spatula don't get to have any! No more when you bake cupcakes alongside the cake!

This cake bakes beautifully. Almost no dome. As it cools, it shrinks from the sides of the pan a tiny bit, so it's super easy to remove. And the smell! Oh yum. And one bowl people, one bowl. Very important, especially when you're trying to make that night's dinner at the same time. If you're going to double the recipe as I did, be aware that it will fill the bowl of a large standmixer right to the top. It might spill over. You've been warned.

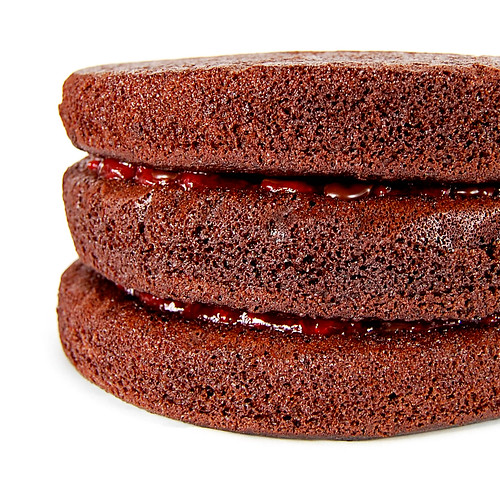
Inspired by sophisticated gourmet, I filled the cake with strawberry jam, and just to make it a tiny bit more sinful, I drizzled the jam with chocolate ganache.

Ganache
recipe source: joy of baking

8 ounces semisweet or bittersweet chocolate, cut into small pieces
3/4 cup heavy whipping cream
2 tablespoons unsalted butter

Place the chopped chocolate in a medium sized heatproof bowl. Set aside. Heat the cream and butter in a small saucepan over medium heat. (Can also heat the cream and butter in the microwave.) Bring just to a boil. Immediately pour the boiling cream over the chocolate and allow to stand, without stirring, for a few minutes. Stir gently (as you do not want to incorporate air into the ganache) with a spoon or whisk until smooth.


I love making ganache. I just find it so cool how once you start stirring the mixture, it looks like yucky brownish soup, and then, in the middle appears a wonderfully thick and glossy chocolate sauce. I'm a geek. I used mostly dark chocolate, and maybe 2 ounces milk chocolate. It was super good. I can't wait to have the leftovers with ice cream!

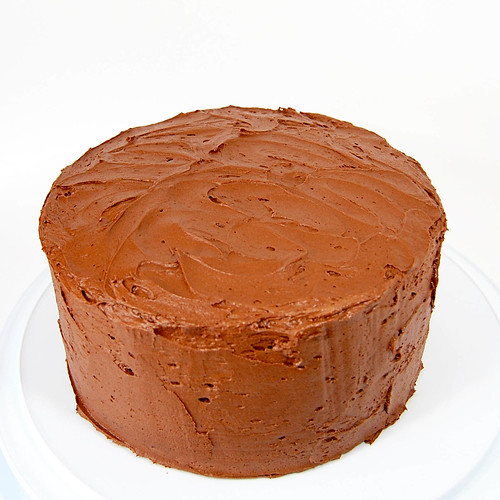
I had a hard time deciding what kind of icing to top this cake with. I thought a chocolate Swiss Meringue Buttercream would be nice, considered a sour cream frosting, but then settled on a plain chocolate frosting. Simple. I tweaked the recipe a bit, because I thought it tasted a bit too much like icing sugar. So I poured half of the chocolate ganache I had made to fill the cake with into the frosting. Fixed that problem.

Chocolate Frosting
recipe source: suitable for consumption
Makes 2 cups

1/2 cup butter, softened
2 2/3 cups icing sugar, sifted
1/2 cup cocoa powder, sifted
1/3 to 1/2 cup heavy cream
1 1/2 teaspoons vanilla

Cream the butter in a large bowl. Blend in the vanilla and alternate the cocoa powder and icing sugar with the cream.

Beat with an electric mixer, adding enough cream to reach desired texture. 


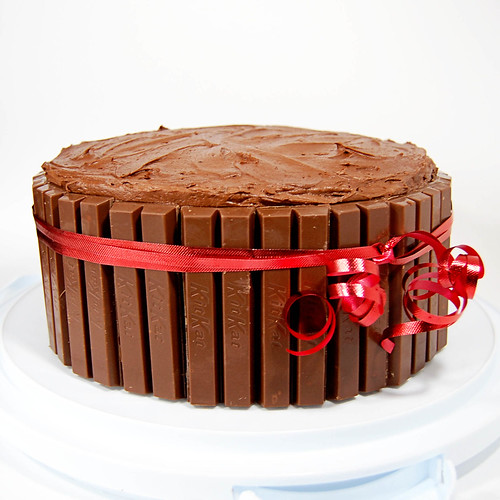
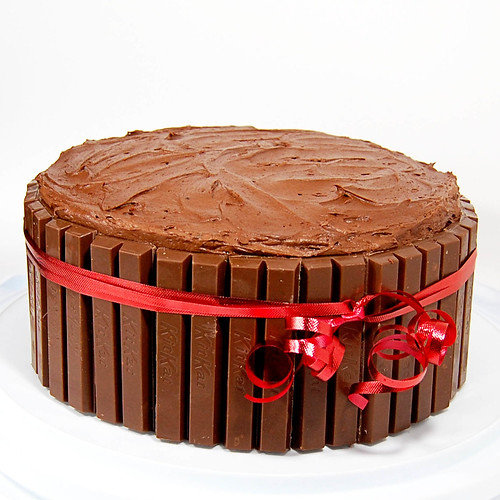
I think it turned out pretty good. And the texture was fun to work with. I can actually say that I enjoyed frosting this cake. It helped that I wasn't feeling any pressure to make it perfect, as I knew I was going to cover the sides with Kit Kat bars. 12 of them to be exact. It was easier to place them on the cake where my frosting was messy, but overall, they just stayed right where I put them. Very easy.


Add a shiny red ribbon to hint at the strawberries and the kit kat wrappers, and you've got a pretty decent cake. I've had a cupcake or two. It's a really good cake. I think it might just become my go-to chocolate cake recipe. Perfectly moist and flavorful, keeps really well. Awesome cake.


J'espère que tes collègues l'ont aimé Mylène!

P.S. I have a new cooking blog if you want to drop by and say hi :) http://bourbonnatrixcooks.blogspot.com

Sunday, May 22, 2011

baked cowboy cookies

I made Momofuku's Compost cookies a little while back, and loved them. They were crunchy, and chewy, and salty and sweet, ok a lot salty, and had a coffee kick, especially after a few days of hanging around.

So when I saw Baked's Cowboy Cookies on the Baked Sunday Mornings recipe schedule, I could not wait to try them! Pretzels, oats, chocolate chips, espresso powder... Sounds like a winner of a cookie recipe! And even better, I already had crushed pretzels leftover from the Compost cookies, so I didn't even have to dirty the food processor! Score!


This is a standard chocolate chip cookie recipe where you cream the butter and sugar together, add vanilla, and the espresso powder dissolved in hot water. Mix in your dry ingredients, and fold in the pretzels and chocolate chips. Now the recipe says to chill the dough at this point, but I portion it first, because my cookie scoop can't handle cold dough very well. And I skipped the step where I was supposed to sprinkle extra pretzels on top. I did flatten my balls of dough before baking them.

Cowboy Cookies
Recipe adapted from Baked Explorations by Matt Lewis & Renato Poliafito (pg 91)

Ingredients

1 ¾ Cups All-Purpose Flour
1 tsp Baking Soda
1 tsp Baking Powder
½ tsp Salt
2 Cups Rolled Oats
14 Tbsp (1 ¾ sticks) Unsalted Butter, cool but not cold, cut into 1-inch cubes
¾ Cup Granulated Sugar
1 Cup Firmly Packed Dark Brown Sugar
1 Large Egg
1 Large Egg Yolk
1 tsp Vanilla Extract
1 tsp Instant Espresso Powder
2 Cups Semisweet Chocolate Chunks (about 12 ounces)
¾ Cup Thin Salty Pretzels (about 1 ½ ounces), broken into tiny pieces but not crushed into dust

In a medium bowl, whisk together the flour, baking soda, baking powder, and salt. Add the oats and stir to combine.

In the bowl of a standing mixer fitted with the paddle attachment, beat the butter and sugars together until smooth and creamy. Add the egg and egg yolk, beating until the mixture looks light and fluffy. Scrape down the sides and bottom of the bowl, add the vanilla, and beat for 5 seconds. Dissolve the espresso powder in ¼ cup hot water and add it to the bowl, mixing until combined.

Add half of the dry ingredients and mix for 15 seconds. Add the remaining dry ingredients and beat until just incorporated. Scrape down the sides and bottom of the bowl and fold in the chocolate chunks and ½ cup of the pretzel pieces.

Cover the bowl tightly and refrigerate the dough for at least 4 hours.

Preheat the oven to 350˚F. Line two baking sheets with parchment paper.

Use a small ice cream scoop with a release mechanism to scoop out dough in 2 tablespoon-size balls (or use a tablespoon measure) and place the dough balls onto the prepared baking sheet about 1 inch apart. Sprinkle the remaining ¼ cup pretzel pieces over the dough balls. Use the palm of your hand to press the dough down lightly; don’t smash the cookie-you just want to slightly flatten the ball and push the pretzel pieces into the dough.

Bake for 11 to 13 minutes, rotating the pans halfway through the baking time, until the edges of the cookies are golden brown or just start to darken.

Set the pan on a wire rack for 10 minutes to cool. Use a spatula to transfer the cookies on the rack to cool completely. They can be stored in an airtight container for up to 3 days.

Makes about 36 to 40 cookies


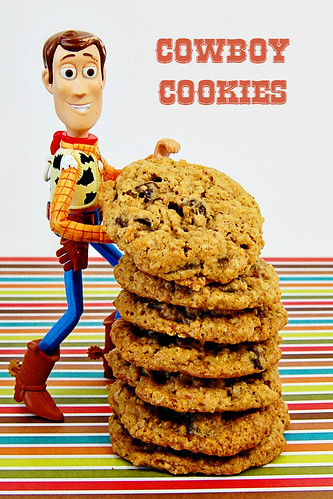
These were awesome. They disappeared really quickly. Crispy edges, chewy middle. Nice crunchy bites from the pretzels. The sweet and salty ratio was perfect. My kind of cookie!


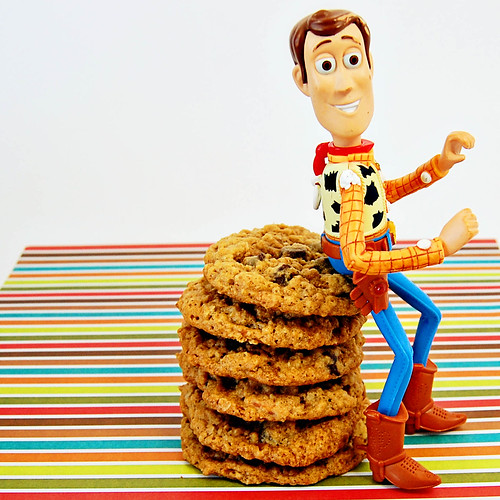
Big thank you to Robin and Rémy for lending me Woody, and for trusting my neighbors not to steal him when they left it on my porch because I wasn't home. And the scratches where there when I borrowed him... I kinda looks like Toy Story 3 Woody, doesn't he?  

Thursday, May 19, 2011

rhubarb oatmeal muffins

My mom showed up at our house the other day with an armful of rhubarb. Apparently, it's really early this year, and going to seed, so she had to "harvest" and share her bounty. Last year when she brought rhubarb over, she had also brought rhubarb muffins, which my husband absolutely loved. So I immediately knew what to do with some of the stalks.


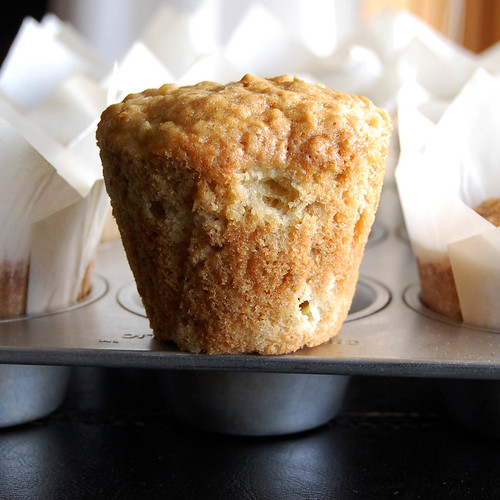
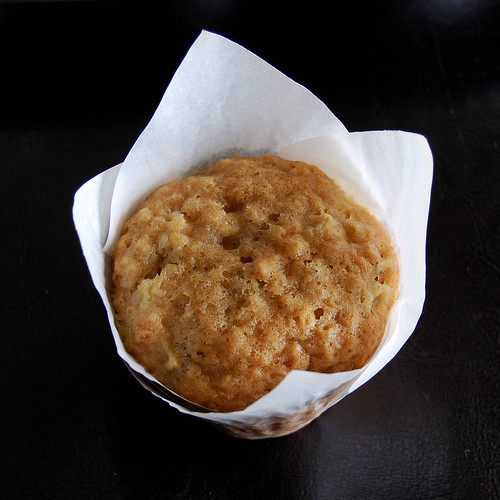
I wasn't going to post this, because, well, muffins are ugly compared to their cousins, the cupcakes, who get all the attention and are so photogenic, and cute! And it's the second muffin recipe this week. But they are so good, I just have to share the recipe! If you grow rhubarb, you probably never have enough recipes that feature it anyway. So just save this one for a rainy day. And if you don't have any fresh rhubarb on hand, I'm sure it works just as well with frozen.

rhubarb oatmeal muffins

In a small bowl, whisk together:

1 cup milk
1 tsp vinegar
1 tsp vanilla
1/2 cup oil
1 egg

In a large bowl, combine:
2 1/2 cups flour
1 1/4 cups brown sugar
1 cup rolled oats
1 tsp baking soda
1 tsp salt

Make a well in the middle of the dry ingredients, pour in the wet ingredients and mix until evenly combined.

Fold in 2 cups chopped rhubarb.

Bake in a 350 oven for 25 minutes.


I love how easily most muffins recipe come together. And most muffins freeze so well too. It's good thing, because I kinda double the recipe without necessarily wanting to. I forgot that I had already added an egg, and I added another one... Oops. So I double everything else, and now we'll be eating rhubarb muffins until next spring.

Not that I mind, because they are incredibly moist, and full of fruit and oats and sugar. And you gotta love the little pockets of tart rhubarb. Yum!


Good thing I still have rhubarb leftover though, as I'm really looking forwards too a blueberry-rhubarb crisp. Stay tuned. That one is amazing!

Monday, May 16, 2011

chewie chocolate chip cookies

I spotted my husband in the kitchen playing around with *my* flour. At first I thought he was cleaning up, but then the clink of the measuring cups alerted me that something was definitely up. Apparently, I wasn't delivering, so he had taken it upon himself to make chocolate chip cookies. To be fair, the last time I made the closest thing to chocolate chip cookies was two months ago when I made these m&m cookies. I've made cookies three times since then, but I guess it doesn't count as they weren't chocolate chip cookies.


He's pretty capable in the kitchen, so I had no doubt that his cookies would be excellent. He likes his chocolate chip cookies with not too many chocolate chips, and they have to be soft and chewy. So he picked a recipe on all recipes called best big fat chewy chocolate chip cookies. After he asked me if he could use a cup and half of the butter softening on the counter, I asked to see the recipe. A quick look revealed a good one, as it's almost exactly like the one I use. And then I figured that he was doubling the recipe. When I asked why, he told me he wanted chocolate chip cookies... ok... So 3 dozen cookies... It's a good thing he didn't find the beaters for the hand-held mixer he was looking for, as I doubt they would have been able to handle that amount of dough.


A quick run to the store to get more chocolate chips, (he only used half of what the recipe calls for, and a mixture of milk, and semi-sweet) and they were in the oven to fill the house with yummy sugary smells.

Best Big, Fat, Chewy Chocolate Chip Cookie
recipe source allrecipes.com

2 cups all-purpose flour
1/2 teaspoon baking soda
1/2 teaspoon salt
3/4 cup unsalted butter, melted
1 cup packed brown sugar
1/2 cup white sugar
1 tablespoon vanilla extract
1 egg
1 egg yolk
2 cups semisweet chocolate chips

Preheat the oven to 325 degrees F (165 degrees C). Grease cookie sheets or line with parchment paper.
Sift together the flour, baking soda and salt; set aside.
In a medium bowl, cream together the melted butter, brown sugar and white sugar until well blended. Beat in the vanilla, egg, and egg yolk until light and creamy. Mix in the sifted ingredients until just blended. Stir in the chocolate chips by hand using a wooden spoon. Drop cookie dough 1/4 cup at a time onto the prepared cookie sheets. Cookies should be about 3 inches apart.
Bake for 15 to 17 minutes in the preheated oven, or until the edges are lightly toasted. Cool on baking sheets for a few minutes before transferring to wire racks to cool completely.


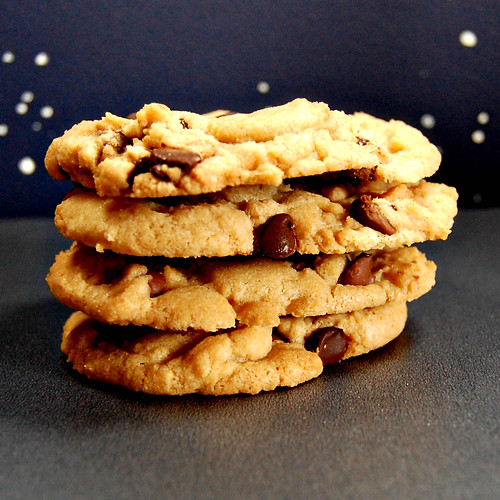
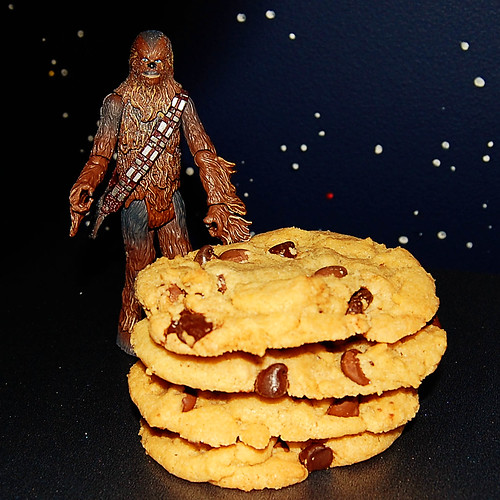
I was curious to see how they would turn out, as I usually chill my cookie dough before baking it. They came out fine. Huge, but fine. They were nice and thick, and straight out of the oven, soft and gooey. After they completely cooled, they were nice and chewy with just enough of a crispy edge.


And, after just a little bit of work, and a quick trip to the grocery store, my husband has his chocolate chip cookies. And he will for a while! They filled three cookie tins!

(And I apologize for the badly lit chewbacca pics. They seemed appropriate, but he's kinda ugly, isn't he?)