Thursday, February 27, 2014

shaped breads

February's Daring Bakers challenge was so dangerous! Easy, simple ingredients, so yummy, and pretty on top of it!

Daring Baker Sawsan, of Chef in Disguise, challenged us to make beautiful, filled breads.
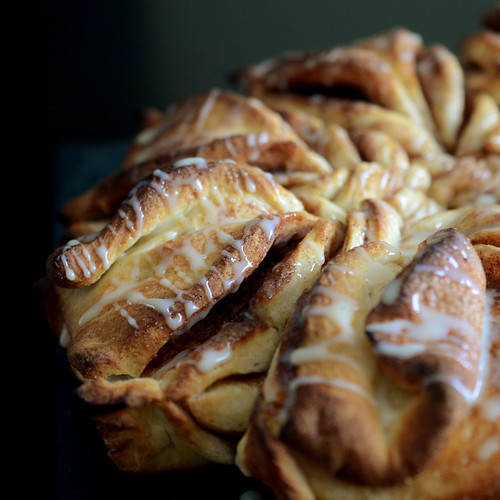


Sawsan provided us with two recipes, and two shaped breads to attempt. The first one I made was filled with cinnamon sugar. The other recipe made two "loaves" one of which i filled with nutella, the other, with berry preserves.

Cinnamon bread
Servings: 8

1/4 cup (60 ml) warm water
3/4 cup (180 ml) warm milk
1 large egg
1/4 cup (60 ml) (60 gm) (2 oz) butter, softened
1/4 cup (60 ml) (50 gm) (1-3/4 oz) white sugar
1/2 teaspoon (3 gm) salt
3-1/4 cups (780 ml) (450 gm) (16 oz) plain (all-purpose) flour, approximately
2 teaspoons (10 ml) (8 gm) dry yeast
1/4 teaspoon (1 gm) cardamom, optional

1/4 cup (60 ml) of milk
1 tablespoon (15 gm) (1/2 oz) sugar

1/2 stick (4 tablespoons) (1/4 cup) (60 ml) (60 gm) (2 oz) butter
4 tablespoons (60 ml) (25 gm) (1 oz) cinnamon
1/2 cup (120 ml) (100 gm) (3-1/2 oz) sugar

1 can (400 gm) (14 oz) sweetened condensed milk

In a bowl whisk the egg with milk, water, sugar, butter and yeast. Set aside

In another bowl sift the flour with the salt and the optional cardamom. Add the liquid ingredients to the dry ingredients and knead until you get a smooth dough.

Note: This recipe requires between 3-1/4 and 3-1/2 cups of flour depending on the weather, humidity and the flour brand. Start with 3-1/4 cups and if you feel that the dough is too soft, add the extra 1/4 cup.

Place the dough in a bowl you have brushed with some oil and cover it with a wet cloth and leave it in a warm place to double.

Turn the dough out onto a lightly floured surface. Divide the dough into 4 parts. Roll each part into a circle at least 20 cm (8 inch) in diameter.

Brush the first layer with butter then sprinkle with sugar and cinnamon. Place the second layer on the first layer repeat the brushing and sprinkling and then do the same with the third layer. Top with the fourth layer, this time only brush it with butter.

Using a knife make cuts that divide the dough circles into 8 triangles. Make cuts that go 2/3 of the way in the middle of each triangle. The cuts should not reach the base of the triangle nor the tip. Take the tip of each triangle and insert it into the cut you made and pull it from the underside.

Arrange the triangles on your baking sheet. Pinch the two angles at the base of the triangle together.
Brush the dough with milk.

Allow to rest for 15 minutes during which you would heat your oven to very hot 500°F/240°C/gas mark 9 (rack in the middle). (Go for the hottest your oven will do).

Bake for 5 minutes on very hot 460°F/240°C/gas mark 9, then lower the temperature to moderately hot 390°F/200°C/gas mark 6 and bake for 15-20 more minutes

Note: ovens do differ greatly, so the time may differ,what you want is to bake it until the under side is golden brown and the bread is baked all the way to the center. If the top of the bread is not golden brown by that time and you have a broiler (grill) in your oven. Turn on the broiler (grill) for a couple of minutes until the bread is golden brown on top. If on the other hand the top is getting too dark, consider lowering the oven temperature and covering the top of the bread with foil to stop it from over browning

Take it out of the oven and allow to cool for 5 minutes then transfer to a wire rick and drizzle with sweetened condensed milk while it is still warm.
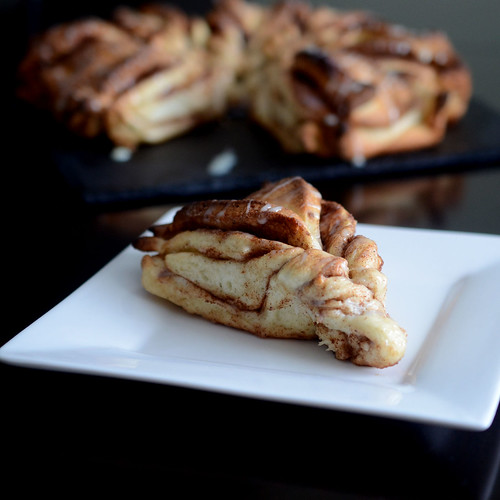


Nutella twists

Servings: This dough recipe makes two loaves, 16 small pieces each

1 can (400 gm) (14 oz) sweetened condensed milk
3 large eggs
1 cup (240 ml) vegetable oil
1 cup (240 ml) warm water
3 teaspoons (15 ml) (12 gm) yeast
7 cups (1 kg) (2.2 lbs) all-purpose (plain) flour, approximately
Pinch of salt

Instead of the eggwash use
2 tablespoons (30 ml) (25 gm) (1 oz) milk powder
3 tablespoons (45 ml) lukewarm water
1teaspoon (5 ml) (5 gm) sugar
1/4 teaspoon (1 gm) instant coffee

For the filling
½ jar (200 gm) (7 oz) of nutella (or similar)

Mix the condensed milk, yeast, oil, water, and eggs in the bowl of your mixer. Add the flour one cup at a time and knead using the kneading attachment or by hand till you get a soft dough. The dough will be slightly sticky due to the sweetened condensed milk, don’t worry once the dough rests it will have a wonderful consistency.

Place the dough in a lightly oiled bowl, cover and allow to rest till it doubles in size

Punch down the dough and divide it into 2 parts. Wrap one part in a plastic bag and work with the other. Divide the dough ball into 4 parts. Roll each part into a circle at least 20 cm (8 inch) in diameter. You can use a plate or any other round item as a template if you want your layers to be identical and uniform. 

Spread the Nutella (or similar filling) on the first layer. Place the second layer on top of the first and repeat. Top with the fourth layer, this time only brush it with butter.

Note: To help with the slippery Nutella, you can place the filled layers before cutting into the fridge for 20-30 minutes, this will help the Nutella to firm up. That will make the cuts and twists easier.

Using a knife make cuts that divide the dough circles into 8 triangles starting at the center but don’t go all the way to the outer edge. Then divide each triangle into two. That gives you a total of 16 triangles. Gently lift the triangles one at a time and twist them.

Repeat for the other dough ball.

Brush the dough with egg wash replacement. Allow to rest for 15 minutes during which you would heat your oven to very hot 500°F/240°C/gas mark 9.

Bake for 5 minutes on very hot 460°F/240°C/gas mark 9, then lower the temperature to moderately hot 390°F/200°C/gas mark 6 and bake for 15-20 more minutes.

Note: Ovens do differ greatly, so the time may differ,what you want is to bake it until the under side is golden brown and the bread is baked all the way to the center. If the top of the bread is not golden brown by that time and you have a broiler (grill) in your oven. Turn on the broiler (grill) for a couple of minutes until the bread is golden brown on top. If on the other hand the top is getting too dark, consider lowering the oven temperature and covering the top of the bread with foil to stop it from over browning.
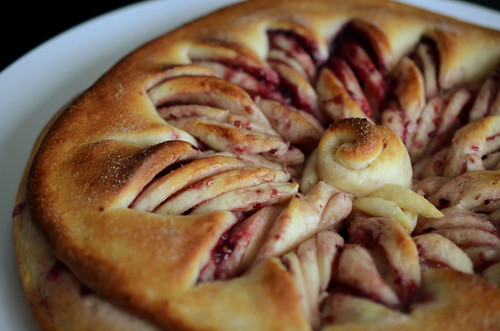


This challenge was very dangerous for me. I could have made bread all month long! So delicious! Thanks Sawsan for the great challenge!


Saturday, February 15, 2014

cinnamon toast crunch frosting

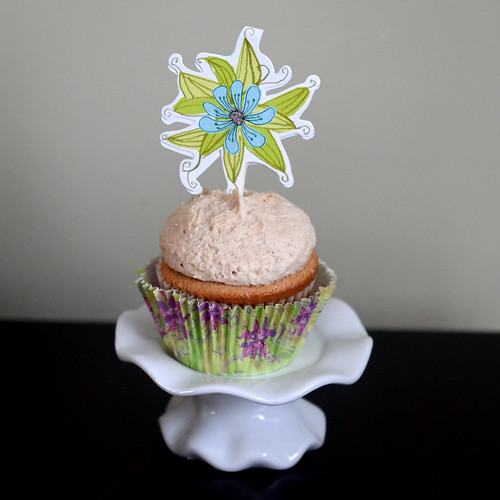
I made yummy frosting this morning! The cinnamon flavored cupcake itself was just meh, but the cinnamon toast crunch frosting was really, really good!


The original recipe called for 1 3/4 cups of crushed cereal, but since Cinnamon Toast Crunch is one of the kid's favorite, so of course, there was only a tiny bit left. Once powdered in the blender, I was able to get about 3/4 cups of crushed cereal.

The frosting had some texture to it, from the the brown sugar and the crushed cereal, so I just plopped it on the cupcake instead of piping it prettily, afraid that the crushed cereal would clog up the piping tip.

I thought it was a really nice change from boring old vanilla frosting. Now just need to find a cupcake recipe to match this frosting!

Cinnamon Toast Crunch Frosting
recipe adapted from: BS' in the Kitchen

1 1/2 cups butter (room temperature)
4 tsp vanilla
1 tsp Wilton butter flavouring
2 tbsp sweetened condensed milk
4 tbsp brown sugar
4-5 cups icing sugar
1 1/2 tsp cinnamon
3/4 cup cinnamon toast crunch cereal crumbs (run through a foodprocessor)
Whipping cream to lighten the texture if necessary

Whip the butter with the vanilla, butter flavouring, sweetened condensed milk and brown sugar. When the mixture is creamy, add the icing sugar and cinnamon. Whip until fluffy, then add the powdered cereal. Continue whipping the frosting, adding whipping cream as needed, until desired consistency is obtained.

Sunday, January 5, 2014

antique caramel cake

My fellow bakers at Baked Sunday Mornings made this Antique Caramel Cake a few weeks back. I didn't because.... I got lazy and didn't have a reason to make it. But after reading all blog posts, I jumped on the occasion to make it for my sister in law's birthday.


And it got great reviews! The cake was nice and moist, and the caramel frosting was delicious. Like going on the list of my favorite frosting. (Note to self: Build list of favorite frosting recipes.) Some of the BSM bakers complained of the frosting being fussy, as it's made with cream cheese and is quite soft. I made sure to frost the cake in a cold spot in the kitchen (not hard to find these days, but I actually opened a window while I was frosting.) I did manage to get the cake frosted without too many problems but it did start to droop after sitting at room temperature for most of the afternoon.

I was kinda surprised when I made the cake that it didn't call for salt, vanilla or baking powder. Just baking soda dissolved in vinegar, added in at the very last before baking. The flavor of the cake was just fine without the salt and vanilla. The sides baked up nice and straight and it didn't dome very horribly.


The original recipe can be found here, and makes two 8-inch layers. I double the recipe, and made 3, 9-inch layers. This is one I'd make again in heartbeat!


Friday, December 27, 2013

whoopie pies - daring bakers challenge

I had the pleasure of hosting this month's Daring Baker's challenge for the Daring Kitchen. Each month, a challenge is presented, and the members have until the end of the month to make the recipes and blog about them, starting on the 27th of the month. I've been a member of this monthly "baking club" since 2011 but I've been a pretty absent member in 2013. I blame life. And my job. And life.

So I chose to challenge my fellow bakers to make whoopie pies for my first time hosting. I figured something that was not all that common, easy enough and that wasn't too time consuming because, after all, December is an insanely busy time for us bakers (and non-bakers!).


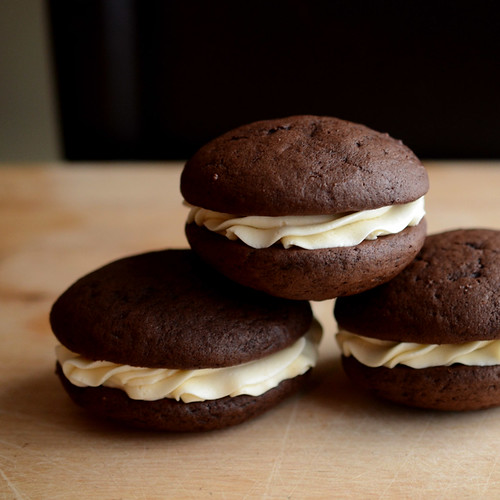
Whoopie pies are a cross between a cookie and a cake (not a pie!), with two round, mound-shaped halves sandwiching a sweet creamy filling.

According to Wikipedia, Whoopie pies are considered a New England phenomenon and a Pennsylvania Amish tradition. It is also Maine’s official state treat. The traditional Whoopie pie consists of a chocolate cake and a vanilla marshmallow filling, but pumpkin and gingerbread cake is also common enough. Want to know why they are named Whoopie pies? Check Wikipedia for the cute story!

I personally love them because of the infinite flavor combination possible. They remind me of cupcakes, but more portable and easier to eat. So I provided three recipes for the cookie/cake, and three filling recipes, and challenged the bakers to come up with some delicious flavor combination of their own.

CLASSIC CHOCOLATE WHOOPIE PIES WITH MARSHMALLOW CREME FILLING
Recipe source: King Arthur Flour
Servings: 8 large or 16 small whoopie pies

Ingredients

For the Whoopie Pies

1/2 cup (120 ml) (4 oz) (115 gm) butter
1 cup (240 ml) (7 oz) (200 gm) brown sugar, firmly packed
1 teaspoon (5 ml) (5 gm) espresso coffee powder, optional
1 teaspoon (5 ml) (5 gm) baking powder
1/2 teaspoon (3 gm) baking soda
3/4 teaspoon (4½ gm) salt
1 teaspoon (5 ml) vanilla extract
1 large egg
1/2 cup (120 ml) (1½ oz) (45 gm) Dutch-process cocoa, sifted
2 1/3 cups (560 ml) (10 oz) (285 gm) unbleached all-purpose (plain) flour
1 cup (240 ml) milk

Directions:

1) Preheat oven to moderate 350°F/180°C/gas mark 4. Lightly grease (or line with parchment) two baking sheets.

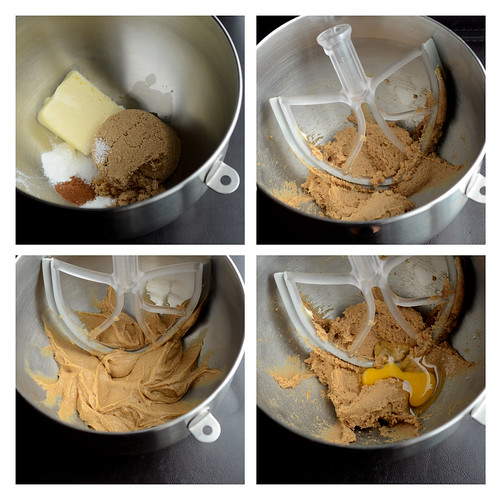
2) In a large mixing bowl, beat together the butter, brown sugar, espresso coffee powder (if using), baking powder, baking soda, salt, and vanilla till smooth. Add the egg, again beating till smooth.


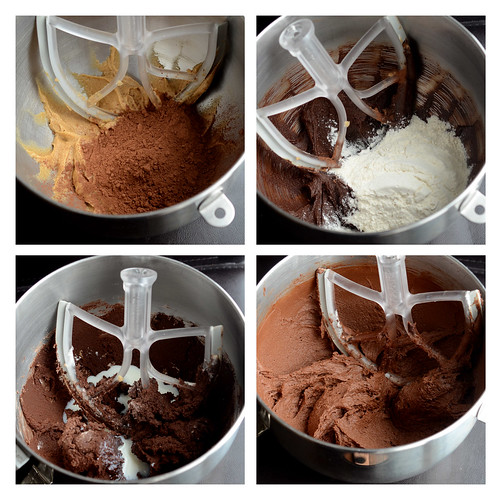
3) Add the cocoa, stirring to combine.

4) Add the flour to the batter alternately with the milk, beating till smooth. Scrape down the sides and bottom of the bowl, and beat again briefly to soften and combine any chunky scrapings.


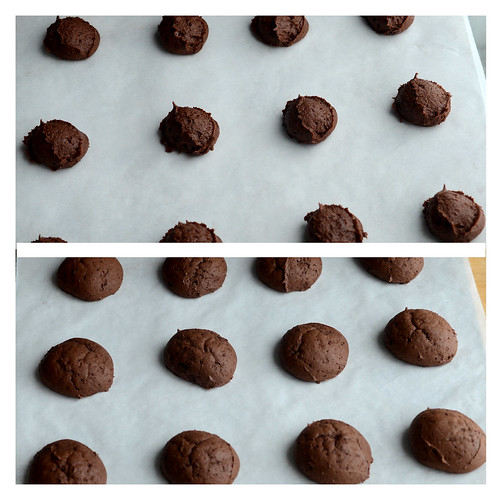
5) Drop the dough by the 1/4-cupful (60 ml) onto the prepared baking sheets, leaving plenty of room between the cakes; they'll spread. A muffin scoop works well here.

6) Bake the cakes in a preheated moderate oven for 15 to 16 minutes, till they're set and firm to the touch. Remove them from the oven, and cool on the pans. While still lukewarm, use a spatula to separate them from the pan or parchment; then allow to cool completely.

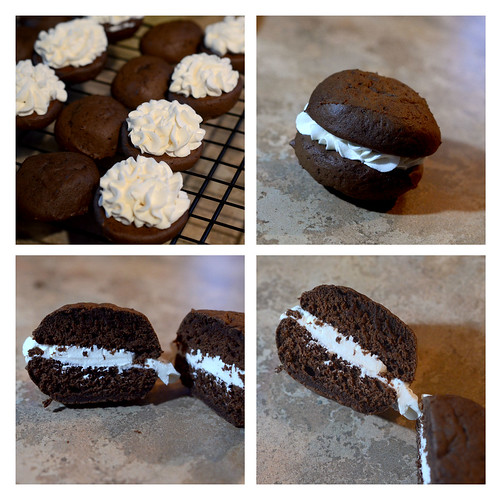
(pictured are mini whoopie pies, using 1 tablespoon batter)

Ingredients

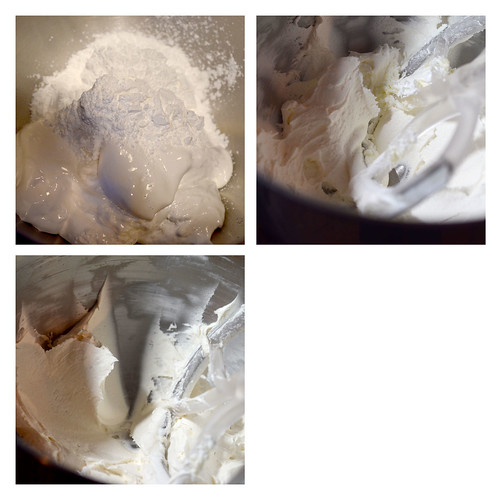
For the Marshmallow Creme Filling

1 cup (240 ml) (6 oz) (175 gm) vegetable shortening
1 cup (240 ml) (7 oz) (4½ oz) (125 gm) confectioners' sugar or glazing sugar
1-1/3 cups (320 ml) (4 oz) (115 gm) Marshmallow Fluff or marshmallow creme
¼ teaspoon (1½ gm) salt dissolved in 1 tablespoon (15 ml) water
1½ teaspoons vanilla extract

Directions:

1) (To make the filling:) Beat together the shortening, confectioners' sugar, and marshmallow until well combined.

2) Dissolve the salt in the water, and add to the marshmallow mixture. Add the vanilla, and beat until smooth. If the filling is too thin, add confectioners’ sugar until desired consistency is reached.


Assemble the Whoopie Pies

1) Spread or pipe filling onto the flat side of half the cakes (with the filling). Top with the remaining cakes, flat side towards the filling. Wrap individually, in plastic wrap, until ready to serve.


The whoopie pies will keep for up to 3 days on a parchment lined baking sheet covered with plastic wrap, in the refrigerator.

RED VELVET WHOOPIE PIES WITH CREAM CHEESE FILLING
Recipe source: Baked Explorations, by Matt Lewis and Renato Poliafito
Servings: 18 small whoopies

Ingredients

For the Whoopie Pies

2 1/2 cups (600 gm) (10 ½ oz)) (300 gm) all-purpose (plain) flour
3 tablespoons (45 ml) (3/4 oz) (22 gm) dark unsweetened cocoa powder, sifted
1/2 teaspoon (2½ gm) baking powder
1/2 teaspoon (2½ gm) baking soda
1/2 teaspoon (3 gm) salt
1/4 cup (60 ml) canola oil
1/2 cup plus 2 tablespoons (150 ml) buttermilk
2 tablespoons (30 ml) liquid red food coloring
1/2 cup (1 stick) (120 ml) (4 oz) (115 oz) butter, softened, cut into pieces
1 tablespoon (15 ml) (12½ gm) vegetable shortening, at room temperature
3/4 cup (180 ml) (5-1/4 oz) (150 gm) dark brown sugar, firmly packed
1/4 cup (60 ml) (2 oz) (55 gm) granulated sugar
1 large egg
1 teaspoon (5 ml) pure vanilla extract

Directions:

1. In a large bowl, sift together the flour, cocoa powder, baking powder, baking soda and salt.

2. In a small bowl, whisk together the canola oil, buttermilk and red food coloring.

3. In the bowl of an electric mixer fitted with the paddle attachment, cream the butter and shortening until smooth. Scrape down the bowl and add the sugars. Beat until the mixture is light and fluffy, about 5 minutes. Add the egg and vanilla extract and beat until combined. Scrape down the sides and bottom of the bowl then mix on low speed for a few more seconds. Do not over mix.


4. Turn the mixer to low. Add the flour mixture, alternating with the buttermilk mixture, in three separate additions, beginning and ending with the flour mixture until just combined. Scrape down the sides and bottom of the bowl, then mix on low speed for a few more seconds.

5. Cover with plastic wrap and chill the batter in the refrigerator for about 15 minutes.


6. While the batter is chilling, preheat the oven to moderate 350°F/180°C/gas mark 4. Line two baking sheets with parchment paper.

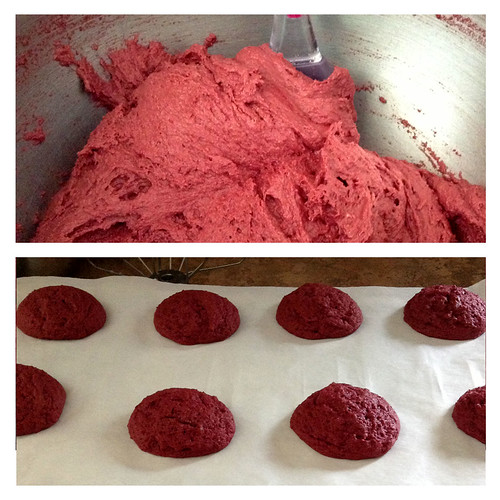
7. Remove the batter from the refrigerator. Use a small ice cream scoop with a release mechanism to drop tablespoons of the dough onto the prepared baking sheets about 1-inch (25 mm) apart. Bake in a preheated moderate oven for 10-12 minutes, until the cookies are just starting to crack on top and a toothpick inserted into the center of a cookie comes out clean. Let the cookies cool completely on the pan while you make the filling.

Ingredients
For the Cream Cheese Filling

3 cups (750 ml) (13 ¼ oz) (375 gm) confectioners’ sugar
1/2 cup (120 ml) (1 stick) (4 oz) (115 gm) unsalted butter, softened
8 ounces (225 gm) cream cheese, softened
1 teaspoon (5 ml) pure vanilla extract
1/4 teaspoon (1½ gm) salt

Directions:

1. Sift the confectioners’ sugar into a medium bowl and set aside.

2. In the bowl of an electric mixer fitted with the paddle attachment, beat the butter until it is completely smooth. Add the cream cheese and beat until combined.

3. Add the confectioner’s sugar, vanilla, and salt and beat until smooth. Be careful not to over beat the filling or it will lose structure.

(The filling can be made 1 day ahead. Cover the bowl tightly and put it in the refrigerator. Let the filling soften at room temperature before using.)


Assemble the Whoopie Pies

1. Turn half of the cooled cookies upside down (flat side facing up)

2. Use an ice cream scoop or a tablespoon to drop a large dollop of filling onto the flat side of the cookie.


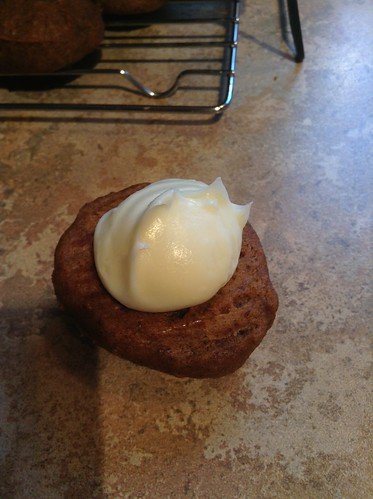
(cream cheese filling pictured on a pumpkin whoopie pie)

3. Place another cookie, flat side down, on top of the filling.

4. Press down slightly so that the filling spreads to the edges of the cookie.

5. Put the whoopie pies in the refrigerator for about 30 minutes to firm up before serving.

The whoopie pies will keep for up to 3 days on a parchment lined baking sheet covered with plastic wrap, in the refrigerator.


(Mini whoopie pies are pictured with standard American buttercream frosting as a filling. Cream cheese filling will be much looser and will not hold its shape if piped.)

VANILLA WHOOPIE PIES
Recipe source: FoodNetwork Magazine
Servings: 8 whoopies

Ingredients

2 ¾ cups(660 ml) (11-2/3 oz) (330 gm) flour
1 teaspoon (5 ml) (5 gm) baking soda
¾ teaspoon (3¾ gm) baking powder
¾ teaspoon salt
½ cup (1 stick) (4 oz) (115 gm) butter, softened
1 1/3 cups (320 ml) ( (10-2/3 oz) (300 gm) granulated sugar
2 teaspoons (10 ml) vanilla
1 large egg
2/3 cup (160 ml) buttermilk

Whisk flour, baking soda, baking powder and salt in a bowl. In a separate bowl, beat butter, granulated sugar and vanilla with a mixer on medium-high speed until fluffy; beat in the egg. On low speed, beat in the flour mixture in 3 batches, alternating with the buttermilk in 2 batches; beat until just combined.


Line 2 baking sheets with parchment paper. Scoop 16 mounds of batter onto the baking sheets, about 2 inches (50 mm) apart (about 2 tablespoons (30 ml) batter per cookie); gently form into rounds with damp fingers and smooth the tops. Refrigerate until firm, about 30 minutes.

Preheat the oven to moderately hot 400°F/200°C/gas mark 6. Bake the cookies until they spring back when pressed, 10 to 12 minutes. Cool 5 minutes, then remove to a rack to cool completely.


OLD FASHIONED VANILLA FILLING
Recipe source: Baked Explorations, by Matt Lewis and Renato Poliafito
Servings: way more than you actually need to fill the whoopies

Ingredients
1 cup (240 ml) (8 oz) (225 gm) granulated sugar
1/4 cup (60 ml) (1 oz) (30 gm) all-purpose (plain) flour
1 cup (240 ml) whole milk
1/4 cup (60 ml) heavy cream (about 35%)
1 cup (2 sticks) (8 oz) (225 gm) unsalted butter, cool but not cold, cut into ½-inch (15 mm) cubes
1 teaspoon (5 ml) pure vanilla extract

In a medium, heavy-bottomed saucepan, whisk the sugar and flour together. Add the milk and cream and cook over medium heat, whisking occasionally, until the mixture comes to a boil and has thickened, 10 to 15 minutes.


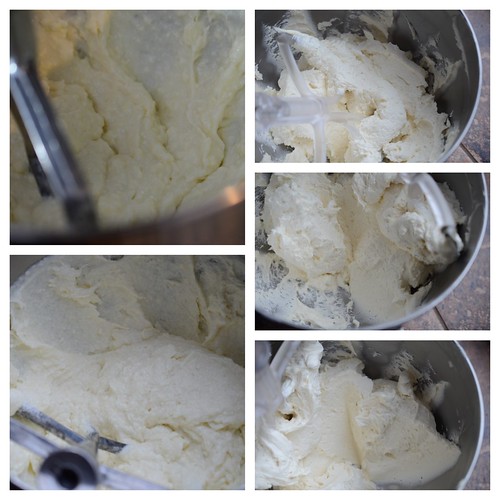
Transfer the mixture to the bowl of a stand mixer fitted with the paddle attachment. Beat on high speed until cool, at least 7 minutes. (You can speed up the process by pressing bags of frozen berries or frozen corn against the sides and bottom of the mixing bowl.) Reduce the speed to low and add the butter; mix until thoroughly incorporated. Increase the speed to medium-high and beat until the frosting is light and fluffy. You can’t overbeat this mixture. Just let it go until it’s nice and smooth.


Add the vanilla and continue mixing until combined. If the frosting is too soft, put the bowl in the refrigerator to chill slightly, then beat again until it is the proper consistency. If the frosting is too firm, set the bowl over a pot of simmering water and beat with a wooden spoon until it is the proper consistency.

***

At first I was afraid my challenge was too simple, or boring, but the members of this group quickly got on the whoopie pie making bandwagon and created all kinds of delicious combinations of cookies and filling. A huge THANK YOU to everyone who has participated this month, especially after the passing of founding member Lis in November. Also, kudos to Ruth and Shelley who are making sure the Daring Kitchen community stays strong. Thank you guys!

For more information about this community of bakers, please visit The Daring Kitchen.

Tuesday, November 26, 2013

birthday layer cake

I baked! Using a recipe I haven't posted before! And I'm writing about it! Using lots of !!! for some reason.


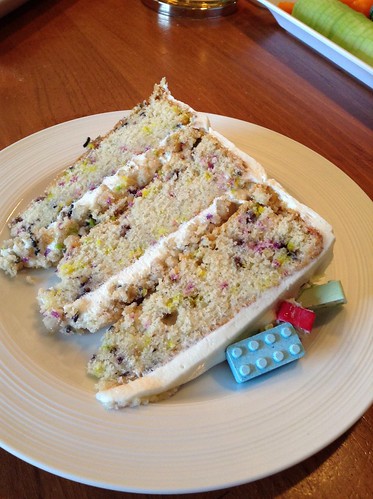
I made this cake for my brother's birthday two years ago. When my nephew's bday rolled around and I didn't get a specific cake requested, my husband suggested the Birthday Layer Cake recipe from Momofuku Milk Bar. He likes it because the cake and frosting recipes are designed to taste just like boxed cake mix and store bought frosting, i.e., too sweet, and chemical tasting.

So I happily went to work, doubling the standard recipe to make a tall 9 inch, three layer cake. I used Monster Mix sprinkles instead of the rainbow sprinkles called for in the recipe. I love the way they look, but I have to admit, once baked, it kinda looked like the cake was studded with bugs... Not so appealing. We ate it anyways, and enjoyed the sugary mess that this cake was.


This recipe has 4 components: the cake layers themselves, then a mixture of milk and vanilla that gets brushed on the cake layers, then vanilla frosting, and then cake crumbs, crunchy clusters of  "cake crumbs" that are layered between the cake and the frosting.

Seems like an elaborate recipe, but everything is quite simple, as long as you have a standmixer. The recipe below makes a really tall 6 inch round cake. I double everything (and tripled the frosting) to make the 9 inch cake fully covered in frosting.

Birthday Layer Cake
recipe source: Milk Bar by Christina Tosi

Birthday cake crumbs

1/2 cup granulated sugar
1 1/2 tbsp light brown sugar
3/4 cup cake and pastry flour
1/2 tsp baking powder
1/2 tsp salt
2 tbsp rainbow sprinkles
1/4 cup grapeseed oil
1 tbsp vanilla extract

Preheat the oven to 300°F.

Combine the sugars, flour, baking powder, salt and sprinkles in the bowl of a stand mixer fitted with the paddle attachment and mix on low speed until well combined.

Add the oil and vanilla and paddle again to distribute and continue beating the mixture until the ingredients clump and form small clusters.

Spread the clusters in a thin layer on a parchment lined baking sheet and bake them for about 20 minutes. They dry and harden as the cool into crispy crumbs. Let them cool completely before using them.

Birthday cake

Pam or vegetable oil for preparing the pan
2 cups cake and pastry flour
1 1/2 tsp baking powder
3/4 tso salt
1/4 cup rainbow sprinkles
4 tbsp unsalted butter, room temperature
1/3 cup vegetable shortening
1 1/4 granulated sugar
3 tbsp light brown sugar
3 large eggs
1/2 cup buttermilk (made from skim milk and white vinegar)
1/3 cup grapeseed oil
2 tsp vanilla extract
2 tbsp rainbow sprinkles

Preheat the oven to 350°F.  Prepare a rimmed three 6 inch round cake pans by spraying the all over with Pam and then covering the base with a round of parchment. Set aside.
Whisk together the flour, baking powder, salt, and 1/4 cup of sprinkles in a small bowl. Set the dry ingredients aside for later.
In the bowl of an electric mixer fitted with the paddle attachment, cream together the butter, shortening, and the sugars on medium-high for 2 to 3 minutes, scraping down the bowl as needed.
Add the eggs (all at once) and then beat again on medium-high for another 2 to 3 minutes. Scrape down the bowl.
Combine the buttermilk, grapeseed oil, and vanilla. With the mixer on low, add the wet ingredients in a steady stream. Increase the mixer speed to medium-high and beat for another 4 to 6 minutes. The mixture will double in size almost, and will appear light and fluffy. There will be no trace of oil left.
With the mixer on low, add the dry ingredients, and mix for another minute or so until the ingredients are all combined.
Pour out the batter into the prepared pans, spreading it out into an even layer. Sprinkle with the remaining 2 tbsp of rainbow sprinkles.
Bake for 30–35 minutes until the cake bounces back slightly when gently pressed in the corner. The center of the cake should no longer jiggle when the pan is shook. Cool the cake completely in the pan on a wire rack.

Birthday cake soak

1/4 cup milk
1 tsp vanilla extract

Whisk together the milk and vanilla in a small cup or bowl. Set aside for later.

Birthday cake frosting

1 1/4 cups powdered sugar
1/2 tsp salt
Pinch baking powder
Pinch citric acid
1/2 cup unsalted butter, room temperature
1/4 cup vegetable shortening
2 ounces cream cheese
1 tbsp glucose
1 tbsp clear corn syrup
1 tbsp clear vanilla extract

Whisk together the powdered sugar, salt, baking powder, and citric acid in a medium bowl. Set aside for later.
In the bowl of an electric mixer fitted with the paddle attachment, cream the butter, shortening, and the cream cheese for 2 to 3 minutes on medium-high until the mixture is smooth and fluffy. Be sure to scrape down the bowl periodically.
Add the glucose, corn syrup, and vanilla, and beat the mixture on medium-high again, for 2 to 3 minutes until it is silky smooth and a little glossy. Scrape down the bowl a few times.
Now add the whisked dry ingredients and incorporate them on low speed. Increase the mixer speed to medium–high and beat the frosting until it is creamy and fluffy, just like the kind that comes in a can.


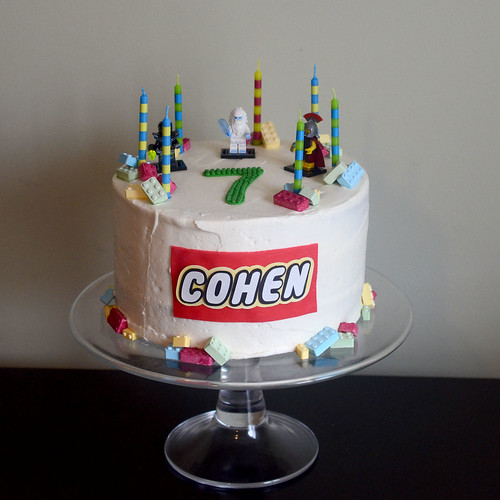
I haven't blogged in forever, but besides work being crazy, I sure did bake a lot over the past few months. I have been preparing to host my first Daring Baker's challenge, and I have been testing the new Baked cookbook for the authors, so I made a bunch of recipe I can't talk about yet, but here are a few pics of what I've been up to, for those of you who don't follow me on Facebook and Instagram:

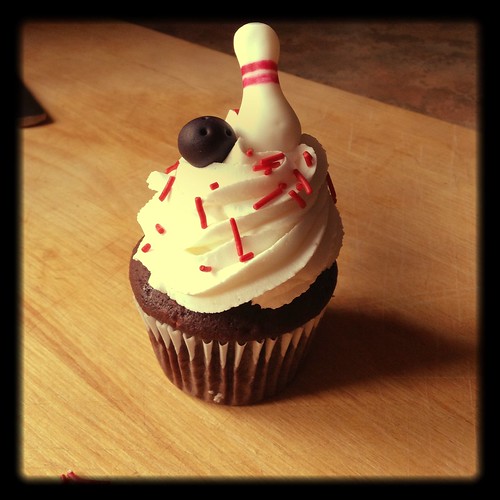
Bowling cupcakes, for a kid's bday party, using a chocolate mayonnaise cupcake recipe, and standard, too sweet, american buttercream.


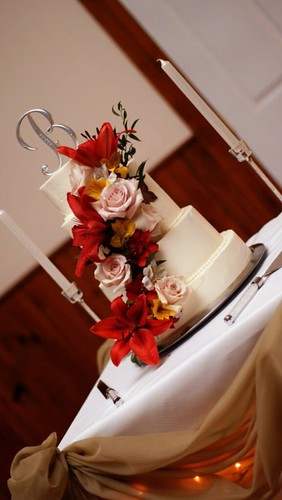
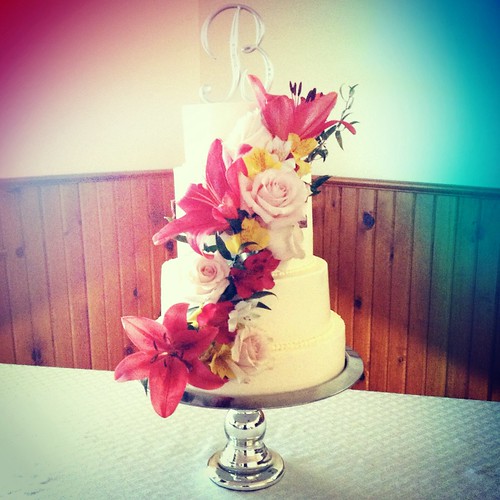
A four tiered german chocolate wedding cake, for my brother in law and his new bride.


Didn't actually bake this, but made this little fondant owl for a coworker's kid's bday.


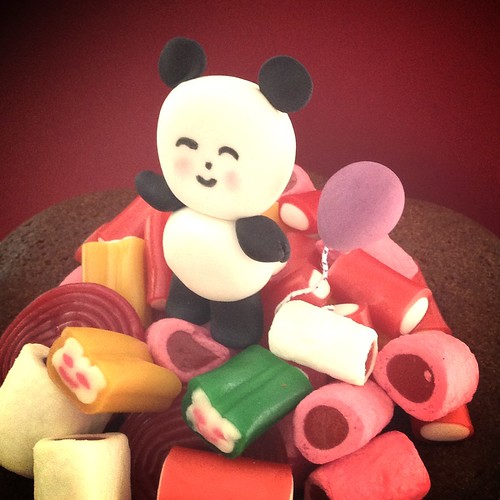
A little fondant panda bear sitting on a bundt cake for my baby's bday.


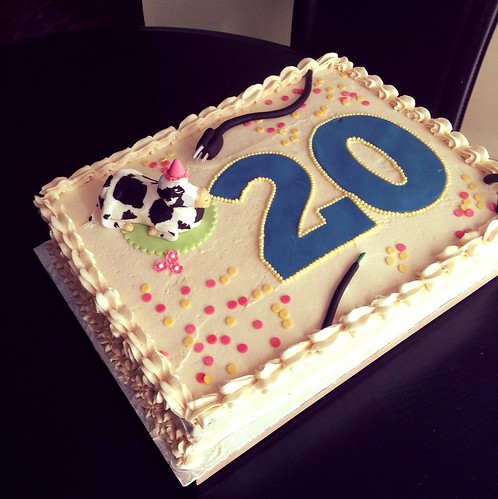
An apple spice cake with caramel frosting for my dad, who was celebrating 20 years working at a local festival.


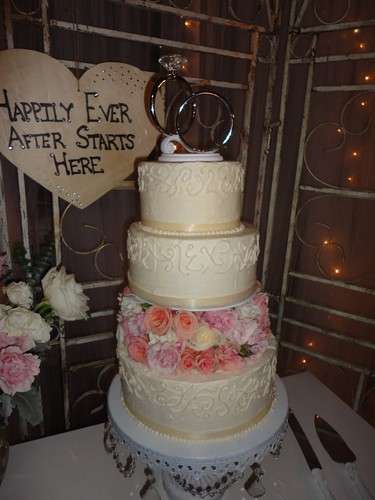
A wedding cake: bottom layer was momofuku  milk bar's carrot cake with cream cheese frosting, middle layer was chocolate cake with chocolate cream cheese frosting, and top layer was vanilla with old fashioned frosting.


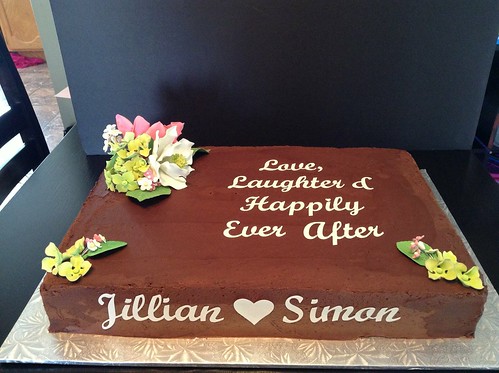
A bridal shower cake, made out of chocolate cake layers, and filled with a coffee flavored buttercream, and frosted with chocolate ganache.


I think this is it... I should really post more often... And take better pictures!

Sunday, September 29, 2013

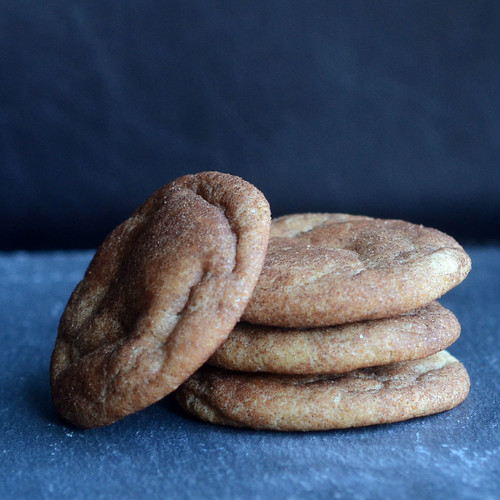
Brown Butter Snickerdoodles

Still hate to bake cookies. Made the dough on Sunday, thinking I would bring them to a potluck at lunch, but didn't read the line in the instruction that said to let them chill in the fridge for an hour. So I stashed the dough in the fridge and didn't manage to actually bake them until Thursday. And then, all of the sudden, the friggin cookies all disappeared.

Loved these! They baked up nice and thick, and are super chewy.


I only wish I had scooped them before putting them in the fridge. When I got the dough out to bake them, the dough was super hard and it was a huge pain to scoop the cookies and roll them into a ball. Always, always, scoop first, then chill.

For the recipe, and to see how the other bakers enjoyed these cookies, visit the Baked Sunday Mornings webpage.

Friday, September 6, 2013

jam filled muffins

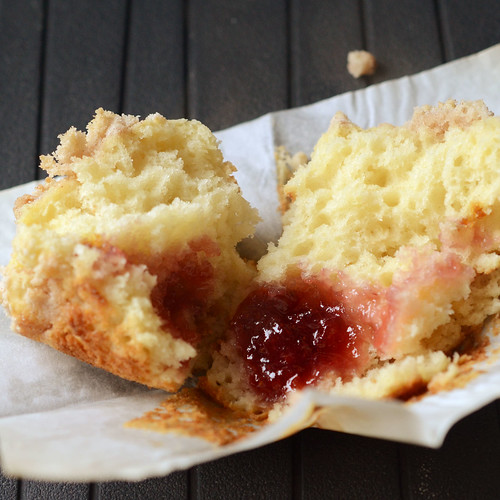
These muffins taste like my childhood. My mom used to make them often when I was a child, and I have been craving them for a while now, ever since I made strawberry jam I think. I just knew I had to use the jam in these muffins.


But I couldn't find my falling-apart Muffins Mania recipe book to save my life. So I asked my mom for a copy of the recipe and finally got to kill my craving.

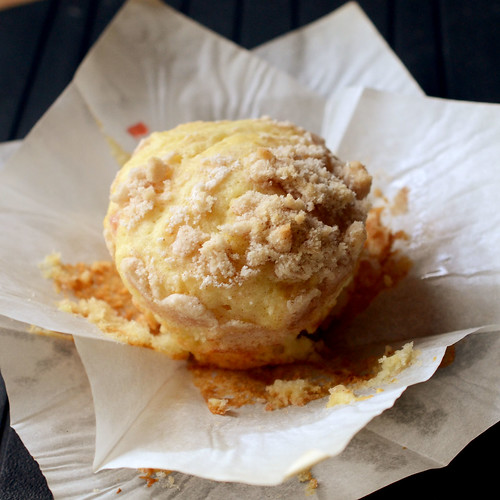
Tasted just like a remembered them! A moist vanilla scented muffin with a jam center. And I still had some leftover crumble topping from back when I made Strawberry Swirled Muffins, so I went ahead and topped the muffins with some of the crumble topping. Added a nice crunch and extra texture to the muffins.


Jam Filled Muffins
Recipe source: Muffins Mania

1 1/2 cups all purpose flour
1/4 cup white sugar
2 tsp baking powder
1/2 tsp baking soda
1/2 tsp salt
1/4 cup butter, melted
1 cup plain yogurt
1/4 cup milk
1 egg
1/2 tsp vanilla
jam or jelly

Preheat oven to 375.

Blend dry ingredients. In a separate bowl, combine melted butter, yogurt and milk. Beat in egg and vanilla.

Add butter mixture to dry ingredients and stir until moistened.

Spoon half of the batter into 9 well greased muffin cups. Place about 1 tsp jam or jelly in each muffin and top with remaining batter.

Bake for 15 to 20 minutes.


This recipe only makes 9 muffins, but they don't keep very well. So find a few friends, and devour as soon as they are cool enough to handle.