Sunday, June 9, 2013

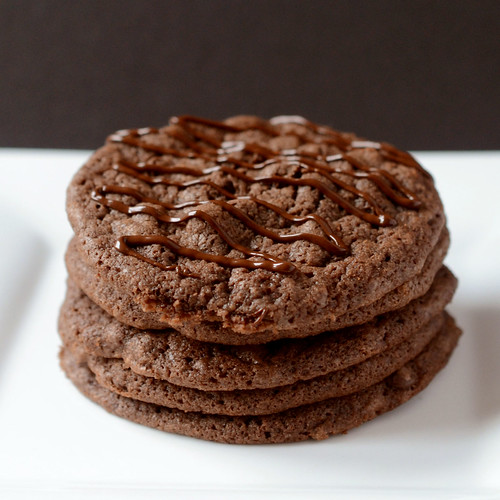
chocolate cream cheese chocolate snacking cookies

I had no intention of baking these. From the title, I assumed they were either slice and bake cookies or a dough that needed to be rolled out and cut with cutters. And I'm not the greatest fan of these type of cookies.

But it was my turn to post the recipe on the Baked Sunday Mornings Page, and while doing that, I actually read the recipe and realized that it was a drop cookie. And that it was an easy recipe. And that I had all the ingredients on hand. So I made them. Swaped the regular chocolate chip for mini ones. And drizzled melted chocolate on top.


So turns out, these cookies are amazing. The raw dough is soooo addicting! It's not heavy like chocolate chip cookie dough but not as light as frosting. Weird texture, but so good! Straight out of the oven these cookies are worth burning your tongue for. And cooled, for breakfast the next day? Like crack. They are soft and tender and so delicious! And dangerous to keep around...  

The recipe can be found on the Baked Sunday Mornings site.

Sunday, May 12, 2013

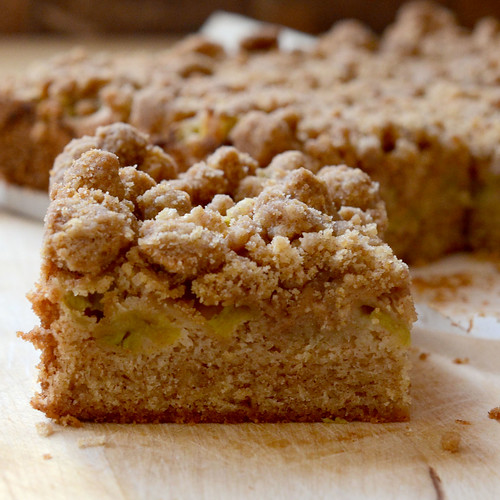
rhubarb crumb cake

It's that time of year again... Allergies, I mean, Spring! I got a bunch of rhubarb last week, and found a bit of time to do something with it! Aside from the usual oatmeal muffins, I made this cinnamony Rhubarb Crumb Cake.


Basically, a buttercake flavored with cinnamon, then a layer of sweetened rhubarb, and sweet crumbs. Pretty straightforward and pretty delicious, but doesn't quite beat Baked's NY-style crumb cake.


Rhubarb Crumb Cake
Recipe adapted from Martha Stewart via Pies and Plot

6 tablespoons unsalted butter, melted, plus more for pan
1 cup all-purpose flour
½ cup packed light brown sugar
1 teaspoon ground cinnamon

2 cups rhubarb, cut into ½ inch pieces1 tablespoon light brown sugar
1 cup all-purpose flour
½ teaspoon baking powder
1 teaspoon ground cinnamon
1 stick unsalted butter, room temperature
1 cup confectioners’ sugar
2 large eggs
2 teaspoons pure vanilla extract

Preheat oven to 350 degrees F. Butter an 8 inch square baking pan. Line it with parchment, leaving an overhand and butter the parchment.Make the crumbs. In a medium bowl, stir together flour, sugar, and cinnamon until combined. Pour in the butter and mix together with a fork until all ingredients are moistened and crumbs of various sizes have formed. Refrigerate while you make the cake.

Make the cake. In a medium bowl, combine rhubarb, brown sugar, and ¼ cup flour. In a small bowl, stir together remaining ¾ cup flour, baking powder, and cinnamon. In a large bowl, cream butter and sugar by hand or using a hand or stand mixer until light and fluffy. Beat in the eggs one at a time until once again light and fluffy. Beat in the vanilla. Mix in the flour mixture and pour into prepared pan. Spread into an even layer. Top with an even layer of rhubarb and finally an even layer of crumbs.

Bake for 50-60 minutes, rotating halfway through if necessary, until a toothpick inserted in the center comes out with a few moist crumbs. Cool completely in pan before cutting and serving. May be stored at room temperature in an airtight container for up to three days or frozen, wrapped in parchment and foil and placed in a zipper bag for up to 3 months. Thaw at room temperature for a couple of hours or in a 350 degree F oven for about 15 minutes.


And I still have enough rhubarb leftover to make blueberry rhubarb crisp! Score!

Sunday, April 21, 2013

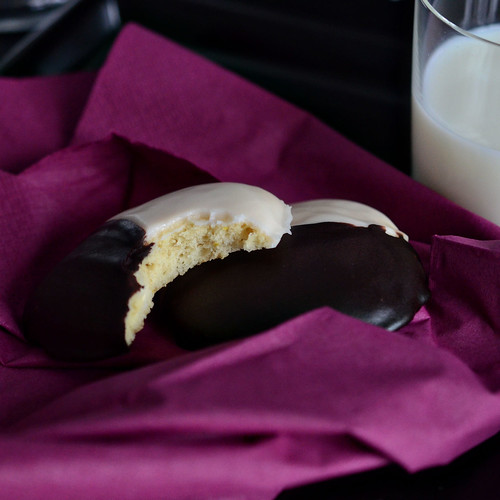
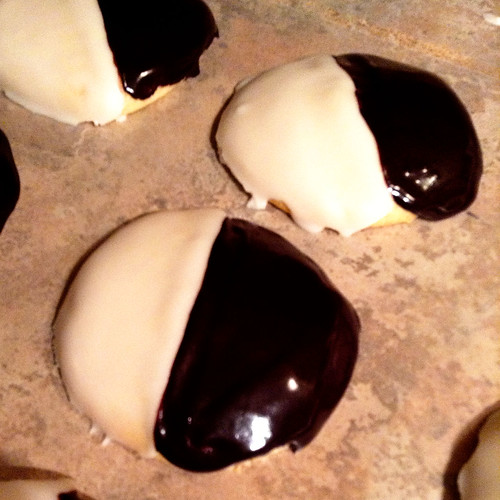
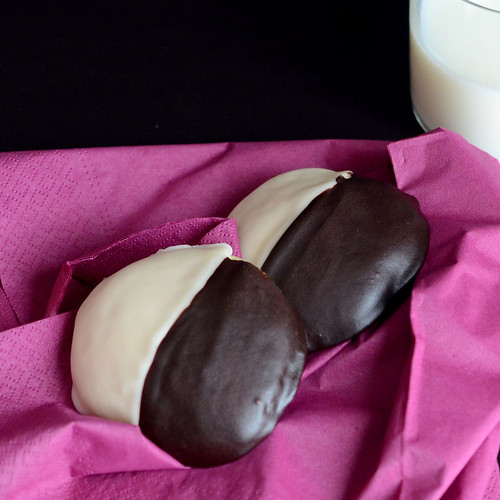
black and white cookies

Having not traveled at all, it's not surprising that I have never had a Black and White cookie. Let's just say it's not a common cookie at the grocery store near my house. For some reason I thought the Black and White cookie was a cutout cookie recipe, and I expected a rather crisp cookie dipped in two kinds of icing.

Turns out, it's a really nice and light cakey cookie, flavored with vanilla and lemon, with vanilla and chocolate icing spread on each half of the cookie.


I made two batches of Black and White cookies within the span of 3 days. The first batch I made was a Cake Boss recipe, while the second one is the Baked recipe out of the Explorations book. (Pictures are of the Baked recipe.)

The first, the cake boss recipe, the dough didn't spread very much at all and the baked cookies were very domey. The batter was extremely sticky and did not settle while baking. Could have been a mistake on my part. My ingredients were not all room temperature, and the mixture curdled big time.

The texture of the cookie was fine, but the cookie shape was not what I expected.

The glaze was finicky, but once I got the hang of it (working quickly, while keeping the icing warm, and adding water to thin out the icing as needed) it went fairly smooth. I loved the consistency of the vanilla icing, as it coated the cookie nicely without dripping everywhere or pooling around the cookie and set quickly. I see myself using this icing recipe to make petits fours one day. The chocolate icing I liked less. I had a hard time getting it to the proper consistency and it had an unappealing finish once dried.

The cookie itself was good, even plain. Actually, it might have been better plain, as I thought the chocolate icing was just... not so good. But might have been the chocolate I used. I don't know.

I quickly set out to make the Baked recipe while the cake boss recipe was still fresh in our minds, so we could compare.

The batter was much nicer to work with. I used a small 2-3 tbsp cookie scoop, and got large cookies. I wouldn't have wanted to make them any larger. They spread some, a couple of them running into each other on my baking sheet, yet stayed thick and soft. The baked cookies was barely golden around the edges.

The cookie itself had a more pronounced lemon flavor than the cake boss recipe, probably because it called for lemon zest (which I did not measure, but I couldn't have been very far off what was called for in the recipe). I also used 3/4 tbsp of lemon juice to make the 3/4 cup buttermilk called for in the recipe. I thought the naked cookie was really good.


The glaze is very simply mixing powdered sugar with milk, cream and vanilla. Half of the vanilla glaze gets over 1/2 cup of cocoa powder added to it to make the chocolate icing. That's where I ran into problems. There was no way all that cocoa powder was getting incorporated into the vanilla icing, even with the added teaspoon of water called for in the recipe. I even took out the hand mixer to make sure I had incorporated all the cocoa in the glaze, but in the end, I had to add a lot of milk for the icing to become the same consistency as the vanilla one. Not a big problem, but I suspect because of all the added milk, the chocolate glaze had issues setting up properly. It was quite delicious though! I used a supersoft red cocoa powder and loved the finish of the glaze on the cookies. Both vanilla and chocolate glaze pooled too much around the cookies for my liking, but were easy to spread on the cookie and gave the cookies a nice look.


Overall, I much preferred making and eating the Baked recipe for the Black and Whites. I'm glad I got to play with the vanilla glaze from the cake boss recipe, but the win in this case is strongly in the Baked boys' book. Very awesome cookie that's dangerous to keep around in the kitchen. It's so light that you'd have no problem eating one after the other without even noticing.

The Baked Black and White cookies recipe can be found on the Baked Sunday Mornings page.

Sunday, April 7, 2013

carrot layer cake

It may not look like much, but inside this cake is three layers of super moist and delicious carrot cake, two layers of "liquid cheesecake", two layers of "milk crumbs" and three layers of graham frosting.


And it was one of the best cakes I've ever made. Sure it's 5 recipes to make one cake, but the time and effort is totally worth it. Although I love the usual carrot cake with the thick layer of tangy cream cheese frosting, this one is a sophisticated version of the standard fare with layers of texture and flavors.

I love making Momofuku Milk Bar cakes. All the components can be made ahead of time, and the assembled cake needs to be stashed in the freezer to set properly. So while it is 5 recipes, you can make each one when you have the time.

The original recipe yields a 6-in cake and I needed to feed more than 8 people, so I doubled all the recipes (except the graham cracker crust) and made a 9-inch cake instead.

I started by making the milk crumbs, a combination of flour, milk powder, cornstarch, sugar and salt combined together with melted butter, then baked. Once cool, the crumbs are coated with more milk powder and melted white chocolate. Now, it's very important to keep these crumbs aside until ready to assemble the cake, as it's insanely easy to pop them in your mouth just like that. Then you won't have enough for the cake.

I made the liquid cheesecake next, combining cream cheese, an egg, sugar, salt and cornstarch, then baking it in the oven until not quite set. This stuff gets scraped into a bowl and kept in the fridge until needed.
Liquid Cheesecake
makes one 6” baking dish
227 g Cream Cheese (8 ounces)
150 g Sugar (3/4 cup)
15 g Cornstarch (1 tablespoon)
2 g Kosher Salt (1/2 teaspoon)
25 g Milk (2 tablespoons)
1 Egg
Heat oven to 300 degrees F. Put cream cheese into the bowl of a stand mixer fitted with the paddle, and beat on medium speed for 2 minutes. Scrape down the sides of the bowl. Add the sugar and mix for 1-2 minutes, until the sugar has been completely incorporated. Scrape down the sides of the bowl.
Whisk together the cornstarch and salt in a medium bowl. Whisk in the milk in a slow, steady stream, then whisk in the egg until the slurry is homogeneous.
With the mixer on a medium low speed stream in the egg slurry. Paddle for 3 or 4 minutes, until the mixture is smooth and loose. Scrape down the sides of the bowl.
Pour the cheesecake batter into a 6 inch pan and bake for 15 minutes. It is done when it is set on the edges but still jiggly in the center. If the edges aren't quite set, bake for 5 minute increments until it's done - no more than 25 minutes.
Cool completely to finish the baking process and allow the cheesecake to set. It will be creamy, and spreadable and can be stored in the fridge in an air-tight container for up to a week.
Just like all Momofuku Milk Bar cakes, the batter gets whipped furiously in the mixer. I bake the batter in cake pans instead of a sheet pan because I find it easier. I left my cake layers in the pan to cool so the sides were kinda wonky, but it all worked out in the end.
Carrot Cake
1 stick butter, softened
1/2 cup packed light brown sugar
1/2 granulated sugar
2 eggs
1/4 cup grapeseed or vegetable oil
1 1/4 cups flour
1 tsp. baking powder
1/4 tsp. baking soda
3/4 tsp. ground cinnamon
1 1/4 teaspoons salt
2 1/2 cups shredded peeled carrots (2-3 medium sized carrots)

Preheat oven to 350.
Combine the butter and sugars in the bowl of a stand mixer fitted with the paddle attachment and cream together on a medium-high for 2 to 3 mins. Scrape down the sides of the bowl, add the eggs, and mix on medium-high for 2 to 3 mins. Scrape down the sides of the bowl once more.
On low speed, stream in the oil, then increase the mixer speed to medium-high and paddle for 4 to 6 mins, until the mixture is practically white, twice the size of your original fluffy butter/sugar mixture, and completely homogeneous  with no streaks of fat. Don't rush the process. Stop the mixer and scrape down the sides of the bowl.
On low speed, add the flour, baking powder, baking soda, cinnamon and salt. Mix for 45-60 seconds, just until your batter comes together and any remnants of dry ingredients have been incorporated. Scrape down the sides of the bowl.
Remove the bowl from the mixer. Dump the shredded carrots into the bowl and, with a spatula, fold them into the batter.
Grease three 6 inch pans and line them with parchment paper. Divide the batter between the pans and spread it in an even layer.
Bake for 25-30 mins. The cake will rise and puff, doubling in size, but will remain slightly buttery and dense. At 25 minutes, gently poke the edge of the cake with your finger, if it bounces back slightly and isn't jiggly in the center, it's done. Leave it in for 3-5 more minutes if it isn't quite done.
Cool the cake on a wire rack (or in the freezer.)
On the day of the assembly, I made the graham cracker crust with graham cracker crumbs, milk powder, sugar, salt, butter and heavy cream. That mixture gets pureed in the blender with milk, the mixed in with whipped butter, brown sugar, icing sugar and cinnamon.

I assemble the cake in one of the cleaned cake pans I use to bake the cake layers in. I line the pan with plastic wrap, then place the first layer of cake at the bottom of the pan. I use acetate sheets to line the inside of the pan a create a collar around the cake layer. Once everything is set up, milk gets brushed on the cake layers. Half of the cheesecake mixture go on next, then half the milk crumbs and then a third of the graham frosting. Then cake, more milk, the rest of the cheesecake layer, the rest of the milk crumbs, another third of the frosting. The final cake layer goes on top, then the remaining frosting tops the whole thing.

Because my cake layers were not straight, I was counting on the filling to fill up the gaps, so between adding components to the cake, I banged the pan on the counter so that all the space around the cake layers would be filled.

Because of all the soft filling, the cake needs to set in the freezer for at least 12 hours. I left mine in the freezer overnight, then took it out the next morning, leaving it in a cool spot to defrost. We ate it about 5 hours later, and it was still kinda frozen in the very middle, but still, nobody complained.

Sunday, March 31, 2013

daring bakers: hidden veggies

Using veggies in sweet applications is something I've done before, but only with the very obvious carrot, pumpkin, zucchini and rhubarb (if it counts as a vegetable).

Ruth from Makey-Cakey was our March 2013 Daring Bakers’ challenge host. She encouraged us all to get experimental in the kitchen and sneak some hidden veggies into our baking, with surprising and delicious results!

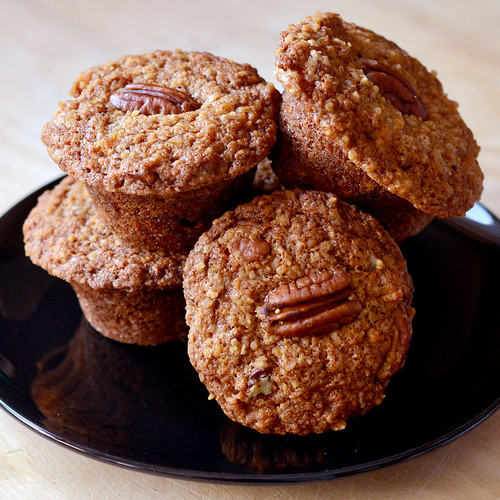
So I quickly went to the kitchen and grabbed a sweet potato I had been meaning to roast, and microwaved it to make muffins with pecans and flavored with maple syrup.


Maple Sweet Potato Muffins
recipe slightly adapted from : Ontario Sweet Potato

1 cup mashed sweet potatoes
1 ½ cups all-purpose flour
¾ cup firmly packed brown sugar
2 tsp. baking powder
1 tsp. baking soda
¾ tsp. ground cinnamon
Dash salt
2 large eggs, slightly beaten
¾ cup salad oil
¼ cup maple syrup
½ cup chopped toasted pecans

1. In large bowl, combine sweet potatoes, flour, brown sugar, baking powder, baking soda, cinnamon and salt. Add eggs, oil and maple syrup; blend well. Stir in pecans and currants.

2. Spoon evenly into greased muffin cups, filling each ¾ full. Bake at 350 degrees Fahrenheit for 15 minutes or until muffins spring back when lightly touched. Remove muffins from pan and serve warm. Makes 1 ½ dozen muffins.

I thought they were really good, especially the top of the muffins where I had sprinkled some maple sugar! They were pretty greasy though, so I would add some applesauce next time so I can reduce the amount of oil.

Saturday, March 16, 2013

maple bacon marshmallows

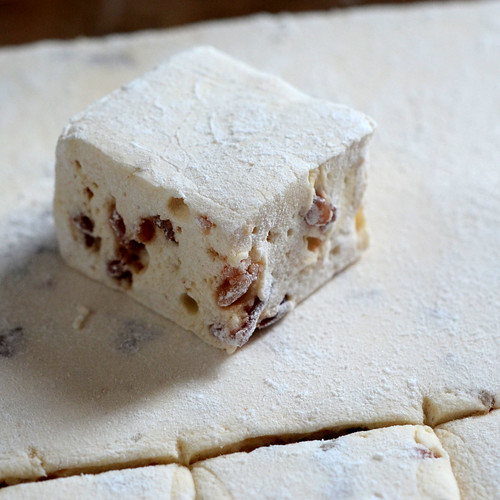
I was brainstorming maple recipes this week for someone else when I came across this picture. Marshmallows had been on my to-do list for a while but they got bumped to the top of it when I saw the maple bacon combo. This time of year, you just can't escape maple everything, so might as well embrace it.


I love bacon and maple syrup together. I love maple syrup even more when there is bacon involved. So these totally made sense to me.

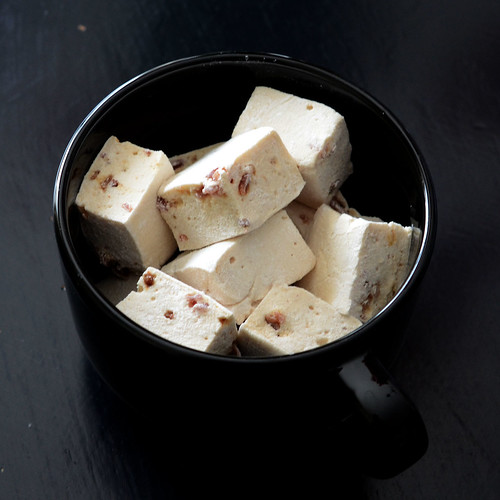
These taste exactly how you'd think. Strong maple flavor, and salty bacon. In a pillowy soft marshmallow. I love salty sweets, so this was a huge hit for me. Not sure we like the textural contrast between the marshmallow and the bacon. You just don't expect chewy bits in your candy. Didn't stop me from eating way more of these than I should.


Maple Bacon Marhmallows
recipe source: Marshmallow Madness by Shauna Sever via Epicurious

4 1/2 teaspoons unflavored powdered gelatin
1/2 cup cold water

2/3 cup sugar
1/2 cup Grade A dark or Grade B maple syrup
1/4 cup light corn syrup
1/4 cup water
1/4 teaspoon salt
1/8 teaspoon ground cinnamon
1/2 cup (about 1 1/2 ounces) finely chopped candied bacon*
1/2 cup 3 parts powdered sugar to 2 parts cornstarch, plus more for dusting

Lightly coat an 8-by-8-inch baking pan with cooking spray.

Whisk together the gelatin and cold water in a small bowl. Let it soften for 5 minutes.

Stir together the sugar, maple syrup, corn syrup, water, and salt in a medium saucepan. Bring it to a boil over high heat, stirring occasionally, until it hits 240°F. Be prepared to lower the heat as needed—this syrup likes to bubble up. Microwave the gelatin on high until completely melted, about 30 seconds. Pour it into the bowl of a stand mixer fitted with the whisk attachment. Set the mixer to low and keep it running.

When the syrup reaches 240°F, slowly pour it into the mixer bowl. Increase the speed to medium and beat for 5 minutes. Increase to medium-high and beat for 3 more minutes. Add the cinnamon, increase to the highest speed, and beat for 1 minute more. Quickly fold in the bacon bits. Pour the marshmallow into the prepared pan. Sift coating over top. Let it set for 6 hours in a cool, dry place. Use a knife to loosen the marshmallow from the edges of the pan. Invert the slab onto a work surface. Cut it into pieces and dust them with more coating.

*To make candied bacon, lay 6 or 7 bacon slices on a wire rack set over a sheet pan lined with foil. Combine 1/4 cup light brown sugar with 1/8 teaspoon ground cinnamon. Rub over both sides of bacon. Bake at 350°F until deeply caramelized, 30 to 35 minutes. Let cool before chopping into bits.


Sunday, March 3, 2013

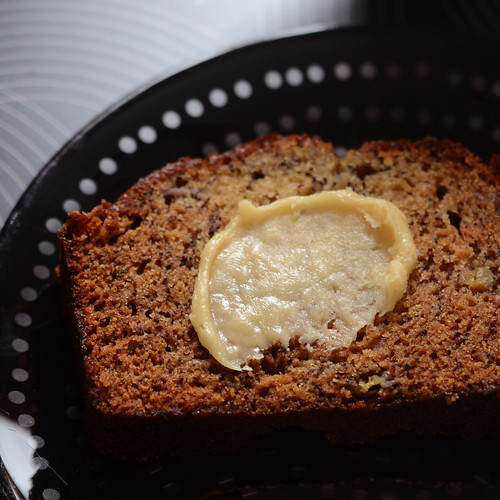
honey banana poppy seed bread

C'est inĂ©vitable. When I buy bananas just because, they stay on the counter and get too soft to eat out of hand and of course, at that point, I'm too lazy to bake with them. And when I buy bananas *specifically* for baking, they disappear right before my eyes.


I still managed to make this week's Baked Sunday Mornings recipe for Honey Banana Poppy Seed Bread by going back to the store for more bananas. And just in case, I also bought a packet of poppy seeds, then discovered I had an opened one with barely a tablespoon out of it at home. It's not an ingredient I use very often, in fact, the only time I can recall eating poppy seeds is on an everything bagel. But I enjoyed the slight crunch they imparted to this banana bread.

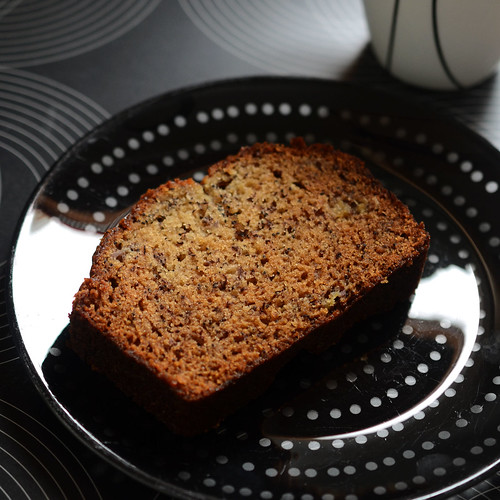
I wasn't feeling all that great when I made this recipe, so I might have forgotten an ingredient, but this banana bread seemed off to me. The batter seemed thin. My usual recipe rises way more than this one did. And looks more rustic. Once I cut into the loaf, I was surprised to see how dark it was inside. I made sure to bake it completely, but I don't think I over-baked it.

    
I really enjoy banana bread, but unfortunately, not this recipe. It just tasted too... toasty to me. But the rest of the fam seemed to like it, so posting it anyway. For the recipe, click on through to the Baked Sunday Mornings Blog and see how the other bakers enjoyed this one!