Saturday, October 13, 2012

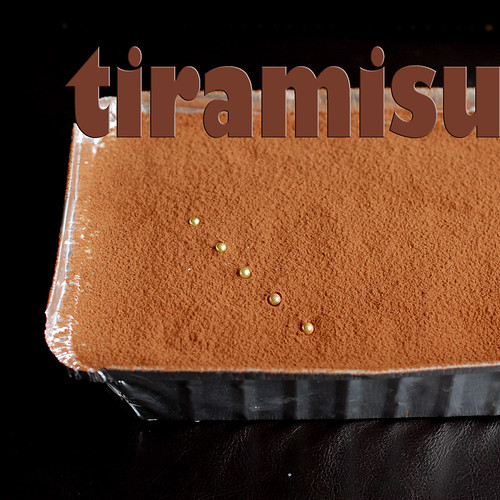
tiramisu

I traded a cardboard house for dessert last summer. I was working at a fair with a colleague I rarely see. We both wanted the cardboard houses on display at one of the booths and she ended up getting the last one at the end of the day, but gave it to me instead of keeping it for her own daughter. I said I'd make her whatever dessert she wanted the next time I saw her. She picked tiramisu. Kinda took me off guard since I've never had tiramisu, let alone made it, but whatever. I'm up for a challenge!


So tiramisu is layers of cookies (savoiardi or ladyfingers or langues de chat) dipped in sweetened espresso, and creamy filling, this one made by combining mascarpone, vanilla pastry cream, zabaglione and whipped cream. Then the whole thing is dusted in cocoa powder.

I picked the recipe the Daring Bakers had made back in February 2010, a full year before I joined.

In the challenge, they were supposed to make the mascarpone from scratch, but I ran out of time and didn't plan ahead properly, so I bought it. And the zabaglione was supposed to be flavored with marsala wine, but there was an option to use coffee, so that's what I did. I don't know my colleague very well, and didn't know if she liked wine. What I do know is that she's trying to get pregnant, so I chose to go with coffee in case she's avoiding alcohol. Now I don't know if coffee zabaglione is even a thing, since I think zabaglione is a custard made with alcohol. But whatever, I'm going with zabaglione anyways.
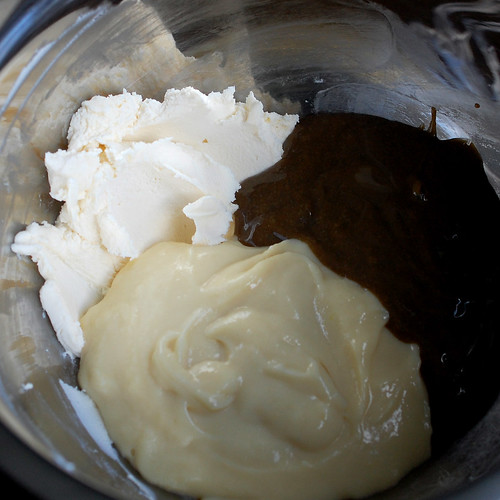

I made the zabaglione and the pastry cream the first day, let the mixtures chill overnight. Felt really fancy flavoring the zabaglione with coffee and lemon zest. Felt European. Although I don't drink coffee, I love the smell of it. And this mixture smelled so good!  The next morning, I made the savoiardi, whipped the cream and combined the four components of the creamy filling. I made the required 2 cups of sweet espresso (which was a cup too many) and layered the dessert.


Dipping the cookies in coffee before layering them with the creamy filling seemed wrong. Soggy cookies are gross, unless it's because oreos were dipped in milk. And even at that, they need to be dipped quickly, and consumed immediately. But then again, the cookies by themselves were not that delicious either. They had a crispy meringue-like shell, but a dry cookie texture inside. And I was surprised that they kept their shape in the oven, just puffing up a bit, just barely spreading.

I wish I could have prettied up the dessert a bit, but it needed to travel a couple of hours by car, then spend the day hanging out in a small fridge before travelling a couple more hours to it's final destination, so I played it safe, and left it in its throwaway container.

This dessert got rave reviews. I was told the flavors were perfect, and the sugar didn't overwhelmed the coffee. The cookies were not soggy and the final product could have  been served in an Italian Piazza. Score 1 for the tiramisu.

LADYFINGERS/ SAVOIARDI BISCUITS
(Source: Recipe from Cordon Bleu At Home)

3 eggs, separated
6 tablespoons granulated sugar
3/4 cup cake flour, sifted
6 tablespoons confectioner's sugar

Preheat your oven to 350 F degrees, line 2 baking sheets with parchment paper.

Beat the egg whites using a hand held electric mixer until stiff peaks form. Gradually add the granulated sugar and continue beating until the egg whites become stiff again, glossy and smooth.
In a small bowl, beat the egg yolks lightly with a fork and fold them into the meringue. Sift the flour over this mixture and fold gently until just mixed.
Fit a pastry bag with a plain tip and fill with the batter. Pipe the batter into 5" long and 3/4" wide strips leaving about 1" space in between the strips.
Sprinkle half the confectioner's sugar over the ladyfingers and wait for 5 minutes. Sprinkle the remaining sugar.
Bake the ladyfingers for 10 minutes, then rotate the sheets and bake for another 5 minutes or so until the puff up, turn lightly golden brown and are still soft.
Allow them to cool slightly on the sheets for about 5 minutes and then remove the ladyfingers from the baking sheet with a metal spatula while still hot, and cool on a rack.
Store them in an airtight container till required. They should keep for 2 to 3 weeks.

TIRAMISU
(Recipe source: Carminantonio's Tiramisu from The Washington Post, July 11 2007 )

For the zabaglione:
2 large egg yolks
3 tablespoons sugar
1/4 cup Marsala wine (or port or coffee)
1/4 teaspoon vanilla extract
1/2 teaspoon finely grated lemon zest

For the vanilla pastry cream:
1/4 cup sugar
1 tablespoon all purpose flour
1/2 teaspoon finely grated lemon zest
1/2 teaspoon vanilla extract
1 large egg yolk
3/4 cup whole milk

For the whipped cream:
1 cup chilled heavy cream
1/4 cup sugar
1/2 teaspoon vanilla extract

To assemble the tiramisu:
2 cups brewed espresso, warmed
1 teaspoon rum extract (optional)
1/2 cup sugar
1/3 cup mascarpone cheese
1 recipe savoiardi/ladyfinger biscuits
2 tablespoons unsweetened cocoa powder

For the zabaglione:
Heat water in a double boiler. If you don’t have a double boiler, place a pot with about an inch of water in it on the stove. Place a heat-proof bowl in the pot making sure the bottom does not touch the water.
In a large mixing bowl (or stainless steel mixing bowl), mix together the egg yolks, sugar, the Marsala (or espresso/ coffee), vanilla extract and lemon zest. Whisk together until the yolks are fully blended and the mixture looks smooth.
Transfer the mixture to the top of a double boiler or place your bowl over the pan/ pot with simmering water. Cook the egg mixture over low heat, stirring constantly, for about 8 minutes or until it resembles thick custard. It may bubble a bit as it reaches that consistency. Strain into a bowl and let cool to room temperature. Cover and refrigerate at least 4 hours or overnight, until thoroughly chilled.

For the pastry cream:
Mix together the sugar, flour, lemon zest and vanilla extract in a medium heavy-bottomed saucepan. To this add the egg yolk and half the milk. Whisk until smooth.
Now place the saucepan over low heat and cook, stirring constantly to prevent the mixture from curdling.
Add the remaining milk a little at a time, still stirring constantly. After about 12 minutes the mixture will be thick, free of lumps and beginning to bubble. Strain the cream into a bowl and cool to room temperature. Cover with plastic film and refrigerate at least 4 hours or overnight, until thoroughly chilled.

For the whipped cream:
Combine the cream, sugar and vanilla extract in a mixing bowl. Beat with an electric hand mixer until the mixture holds stiff peaks. Set aside.

To assemble the tiramisu:
Have ready a  8" by 8" serving dish.
Mix together the warm espresso, rum extract and sugar in a shallow dish, whisking to mix well. Set aside to cool.
In a large bowl, beat the mascarpone cheese with a spoon to break down the lumps and make it smooth. This will make it easier to fold. Add the prepared and chilled zabaglione and pastry cream, blending until just combined. Gently fold in the whipped cream. Set this cream mixture aside.

Now to start assembling the tiramisu.
Workings quickly, dip 12 of the ladyfingers in the sweetened espresso, about 1 second per side. They should be moist but not soggy. Immediately transfer each ladyfinger to the platter, placing them side by side in a single row. You may break a lady finger into two, if necessary, to ensure the base of your dish is completely covered.
Spoon one-third of the cream mixture on top of the ladyfingers, then use a rubber spatula or spreading knife to cover the top evenly, all the way to the edges.
Repeat to create 2 more layers, using 12 ladyfingers and the cream mixture for each layer. Clean any spilled cream mixture; cover carefully with plastic wrap and refrigerate the tiramisu overnight.
To serve, carefully remove the plastic wrap and sprinkle the tiramisu with cocoa powder using a fine-mesh strainer or decorate as you please. Cut into individual portions and serve.


Sunday, October 7, 2012

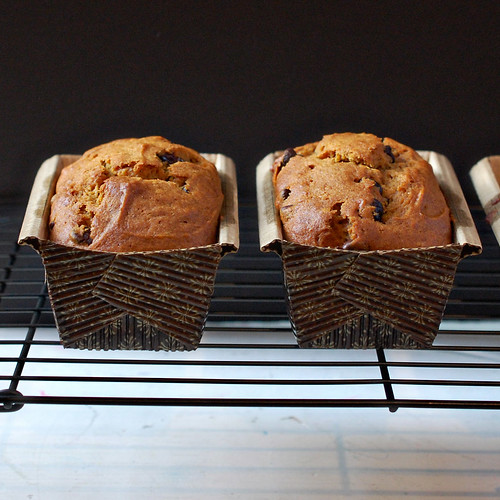
pumpkin chocolate chip loaf

Another Baked Sunday Mornings, another recipe I didn't make. Bad blogger! The scheduled recipe was for a Burnt Sugar Bundt Cake with Caramel Rum Frosting. I didn't have a use for a huge Bundt cake, and couldn't justify making it just for us, especially since I'm 5 days late making my husband's birthday cake.

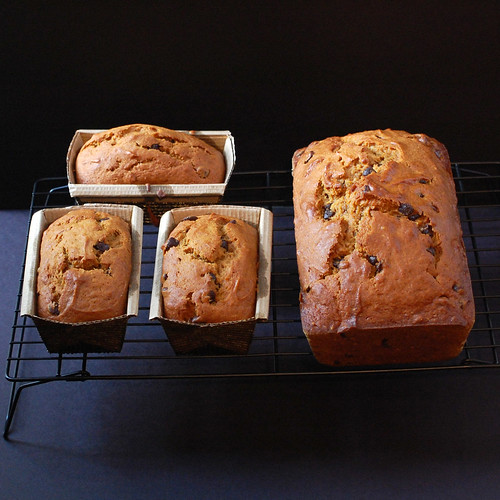
What I could justify though, was making this pumpkin chocolate chip loaf for Teacher's Appreciation Day.


The recipe is out of Baked's first cookbook. I'm sure I've made it before pre-blog but I was happy to make it again. I liked how simple is was to prepare, and the fact that I didn't need to use the stand mixer, especially since I made it at 5:30 am before school. Didn't want to wake up the girls with the mixer!

The resulting loaf tastes like fall, and is super moist! We love if for breakfast.


Pumpkin Chocolate Chip Loaf
from Baked: New Frontiers in Baking

3 1/4 cups all-purpose flour
2 teaspoons ground cinnamon
1/2 teaspoon ground nutmeg
1/2 teaspoon ground allspice
1/2 teaspoon ground ginger
2 teaspoons baking soda
2 teaspoons salt
1 3/4 cups pumpkin puree (a 15-ounce can)
1 cup vegetable oil
3 cup sugar
4 large eggs
1 teaspoon pure vanilla extract
1 1/2 cup (12 ounces) semi- or bittersweet chocolate chips

Preheat the oven to 350 degrees F. Butter and flour two 9-by-5-by-3-inch loaf pans.

In a large bowl, whisk together the flour, spices, baking soda and salt.

In another large bowl, whisk together the pumpkin puree and oil until combined. Add sugar and whisk again. Whisk in the eggs one at a time then the vanilla. Add 2/3 cup room-temperature water and whisk to until combined. Fold the chocolate chips into the wet ingredients with rubber spatula.

Fold the dry ingredients into the wet, being careful not to overmix the batter. Spread the batter into the prepared pans, and gently knock the bottom of the pan onto the countertop to even out the batter. Use a spatula to smooth the top.

Bake in the center of the oven until a toothpick comes out clean, about 75 to 90 minutes, rotating pans halfway through. Cool on a wire rack for 15 minutes before inverting the loaf onto the rack to cool completely before serving. The loaf will keep for 3 days or more wrapped in plastic wrap or in an airtight container at room temperature.


That's all that was left by the time I got around to taking a cross section picture! It was that good!

Thursday, September 27, 2012

empanadas

Patri of the blog, Asi Son Los Cosas, was our September 2012 Daring Bakers’ hostess and she decided to tempt us with one of her family’s favorite recipes for Empanadas! We were given two dough recipes to choose from and encouraged to fill our Empanadas as creatively as we wished!

I wasn't very creative. I filled my Empanadas with apple pie filling. Brushed them with some an egg wash, sprinkled on some raw sugar, and baked them.


I had spotted this cute mini apple pie cutter/maker at the store and couldn't help but using it for this challenge! I don't like to make pie dough, and as i'm more comfortable with yeasted dough I thought this would be perfect. Turns out that yeasted dough doesn't really like to be rolled thinly and cut using a plastic cutter. The dough tends to shrink back. It did work out, but it was a bit finicky.

We weren't big fans of this, but it's probably my fault. Maybe I should have sweetened the dough more. Or flavored it in some way. I did use butter instead of oil, thinking it would impart it with a buttery taste. I cut some of the salt and added a tbsp of sugar. But it wasn't enough. I also used a mixture of all purpose and bread flour because I didn't have enough bread flour. So that probably had an impact on the texture of the baked dough.

I'm sure my fellow Daring Bakers fared much better than I at this challenge! Hop on over to the Daring Kitchen and have a look at what they came up with!


Monday, September 24, 2012

chocolate mayonnaise cupcakes

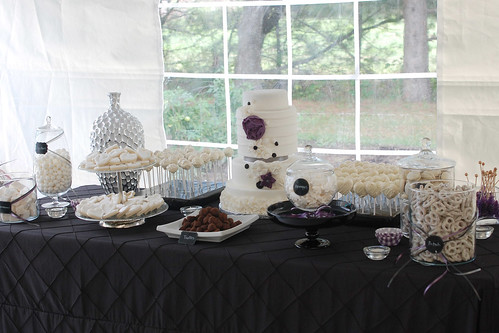
I've been a bad blogger! Haven't posted in almost a month. Skipped the past three Baked Sunday Mornings recipes. I've been busy with cake decorating this month, a sweets table for a wedding, made a few recipes that I've made before, and dived right in the new Baked cookbook and made recipes not yet on the Baked Sunday Mornings recipe schedule. And I figured I should post one of them before they kick me out of the club for being delinquent!

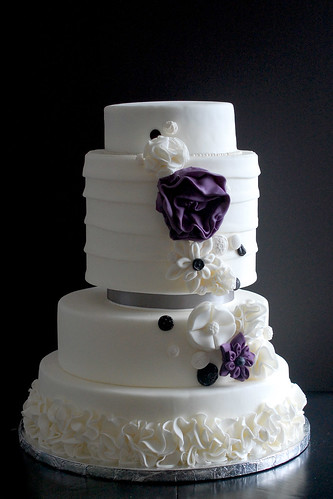
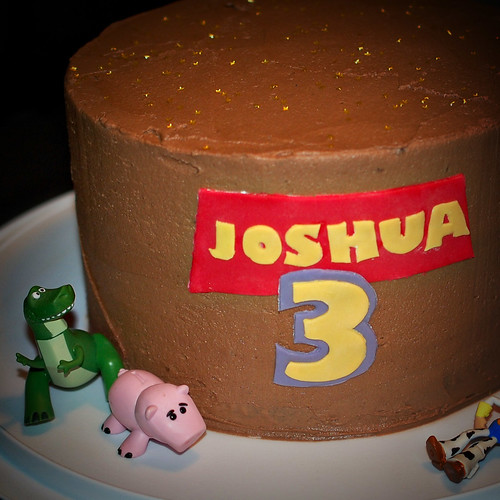
I've made this recipe three times this month. One recipe became the top tier of a wedding cake. (It actually made three 6-inch layers). I doubled it on a second occasion to make three 8-inch layers that got transformed into a toy story cake and I also got a dozen cupcakes that became little aliens. Finally, I made it a third time this month into these cupcakes for a bridal shower.


I was very impressed with this recipe when I baked the batter in cake tins. Even if the cake was very moist, its structure was perfect. The cake came out of the pan very easily, and the sides of the cake stayed straight, which helps when trying to get a perfect finish in buttercream! It does dome quite a bit, but once the cakes are leveled off, the scraps are delicious to snack on!

Because the cake does dome, it made for very pretty cupcakes! I made sure to rotate the pans halfway through the baking time though, to make sure that they would rise evenly.

Oh yeah, and instead of butter, these cupcakes require mayonnaise. Although it could seem weird to some people, but having had mayonnaise cake when I was a kid I know they produce super moist cake, and really, when you think about it, mayonnaise is basically oil, egg yolks and some kind of acidic ingredient.

Chocolate Mayonnaise Cupcakes
recipe source : Baked Elements

2 ounces good-quality dark chocolate, coarsely chopped
2/3 cup dark unsweetened cocoa powder
1 3/4 cups boiling water
2 3/4 cups all-purpose flour
1 1/4 teaspoons baking soda
1/4 teaspoon baking powder
1 cup granulated sugar
1 cup firmly packed dark brown sugar
1 1/3 cups mayonnaise
2 large eggs
1 teaspoon pure vanilla extract

Preheat the oven to 325 degrees F. Line two 12-cup cupcake pans with paper liners.
In a medium heatproof bowl, stir together the chocolate and cocoa powder. Add the water and whisk until smooth.
In another medium bowl, sift together the flour, baking soda, and baking powder.
In the bowl of a standing mixer fitted with the paddle attachment, beat  both sugars and the mayo together until well blended, 2 to 3 minutes. Add the eggs, one at a time, beating well after each addition, then beat the mixture until it is completely combined and uniform in color. Add the vanilla and beat again.
Scrape down the sides and the bottom of the bowl. Add the flour mixture in three parts, alternating with the chocolate mixture, beginning and ending with the flour mixture. Beat just until incorporated.
Fill the cupcake liners about three-quarters full. Bake the cupcakes for 17 to 20 minutes, rotating the pans halfway through the baking time, until a toothpick inserted in the center of a cupcake comes out clean.
Allow the cupcakes to cool for 15 minutes in the pan, then turn them out onto wire racks to cool completely.
I really like this recipe. It's easy, there is no advance prep it produces a great cake with an almost perfect texture. I'm not sure it is the most delicious cake I've ever had, but I think the once you slather it with frosting, the resulting treat is delicious!

I haven't tried the frosting recipe included with these cupcakes. Maybe I'll save that for when the Baked Sunday Mornings baking group gets around to making this one.

Monday, August 27, 2012

pâte à choux swans

It's Daring Baker's reveal day!

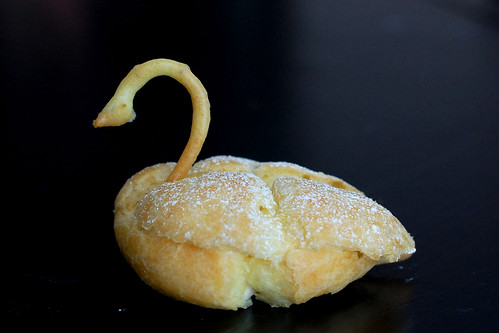
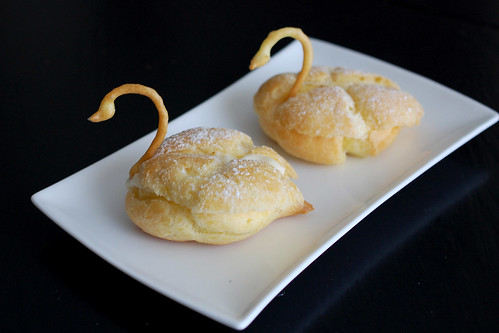
I was very excited when I saw August's challenge! Kat of The Bobwhites was our August 2012 Daring Baker hostess who inspired us to have fun in creating pate a choux shapes, filled with crème patisserie or Chantilly cream. We were encouraged to create swans or any shape we wanted and to go crazy with filling flavors allowing our creativity to go wild!

A couple weeks prior to the challenge being announced, I had played with pâte à choux for the first time, planning on making eclairs to bring to a family gathering. Although my eclairs shells turned out fine, I undercooked my pastry cream and it was too soupy to pipe in the shells. So that was a fail!

I was quite ready to give it another go, and this time, it did turn out!


I used the pâte à choux recipe provided by our hostess, but took the lazy way out, and used the stand mixer to finish the dough. There doesn't seem to be much variations between pâte à choux recipes, so you can't go wrong!

Pâte à choux

½ cup (120 ml) (115 gm) (4 oz) butter
1 cup (240 ml) water
¼ teaspoon (1½ gm) salt
1 tsp sugar
1 cup (240 ml) (140 gm) (5 oz) all-purpose flour
4 large eggs

Line at least two baking sheets with silicone mats or parchment paper, or grease pans well.
Preheat oven to moderately hot 375°F/190°C/gas mark 5 .
In a small saucepan, combine butter, water, salt and sugar. Heat over medium until butter melts, then remove from stove.
Add flour all at once and beat the mixture until the dough pulls away from the sides of the pot.
Transfer the mixture to the bowl of a stand mixer, and using the paddle attachment and a low speed, mix briefly before adding the first egg. Beat for about a minute, until well combined. Add remaining eggs one at a time, beating for about a minute after each addition. Resulting mixture should be somewhat glossy, very smooth, and somewhat thick.

Scoop or pipe the mixture in desired shapes and bake in a 375 F oven. Start checking the progress at 20 minutes (10 minutes for the swan heads). The dough should be golden.

To make the swan bodies, pipe the dough in a tear drop-like shape, about 1.5 inch long and 1 inch wide.

The swan heads are piped using a much smaller plain tip, in a 2 shape.


I chose a crème chiboust to fill my pastries with. I had never heard of this kind creamy filling before researching pâte à choux, but a crème chiboust is a pastry cream combined with italian meringue. It's traditionally used to make St-Honoré cake.

The pastry cream is made by combining flour, salt, sugar, egg yolks and  milk in a saucepan, and cooking it while constantly stirring until thick. Gelatine is then added in, with vanilla, and a bit of heavy cream. The pastry cream is kept warm while the italian meringue is being made, by heating water and sugar to 240F degrees, then adding it to whipped egg whites and whipping the resulting meringue until the mixture is cooler, but still warm. The two mixtures are then combined to make chiboust cream.

Crème Chiboust
recipe adapted from Tartelette and Gary Rhodes

1 envelope unflavored gelatin
1/4 cup cold water
1/2 cup + 2 Tablespoons sugar
½ cup all-purpose flour
1/4 teaspoon salt
5 egg yolks
2 cups whole milk
1 Tbsp vanilla
¼ cup whipping cream

5 egg whites
dash of salt
1 cup sugar

Bloom the gelatin in the 1/4 cup of cold water.
Put the sugar, flour, and salt into a saucepan and stir together with a whisk. Add the yolks and enough milk to make a paste. Whisk in the remainder of the milk. Place over low heat and stirring constantly, cook until thick. Remove from heat and stir in the vanilla and the gelatin. Stir until the gelatin is completely dissolved. Stir in the whipping cream.

In another saucepan, boil together the sugar and water to around 240°F, which takes 2-3 minutes. While the sugar is boiling, whisk the egg whites to firm peaks. Gradually pour the boiled sugar onto the egg whites, whisking all the time; slowly continue to whisk the egg whites until just warm. Fold the meringue into the custard.

I was afraid the crème chiboust would set solidly if I let it cool, so I used it immediately. It was a bit soft for piping, but held up anyways. I should have strained the pastry cream before combining it with the italian meringue, as it was a bit lumpy, but still, super delicious! Once cold, it did set very solidly, so next time I would decrease the amount of gelatine, but it was still very delicious!

Now that I know how simple make cream puffs can be, and what pretty creations you can make with them, this could get very, very dangerous!

Thanks for the challenge Kat. Can't wait to see what challenge September brings!


Sunday, August 26, 2012

heartland turtle bars

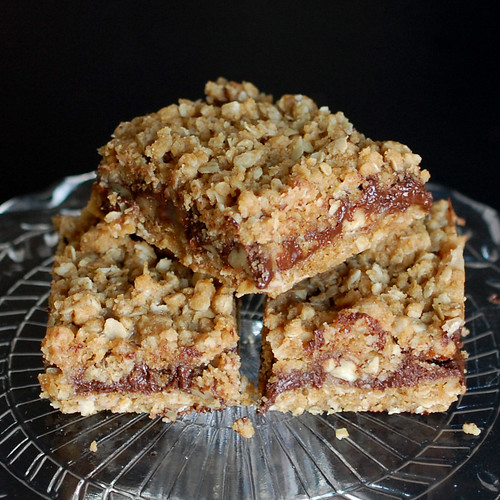
It's been a while since I blogged with the Baked Sunday Morning crew, but after a short hiatus, I decided to jump right back in, and make these Heartland Turtle Bars. I really like desserts with oats in them, and this one is also chock full of chocolate, caramel and pecans.


One of the easier recipes in Baked Explorations, it's way less involved than most of them, and quite simple to make. The dry ingredients are combined together with melted butter, and 2/3 of the mixture is pressed in the bottom of a pan to make the crust, while the rest is reserved for the topping. The crusts bakes for 10 minutes, and once it's cool, chocolate chip and pecans are sprinkled on top.

The caramel layer is a mixture of butter and brown sugar, with a touch of cream. Mine was quite liquid and immediately blended in with the chocolate. So there was no distinct caramel layer like I was expecting. The rest of the topping was sprinkled on top of the caramel, and the bars were baked once more until golden brown.

Maybe I didn't bake them enough, but they were quite softer than I had imagined. I have to admit that they didn't get to cool down very much either, as it was quite warm and the house. (And I didn't read the part about chilling the bars for an hour so that they firm up) The chocolate stayed very soft.

It's very, very sweet. My husband said that it reminded him of an apple crisp, and said that the bars would be awesome, slightly warm, under a scoop of vanilla ice cream!

The recipe can be found on the Baked Sunday Mornings blog. Click on though to see how the other bakers enjoyed this one.

Sunday, August 5, 2012

chocolate ice cream

A UK based blog, Domestic Sluttery, started this new "pudding club", where once a month, they are going to announce a new pudding theme, and participants are to make a recipe, photograph and blog about it.

So of course, I decided to join in! I like that it's very lax in its rules. You make something, post it whenever, the Domestic Sluts share the posts when they can, and recap the first Monday of every month. Plus, I'll get to discover new blogs! Always fun!

My only issue is that the Canadian in me is not so familiar with the "pudding" term. I assume that it refers to their word for dessert. But then, in their inaugural post, they used the word "puddingy". And examples of puddings for this month's theme "chocolate", were a soufflé, a mousse, or a chocolate fondant pudding. Sure, they're desserts, but they are also like actual puddings (my understanding of pudding, a creamy, egg, milk or cream based concoction...).


In honor of this month's chocolate theme, I made chocolate ice cream. See, until I can understand this better, and see what the other participants in this club made, I made something safe. It's pudding (custard) based and I eat it for dessert, so yeah. Safe!

The recipe is out of a book from a famous ice cream shop in the states that I've never actually been to. I've made a couple recipes out of it so far, and they were very good. 

Chocolate Ice Cream

6 egg yolks
12 tbsp sugar
1/4 cup cocoa powder
1 cup milk (1%)
1 3/4 cups heavy cream
1/4 tsp kosher salt
1 tsp vanilla


Their method is pretty traditional, where egg yolks and half the sugar are whisked together and set aside, and a mixture of cream, milk, sugar, salt and flavorings, in this case, cocoa powder is brought to an almost boil. The cream mixture is gradually whisked in the egg yolks to temper them, and the whole thing is transferred back to the saucepan to cook until the mixture thickens enough to coat the back of a spoon.

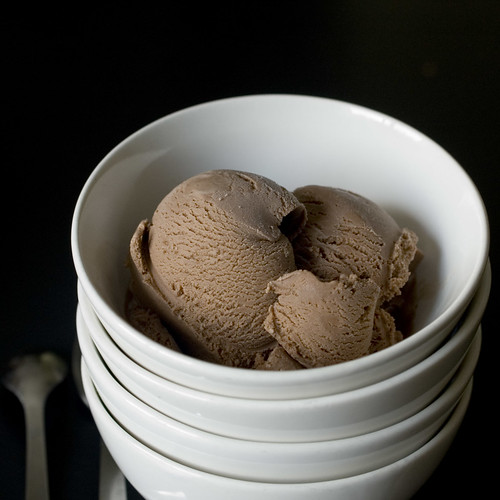
The mixture has to be completely chilled before being churned in an ice cream maker. Right out of the ice cream maker, the chocolate ice cream was super smooth, yet was slightly chewy. It looked like the perfect soft serve ice cream. I stuck it in the freezer overnight, and it came out perfect! The chocolate flavor isn't very pronounced, but it tastes like a milk chocolate ice cream.


For more information about the Sluttery Pudding Club, click on through to their site, and please visit the blogs of other participants in this club!