Wednesday, June 29, 2011

chocolate waffles

I think I started a dangerous trend. My daughter woke up and asked for a special breakfast because she was on vacation. I hope I won't be compelled to make a "special breakfast" everyday this summer! I sold her on popovers, but when I checked on the preheating oven, I saw that it was smoking like crazy. No popovers I guess! Good thing I hadn't started on the batter yet. So we settled on waffles instead. A quick search on the internet revealed yummy looking chocolate waffles over at Annie's Eats.


Chocolate waffles, whipped cream, strawberries and chocolate sauce. That screams special vacation breakfast! These chocolate waffles were great! The chocolate chips really drove the chocolate flavor home. To tell the truth, it kinda felt like we were having dessert for breakfast! Special indeed.

Chocolate Waffles
recipe adapted from Annie's Eats

Ingredients:
1½ cups all-purpose flour
3 tbsp sugar
½ cup cocoa powder
1 tsp baking powder
1 tsp salt
½ tsp baking soda
3 large eggs, beaten
4 tbsp butter, melted and slightly cooled
1 tsp vanilla extract
2 cups buttermilk, at room temperature (I used milk + 2 tbsp lemon juice)
1/2 cup mini chocolate chips
Nonstick cooking spray

Preheat the waffle maker according to the manufacturer’s instructions.

In a medium mixing bowl, combine the flour, sugar, cocoa powder, baking powder, salt and baking soda. Whisk to blend. In another bowl combine the eggs, butter, vanilla and buttermilk. Whisk to blend well. Mix the wet ingredients into the dry ingredients just until incorporated. Stir in the mini chocolate chips. Let the batter rest for 5 minutes.

Fill the waffle iron with batter and cook until the waffle is crisp and completely cooked. Repeat until all the batter has been used. Serve immediately with fresh berries, whipped cream and chocolate syrup.


Monday, June 27, 2011

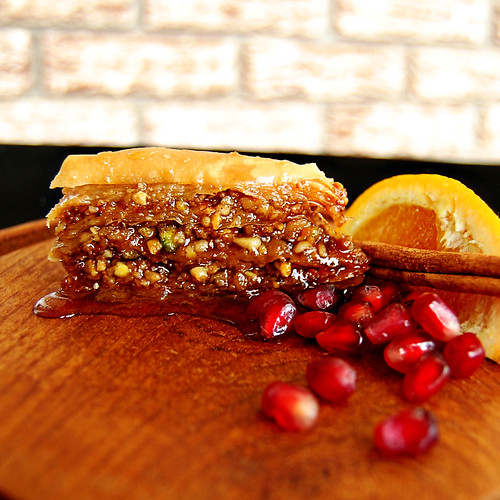
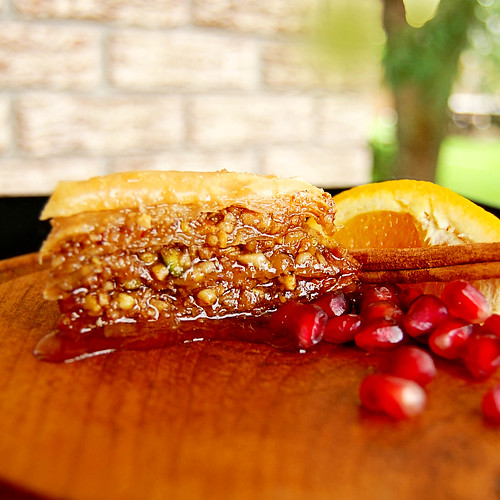
baklava

When I joined the Daring Bakers (a group that meets online where bakers make their own variation of the same recipe each month), I was really relieved to see that they had already made puff pastry from scratch, and strudel from scratch, as I had no desire, and absolutely no patience to make these pastries.

Fast forward to this month for my fourth challenge, and I learn that Erica of Erica’s Edibles was our host for the Daring Baker’s June challenge. Erica challenged us to be truly DARING by making homemade phyllo dough and then to use that homemade dough to make Baklava.


Oh boy. First of all, I've only eaten Baklava once before. Second, I'm not a big fan of flaky dessert. I don't like appetizers made with phyllo dough. And most importantly, I hate rolling out dough. And of course, phyllo dough, is paper thin!

I knew this was going to be a real challenge for me. Erica provided us with recipes for the phyllo dough, nut filling and honey syrup, but we could use basically any recipe we wanted, as long as we made the phyllo dough from scratch and used it to make Baklava. Since I had no clue what I was getting myself into, I chose to follow the recipe as it was given to us.

So basically, since the dough needs to rest for a minimum of 30 minutes and up to two hours, I made the dough first. I doubled the recipe we were given so I'd have enough to fit into my 8-inch square pan. While that was resting, I made the filling, then attempted to roll out the dough, using my pasta machine. First sheet went well, second went horribly wrong and ended up in the garbage, third went ok, fourth ended up with me cursing and tossing it in the garbage. I thought I'd try it again with the rolling pin, but that resulted in more swearing and me throwing the whole batch of dough in the garbage. 

Both my husband and I knew that was going to happen, since I have very little patience for these kinds of things. So he agreed to go to the grocery store to get a box of frozen phyllo dough, while I watched the episode of Good Eats where Alton Brown makes Baklava. He makes it seem so easy!

Alton said to put the frozen dough in the microwave for 60 seconds instead of letting it thaw overnight in the fridge. So I did that, but it was still kinda frozen, so I put it in for 30 seconds longer, and decided that was good enough. It wasn't. I cursed some more while trying to separate the layers of paper thin dough. It didn't go well. The phyllo ripped, suck together. I was already in a foul mood from the failed batch of dough and my patience by that point was non existent. So my pastry layers were not even, some of them were 3 thick without butter in between, I ran out of clarified butter (well brown butter, since I left it to "clarify" too long) and used veggie oil... An over all mess.

In any case, I got everything in a 9 by 13 pan, and scored it before putting it in the oven. I was dreading the cutting part so much, and surprisingly, that was the easiest part of this process! I baked it for 30 minutes, cut the baklava again, then baked it for 30 minutes more. Meanwhile I made the syrup and let it cool. When the Baklava was done, I cut it again, and tested the syrup but it was still hot. So I decided to let the Baklava cool and warm the syrup again so I could pour it on the cooled Baklava. I don't know why one needs to be hot and one needs to be cool, but I thought with everything that went wrong with this recipe, I should at least get this simple step right!   

I'm not going to provide the recipe for the dough, as I really, really suggest buying it frozen if you really feel the need to make this dessert. But do visit the Daring Kitchen for the original recipe with the best step by step pictures I've seen in a while! Erica did a great job putting this recipe together!

Baklava Filling

2 teaspoons ground cinnamon
pinch cloves
3/4 cup (6 oz) hazelnuts
3/4 cup (6 oz) walnuts
3/4 cup (/6 oz) pistachios
2/3 cup sugar

Combine nuts, sugar and spices in a food processor and pulse on high until finely chopped. If you do not have a food processor chop with a sharp knife as fine as you can. Set aside

Baklava Assembly

1 package phyllo dough, thawed
1 cup butter, clarified

1. Preheat oven to 350°F.
Trim your phyllo sheets to fit in your pan
4. Brush bottom of pan with butter and place first phyllo sheet
5. Brush the first phyllo sheet with butter and repeat approximately 9 times, for a total of 10 sheets of phyllo, ending with butter.
6. Sprinkle 1/3 of the nut mixture on top
7. Continue layering phyllo and buttering repeating 5 times, for a total of 6 sheets of phyllo, ending with butter.
8. Sprinkle 1/3 of the nut mixture on top
9. Continue layering phyllo and buttering repeating 5 times, for a total of 6 sheets of phyllo, ending with butter.
10. Sprinkle 1/3 of the nut mixture on top
11. Continue layering and buttering phyllo 7 more times, for a total of 8 sheets of phyllo. On the top layer, make sure you have a piece of phyllo with no holes if possible, just looks better.
12. Once you have applied the top layer tuck in all the edges to give a nice appearance.
13. With a sharp knife cut your baklava in desired shapes and number of pieces. If you can't cut all the ways through don’t worry you will cut again later. Then brush with a generous layer of butter making sure to cover every area and edge
14. Bake for approximately 30 minutes; remove from oven and cut again this time all the way through. Continue baking for another 30 minutes. (Oven temperatures will vary, you are looking for the top to be a golden brown, take close watch yours may need more or less time in the oven)


Syrup

When you put your baklava in the oven start making your syrup. When you combine the two, one of them needs to be hot. If the syrup is cool enough, you can pour it on the baklava when it comes out of the oven, but if not, you can warm the syrup again once the baklava is cool, and pour the hot syrup on it.

1 1/4 cups honey
1 1/4 cups water
1 1/4 cups sugar
1 cinnamon stick
1 (2-inch) piece fresh citrus peel (lemon or orange work best)
a few cloves or a pinch or ground clove

1. Combine all ingredients in a medium pot over medium high heat. Stir occasionally until sugar has dissolved
2. Boil for 10 minutes, stir occasionally.
3. Once boiled for 10 minutes remove from heat and strain cinnamon stick and lemon, allow to cool as baklava cooks

When ready pour the syrup evenly over the top, taking care to cover all surfaces when pouring. It looks like it is a lot but over night the syrup will soak into the baklava creating a beautifully sweet and wonderfully textured baklava!

16. Allow to cool to room temperature. Once cooled cover and store at room temperature. Allow the baklava to sit overnight to absorb the syrup.
17. Serve at room temperature


Although I wasn't a big fan, my mom and dad really liked it, and it disappeared quickly. I'm kinda sad that I wasn't *daring* enough to attempt this recipe until I succeeded, but I value my sanity too much. Can't wait to see what next month has in store for us.

Sunday, June 26, 2011

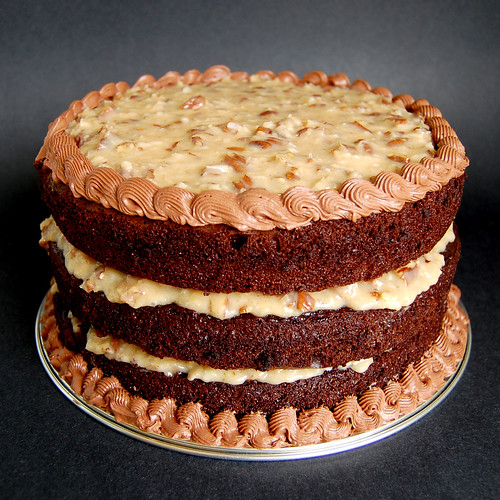
german chocolate cake

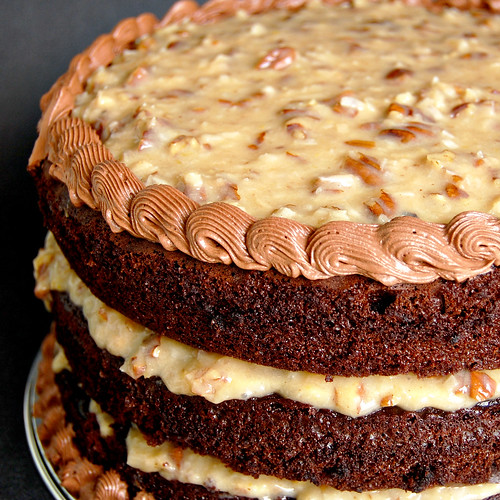
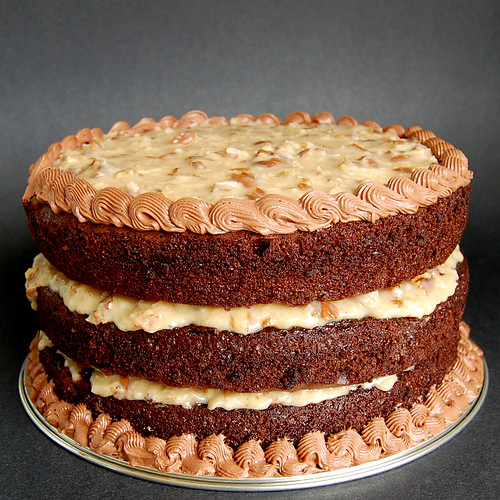
This cake got rave reviews. One "feel free to make this cake every year for my birthday" and one "the best cake I've ever eaten".


That's pretty good for an easy cake like this one. It's just a double recipe of my go to chocolate cake and Baked's filling recipe for German chocolate cake. Even the chocolate frosting was a hit. I was so embarrassed to admit that it came from a can... But I wasn't going to make a frosting just to pipe around the edge of the cake. And I will admit that I actually like frosting from a can!

The chocolate cake is super moist and chocolaty. The filling tastes like caramel with toasted coconut and pecan in it. Actually, really, really good. The frosting added just a tiny bit of a creamy element.

The chocolate cake recipe yields three 9-inch round layers, and 8 cupcakes. One of these days, I'll scale down the recipe to make only the three layers I usually need, but in the meantime, extra cupcakes in the freezer is never a bad thing.

Moist Chocolate Cake
recipe adapted from foodess

4 cups sugar
3 1/2 cups flour
1 1/2 cup cocoa
3 tsp baking powder
3 tsp baking soda
2 tsp salt
4 eggs
2 cups buttermilk
1 cup butter, melted
2 tbsp vanilla extract
2 cups hot coffee

Preheat oven to 350 degrees. Line the bottom of three 9-inch baking pans with parchment paper and lightly oil the sides, set aside. Put cupcake liners in a muffin tin.

In the large bowl of a standing mixer, stir together sugar, flour, cocoa, baking powder, baking soda, and salt.

Add eggs, buttermilk, melted butter and vanilla extract; beat 2 minutes on medium speed.

Stir in hot coffee.

Pour batter evenly between the three pans and bake on middle rack of oven for 30 to 35 minutes, until toothpick inserted in centre comes out clean. Pour the rest of the batter in cupcake liners, and bake 25 minutes. Cool completely on wire racks before frosting.


I mentioned before how amazing this cake is, but it's worth repeating: one bowl. no extra prep. no dome = no trimming the top. cake shrinks from the edges of the pan a little as it cools, so no worries about the cake not coming out of the pan in one piece. super moist and yummy... seriously... the perfect chocolate cake!

I'm not really good at dividing stuff just by eyeballing it, so I almost always weigh the batter as it goes in the pans, so that my cake layers come out even. For this cake, I pour 1 pound 11 ounces of batter in each of the cake pans, and use the rest for the cupcakes. I do the same for the fillings. For the coconut pecan filling, 10.5 ounces went between each layer and on top of the cake.


Coconut Pecan Filling
recipe from Baked New Frontiers in Baking

1 1/3 cup shredded sweetened coconut
1 cup sugar
1/2 cup unsalted butter
1 cup evaporated milk
1 tsp pure vanilla extract
3 large egg yolks
1 1/3 cup toasted pecans, chopped coarsely

Preheat the oven to 300. Line a baking sheet with parchment paper. Spread 1/2 cup plus half of 1/3 cup measure of the coconut evenly across the pan and place in the oven for 5 minutes or until the coconut begins to brown. Remove from the oven and cool on a wire rack.

In a large saucepan, stir together the sugar, butter, evaporated milk, vanilla and egg yolks. Bring the mixture to a boil, stirring constantly. After the mixture begins to boil and thicken, remove from the heat and stir in the toasted coconut, 1/2 cup plus half of a 1/3 cup measure of the regular coconut, and pecans.

Place the pan over an ice bath (a large bowl filled with ice) and stir the mixture until cool.

Place one layer of chocolate cake on a serving platter, then 1/3 of the coconut and pecan filling (spread not quite to the edges so the filling doesn't drip all over the side of the cake), another chocolate cake layer, another third of the filling, the last layer of chocolate cake and the leftover filling, not quite to the edge, so you can pipe on the chocolate frosting border.


We had a big pizza dinner before the cake, so I only cut small slices, and half the cake served 7 adults and 4 tiny kiddos. It's a good thing it was enjoyed, because there are a lot of leftovers! Happy Birthday Doris, and I'm glad you liked the cake!

Saturday, June 25, 2011

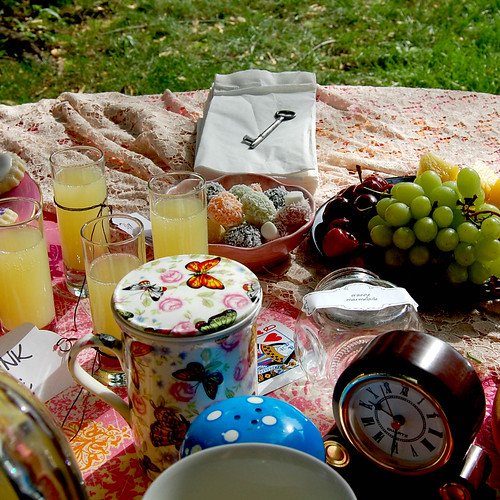
mad hatter tea party

On a beautiful afternoon, the sun was shining, the birds were singing, the bugs were crawling, and the Mad Hatter had friends over for a tea party! Alice was there, fresh from her nap and wearing a pretty blue dress. The Queen graced us with her presence. The White Rabbit was very late, but joined the fun once she woke up and when the Dormouse arrived from work.


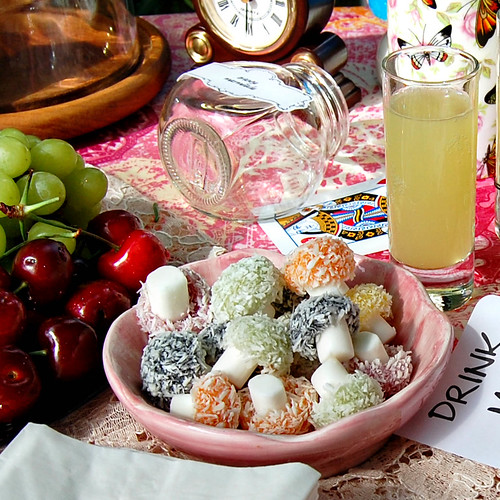
See, all day, the Mad Hatter had been preparing all kinds of wonderful treats for her tea party guests. They dined on donut holes, and fresh fruit. Cubes of cheese and pistachios. They played croquet (well, golf) and chess, that is, until the Mad Hatter stepped on the glass board and broke it in a million pieces.


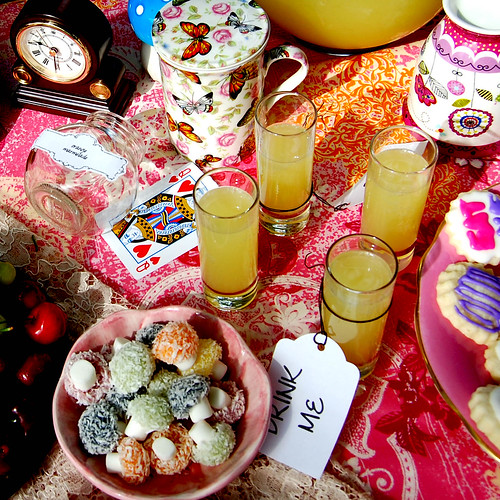
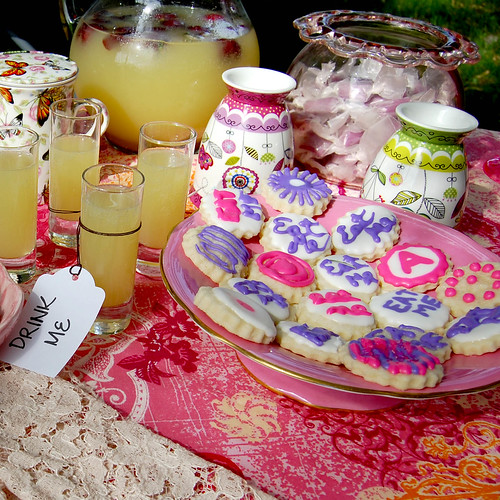
On this very hot afternoon, cold drinks were a must. Although Alice was a bit freaked by the flowers imprisoned in ice cubes, guest passed up on the green iced tea in favor of pineapple limeade. A sweet summer punch that could have benefited from added club soda and/or ice cubes to cut down on the sweetness a bit.


Drink Me Pineapple Limeade
recipe source: Mom Magazine

1 12-ounce can frozen pineapple juice concentrate
1 6-ounce can frozen limeade concentrate
4 cups cold water
1 liter club soda, chilled
Ice cubes
Fresh cherries (optional)

In a large pitcher combine pineapple juice concentrate, limeade, and water. Chill for at least 30 minutes. To serve, transfer fruit juice mixture to pitchers; add club soda, ice cubes, and fresh cherries.


Our local pharmacy provided weirdly appropriate coconut covered mushroom candies that were a chewy contrast to the hard grape candies the Mad Hatter had made for the occasion.


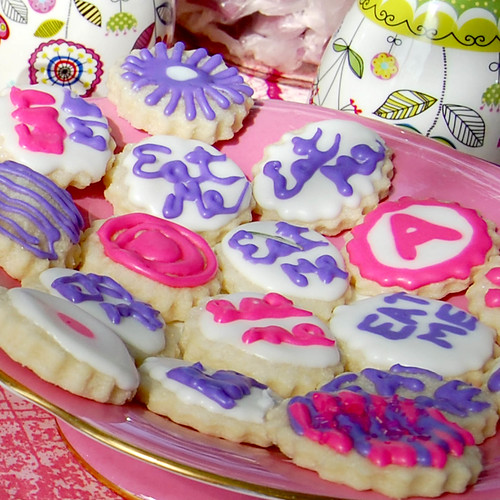
After having had a couple of heart shaped egg salad sandwiches and diamond shaped cucumber sandwiches, guests looking for a sweet finish could grab a cookie just asking to be eaten. They did not make us grow taller, but they were a sweet treat to end this picnic. And the recipe could not be simpler! Three ingredients is all that's required for the cookie, which, by itself is no yummy treat. But add royal icing in girly colors, and you've got a sweet eat!


Eat Me Cookies
recipe adapted from: sweet pea's kitchen

2 cups all-purpose flour
1 cup unsalted butter, softened
1/3 cup heavy whipping cream
Decorating sugar

In medium bowl, mix flour, 1 cup butter and the whipping cream. Divide dough into thirds and wrap each portion in plastic wrap. Refrigerate about 1 hour or until firm.
Heat oven to 375ยบ degrees F. Line a baking sheet with parchment paper. On a lightly floured surface, roll one-third of dough at a time 1/8 inch thick on lightly floured surface. (Keep remaining dough refrigerated until ready to roll.) Cut into desired shapes with 1 1/2-inch cookie cutters. Dip both sides of the cookies in decorating sugar.  Place on prepared baking sheet. Prick each cutout about 4 times.
Bake 7 to 9 minutes or just until set but not brown. Remove from cookie sheet to wire rack. Cool completely, about 1 hour. Decorate with Royal Icing.


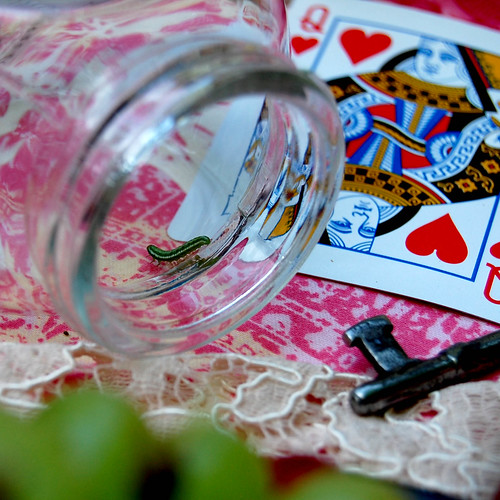
We were lucky enough to be visited by the Caterpillar, who could not resist making sure the orange marmalade jar was truly empty. It was, and the caterpillar was returned to the forest floor, well, lawn, to find a mushroom to sit upon.


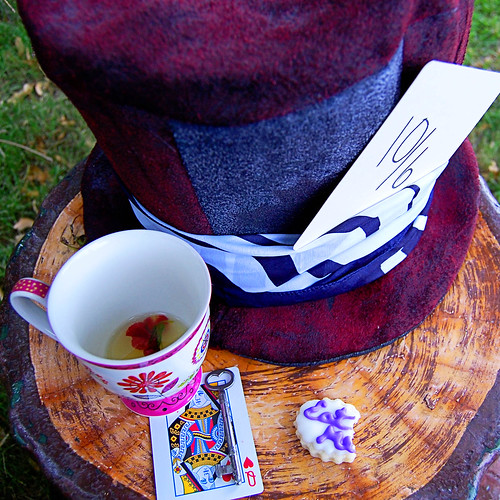
After the ice melted and the drinks grew warm, the snacks were gone, and the creepy crawlies claimed the crumbs. The guests departed, and the mad hatter took off her hat, as she was very warm, but pleased by the outcome of her mad tea party bash.

A great thank you to Vanessa of A Franciful Twist who put this virtual Mad Tea Party together, and to guest of honour Sweetapolita for spreading the word allowing me to partake in this year's event. To virtually experience other Mad Tea Parties, visit Vanessa's blog to see what other party guests were up to! 

Thursday, June 23, 2011

french toast

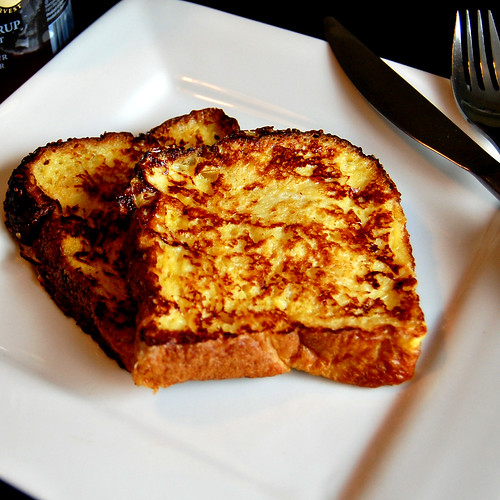
I decided that breakfast, for the first day of summer vacation, was to be special. We usually rush through it, having bagels, or tartines, oatmeal or cold cereal, fruit and juice. But this morning, since our plans were rained out, I decided to make French Toast.


We had French Toast often when I was a kid, and I've been making them for years, but I never knew just how good they could be if you follow a recipe! Before Alton Brown's recipe came along, I whisked a couple of eggs, added a splash of milk, vanilla and cinnamon before using whatever kind of "sandwich bread" we had on hand and cooking it in a pan with cooking spray. It made decent breakfast.

But this recipe produces really insane French Toast, not to be confused with a healthy breakfast. Well, if you're having French Toast, I can assume you're not going for healthy, since you're most likely going to pour maple syrup all over it. It's a treat!


French Toast
recipe adapted from Alton Brown

1 cup whole milk
3 large eggs
2 tablespoons maple syrup
1/4 teaspoon salt
8 (1/2-inch) slices day-old challah bread (egg bread)
4 tablespoons butter

In medium bowl (large enough for a slice of bread to fit in), whisk together the milk, eggs, syrup, and salt.
Over medium heat, melt 1 tablespoon of butter in a 10-inch nonstick saute pan.
Dip bread into mixture, coating it with the egg on each side.
Place 2-4 slices of bread at a time into the pan and cook until golden brown, approximately 3 minutes per side.  Repeat with all 8 slices. Serve immediately with maple syrup, whipped cream or fruit.


Alton uses half and half. Yeah, that's decadent all right, but I used whole milk, since I had some on hand. He also uses honey, but I don't really get that, so I just use maple syrup instead. And no vanilla or cinnamon. Surprisingly, I don't even miss them! The egg bread is very important here. It's really worth buying a loaf, just to make this. Alton lets it soak in the egg mixture for 30 seconds on each side, but I hate, HATE, soggy French Toast, so I just dip it and fry it. Frying is the key word. You need the butter. It really brings the French Toast to a whole other level.

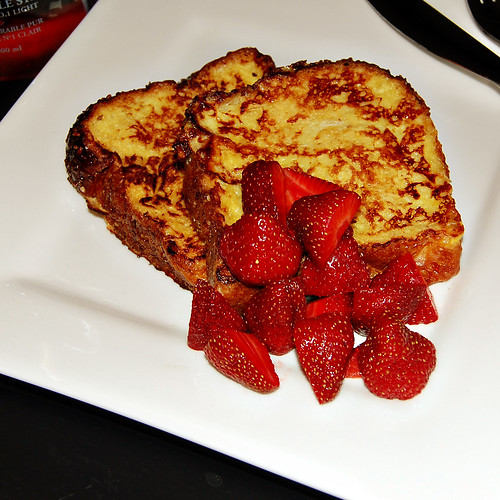
Local strawberries are nice and ripe, and I can't resist adding them to anything and everything. They were great with these french toast. A beautiful way to start summer vacation!

Wednesday, June 22, 2011

cap'n crunch cookies

It was my daughter's last day of school today. Sniff, sniff. This program was really the best thing for us. She was appropriately stimulated in the mornings, while I spent time with the baby, and generally got stuff done, and we got to spend the afternoon together. Really, I couldn't have asked for a better win win situation for us during my mat leave. But now, it comes to an end, and to mourn celebrate the end of the school year, I made cookies for her teacher.

She's been really fun to feed this year. She's not much of a baker, so she thinks that I have made skills in the kitchen. People like that are the best! She liked everything that I brought her, so I know that she's not picky, but I was trying to get her to give me a clue as to what kind of person she is (chocolate, vanilla, peanut butter, fruits, citrus, caramel...?). I couldn't get an answer from her when I asked her what kind of treat she wanted. She vaguely replied, anything, cupcakes are good, or cookies, anything really, but those last cookies you brought were really good...

So I made the grape nuts cookies again, but substituted the apples for chocolate chips. And I made a recipe I've had my eye on for a while...


cap'n crunch cookies
recipe inspired and adapted from Visions of Sugarplums

2 cups Cap'n Crunch cereal, divided
1/2 cup + 2 tbsp unsalted butter
3/4 cup packed brown sugar
1/4 cup granulated sugar
1 teaspoon vanilla extract
1 large egg
3/4 teaspoon baking soda
1/4 teaspoon salt
1 cup cake flour

Heat oven to 350 degrees F. Line a cookie sheet with parchment paper.

Process 1 1/4 cups Cap'n Crunch in a food processor until finely ground.

Melt 1/2 cup + 2 tbsp butter in a small saucepan over medium heat, until butter foams and turns light golden brown.

In a large mixing bowl, using a mixer on medium speed, beat together browned butter, 3/4 cups brown sugar and 1/4 cup granulated sugar until well combined and grainy - about 2 minutes. Beat in 1 tsp vanilla, 1 egg, 3/4 tsp baking soda and 1/4 tsp salt and beat an additional 2 minutes. Reduce mixer speed to low and beat in the finely ground Capn Crunch and 1 cup cake flour until just combined. Process the remaining Cap'n Crunch, just enough to break them in smaller pieces. Stir them into the batter until combined.

Portion dough into 2-3 tbsp sized balls, and place on cookie sheet. Bake 12 minutes or until golden brown. Cool 2 minutes before transferring cookies to wire racks to cool.

Makes 18 cookies


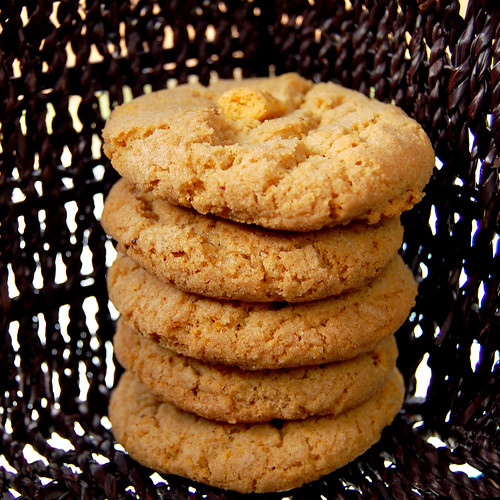
These were sweet, sweet cookies. Like, you're going to eat just one, then need a glass of milk to wash it down. But then you're going to go and get another one, because it's just that good, and different. It's a super chewy cookie, but not like a chocolate chip cookie would be chewy. Different. Hard to describe. The top is not crisp, just firm. I put a piece of cereal on top of my cookies before baking so there would be a hint of the flavor to come, but I think next time, I'd roll the dough in crushed cereal for added texture and prettier presentation.

Tuesday, June 21, 2011

lemon cream ice cream

Didn't even register with me that today was the first day of summer until 2 days ago. I mean, it's been so nice out, seems like summer started a long time ago! And even though Haagen Dazs was on sale last week at the supermarket and I totally stocked up, I still wanted to blog about ice cream. Especially since my husband surprised me with two cookbooks last week, one of which is Jeni's Splendid Ice Creams at Home.


That book is way beyond your usual vanilla, strawberry and chocolate ice creams. She's got weird combos in there! And then some that I wouldn't have thought of, but would still like to try. I also like the fact that there is no egg tempering in her recipes. Well, no egg at all. She uses cream cheese, which I was very happy to see, as my go-to ice cream recipe has cream cheese in it too, and I love it! Another thing she does, is to chill the ice cream base in a ice bath, as opposed to storing it in the fridge overnight and churning it the next day. See, this way you get your ice cream sooner!

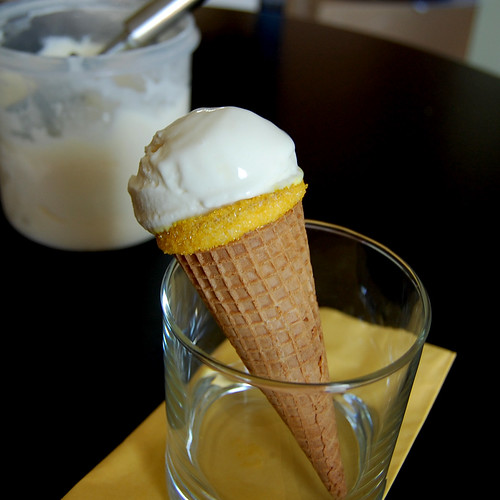
I picked the lemon ice cream to try on this first day of summer, because, well I wanted a refreshing ice cream with no chunks in it. The kind of ice cream you want to lick from a cone. Didn't hurt that I had all the ingredients on hand too! Just whole milk, cream, sugar, lemons, cream cheese, corn syrup, cornstarch and salt.


So you start by zesting 2 lemons (in big strips so it's easier to fish out before churning) and setting it aside. You then juice the lemons to make 1/2 cup of juice. You add it to a small saucepan with two tbsp sugar and heat it until the sugar is dissolved. This lemon syrup is then chilled and will be added to the churning ice cream later on.

To thicken the ice cream, you have to make a cornstarch slurry by measuring 2 cups of milk, and taking out 2 tbsp to put in a small bowl along with 1 tbsp plus 1 tsp cornstarch. That's set aside. You should also whisk 3 tbsp cream cheese and 1/8 tsp salt in a large bowl until there are no more lumps. That's also set aside.

The rest of the milk goes in a medium saucepan, along with the zest of the two lemons, 1 1/4 cups heavy cream, 2/3 cups sugar and 2 tbsp light corn syrup. That mixture is heated until boiling, and then boiled for 4 minutes. Then you take it off the heat, and add in the cornstarch. It's brought to a boil again, and cooked for 1 minute until it thickens a bit. The mixture is taken off the heat and whisked gradually in the cream cheese mixture. The whole thing is then transferred to a large zip top bag, and put into an ice bath to chill before churning with the lemon syrup made earlier. (Don't forget to take the zest out before churning.) It then chills for four hours.


It was in the freezer for four hours to the minute, when I took it out to taste it. Yes I was anxious, but by that time, my daughter had asked me about fifteen hundred times where the ice cream was and when could she eat some. She needed ice cream so she could move on... I needed her to move on. Anyways...

It's the smoothest ice cream ever. The texture is just right, melty and soft and just a tiny bit chewy. The lemon flavor came through, nice and bright, and kinda reminded me a bit of lemon cream cheese icing. That's a very good thing. It was just what was needed on the first day of summer.