Sunday, June 19, 2011

buttermilk donuts

We were going to a BBQ at my in-laws for father's day, so baking a cake just for my husband, when we were going to have some at the BBQ seemed a bit outrageous, but donuts for breakfast? Sounds like an awesome father's day treat. It was supposed to be a surprise, but I made the mistake of telling my four-year-old. Didn't stay secret for long, but my husband was really happy about this treat.


Baked Explorations has a recipe for Farm Stand Buttermilk Donuts, and the Baked Sunday Morning group had already made them when I joined. I thought this was the perfect occasion to try these donuts. They weren't as hard to make as I thought they would, and didn't dirty that many dishes. The dough comes together like a quickbread, where you mix the wet ingredients with the dry, and mix until a dough forms. You pat it down until it's about 1/2 inch thick, then you then cut out the donuts, and chill them while you heat up the oil. When the oil is at the right temperature, you fry them until golden brown. Drain them on paper towel and dip them in whatever topping you'd like. I made the vanilla glaze with powdered sugar, milk and vanilla, and I had a leftover mixture of cinnamon sugar, so I used that too. For the donut holes, I coated them with powdered sugar.
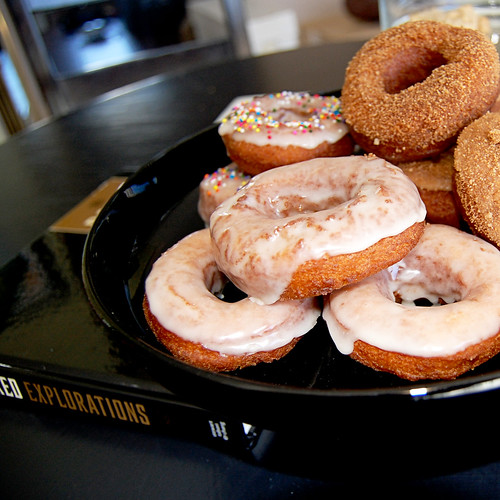


Farm Stand Buttermilk Doughnuts Three Ways
recipe source: Baked Explorations

3 1/2 cups all purpose flour
3/4 cup granulated sugar
1/2 teaspoon baking soda
2 teaspoons baking powder
1 teaspoon salt
1 teaspoon freshly grated nutmeg
1 teaspoon cinnamon
2 large eggs
3/4 cup buttermilk
1/4 cup sour cream
1/4 cup (1/2 stick) unsalted butter, melted and slightly browned and cooled
Vegetable oil for frying

For the Vanilla Glaze
2 cups confectioners' sugar
1/4 cup whole milk
1 teaspoon vanilla paste or 1 1/2 teaspoons pure vanilla extract
Sprinkles to decorate (optional)

Line one baking sheet with parchment paper and another baking sheet with two layers of paper towels.
In a large bowl, whisk together the flour, sugar, baking soda, baking powder, salt, nutmeg, and cinnamon.

In a medium bowl, whisk the eggs, buttermilk, and sour cream until combined. Add the melted, cooled butter and whisk again.

Make a well in the center of the flour mixture and pour the liquid ingredients into the well. With a rubber spatula, slowly fold the flour into the liquid center until the mixture forms a sticky dough.

Turn the dough out onto a work surface lightly dusted with flour. Sprinkle the top of the dough with flour and pat it out until it is about 1/2 inch thick.

Use two round cutters ( 3 1/4" and 1 1/2" for large doughnuts; 2 1/2" and 1 " for smaller doughnuts). Dip the large cutter in flour and press out the rounds. Dip the smaller cutter in the flour and cut out the center of each dough round. Arrange both doughnuts and doughnut holes on the parchment-lined baking sheet, pat the dough scraps back together, and use them to make as many more doughnuts and doughnut holes as possible. Chill the dough while you heat the oil.

Pour enough oil into a deep skillet to make a layer approximately 1 inch to 1 1/2 inches deep. Slowly heat the oil over medium -high heat until it is 365 to 370 degrees F.

While you are waiting for the oil to reach temperature, make the assorted toppings.

Make the Vanilla Glaze
In a medium wide-mouthed bowl, whisk together the sugar, the milk, and the vanilla paste.

Once the oil reaches temperature, gently lift the large doughnuts off the baking sheet and place them in the hot oil. Do not crowd the skillet-make no more than 3 doughnuts at a time. Once they have browned on one side (this takes 2-3 minutes), turn them over with tongs or a slotted spoon and continue to cook for another minute or just until browned (they can overcook or burn rather quickly). Using a slotted spoon, transfer the doughnuts to the paper towel lined baking sheet and continue to fry the rest of the dough until finished. The doughnut holes will cook faster and can be made in two or three batches after the doughnuts are done.

Assemble the Doughnuts
Once you have finished frying, work quickly to dip the doughnuts in the chocolate or vanilla glaze, or the cinnamon sugar. If you like, decorate the chocolate or vanilla doughnuts with sprinkles. Serve immediately.
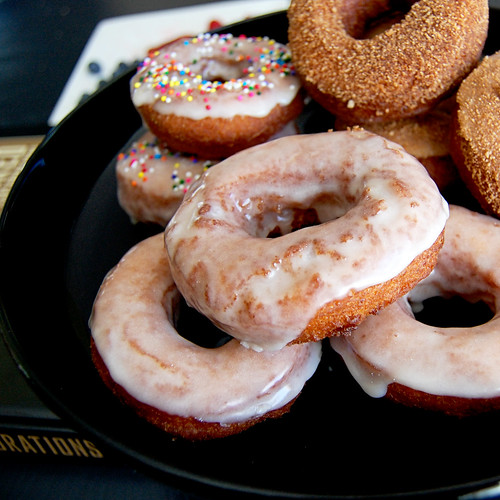
Although it's a really hands-on recipe, it's easy enough to do, even for breakfast, even with two little ones underfoot while daddy's still sleeping. He really enjoyed them and said we should have them more often. When I suggested making this a Father's day tradition, he gave me a look that said I didn't understand the meaning of more often...  

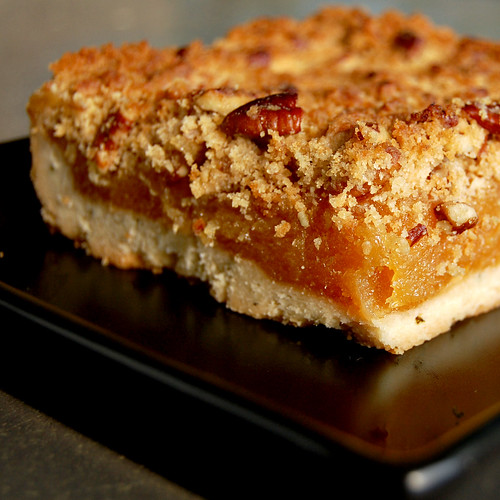
rosemary apricot (pear) squares


Earlier this Spring when I bought plants for my "garden", I grabbed some rosemary knowing that this recipe was on the Baked Sunday Morning calendar. I don't use that herb very often, but it was actually cheaper to buy the whole plant than it is to by a package of  "fresh" rosemary at the grocery store. Can't get much fresher than my backyard.


I'm actually pretty proud of my garden. The herbs are doing beautifully, the lettuce is coming along great. We've had a few green onions so far. The tomatoes have flowers and Cha's been eating strawberries. I think that's the best part, watching her enjoy the plants. She loves seeing how fast and tall they are growing.

But I disgress. This week's recipe was the Rosemary Apricot Squares on page 121 of Baked Explorations. It's another one of those recipe that seemed good, but wasn't necessarily on my to-bake list, like say, the Mississippi mud pie that's not even on the calendar! I really, really want to make that!

So these squares have a rosemary scented crust, a fruit filling and a crumbly nutty topping. I started the filling first, because my butter wasn't quite soft enough to be used for the crust yet. I couldn't find California or unsulfured apricots, so I used the "freaky science experiment" orange ones that my grocery store stocks. Surprised at the price of them too. I didn't have brandy, so I used Tripe Sec and added a strip of lemon peel just to brighten things up. I let that simmer away while I made my crust, but didn't really keep an eye on it, and it burned. I've only been cooking on this stove for over three years, you'd think I know that it's impossible to simmer something on the front burner. It's only good for boiling pasta. I tried puréeing it anyways, but it tasted really bad, so the whole thing went into the garbage.

By that time, I had already made the crust by creaming 3/4 cups butter, 1/2 cup powdered sugar and 3/4 tsp vanilla, then adding 1 3/4 cups flour, 1/2 tsp salt and 2 1/2 tsp rosemary. Since I was using a 8 inch pan, I pressed my dough up the sides of the pan too, so the bottom layer wouldn't be too thick. Some people thought it was still too thick, but I liked it.

While the crust was chilling in the fridge, I went to the store and decided to go with dried pears instead of the apricots. I baked the crust for 30 minutes and made the fruit layer again. 2 cups of dried pears, 1/2 cup sugar, 3 tbsp honey, 2 tbsp Triple Sec and a pinch of salt simmered *on the back burner* for 40 minutes. As I was puréeing it, I really regretted not adding a vanilla bean in with the pears. It would have been awesome.

Most of the filling went on the crust, and since I was using a smaller pan than called for, I sandwiched the leftovers between crackers for snack. Yum. Would have been good with some cheese too! I made the topping in the same unwashed bowl I had used for the crust. Less dishes! Score!

Before I started making recipes from the Baked guys, I had never used dark brown sugar but now I always have to keep it in the pantry, because they use it almost exclusively. 1/2 cup of it was mixed with 1/2 cup of flour, 1/3 cup pecans and a pinch of salt. Then 3 tablespoons of cold butter went in until the mixture was crumbly. Sprinkle that on the fruit layer, and 30 minutes in the 350 oven. I turned on the broiler for a few minutes afterwards to get the topping nice and brown.


I was very happy to see that it cut really easily. The crust is really, really nice. It's crisp but not hard, and has the texture of a shortbread almost. I couldn't tell there was rosemary in it, it certainly didn't taste "herby", but I think it cut through the sweetness a bit, and lent a fresh taste to the dessert.  My layers are way thicker than the pictures, but that's too be expected with the smaller pan. I found that there was a bit too much of the fruit layer for my taste. It was very tasty, but it's a good thing that the crust provided some much needed texture. The topping was very crumbly and soft, not clumpy and crispy, and went very well with the other two layers. I'm not a big fan of nuts, but I didn't mind them here at all. Overall, a very nice dessert!


So two weeks ago we had a tart, this week a square with a crust, next time, it'll be pie. I've never made so many crusts in my life! But so far so good! To see what the others bakers thought of this square, and for the complete recipe, visit the Baked Sunday Morning site.

Monday, June 13, 2011

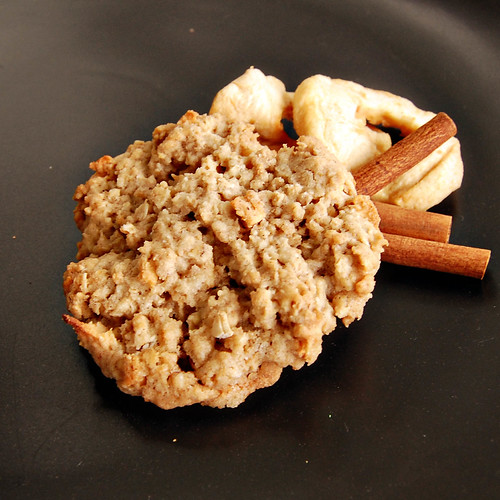
apple cinnamon grape nuts cookies

Many years ago, I bought Grape Nuts for the first time. Maybe the commercial made it sound like an amazing breakfast cereal. Or maybe it was the packaging. In any case, bought some, tried some and, since we are a froot loops and lucky charm kind of family, we obviously didn't like Grape Nuts in milk. I was whining about it to my mother in law when she passed along a recipe for Aunt Amy's Cookies. No clue who Aunt Amy is, but she sure found an amazing way to use up Grape Nuts!


My local grocery store doesn't carry Grape Nuts, so when I spotted them in another store recently, I quickly grabbed a box remembering this recipe. Yesterday, my husband brought home oatmeal chocolate chip cookies from the grocery store, and they made me crave Aunt Amy's Cookies. 

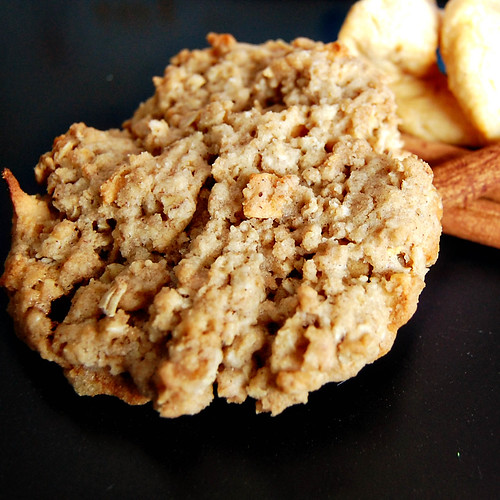
They're very similar to an oatmeal cookie, but they have the salty/sweet thing going on that I love. They have a slightly crispy exterior, without being crumbly or hard, and they are deliciously chewy inside. Since they are flavored with a hint of cinnamon, I decided to add chopped dried apples to the dough. And that was a genius move! The cookies are quite sweet, even if I reduced the sugar a bit, so the slight tartness of the apples brings nice fruity notes to the cookie, and great texture too. They don't spread much while baking, so they stay nice and thick. It's one of my favorite cookie. Love it!


Aunt Amy's Cookies

1/2 cup butter, softened
1/2 cup white sugar
1/2 cup brown sugar
1 egg
1 tsp vanilla
1 cup Grape Nuts
1 cup rolled oats
1 cup unbleached all purpose flour
1/2 tsp baking soda
1/4 tsp baking powder
1/2 tsp salt
1/2 tsp cinnamon
2/3 cup chopped dried apples (optional)

Preheat oven to 350.

Cream 1/2 cup softened butter. Beat in 1/2 cup white sugar, 1/2 cup brown sugar until fluffy. Add in one egg and 1 tsp vanilla and mix until combined. Stir in 1 cup Grape Nuts and 1 cup rolled oats.

Combine 1 cup flour, 1/2 tsp baking soda, 1/4 tsp baking powder, 1/2 tsp salt and 1/2 cinnamon. Add to the butter mixture and mix until combined. Add in 2/3 cup chopped dried apples if desired.

Using a small ice cream scoop, portion out the cookie dough and place on a baking sheet lined with parchment paper. Slightly flatten the balls of dough with a fork.

Bake in the preheated oven for 10-12 minutes, until the edges start to get golden brown. Leave on the cookie sheet to cool until set, then transfer to a cooling rack.


I used a 2 tbsp ice cream scoop for small cookies, the perfect size for a child's snack with a glass of milk. I also made a few bigger cookies for bigger appetites using a 1/4 cup ice cream scoop. These cookies are pretty filling, so one of the big ones would be plenty for an adult. This batch of cookies yielded 18 small cookies and 3 large ones. 

It's worth picking up Grape Nuts just to make these!


Friday, June 10, 2011

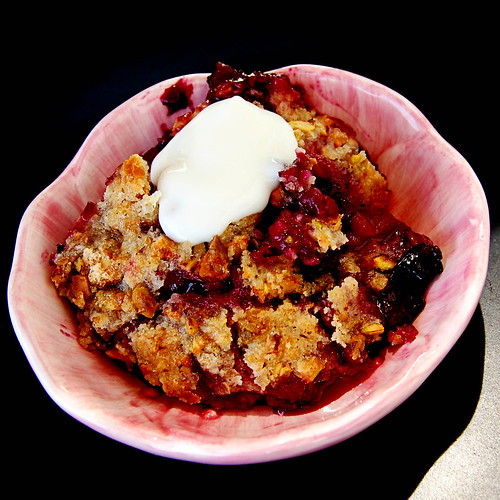
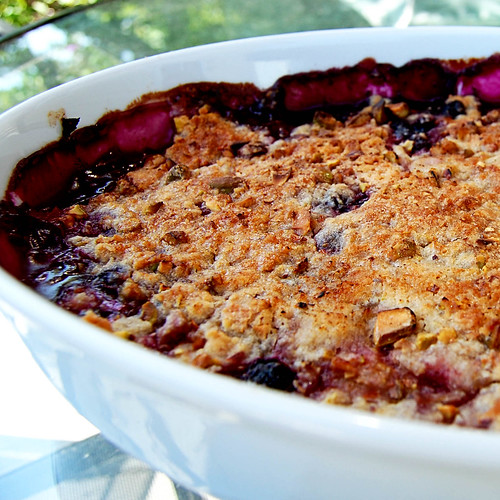
blueberry rhubarb crisp with pistachios

When I inherited an armful of rhubarb stalks a few weeks back, I made super moist and delicious rhubarb oatmeal muffins and froze the rest of the rhubarb so I could make this crisp. 


For the past few years, I've made this dessert every Spring. Since blueberries and rhubarb are never in season at the same time, I mostly always use frozen blueberries and rhubarb. I know this crisp could be made year round, but like strawberries in June, and cherries, peaches and corn in August, some things you just have to have in season. And this is a Spring dessert! 

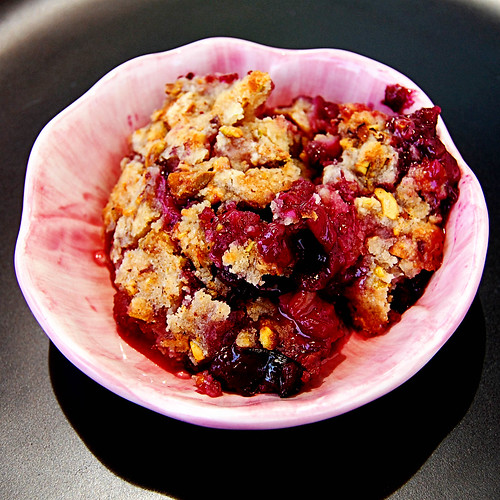
Now my crisps always have to have oats in the topping. Its a rule that can't be broken, except when it comes to this crisp. The pistachios and their beautiful green and purple color just make this dish pop! A juicy sweet and tart fruit layer of blueberries and rhubarb tossed in a bit of flour and sugar, topped with pistachios, flour, brown and white sugar and butter. Simplicity at its most deliciousness!


Blueberry Rhubarb Crisp with Pistachio Crust
recipe adapted from Gourmet via a chow life

1/4 cup granulated sugar
2 tablespoons all-purpose flour
2 cups chopped rhubarb
2 cups blueberries

1/2 cup shelled natural pistachios, chopped
3/4 cup unbleached all-purpose flour
1/4 cup granulated sugar
1/4 cup packed brown sugar
3/4 stick (6 tablespoons) cold unsalted butter

Preheat oven to 375°F. and butter a 2-quart shallow baking dish.

In a bowl stir together sugar and flour. Add rhubarb and blueberries to sugar mixture, tossing well, and spread mixture in baking dish.

In a bowl whisk together flour and sugars. Cut butter into 1/2-inch cubes and with your fingers or a pastry blender blend into flour mixture until mixture resembles coarse meal. Add pistachios and toss well.

Squeeze a handful of topping together and coarsely crumble in chunks over filling. Squeeze and evenly crumble remaining topping over filling in same manner. Bake crisp in upper third of oven until filling is bubbling and topping is crisp and golden, about 50 minutes.
Serve crisp warm or at room temperature.


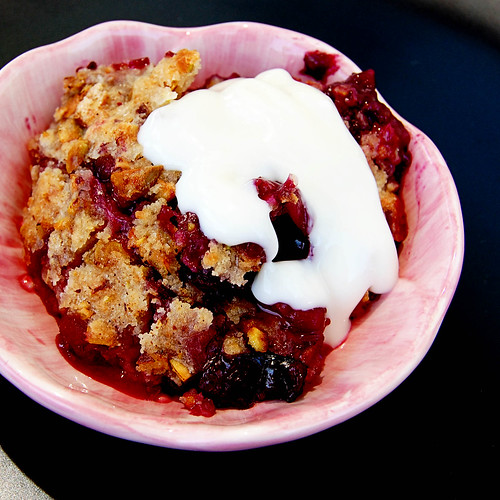
I served this dessert with a dollop of vanilla yogurt, but of course, it would be excellent with vanilla ice cream or whipped cream. I slightly reduced the sugar in both the topping and the fruit layer from the original recipe, and we all thought it was sweet enough. A delicious Spring dessert.


Monday, June 6, 2011

grape candies

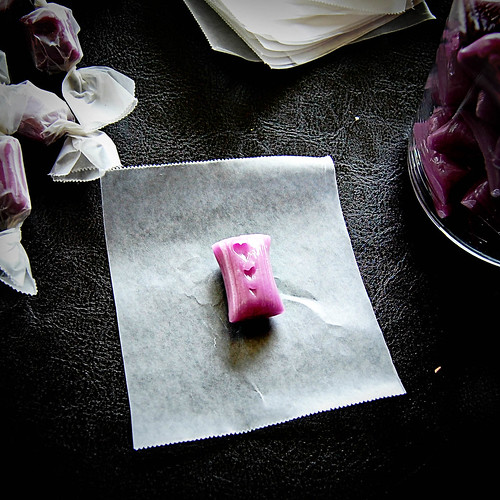
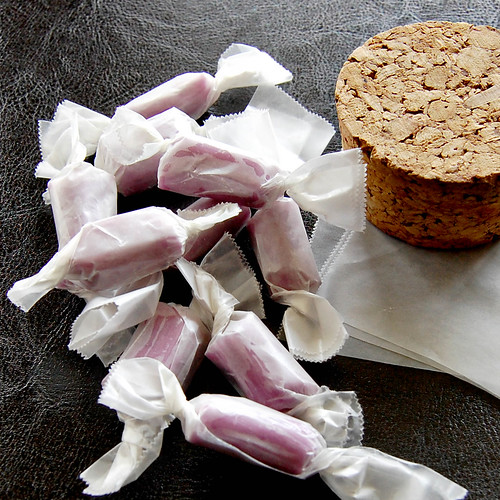
This morning I thought I'd get a head start on this Mad Tea Party coming up soon, and make wonderland-ish candy using a recipe for Grape Saltwater Taffy I had bookmarked a little while back.


I've never pulled sugar before, but the recipe made it seem simple enough. Boil sugar, cornstarch, corn syrup, water, margarine and salt until it hits hard ball stage on a candy thermometer. Then add flavoring and color, let cool and work the sugar until shiny. Then cut the candy and wrap it. Simple no?


It's funny because the blogger that shared this recipe had really soft taffy and had a hard time with it, whereas mine is more like a hard candy that you let melt in your mouth. Biting into it would surely cause a trip to the dentist! I might have cooked it too much. Or pulled it too much? The pulling part actually cause some blisters on the pad of my thumbs and fingers. Ouch!

Doesn't matter that it's too hard to be called taffy, it's still delicious! And quite fun to make, aside from the blisters.

Grape Salt Water Candy
recipe source: Wilde in the Kitchen

2 cups sugar
1 tbsp cornstarch
1 cup corn syrup
¾ cup water
2 tbsp margarine
1 tsp salt
¼ tsp grape candy oil
Purple food coloring (if you want, I didn’t use any)

In a saucepan, combine sugar, cornstarch, corn syrup water and margarine. Bring to a boil and stir until clear. Discontinue stirring and attach candy thermometer. Heat sugar mixture until it reaches 266 F, wash down any sugar crystals, from the sides of the pot, with a wet pastry brush.

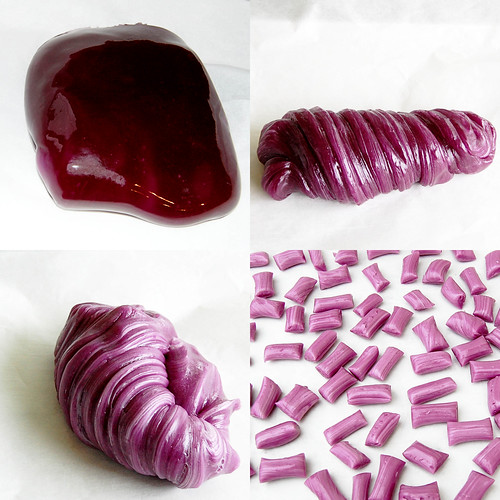
Remove pot from the heat and add oil and coloring. Stir until the color is even then pour onto a greased cookie sheet or silpat. Allow candy to cool until it is easy to handle but still has some give.

Pull the taffy until it is lightened in color and shiny. Roll into a long rope and cut into 1-inch pieces. Wrap in waxed paper and twist ends to close.


A few notes: It takes a while for the sugar to reach 266F. And I was surprised to see how cloudy the mixture was, I guess from the cornstarch and margarine. Next time, I would probably combine the sugar, cornstarch and salt before adding the wet ingredients. I poured my candy onto a piece of parchment paper on a baking sheet and left it to cool before I tried handling it. The best way to remove the sugar from the parchment paper was to handle it like a band-aid, quickly and with a short movement, or else, you'd just be stretching the sugar forever, and it would still be on the paper. It was still quite hot when I started pulling, but not so that it was intolerable. I was picturing rolling the candy into a rope like I would playdough, but by the time I was ready to start cutting, there was no way that was happening, so I kinda formed a rope by twisting and pulling it, then laying it on the counter to cut pieces off with scissors. You really have to work quickly, because it hardens pretty fast. At least mine did. 


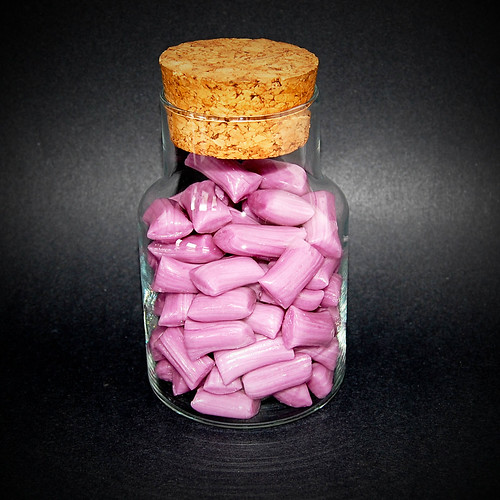
Oh and I don't recommend putting the candies in a glass jar like the one above. They might stick together, and you might have to use chop sticks and all of your strength to pry them lose, and you might break the glass jar while you're at it and have to throw out half your candies because of possible glass shards. Just saying.

Sunday, June 5, 2011

orange creamsicle tart from baked

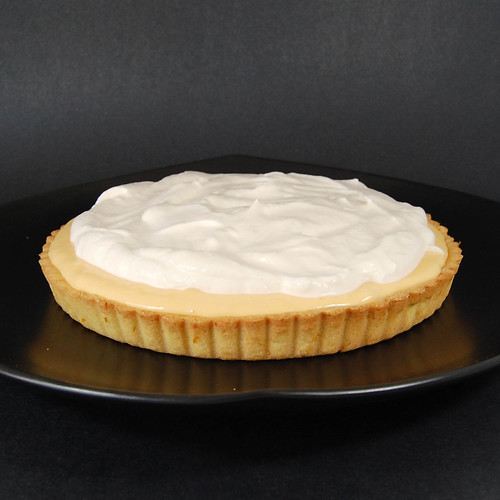
For this edition of Baked Sunday Mornings (an online group where bloggers are baking through Matt and Renato's Baked Exploration and blogging about it every second Sunday morning), we were to bake the Orange Creamsicle Tart on page 74.


I thought my husband was going to be excited about this one, but when I told him what was on the baking calendar, he just gave me the "I like tarts, I like creamsicles" but I don't necessarily want to eat them together line he give me when I try to combine two foods that he likes. Bah. Charlotte was excited since she had asked for a lemon pie a few days before. We decided that this tart was going to do just fine instead.

Even though making this tart is a day long affair, I really did enjoy making it. You start by making the orange filling, by zesting two lemons before juicing them and sprinkling 1 1/4 tsp  gelatine on the juice to soften. Then there's the zesting and juicing of three oranges, the juice of which is added to orange pop (soda) to reduce by half. The zest of the lemons and oranges is mixed with 3 eggs and 2 egg yolks and 3/4 cup sugar. Then that mixture is tempered with the reduced orange juice/pop mixture and poured back in the saucepan to cook until the curd coats the back of a spoon. The gelatine goes in next, and the whole thing is poured in a fine mesh strainer over 1/2 cup cubed butter. Then you have to whisk like crazy to incorporate air into it. I'm sure minimal air was incorporated in mine since, well, I'm lazy. A piece of plastic wrap goes directly on the curd and it chills in the fridge for 4 hours.

The tart dough was really easy and smelled so good! I don't often bake with orange, so the dough reminded me of scented playdough. It was that silky too. 


For the orange tart dough, 1/2 cup of butter, 1/4 cup of sugar and 1/4 tsp salt are mixed together until fluffy, then we add an egg, and once that's incorporated, 1 1/2 cups all purpose flour until the dough comes together. The dough is then shaped in a circle, wrapped in plastic and stashed in the fridge to chill for half an hour. Then I covered my counter with a piece of parchment and rolled out my dough between that and the piece of plastic I used to wrap it. It went super easy, no flouring, no sticking anywhere. You then peel off the parchment, and put the dough plastic side up in the tart pan. You can easily nudge it in all the nooks and crannies of the pan with the plastic still in place. Then the dough goes in the freezer for 30 minutes. After it's nice and cold, the plastic gets replaced with a piece of foil, and the tart is filled with dried beans, and baked for 15 minutes at 375. Remove the foil and beans, and bake it for an extra 10 minutes until it starts to get golden.

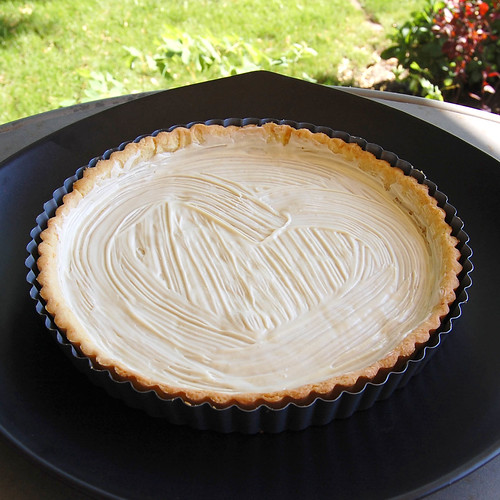
As a note, Matt and Renato said to brush melted white chocolate on the tart before filling it to add a bit of sweetness and to keep the tart crisp. So I did just that.


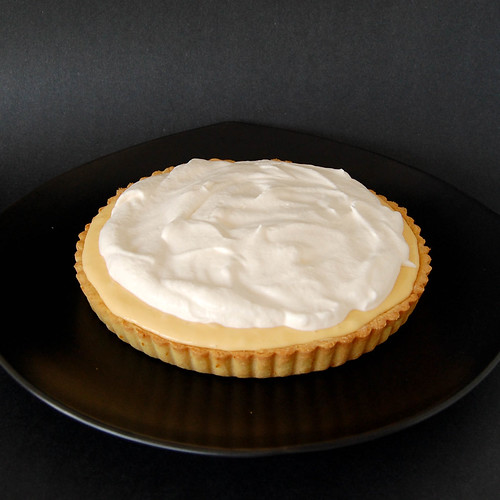
After that, because you haven't dirtied enough dishes as is, the curd get poured into the bowl of a stand mixer and whipped for 5 minutes before going in the pastry shell. And into the fridge it sits for an hour. Mine was really liquidy, and I had too much to fill the tart pan. I wasn't looking at what I was doing, and almost over filled it. It sets again in the fridge for one hour before being topped with whipped cream (one cup whipping cream, 2 tbsp sugar, 2 tbsp orange pop).


With the filling being so liquidy, I was afraid of it running all over the plate when I cut into it, and it did just that. Although after spending the night in the fridge, the filing did firm up quite a bit, and we were able to get clean slices when we went for seconds.

We really enjoyed this dessert. My husband gave it a 8 out of 10, mainly because of the texture of the filling that he found too soft. The crust was probably the best part of this tart. I'll be using it again to make lemon squares. It was flavorful, and crispy in a good way, and most of all, easy to work with. The orange filling was quite sweet, and the whipped cream was needed to cut through the sweetness.

For the complete recipe and to see how the other bakers liked this tart, visit the Baked Sunday Mornings group. And feel free to grab a book, and join us!  

Wednesday, June 1, 2011

mousse cake pastry class

On a whim tonight, I decided to attend a pastry class given at a local gourmet kitchen store by cordon bleu schooled pastry chef Lysanne Bégin. I was in the store trying to find a tart pan for Sunday's Baked recipe, when the owner told me about the class that night. I felt kinda weird attending by myself, but finally decided to go anyway, and I'm glad I did, as I really enjoyed myself and learned a few things.

We were given recipes with ingredients but no method. The pastry chef told us that if we wanted full recipes, we could open a cookbook, we didn't have to attend a class. Well, she's right. So she explained every recipe while we took notes and asked questions.

The seven of us were divided into three groups and each group got to make a mousse based cake, using various techniques.

There was one group assigned to a triple chocolate bavarois, one assigned to the mixed berry mousse on angel food cake, and my teammate and I were assigned the mocha mousse cake.

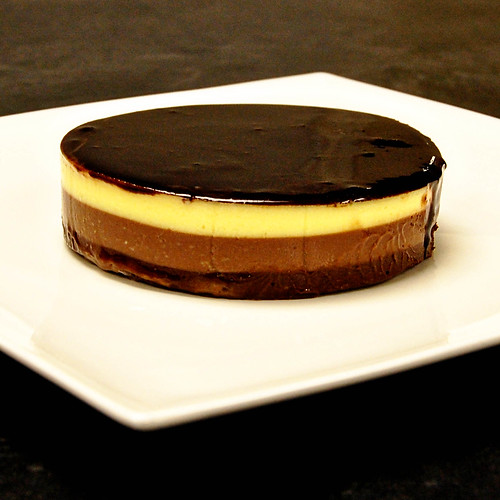
The triple chocolate bavarois is made with a gelatin thickened pastry cream. A third of it is poured over dark chocolate, another third over milk chocolate, and the last of the pastry cream is poured over white chocolate. The heat of the pastry cream melts the chocolate, and similar to making a ganache, you stir it until smooth and leave it in a warm spot so it doesn't set until you're ready to layer the dessert.

Once the three flavors of pastry cream are done, the dark chocolate layer is poured into a mold and stored in the freezer to set. Once it's set, the milk chocolate layer is poured on top of the dark chocolate layer, and left to set in the freezer. Once that's set, the white chocolate layer is poured on and left to set.

The dessert is then topped with a gorgeous chocolate glaze that makes it all shiny and perfect looking. The whole thing then goes in the freezer overnight. It has to defrost in the fridge before plating. Although I did not make this cake myself, it looked pretty easy and very impressive on the plate. Unfortunately, my notes are not complete and I'm afraid of sharing a recipe that might, or might not work. If I try it, I'll be sure to post the results!

Although I found the mousse had a very gelatin-y texture and mouthfeel, the glaze was very impressive. This is the triple chocolate bavarois prepared by another team in my class. Pretty impressive right?


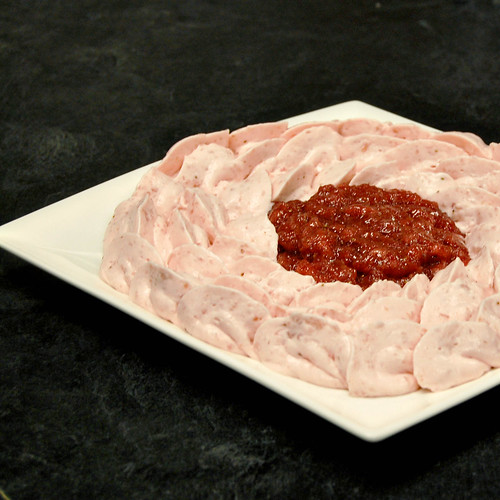
The second team made an angel food cake that was should have been covered in strawberry mousse and strawberry jelly. Of all the mousses made, that one was my favorite. The texture was perfect, light, and it tasted really good, even if there was kirsch in it.

Unfortunately, the angel food cake didn't turn out. It could have been the low oven, or too little flour, but it stayed soft meringue and couldn't be used. Still, the pastry chef demonstrated the piping technique which I found awesome (mainly because my piping skills are absolutely terrible), and we sample the mousse and jelly. The top of the cake should have looked like this.


This one I will surely try, and I feel confident enough about my notes that I'm able to post the recipe.

mixed berry mousse
recipe source: Lisanne Bégin

8 gr gelatin
150 gr berry puree
50 g sugar
5 g lemon juice
10 g kirsch
400 ml heavy cream

Soften gelatin in enough cold water to cover it. Place it in a saucepan, along with the berry puree, sugar and lemon juice and bring to a boil. Let cool.

In a clean bowl, whisk cream and kirsch to soft peaks. Fold the whipped cream into the cooled berry mixture, and chill until the mixture has set and is of a consistency suitable for piping.

berry jam
recipe source: Lisanne Bégin

4 g gelatin
150 g berries, chopped
75 g sugar

Soften the gelatin in enough cold water to cover it. In a saucepan, cook the gelatin, berries and sugar at 104 degrees for 30 minutes until jam-like consistency.

I'm not going to post the angel food cake recipe as it didn't turn out, but I found interesting that the pastry chef baked it into a regular 8-inch round springform pan. I thought that angel food cake always needed to be baked in a, well, angel food cake pan. Good to know!

Lastly, our team made the mocha cake, which consists of two disks and an outside border of lady finger cookie, a chocolate mousse, and a light coffee pastry cream.

We first made the chocolate mousse by melting chocolate over a water bath, and whipping heavy cream and sugar to soft peaks. We let these to components hang out until they reached room temperature before folding the chocolate into the cream to make chocolate whipped cream.

My teammate made the cornstarch thickened pastry cream by combining milk, egg yolks, sugar and cornstarch in a pan, bringing it to a boil, and cooking it for 15 seconds. She then softened the gelatin into some cold water, added it to the hot pastry cream, and let that hang out while she whipped cream and coffee extract. She combined the whipped cream and pastry cream, and we had our light coffee pastry cream. I hope I got that right, because while she was doing that, I was busy making lady fingers into disks and a strip to go around the mold.

Basically, you combine flour and cocoa and set that aside. You whisk egg whites and sugar until stiff peaks, and in a separate bowl, you whisk egg yolks and sugar until light yellow in color. Fold the egg yolks in the egg whites, fold in the flour and cocoa mixture.

I traced two circles on a piece of parchment paper so that I could pipe the batter in the right shape for our mold. We also piped a strip the height and length of the mold so we could line the inside of it, before adding our mousse. We didn't have enough batter to pipe the whole strip, so once the cookie was cooked, we cut it in half so we'd have enough to line the pan. Apparently, that strip of cookie shouldn't be as high as the pan anyway. I was surprised to see that the cookie didn't spread at all while cooking. It had a weird (to me) texture, like an egg-y and dense sponge cake. Not my favorite.

So we lined the pan with the strip of cake, put one of the cookie disks at the bottom of the pan, topped that with the chocolate whipped cream, then another cookie disk, and finally, the light mocha pastry cream. We set it in the freezer to set.

 
Overall, I really enjoyed my evening. It was really busy and fun. I realized how hard it is to work in someone else's kitchen and how happy I am in mine! I got to learn about mousse cake, play in the kitchen while someone else was doing the dishes, and best of all, eat cake!


Thank you Maryse, Lisanne, and Sean for the great class. It was really fun!