Wednesday, December 28, 2011

peanut butter oatmeal cookies

Before I go and post yet *another* cake on this blog, I thought I'd mix it up a bit, and talk about these cookies I made for my work's cookie swap earlier in the month.

I had great intentions of making these, or if they failed, these, but both cut-out recipes didn't pass muster. So at the very last minute, I whipped these oatmeal peanut butter cookies and gave them some Christmas bling with a pretty red ribbon.


I doubled the recipe, and got the four dozen cookies that I needed, plus a couple for quality control. The original recipe also includes a peanut butter filling to make sandwich cookies that I highly recommend. So freaking good!

Peanut Butter Oatmeal Cookies
Recipe source: Rara Bakes
1/2 cup butter, softened
1/2 cup peanut butter
1/2 cup white sugar
1/2 cup brown sugar
1 egg
1 tsp vanilla extract
1/2 tsp baking soda
1/2 tsp salt
1/4 tsp baking powder
3/4 cup flour
1 cup oatmeal

Cream together butter, peanut butter, and sugars. Add egg and vanilla. Mix well.
Add baking soda, salt, baking powder, and flour. Stir. Fold in oatmeal.
Scoop out tablespoonfuls onto a baking sheet.

Bake at 350 for 9-10 minutes or until edges lightly brown. Let cool on cookie sheet for 1 minute, then move cookies to a cooling rack.


I'm thinking we should change the formula for our cookie swap next year... We were 9 participating, so we decided to make 1/2 dozen cookies per person... but that's still a lot of cookies!

Saturday, December 17, 2011

poinsettia cake

I think these cake decorating classes are starting to pay off! Royal icing poinsettias in a chocolate cake basket-weaved flowerpot.


One week until Christmas eve... So not ready!

Wednesday, December 14, 2011

book cake

When I first saw this cake from Sprinkle Bakes, I immediately sent the link to my mom, who works in a library, knowing she'd be amazed. She was. So when she said she had a xmas party to organize for the people who volunteer their time at the library, I thought it was the perfect opportunity to see if I could make something like it.


I still had some wafer paper sheets from my daughter's last birthday cake, so we ordered a butterfly punch and a paragraph stamp and crossed our fingers it would get to us in time!

My friend Gen had bought a book-shaped cake pan a few weeks prior, so I was super happy when she let me borrow it. No carving necessary! That thing holds a lot of batter! I doubled a double vanilla pound cake recipe, and it barely filled one side of the book. So moved on to plan B, send my husband to get some boxed cake mix, prepared two of those, and baked the cake. I should have read the directions that said to trim the top of the cake while still in the pan *before* I flipped it over cooling racks. Of course the book cracked right in the middle! Lesson learned! Cake needs to have a flat surface before turning it out of the pan. Common sense really, but I didn't think of it. Nothing a lot of icing couldn't fix!


Since I had never worked with fondant before, I was super happy to see that there was a quick 3-hour class at my local craft store the weekend after we decided to attempt this cake. Although the point of the class was learning how to make tiered cakes, the instructor said I could make anything I wanted, and helped me cover the book cake with fondant. It's a good thing I took the class, because if I had been at home all by myself, there is no way I would have rolled the fondant 3 times to get it to the right size. I would have chucked the whole thing in the garbage and given up. That's how much patience I have.

While everyone else in the class were working on their tall cakes, I found a stamp with a paragraph of text on it, thinned out some black gel food coloring, and brushed it on the stamp with a small paintbrush, before stamping some wafer paper. It only took about... 5 or 6 sheets to get 2 that I liked enough to put on the cake!

So once the cake was covered in fondant, I left in the freezer until a couple days before the party. I rolled chocolate fondant to make the book cover, trimmed it using the cake pan as a guide, plopped the frozen cake in the middle, and laid the wafer paper pages on top. Since the cake was defrosting, the moisture from the frozen fondant made the wafer paper stick to the cake in all the right places. I punched out a few butterflies from the remainder of the stamped wafer paper, and "glued" them on the cake with some light corn syrup. A couple of metal wire thingies sported a few more butterflies.


Not quite as pretty as the inspiration for the cake, but for my first fondant cake, I think it's pretty good! Now if I could just find a class to help me take better pictures when there is no natural light around!

Sunday, November 27, 2011

sans rival

It's been kinda quiet on this blog lately... the insanity that is my job in the fall and cake decorating classes doesn't leave much time to fool around in the kitchen. And now with the days getting shorter and shorter... I should really learn how to take food photographs using artificial lights!

In any case, I was glad to have found the time to make this month's Daring Bakers' challenge. Catherine of Munchie Musings was our November Daring Bakers’ host and she challenged us to make a traditional Filipino dessert – the delicious Sans Rival cake!


Now I don't know how Filipino the Sans Rival is - sounds like a French dessert to me - but it sure wasn't traditional when I was done with it.

The Sans Rival is made of layers of cashew daquoise, or nut meringue, and french buttercream. Our host had modified the recipe to include chocolate, and her cake looked too good not to make the chocolate version as well. I was planing on using hazelnuts and frangelico to flavor the cake, but when I looked in the pantry, there were no hazelnuts to be found. So I substituted Oreo crumbs for the nuts, baked 5 layers of the meringue in 6 inch pans, and the rest of the batter in .2.5 inch molds, to make mini cakes.

I have absolutely no luck with frosting, so I wasn't expecting much from this... only for it to turn out beautifully silky. A seriously beautiful frosting that's insanely rich! A keeper of a recipe!


Chocolate Sans Rival
recipe modified from November 2011 Daring Bakers' Challenge
Yields 1 6-inch, five-layer cake and 3 2.5 inch, two-layer cake

10 large egg whites, room temp
1 cup (8 oz) white granulated sugar
1 teaspoon cream of tartar
 2 cups oreo cookie crumbs

1. Preheat oven to 325°F.
2. Line cake pan bottoms with parchment paper and butter and flour the sides really well.
3. In a large clean, dry glass or metal mixing bowl, beat egg whites on medium until foamy (2 mins.). Sprinkle with cream of tartar. Gradually add sugar, a couple of tablespoons at a time, continuing to beat now at high speed until stiff shiny peaks form. (about 7-10 mins.)

4. Fold in oreo cookie crumbs.

5. Spread meringue in pans, evenly to edges. If doing batches, use fresh parchment paper and cooled pans for each batch.

6. Bake in preheated oven for 30 minutes, or until golden brown. Remove the meringue from the baking pans while still hot; allow to cool slightly. Peel off the parchment paper while it is still warm, it is difficult to remove sometimes when they have completely cooled.

French Buttercream

 5 large egg yolks, room temperature
1 cup (8 oz) white granulated sugar
1/4 cup water
1¼ cup (10 oz) unsalted butter, room temperature
2 oz unsweetened chocolate, melted, 

1. Put the egg yolks in a mixing bowl. Beat at high speed until the yolks have doubled in volume and are a lemon yellow.
2. Put the sugar and water in a heavy pan and cook over medium heat, stirring the sides down only until all the sugar is dissolved and the syrup reaches 235°F/112°C (or thread stage).
3. With the mixer on high, very slowly pour the syrup down the sides of the bowl, until all has been added. Be careful as the very hot syrup could burn you if it splashes from the beaters. Continue beating on high until the mixture is ROOM TEMPERATURE (about 15 mins). Still on high, beat in the soft, room temperature butter a tablespoon at a time. Add chocolate after you beat in the butter. Refrigerate the buttercream for at least an hour, and whip it smooth just before you use it.
Assembly:
Set bottom meringue on cake board with a dab of butter cream to hold it in place. Spread a thin layer of buttercream and then place another meringue on top. Repeat with remaining layers, and finally buttercream the top and sides. Decorate with more oreo crumbs.

Refrigerate until ready to serve. It is easier to cut cold. May freeze.


My daughter's babysitter got the bigger cake for her birthday. She said it was to die for, and reminded her of a cake found in a French patisserie. I'll take that as a compliment! Too bad I couldn't get a picture of it cut, with its layers... 

I enjoyed this one! Can't wait to see that next month brings!

Sunday, November 20, 2011

boston cream pie cake

When I actually have a reason to bake, I look through the upcoming recipes on the Baked Sunday Mornings schedule and try to pick one of those recipes. So a little while back, for my Dad's birthday, I made this morning's recipe, Boston Cream Pie Cake from Baked Explorations.


I though it was a good match for my dad, who doesn't really like desserts, and is not a big fan of chocolate. So instead of having 2/3 chocolate pastry cream to 1/3 vanilla pastry cream, I decided to do the opposite. The only thing is that I didn't bother decreasing the amount of chocolate the recipe called for, so my chocolate pastry cream was way to thick and solid to use as cake filling. So the filling in the cake ended up all vanilla, which was not a bad thing.

I baked the cake in a half sheet pan, and split it into four rectangles to get a rectangular cake. Once it was assembled, I trimmed the sides to get a cleaner look, although it didn't work as well as I had hoped. I think if the cake had been frozen it might have worked better.

I used 72% dark chocolate for the glaze, and it was too bitter for most of us. Strangely enough, the glaze was my husband's favorite part of the cake!

I was really worried about the final look of the cake, but I was satisfied with the way the chocolate glaze dripped down the sides. It's definitely not the prettiest cake I've ever made, but it was tasty enough. It's hard to go wrong when you fill cake with pastry cream! Yum!


Want to see how the other Baked Sunday Mornings members fared with their cakes? Head on over to Baked Sunday Mornings for their links, and this recipe! Next up is Baked French Toast! Sounds good!


Sunday, November 6, 2011

pumpkin cheddar muffins

I totally wasn't feeling this week's Baked Sunday Mornings recipe. I mean pumpkin and cheese? In a muffin. With cayenne and black pepper. In the breakfast section of the Baked book. Right... So I consulted my husband who said I should probably try it, since there hasn't been very many bad recipes in the book so far.


So I sent him to the store to get a can of pumpkin puree, and aged cheddar. Since this was one of the few recipes in the book that are "two bowls, mix wet ingredients with dry ingredients and bake", I quickly whipped these muffins up. Interestingly enough, they were baked in a 400 degree oven, for 20 minutes, and when I pulled them out, they were a tiny bit over baked. They smelled really interesting in the oven. I tasted one right away, and was really intrigued by the flavors. This muffin was surprisingly good! It has spicy end notes that are quite pleasant. Although I did eat it for breakfast, I think it would pair really well with a hot bowl of tomato soup! Perfect fall food!

To get the recipe and see how the other Baked Sunday Mornings bakers thought of this one, click on through to the new www.BakedSundayMornings.com page!


Thursday, November 3, 2011

pumpkin apple streusel muffins

I know it's now November and I said that I only bake with pumpkin in October, but this recipe is just too good not to share!


Many years ago, I made these so often that we actually got totally sick of it. It took a few years before I could make it again, and I swore that I would only make it in the fall. So now I totally look forward to the cooler weather so I can bake these.

Although I usually bake this batter in muffin tins, this time around, I baked it in a 9x13 pan. A round pan works too... very forgiving recipe!


Pumpkin Apple Streusel Muffins
recipe source: allrecipe.com

2 1/2 cups all-purpose flour
2 cups white sugar
1 tablespoon pumpkin pie spice
1 teaspoon baking soda
1/2 teaspoon salt
2 eggs, lightly beaten
1 cup canned pumpkin puree
1/2 cup vegetable oil
2 cups peeled, cored and chopped apple

2 tablespoons all-purpose flour
1/4 cup white sugar
1/2 teaspoon ground cinnamon
4 teaspoons butter

1. Preheat oven to 350 degrees F (175 degrees C). Lightly grease 18 muffin cups or use paper liners.
2. In a large bowl, sift together 2 1/2 cups all-purpose flour, 2 cups sugar, pumpkin pie spice, baking soda and salt. In a separate bowl, mix together eggs, pumpkin and oil. Add pumpkin mixture to flour mixture; stirring just to moisten. Fold in apples. Spoon batter into prepared muffin cups.
3. In a small bowl, mix together 2 tablespoons flour, 1/4 cup sugar and 1/2 teaspoon cinnamon. Cut in butter until mixture resembles coarse crumbs. Sprinkle topping evenly over muffin batter.
4. Bake in preheated oven for 35 to 40 minutes, or until a toothpick inserted into a muffin comes out clean.


These are insanely moist and flavorful. It is a sweet cake, especially the streusel, but I still enjoy it for breakfast one in a while. And the perfect recipe to use up leftover pumpkin puree, as it calls for only a cup of the stuff. So if you buy a big can, make the whoopie pies, you'll get just enough leftover to make this recipe!


Sunday, October 30, 2011

halloween ghosts

Halloween kinda snuck up on me this year. I didn't even see the month of October go by, but somehow I managed to get the kids costumes and the house decorated. Even though I bought a pumpkin to turn into a jack-o-lantern, it still sits in the truck of my car, untouched, as does the gingerbread haunted house I wanted to decorate with Cha.

I did carve out some time to make ghosts sugar cookies, and marshmallows. Figured I have a reputation to uphold, and can't send my kid to school without treats!


I made the marshmallows to bring to my nephew's birthday party. I had a few extra egg whites in the fridge, and had been meaning to try David Lebowitz's recipe, and I'm glad I did! I think it might be the only recipe I have tried of his, and love the way this one is written. Super clear. Plus, he re uses pots instead of making us wash a mountain of dishes! His post is full of useful information too! Check it out!

Marshmallows
25-50 marshmallows

recipe adapted from David Lebowitz

2 envelopes powdered gelatin
1/2 cup + 1/3 cup cold water
1 cup sugar
1/3 cup light corn syrup
4 large egg whites (1/2 cup, 110g), at room temperature
pinch of salt
2 teaspoons vanilla extract or 1 teaspoon vanilla paste

One part corn starch (or potato starch), one part powdered sugar (about 1 cup each)

1. In a small bowl, sprinkle the gelatin over the 1/2 cup cold water to dissolve and soften.

2. In a small saucepan fitted with a candy thermometer, mix the sugar and corn syrup with 1/3 cup of water. Place over medium-to-high heat.

(Note that you will use this saucepan twice, to make the syrup and melt the gelatin, eliminating the need to wash it between uses).

3. In the bowl of an electric mixer, pour in the egg whites and beat on low speed until frothy. Add the pinch of salt.

4. When the syrup reaches about 210ºF (99ºC), increase the speed of the mixer to high and beat the whites until they are thick and fluffy.

5. When the syrup reaches 245ºF (118ºC), slowly pour the hot syrup into the whites, pouring so that the syrup does not fall on the whisk since some of the syrup will splatter and stick to the sides of the bowl.

6. Scrape the gelatin and water into the pan that you used for the syrup. (There should still be residual heat left in the pan from making the syrup in it to dissolve it).

Pour the liquified gelatin slowly into the whites as they are whipping. Add the vanilla extract or paste and continue to whip for 5 minutes, until the mixture is feels completely cool when you touch the outside of the bowl.

7. Dust a baking sheet evenly and completely with a generous layer of the powdered sugar/cornstarch mixture. (I use a sifter to do this.) Make sure there are absolutely no bare spots.

8. Scoop the marshmallow mixture into a pastry bag fitted with a plain round tip. Pipe desired shapes onto the baking sheet. Allow to dry for at least 4 hours, preferably overnight, uncovered.

9. Put about 1 cup of the marshmallow mixture into a large bowl.

Dust the top of the marshmallows with some of the marshmallow mixture.  Shake the marshmallows vigorously in a wire strainer to remove the excess powder.

Storage: The marshmallows can be made up to one week in advance, and stored in an airtight container.


I let them set overnight, then I drew a face on them with food markers. They were a hit! Very smooshy and a great treat for halloween! I love the sheen that they got too! Very pretty.

As we're not allowed sending candy to school, I made cookies for Cha's classmates. My regular old sugar cookie recipe, but I tried a different recipe for the royal icing. I wasn't quite satisfied with the way the royal icing turned out the last few times I made it, so I thought I'd turn to an expert and get some pointers. Sweetopia uses a recipe from Antonia74. And that's what I used as well! Turned out great! But makes a lot of icing!

Royal Icing Recipe
recipe from Antonia74 via Sweetopia

6 oz (3/4 cup) of warm water
5 Tablespoons Meringue Powder
1 teaspoon cream of tartar
1 kilogram (2.25 lbs.) powdered icing sugar

*** Note; if your meringue powder has no vanilla flavour (vanillin powder) in it, add a teaspoon of clear vanilla to this recipe.

In mixer bowl, pour in the warm water and the meringue powder. Mix it with a whisk by hand until it is frothy and thickened…about 30 seconds.

Add the cream of tartar and mix for 30 seconds more.

Pour in all the icing sugar at once and place the bowl on the mixer.

Using the paddle attachment on the LOWEST speed, mix slowly for a full 10 minutes. Icing will get thick and creamy.

Cover the bowl with a dampened tea-towel to prevent crusting and drying.
Tint with food colourings or thin the icing with small amounts of warm water to reach the desired consistency.  


Again, the food marker came in handy to draw on ghosts faces! I had just the right amount of tiny bags that fit the ghosts perfectly. Topped with a cute sticker to close the bag, we had perfect treats for little halloween ghosts!

I'll be trick-or-treating with Strawberry Shortcake tomorrow, while my husband stays home with my tiny ghost! Wishing everyone a safe and happy halloween!


Thursday, October 27, 2011

povitica

I skipped the last Daring Baker's challenge, because it was croissants from scratch. There was no way I was making that without losing my mind. So I didn't make croissants. I felt guilty not making September's recipe, but on the other hand wasn't very sorry, because it was my first challenge after being back at work, and I was still adjusting to my new life. It's pretty hectic, and weekends are kinda sacred. Not much time for marathon baking sessions.


So this month, I had every intention of participating. The Daring Baker’s October 2011 challenge was Povitica, hosted by Jenni of The Gingered Whisk. Povitica is a traditional Eastern European Dessert Bread that is as lovely to look at as it is to eat!

I was a tiny bit disappointed with the challenge being bread, again, but I though playing around with the filling would be fun. I had fully intended to fill one of the loaves with leftover hazelnut praline, but I didn't have enough, so decided on a cinnamon, brown sugar and cocoa filling for one, and s'mores filling for the other.


Povitica
Makes two loaves

To activate the Yeast:
1 Teaspoon (5 ml/4 ½ gm) Sugar
½ Teaspoon (2½ ml/1½ gm) All-Purpose (Plain) Flour
¼ Cup (60 ml) Warm Water
1 Tablespoon (15 ml/7 gm/¼ oz/1 sachet) Dry Yeast

Dough:
1 Cup (240 ml) Whole Milk
6 Tablespoons (90 ml/85 gm/3 oz) Sugar
1½ Teaspoons (7½ ml/9 gm/1/3 oz) Table Salt
2 Large Eggs
¼ Cup (60 ml/60 gm/½ stick/2 oz) Unsalted Butter, melted
4 cups (960 ml/560 gm/19¾ oz/1¼ lb) All-Purpose Flour, measure first then sift, divided

Filling:
Brown sugar, cinnamon, cocoa
Marshmallow fluff, cocoa, graham crumbs

Topping:
beaten egg white
Melted Butter

To Activate the Yeast:
In a small bowl, stir sugar, flour, and the yeast into the warm water and cover with plastic wrap.
Allow to stand for 5 minutes

To Make the Dough:
In a medium saucepan, heat the milk up to just below boiling (about 180°F/82°C), stirring constantly so that a film does not form on the top of the milk. You want it hot enough to scald you, but not boiling. Allow to cool slightly, until it is about 110°F/43°C.
In a large bowl, mix the scalded milk, the sugar, and the salt until combined.
Add the beaten eggs, yeast mixture, melted butter, and 1 cup (480 ml/280 gm/10 oz) of flour.
 Blend thoroughly and slowly add remaining flour, mixing well until the dough starts to clean the bowl.
Turn dough out onto floured surface and knead, gradually adding flour a little at a time, until smooth and does not stick.
Divide the dough into 2 equal pieces (they will each weight about 1.25 pounds/565 grams)
Place dough in 2 lightly oiled bowls, cover loosely with a layer of plastic wrap and then a kitchen towel and let rise an hour and a half in a warm place, until doubled in size.

To Roll and Assemble the Dough:
Spread a clean sheet or cloth over your entire table so that it is covered.
Sprinkle with a couple of tablespoons to a handful of flour (use flour sparingly)
Place the dough on the sheet and roll the dough out with a rolling pin, starting in the middle and working your way out, until it measures roughly 10-12 inches (25½ cm by 30½ cm) in diameter.
Spoon 1 to 1.5 teaspoons (5ml to 7 ½ ml/4 gm to 7 gm) of melted butter on top.
Using the tops of your hands, stretch dough out from the center until the dough is thin and uniformly opaque. You can also use your rolling pin, if you prefer.
As you work, continually pick up the dough from the table, not only to help in stretching it out, but also to make sure that it isn’t sticking.
When you think it the dough is thin enough, try to get it a little thinner. It should be so thin that you can see the color and perhaps the pattern of the sheet underneath.
Spoon filling evenly over dough until covered.
Lift the edge of the cloth and gently roll the dough like a jelly roll.
Once the dough is rolled up into a rope, gently lift it up and place it into a greased loaf pan in the shape of a “U”, with the ends meeting in the middle. You want to coil the dough around itself, as this will give the dough its characteristic look when sliced.
Repeat with remaining three loaves, coiling each rope of dough in its own loaf pan.
Brush the top of each loaf with a couple of beaten egg whites.
Cover pans lightly will plastic wrap and allow to rest for approximately 15 minutes.

To Bake the Dough
Preheat oven to moderate 350°F/180°C/gas mark 4.
Remove plastic wrap from dough and place into the preheated oven and bake for approximately 15 minutes.
Turn down the oven temperature to slow 300°F/150°C/gas mark 2 and bake for an additional 45 minutes, or until done.
Check the bread at 30 minutes to ensure that the bread is not getting too brown. You may cover the loaves with a sheet of aluminum foil if you need to.
Remove bread from oven and brush with melted butter.
Allow to cool on a wire rack for 20-30 minutes, still in the bread pan. Allowing it to cool in the pan helps the loaf to hold its shape.
It is recommended that the best way to cut Povitica loaves into slices is by turning the loaf upside down and slicing with a serrated knife.


Although not surprised, I was kinda disappointed with the final result of my bread. It was a bit too dry for my taste, but I might try toasting and buttering it for breakfast. To be fair, I think I messed up the amount of flour I was supposed to add to the dough. I found it behaved weirdly. Took forever to double in size, and by the time it had, I had to stuck it in the fridge because I didn't have time to finish the recipe then. It stayed in the fridge overnight and the next day. I brought it back to room temperature before rolling out, not as thinly as I was supposed to because I'm not a very patient baker. I forgot to butter the dough at that point, and made up the filling as I went.

I didn't get very much rise while the bread was baking, but it was done in an hour, like the recipe said. I left it to cool in the pan over night and the next day, without covering it, so maybe that had something to do with the dryness too?


In any case, although not my favorite thing to bake, I have to admit that it was pretty cool cutting into the loaf and seeing the pretty swirls!

Can't wait to see what next month's challenge will be, and see if I'm able to find time to enjoy making it!

Tuesday, October 25, 2011

pumpkin scones

I have a love-hate relationship with pumpkin. I like it in cakes, cupcakes, baked goods that involved butter, sugar, flour and spice, but don't even offer me pumpkin pie, mousse, crème brûlée or any other custardy pumpkin dessert. Not for me! I'll pass, thanks!

We love fall flavors here. Pumpkin, apples, cinnamon, nutmeg... And for some reason, we try to get in as many pumpkin recipes as we can in October...


So pumpkin scones had to be made! These are super tender and almost fluffy pastries, covered in a simple powdered sugar glaze. They are supposed to be drizzled with a spiced glazed too, but I ran out of powdered sugar, and tried to use powdered milk instead, and it got all gritty, and yeah. It was a mess. A tasty mess, but it made my drizzled scones unfit for the camera. The scones were delicious as is, almost dessert worthy with the glaze, and absolutely delicious with the spiced drizzle. Make it. Make sure you have enough powdered sugar!


Pumpkin Sconesrecipe source: Brown Eyed Baker via the shoe box kitchen

For the Scones:
2 cups all-purpose flour
1/4 cup plus 3 tablespoons granulated sugar
1 tablespoon baking powder
1/2 teaspoon salt
1/2 teaspoon ground cinnamon
1/2 teaspoon ground nutmeg
1/4 teaspoon ground cloves
1/4 teaspoon ground ginger
6 tablespoons cold butter, cut into 1-inch cubes
1/2 cup canned pumpkin puree
3 tablespoons half-and-half
1 large egg

For the Powdered Sugar Glaze:
1 cup plus 1 tablespoon powdered sugar
2 tablespoons milk

For the Spiced Glaze:
1 cup plus 3 tablespoons powdered sugar
2 tablespoons milk
1/4 teaspoon ground cinnamon
1/8 teaspoon ground nutmeg
1 pinch ground ginger
1 pinch ground cloves

Preheat the oven to 425 degrees F. Line a baking sheet with parchment paper; set aside.
In the bowl of a stand mixer fitted with fit the paddle attachment, stir together the flour, sugar, baking powder, salt, cinnamon, nutmeg, cloves and ginger. Add the butter and toss with a fork to coat with the flour mixture. Mix on medium-low speed until the texture resembles coarse cornmeal, with the butter pieces no larger than small peas.

In a separate bowl, whisk together the pumpkin, half-and-half and egg. Fold wet ingredients into dry ingredients, and form the dough into a ball. Pat out dough onto a lightly floured surface and form into a 1-inch thick rectangle about 4 inches by 12 inches. Use a large knife to slice the dough making three equal portions. Cut each of the portions in an X pattern (four pieces) so you end up with 12 triangular slices of dough. Place on prepared baking sheet. Bake for 14-16 minutes, or until light brown. Place on wire rack to cool.

While the scones are cooling, make the powdered sugar glaze by mixing the powdered sugar and milk together until smooth. When scones are cool, use a pastry brush to spread plain glaze over the top of each scone. Allow to firm.

While the powdered sugar glaze is firming, combine all of the ingredients for the spiced glaze. Drizzle over each scone and allow the icing to dry before serving (about an hour).


I made these with the intention of them being breakfast, but when I offered a second scone to my husband, he declined and said he was going to get some breakfast. Although they are not quite breakfast material, they sure didn't last! Every single one of them was eaten promptly, but as dessert.

Sunday, October 23, 2011

chocolate mint thumbprint cookies

I really wasn't in the mood to bake these cookies. The guys from Baked say that they should be made year-round, and not just at christmas time, but the combination of mint and chocolate, plus the thumbprint cookie format, just screams christmas!

So I made the dough one day, baked them the next, filled them two days after that. Can you tell I wasn't very motivated? After making the white chocolate mint ganache, and seeing the cheap chocolate I used turn it a yucky yellowish color, I decided to tint it green to hint at the mint taste in the cookies.


Yeah, didn't turn out too great! The ganache looked like green slime! So I decided to pretend they were Halloween cookies, and that was that. On the upside, I kinda like these pics, and the chocolate kinda broke up the pumpkin and apple recipes I have posted, and have planned for the blog!


The cookie batter tasted kinda bitter when raw, but turned out pretty good once cooked and cooled. Quite rich, and the mint taste wasn't very present in the cookie, but it could be the mint chocolate I used. I liked the texture, it wasn't crumbly, or dry, but pleasant, and the sugar crust gave it a nice crunch, and it sparkled beautifully! The cool, minty ganache center was a nice creamy contrast to the crunchiness of the cookie. Best part, they last forever in the fridge.

I used a squeeze bottle to fill the centers of my cookies and that went superbly! When my husband saw the pools of green slime in the middle of the dark cookies, he suggested Halloween cookies, and we found that bloody bone candies left over from last year's clearanced baking decorations added just the right amount of gross, like a ladle in a cauldron of boiling magic potion.


To get the recipe for these, head over to the new Baked Sunday Mornings website, and see how the others fared too! Next up for our group in two weeks: Pumpkin Cheddar Muffins!

Sunday, October 16, 2011

pumpkin whoopie pies

This recipe for Pumpkin Whoopie Pies is one of the first I tried when I got the Baked New Frontiers cookbook. I had to! It was October is the only month during which you can bake with pumpkin. Or maybe that's just me. So pretty much every year since, I have made Pumpkin Whoopie Pies in October.

They are delicious! Moist cake-like cookies, cream cheese filling, two-bite treats.


Pumpkin Whoopie Pies
Recipe source: Baked: New Frontiers In Baking

3 cups all-purpose flour
1 teaspoon salt
1 teaspoon baking powder
1 teaspoon baking soda
2 tablespoons cinnamon
1 tablespoon ginger
1 tablespoon cloves
2 cups firmly packed dark brown sugar
1 cup vegetable oil
3 cups chilled pumpkin puree
2 large eggs
1 teaspoon pure vanilla extract

Cream Cheese Filling:
3 cups confectioners sugar
1/2 cup (1 stick) unsalted butter, softened
8 ounces cream cheese, softened
1 teaspoon pure vanilla extract

Preheat oven to 350 degrees F. Line two baking sheets with parchment paper.
In a large bowl, mix together the flour, salt, baking powder, baking soda, cinnamon, ginger, and cloves together and set aside.
In a separate bowl whisk the brown sugar and oil together until combined. Add the pumpkin puree and whisk to combine thoroughly. Add the eggs and vanilla and whisk until combined.
Add the flour mixture to the pumpkin mixture and mix until completely combined.

Drop heaping tablespoons of the dough onto the prepared baking sheets, about 1-inch apart. Bake for 10 to 12 minutes, until the cookies are just starting to crack on top and a toothpick inserted into the center of the cookie comes out clean. Remove from oven and let cool completely on the pan while you make the filling.
Sift confectioners sugar into a medium bowl and set aside.
In the bowl of an electric mixer fitted with the paddle attachment, beat the butter until it is completely smooth, with no visible lumps. Add cream cheese and beat until combined.
Add confectioners sugar and vanilla and beat until smooth.
Turn half of the cooled cookies upside down, flat side facing up. Use a tablespoon to drop a large dollop of filling onto the flat side of the cookie. Place another cookie, flat side down, on top of the filling. Press down slightly so that the filling spreads to the edges of the cookie. Repeat until all cookies are used. Place whoopie pies into the refrigerator for 30 minutes to firm up before serving.

Sunday, October 9, 2011

oatmeal chocolate chip cake with cream cheese frosting

After being away from the kitchen for what seems like ever, (really only a week, but it was a looong week), I tackled two Baked recipes in one evening. Thankfully, they weren't overly complicated. I made the must-bake-every-October pumpkin whoopie pies, and this week's Baked Sunday Morning recipe, the Oatmeal Chocolate Chip Cake with Cream Cheese Frosting.


We don't purchase many pre-packaged goodies at our house, but my husband is really fond of chocolate chip muffin bars, and they magically appear in our grocery cart pretty often. So when I read over this week's recipe, I was hopeful that we had found an homemade replacement for the store bought bars.

I searched all over the city to find a baking pan with bar-like rectangular cavities (financier pan). No go. Hate that it's impossible to find stuff in brick and mortar stores! Love that you can find anything on the internet, but the internet is no so great for spur of the moment, need-this-now situations! On the other hand, I did find the tart pan I was looking for 9 Baked Sunday Mornings recipes ago.

This recipe is simple enough, but a bit of planning ahead is required, as the oats and butter must be soaked in boiling water for half an hour before continuing with the recipe. You must also coat the chocolate chips in flour, to keep them from sinking in the batter. Otherwise, it's just a matter of mixing eggs, sugar, salt, baking soda, baking powder, and cinnamon. The cooled oats get mixed in, then flour, then the chocolate chips. The mixture gets baked for 40-45 minutes, and that's it!

Unless you want to frost the bars. Then it's your standard butter, cream cheese, powdered sugar and vanilla that gets mixed until creamy and delicious. Truthfully, I didn't make the frosting in the recipe, because I had extra filling from the whoopie pies, so I used that instead!


Oatmeal Chocolate Chip Cake with Cream Cheese FrostingAdapted From: Baked Explorations
Yield: One 9 by 13 Cake

1 cup old-fashioned oats
1/2 cup (1 stick) unsalted butter, cut into small cubes, at room temperature

8 ounces chocolate chips
1/2 teaspoon vanilla
2 tablespoons all-purpose flour

2 eggs, lightly beaten
3/4 cup granulated sugar
1 1/4 cups firmly packed dark brown sugar
1/2 teaspoon salt
1 teaspoon baking soda
1 teaspoon baking powder
1 1/2 teaspoons cinnamon

1 1/2 cups all-purpose flour

For the Cream Cheese Frosting
5 tablespoons unsalted butter
5 1/2 ounces cream cheese, softened
2 cups confectioners' sugar, sifted
3/4 teaspoon vanilla extract
Heat 1 1/4 cups water to boiling.
Place oats and cubed butter in a large bowl and pour boiling hot water over. Wait 30 seconds and stir to moisten all the oats and melt the butter. Set the mixture aside for 25-30 minutes.

Preheat the oven to 375 degrees and position the rack in the center. Spray the sides and bottom of a 9 by 13 inch baking pan with nonstick cooking spray. Line with parchment paper.

Place the chocolate chips in a small bowl and toss them with the vanilla until covered. Then sprinkle 2 tablespoons of the flour over the chips until coated and set aside.

In a separate bowl, whisk together the eggs, both sugars, salt, baking soda, baking powder and cinnamon until combined. Gently fold in the remaining flour and then the chocolate chips and pour the batter into the prepared pan.

Bakes the cake for 40-45 minutes, or until a toothpick inserted in the center comes out clean. Let the cake cool in the pan or on a wire rack for at least 30 minutes.

To Make the Frosting - Beat the butter until it is completely smooth (can be done with a stand or hand mixer). Add the cream cheese and beat until combined. Add the confectioners' sugar and vanilla and beat until completely smooth. Cover, and refrigerate for 30 minutes before using.

Spread a thin layer of the frosting on the cooled cake. The frosted cake can be kept, refrigerated and tightly covered, for up to 3 days.


My husband wouldn't say that he'll stop buying the prepackaged bars, but did admit that these are pretty good! They are good plain, and over the top with the frosting. Easy enough to make regularly, I think this might be added to my regular rotation of snack recipes!

Thursday, October 6, 2011

cinnamon roll cheesecake

I first made this last fall, pre-blog, for my dad's birthday. My husband said it was the best thing he's ever had, or something to that effect. Then I made it again for Christmas. I was asked for the recipe so many times, that the idea of starting a blog slowly started to form in my head.


It's a recipe that has multiple components, but comes together really easily. I'm a lazy baker, and I didn't have any trouble putting this cake together after dinner, for my husband's birthday the next day.

You start by baking the cinnamon roll batter: creaming butter and sugar, adding an egg, milk and some vanilla. Dry ingredients go in, the half of the batter gets spread in a springform pan, while the rest hangs out until later.

After washing out the standmixer bowl, you make the cheesecake filling, by creaming the usual suspects together. The cheesecake filling gets poured over the cinnamon roll batter.

Next, melted butter, brown sugar and cinnamon get combined, and dropped by spoonfuls onto the cheesecake, then swirled in the batter with a knife. And at last, the rest of the cinnamon roll batter gets dropped by spoonfuls onto the cheesecake.

After being baked and chilled, a quick icing made out of more cream cheese gets artfully drizzled on the cake.

This cake is so good! My husband decided that this could be his birthday cake every year.

Peabody's Cinnamon Roll Cheesecake with Cream Cheese Frosting
recipe from the culinary concoctions of peabody

Cinnamon Roll Batter:
2/3 cup white sugar
¼ cup unsalted butter, at room temperature
1 egg, at room temperature
½ cup whole milk, at room temperature
1 tbsp vanilla extract
2 cups flour
2 tsp baking powder
1/2 tsp salt

Cheesecake filling:
2 pkg. (8 oz. each) cream cheese, at room temperature
1 cup sugar
1 tbsp vanilla extract
2 tbsp flour
3 eggs, at room temperature

Cinnamon Filling:
1/3 cup butter, melted
1 cup brown sugar
3 tbsp cinnamon

Cream Cheese Frosting:
2 ounces cream cheese, at room temperature
3 tbsp unsalted butter, at room temperature
1 tbsp lemon juice
2 tsp vanilla
1 cup powdered sugar
milk (if needed to thin frosting)

Preheat oven to 350 degrees F.

Grease a 9-inch springform pan.

Cinnamon Roll Batter:

Using a stand mixer with a paddle attachment cream together the butter and sugar for 3 minutes, until light and fluffy.

Add egg, milk, and vanilla. Beat for another minute. Scrape down bowl.

Sift together flour, baking powder, and salt. Combine the sifted and creamed ingredients together. Mix on low speed until throughly combined.

Spread half of the batter in a thin layer onto the bottom of the springform pan.

For the Cheesecake Filling:

Using a stand mixer (and a clean bowl) fitted with paddle attachment, beat cream cheese and sugar for 2 minutes on medium-high speed.

Add the eggs one at a time, scraping down the bowl after each addition.

Add the vanilla and flour and beat for another minute.

Pour all of the cheesecake batter on top of the cinnamon roll batter in the springform pan.

Cinnamon Filling:

In a small bowl, combine the melted butter, cinnamon, and brown sugar. Mix until thoroughly combined.

Drop spoonfuls of the cinnamon filling over the entire top of the cheesecake. Swirl in the batter with a butter knife.

Take the rest of the cinnamon roll batter and drop spoonfuls over the entire top of cheesecake. Push them down gently in the cheesecake batter.

Bake for about 50-55 minutes, cake will be puffy and lightly browned. Let chill for 20 minutes at room temperature and then cover and move to fridge for 4 hours. Remove cake and let it warm up to room temperature just a bit. Frost with Cream Cheese Frosting.

Cream Cheese Frosting:

Using a stand mixer (and a clean bowl) with paddle attachment, beat the cream cheese and butter together for 2 minutes. Add remaining ingredients and beat until desired consistency is reached. If too thick, thin out with milk.


What I love about this cheesecake, is it doesn't have to look perfect. Mine is lumpy, and unevenly brown, has a huge crack in the middle of it, but doesn't matter! Drizzle on the icing, and you're good to go! No one is going to complain!

The only thing with this particular cake, is that I didn't swirl it well enough, so I got chunks of cinnamon sugar in it... still good, but it would have been better if the cinnamon was more evenly distributed. So swirl, swirl, swirl!

Sunday, September 25, 2011

nutella scones

The recipe for this week's Baked Sunday Morning bakealong-blogalong is for Honey Corn Muffins. Yeah. Didn't feel like making that. So I made the first recipe the group posted about almost one year ago, way before I joined. Nutella Scones. Way more interesting than corn muffins!


Although I was never a big fan of recipes that called for cutting butter into flour, I've grown to like making scones and biscuits, even if I don't make them often. These came together pretty quickly, and were out of the oven by the time my husband got out of bed.

The recipe calls for toasted hazelnuts, but I couldn't find any in my pantry, so I just didn't add any nuts to these scones. I had read about other bloggers having trouble with the dough not coming together, so I added in a big spoonful of hazelnut praline that I had bought for something else, and never used. Although not as amazing as nutella, hazelnut praline is pretty delicious stuff. I drizzled most of my scones with both the praline and the nutella.


And for some reason, I didn't want triangle shaped scones that morning. So, just like the recipe instructed, I patted out the dough into a rectangle, spread nutella all over it, the rolled it into a cylinder (I feel like I'm in school learning about geometry writing this paragraph), and instead of flattening it and cutting it into wedges, I just sliced it in 8 pieces, to make round scones. I was hoping that I'd be able to see the nutella spiral on top of the scone...


They were a nice change from the usual weekend breakfasts. But I think the hazelnuts were definitively needed, to add some kind of texture to these scones. They were delicious, but very rich, and hard to eat almost. A tall glass of milk was needed to get these down! Certainly better than the corn muffins I was supposed to make, I'm sure!

If you'd like the recipe, hop over to the Baked Sunday Mornings blog. To see what other bloggers thought of the Honey Corn Muffins, check out the Baked Sunday Mornings facebook page where we've been posting while our BSM host is on a blogging break!

Looking forward to the Oatmeal Chocolate Chip Cake with Cream Cheese Frosting recipe in two weeks!

Saturday, September 24, 2011

apple cinnamon waffles

My husband usually makes breakfast for the girls on the weekend, but today, he had to go to the garage and get the brakes on the car fixed, so he didn't have time. So I stepped up to the plate, and made waffles.


I've had my eye on these blueberries and sour cream waffles, but we were out of blueberries. So since we had a bunch of apples, it is still September after all, I changed the recipe a bit, and made apple cinnamon waffles, that we topped with leftover caramel sauce, or maple syrup. Looked like autumn outside, and breakfast tasted like fall.

Blueberry Sour Cream Waffles
recipe adapted from The Family Kitchen

1 cup all-purpose flour
1 cup whole-wheat all purpose flour
1 tbsp sugar
1 tsp cinnamon
pinch grated nutmeg
1 1/2 teaspoons baking powder
1 teaspoon baking soda
1/2 teaspoon salt

1 cup sour cream
1 cup whole milk
3 eggs
8 tablespoons butter melted and cooled
1 cup grated apples (2 apples)

Preheat your waffle iron on medium-high heat.

In a large bowl, combine the flours, sugar, cinnamon, nutmeg, baking powder, baking soda, and salt. In a smaller bowl, whisk together the milk and sour cream, and then whisk in the eggs. Pour the wet ingredients into the dry, and stir just until combined. Fold in the butter, and then the apples, stirring minimally.

Pour 1/4 cup of batter per waffle onto the iron and cook until the waffles are a light golden brown. Keep cooked waffles warm on a platter in the oven.

Serve waffles with maple syrup or caramel syrup.


Although they made an excellent second-official-day-of-fall breakfast, the texture was more reminiscent of pancakes than of waffles, probably due to the apples being high in moisture, compared to the original blueberries in the recipe. In my waffle iron, I used 1 cup batter and cooked them for a good 3 minutes 45 seconds. Made 6 huge waffles. A great start to my most favorite season! Can't wait to start baking with pumpkin next month!

Thursday, September 22, 2011

soft pretzels

The first picture of food I ever took was of a pretzel. It was my first time making them and I was impressed with the outcome. I was going to send the pic to a friend of mine, to brag about my accomplishment, but never did. Felt kinda silly writing, "hey, look what I just made". A little while after that, I decided to start up this blog. Figured I wouldn't have to push my foodstuff onto people, they could come here and see it if they wanted to. Still kinda feel silly writing "hey, look what I just made"!


But these pretzels are worth writing about! We had them fresh from the oven, with leftover pizza sauce for dinner. They were amazing! The inside is so soft and yummy! And the crust is just salty enough. I sprinkled fleur de sel on top of four of them, and topped the other four with a mixture of sugar, chocolate and cinnamon in one of those grinders things. The sweeter ones were delicious with peanut butter the next day. Not as soft as the fresh ones, but still delicious nonetheless.

Soft Pretzels
recipe adapted from Alton Brown via FoodNetwork
1 1/2 cups warm (110 to 115 degrees F) water
1 tablespoon sugar
2 teaspoons kosher salt
1 package active dry yeast
22 ounces all-purpose flour, approximately 4 1/2 cups
2 ounces unsalted butter, melted
Vegetable oil, for pan
10 cups water
2/3 cup baking soda (I used a heaping 1/3 cup)
1 large egg yolk beaten with 1 tablespoon water (I used heavy cream)
Pretzel salt (I used fleur de sel)

Combine the water, sugar and kosher salt in the bowl of a stand mixer and sprinkle the yeast on top. Allow to sit for 5 minutes or until the mixture begins to foam. Add the flour and butter and mix until combined with a spatula. Using the dough hook, turn on the mixer at medium speed and knead until the dough is smooth and pulls away from the side of the bowl, approximately 4 to 5 minutes. Remove the dough from the bowl, clean the bowl and then oil it well with vegetable oil. Return the dough to the bowl, cover with plastic wrap and sit in a warm place for approximately 50 to 55 minutes or until the dough has doubled in size.

Preheat the oven to 450 degrees F. Line 2 half-sheet pans with parchment paper and lightly brush with the vegetable oil. Set aside.

Bring the 10 cups of water and the baking soda to a rolling boil in an 8-quart saucepan or roasting pan.

In the meantime, turn the dough out onto a slightly oiled work surface and divide into 8 equal pieces. Roll out each piece of dough into a 24-inch rope. Make a U-shape with the rope, holding the ends of the rope, cross them over each other and press onto the bottom of the U in order to form the shape of a pretzel. Place onto the parchment-lined half sheet pan.

Place the pretzels into the boiling water, 1 by 1, for 30 seconds. Remove them from the water using a large flat spatula. Return to the half sheet pan, brush the top of each pretzel with the heavy cream and sprinkle with the fleur de sel. Bake until dark golden brown in color, approximately 12 to 14 minutes. Transfer to a cooling rack for at least 5 minutes before serving.


The first time I made these, I measured the baking soda, but failed to measure to water. The results? Pretzels that tasted very strongly of baking soda. So I was careful this time around, and measured the water, and used much less soda than what the recipe called for. They tasted awesome.

For some reason I ran out of eggs (because of pancakes that call for half a dozen that my husband had made that morning). So I used heavy cream to brush on the pretzels before baking, and they turned out fine. The fleur de sel was also perfect for these, but the cinnamon sugar grinder thing didn't sweetened them as much as I would have liked.

I wish I had gotten a picture of the inside of one... next time!


Friday, September 16, 2011

blueberry & cream cookie

I don't know why, but the momofuku empire fascinates me. I'll never eat in one of their restaurants, probably will never cook anything out of their cookbooks, but everytime I see one of their Milk Bar recipes, I get excited. They are usually over the top, complicated, out of the ordinary and cool. (I'm not sure what gives a recipe a cool factor, but for me, if it has Christina Tosi's name attached to it, it's cool.) And they are coming out with a baking cookbook this fall. I cannot wait! Wonder if anyone would be interested in doing a baking club for that one, like the ones for Baked, and Dorie's books... Anyone?

Anyways, out of the few recipes available online, I've tried the compost cookie, which was awesome. I still have the amazing sounding banana cake, the chocolate malt cake and the crack pie to try... and there's copycat versions of their cornflake cookie and their corn cookie on my list too. But for now, a simple enough cookie featuring dried blueberries and milk crumbs.


There are two components to the recipe, the milk crumbs, that have to be baked and cooled completely, and the cookie dough in which they get incorporated, that needs to chill 24 hours before being baked. On their website, the ingredients for the blueberry and cream cookie lists white chocolate, but the recipe off the bon appetit website didn't include white chocolate chips, so I left them out too, since we're not huge fans.
blueberry & cream cookie
adapted from bonappetit
milk crumbs
3/4 cup nonfat dry milk powder
1/2 cup all purpose flour
3 tablespoons sugar
2 tablespoons cornstarch
3/4 teaspoon coarse kosher salt
6 tablespoons (3/4 stick) unsalted butter, melted
Preheat oven to 275°F. Line large rimmed baking sheet with parchment. Combine milk powder, flour, sugar, cornstarch, and coarse salt in medium bowl; toss to mix evenly. Add butter; stir with fork until clusters form. Spread mixture evenly on prepared sheet. Bake until crumbs are dry and crumbly but still pale, about 10 minutes. Cool Milk Crumbs completely on sheet. Can be made 1 week ahead. Store in airtight container at room temperature.
cookies
2 cups (4 sticks) unsalted butter, room temperature
1 1/2 cups sugar
1 1/2 cups plus 2 tablespoons (packed) golden brown sugar
1/2 cup plus 2 tablespoons light corn syrup
2 large eggs
5 1/4 cups all purpose flour
2 teaspoons baking powder
1 teaspoon baking soda
1 teaspoon coarse kosher salt
1 1/2 cups milk crumbs
1 1/2 cups dried blueberries
Combine butter, both sugars, and corn syrup in large bowl of stand mixer fitted with paddle attachment. Beat on medium-high speed until fluffy and pale, occasionally scraping down sides of bowl, about 3 minutes. Add eggs; beat on medium-high speed until mixture is very pale and sugar is completely dissolved, about 10 minutes. Add flour, baking powder, baking soda, and salt; beat on low speed just until blended, occasionally scraping down sides of bowl. Add Milk Crumbs; mix on low speed just until incorporated. Remove bowl from mixer. Stir in blueberries just until evenly distributed (dough will be very sticky).
Using 1/4-cup ice cream scoop for each cookie, drop dough onto 2 large rimmed baking sheets. Cover with plastic wrap and refrigerate at least 24 hours. DO AHEAD Can be made 2 days ahead. Keep chilled until baking time.
Position 1 rack in top third and 1 rack in bottom third of oven and preheat to 375°F. Line 2 large (18x12-inch) rimmed baking sheets with parchment. Transfer 6 chilled dough scoops to each sheet, spacing at least 4 inches apart (cookies will spread). Bake cookies, 2 sheets at a time, until golden, reversing sheets halfway through baking, 20 to 22 minutes total. Repeat with remaining chilled dough, cooling and relining sheets between batches. Transfer cookies to racks; cool completely. DO AHEAD Can be made 3 days ahead. Store in airtight containers at room temperature.

The raw dough is interesting, as I'm used to feeling the sugar as I bite into it, but in this case, the dough is completely smooth, but for the milk crumbs that are evenly dispersed in the batter. It's very interesting. The dough has some kind of aftertaste, that I can't quite place.

I used a 2-3 tbsp cookie scoop to portion out my cookies before chilling them for the requisite 24 hours. I baked them for 12 minutes, and they were just done. From what I can tell from the Milk Bar website, they are quite pale in color, and that's what I was trying to do as well, but the outside of the cookie is a bit golden. I managed to get 9 on a sheet nicely, but they did spread some.

Straight from the oven, you definitely taste the butter in those cookies, then you get the creaminess, the bites containing a blueberry are a very nice surprise of fruity chewiness. I was presently surprised that we could still make out the milk crumbs in them.


Completely cool, they taste less like butter, and they're pretty chewy, but not dry or cakey. It does make a  lot of cookies, so I froze some of the baked cookies, as well as the raw dough. I cooked the frozen dough straight from the freezer, for about 15 minutes, and they turned out just as good as the fresh cookies. I brought a box of them to a work meeting, and they got rave reviews. In fact, I think they may have made me new friends.

Sunday, September 11, 2011

apple caramel cupcakes, and the best frosting ever

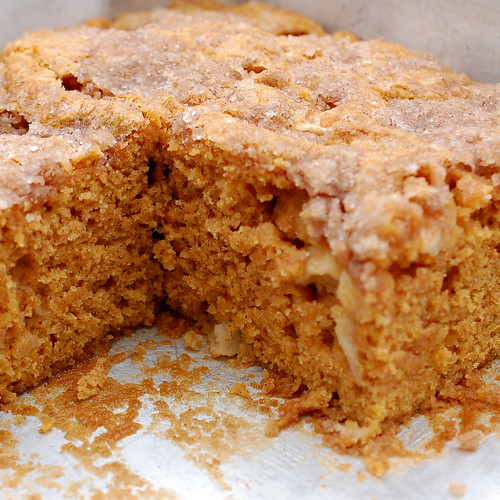
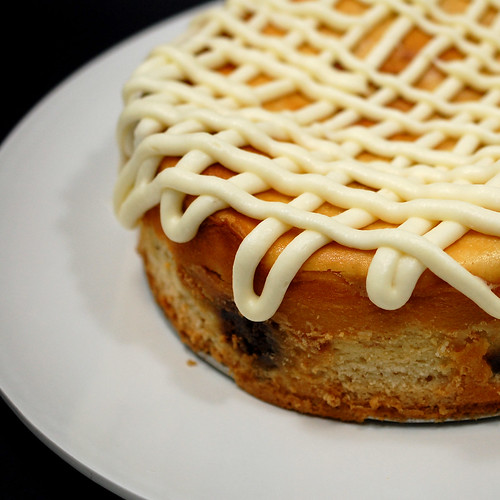
This weeks's Baked Sunday Mornings recipe was a 8-inch, three layer apple cake, with with a caramel frosting. Although I had absolutely no occasion to serve this at, I really wanted to make it, mainly because the picture in the book is just gorgeous, and the flavors are so accessible! I mean, who doesn't like apples and caramel?!


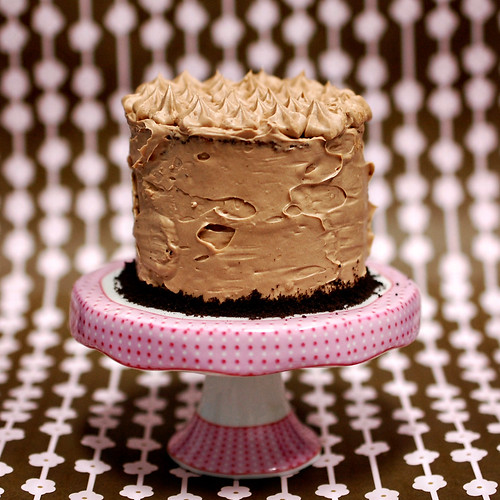
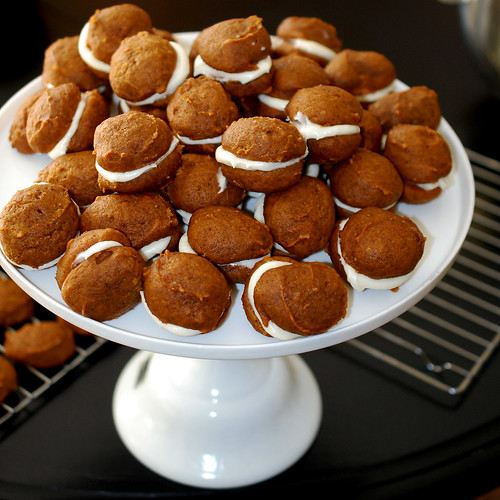
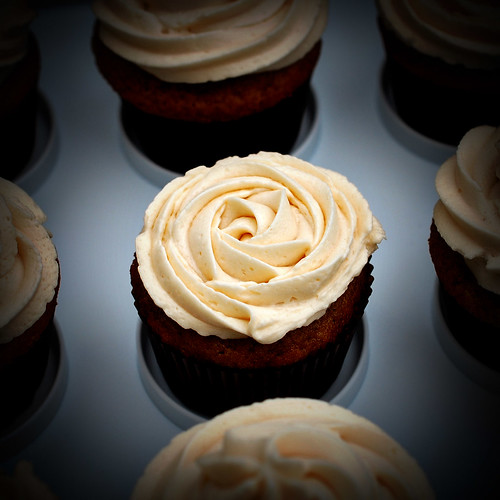
I decided to make them into cupcakes so I could easily bring them to work for my first day back in 14 months. I figured bringing in treats would increase the odds of people being happy to see me. So I halved the cake recipe, made 18 cupcakes with it, made a full batch of caramel and a full batch of frosting. It's a very good thing I halved the recipe, because these were the best cupcakes I've made in a long while. And if 18 more cupcakes were laying around, I would have eaten them all.

Apple Caramel Cupcakes
recipe adapted from Baked Explorations
makes 18 cupcakes

Preheat the oven to 350 degrees. Line a cupcake pan with paper liners.

2 cups all purpose flour
1 tsp baking soda
1/2 tsp baking powder
1/2 tsp salt
1 tsp cinnamon
1/2 tsp ground allspice
1/2 tsp ground cloves

Sift dry ingredients together. Set aside

3/4 cups unsalted butter, softened
1 1/4 cups sugar
1 large egg

In the bowl of standmixer fitted with the paddle attachment, beat the butter until creamy, about 4 minutes. Add the sugar, and beat until light and fluffy, about another 3 minutes. Add the egg and mix until combined.

2 cups applesauce

Add 1/3 of the flour to the butter mixture, then half the applesauce, another 1/3 of the flour, the rest of the applesauce, then the rest of the flour, mixing between each addition until combined. Scrape the sides of the bowl and mix on low speed for a few seconds.

Scoop 1/4 cup of the batter in each of the cupcake liners. Bake for about 20 minutes, until the tops spring back, and a toothpick inserted in the middle of a cupcake comes out clean.


While cupcakes are baking, make the caramel sauce. I  made the frosting using the Classic Caramel Sauce recipe on page 191 of the Baked book, but I prefer this recipe, and will use it next time I make this cake. I found the recipe from the Baked book too buttery for my taste, and the instructions were not as clear as I obviously need them to be. My caramel came out way too pale, and a tad too thin. The last time I made this recipe though, perfection. So I recommend this one.

Caramel Sauce
Makes about 1 cup of caramel

1 cup (8 oz.) sugar
1/2 cup (4 fluid oz./ 120 ml.) water
1 cup (8 fluid oz./ 240 ml.) heavy cream
1/2 teaspoon salt

In a heavy-bottomed saucepan, combine the sugar and water on medium-high heat. Boil until the water completely evaporates and the sugar caramelizes to a dark mahogany color.

Working quickly, add the cream to the darkened caramel. It will bubble and pop vigorously, so add only as much cream as you can without overflowing the pot.

Return the pot to the stove on low heat and whisk gently to break up any hardened sugar. Add any remaining cream and continue stirring. Gradually, the hard sugar will dissolve and the caramel sauce will continue to darken. When the caramel has darkened to the point you want it, remove it from the heat. Add the salt and stir to combine.


I had a bit of trouble with my frosting, but nothing that couldn't be fixed. I think my butter was way too soft, because after adding it to the cooled sugar mixture, the frosting was soupy and would not whip up. I stuck it in the fridge for a good while, and was not expecting much when I started whipping it again. I ignored it for a couple of minutes, and when I came back to it, I was pleasantly surprised to see how fluffy it was. I couldn't really taste the caramel, even though I added more than what the recipe called for, but I'm sure it's because I didn't let my sugar caramelize properly, and the caramel syrup was weak. Still, hands down, the best frosting I have ever made.

The texture was just right. It was not too sweet, it didn't taste like butter. Awesome!
Caramel Frosting
recipe source: Baked Explorations

In a medium heavy-bottomed saucepan, whisk:

1 1/2 cups sugar
1/3 cup all-purpose flour

Add:

1 1/2 cups whole milk
1/3 cup heavy cream

Cook over medium heat, whisking occasionally, until the mixture comes to a boil and has thickened, about 10-15 minutes.

Transfer the mixture to the bowl of a stand mixer, and beat with the paddle attachment until cool. Reduce speed to low, and add:

1 1/2 cups softened butter, cubed
1 tsp pure vanilla

Mix until thoroughly incorporated, the increase speed to medium-high and beat until the frosting is light and fluffy.

Add:

1/3 cup caramel sauce

Continue mixing until combined. If the frosting is too soft, chill in the refrigerator until it can be beat to proper consistency.

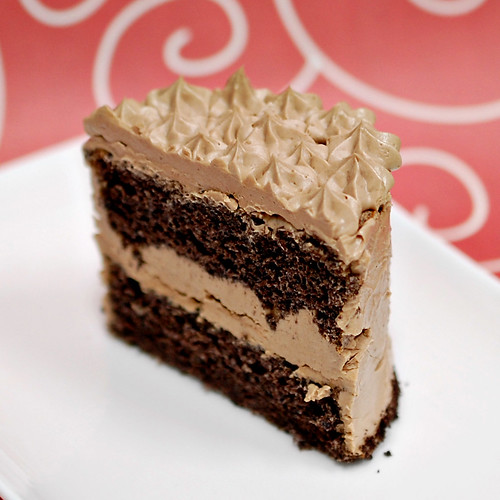
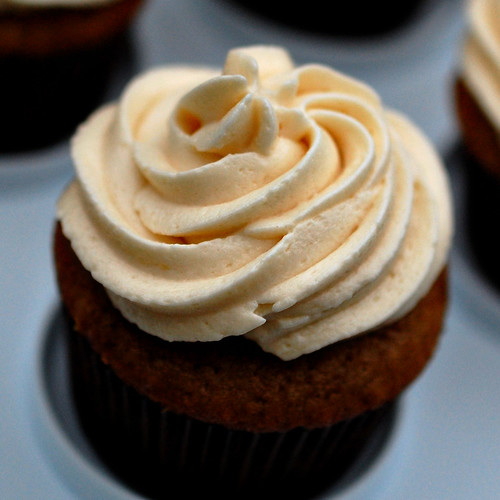
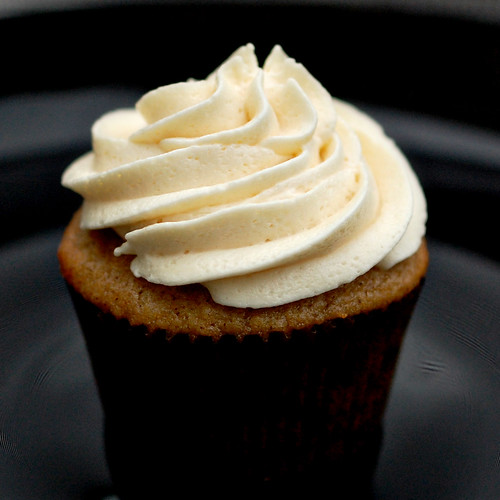
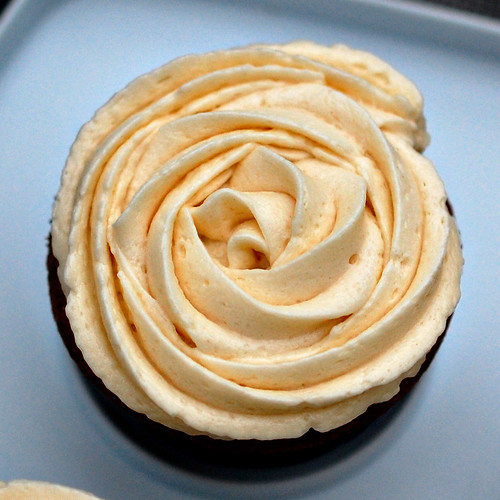
Pipe frosting on the cupcakes, and drizzle with added caramel if desired.


I bought a 1M piping tip just for these, so I had fun practicing the only two techniques I know, basically. I had been using cheapo giant tips, but was never able to get good results, so I'm very happy with how these turned out! And it was interesting to see which ones went first with my coworkers... By mid-morning on the second day, only one cupcake with the smaller amount of frosting remained. And it was quickly gobbled up. This frosting rocks! Pile it on!