

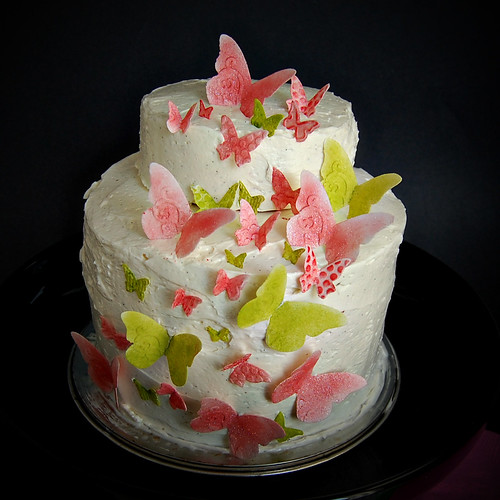
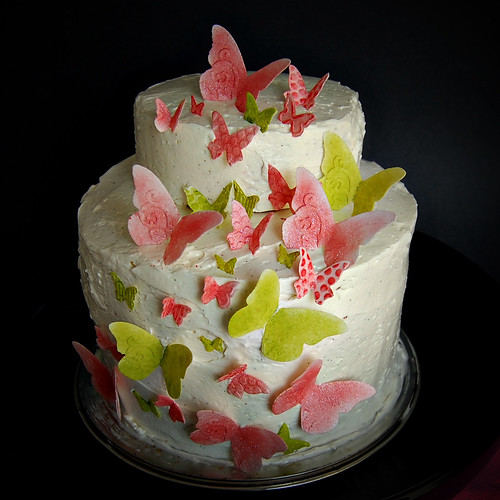
Although I've been planning her birthday in my head for a while now, I've been very indecisive, buying things, returning things, settling on a cake, changing my mind, about a million times. I had lots of inspiration, but had a hard time pulling everything together. Finally, I spotted this cake, and my mind was made up. Decoration-wise, at least.
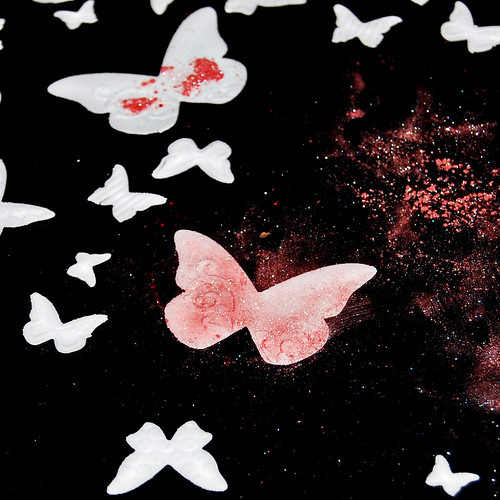
I've never worked with fondant or gum paste or anything like that before, and I'm not sure I'd have the patience to work with these mediums. And although I could have bought the butterfly decorations for relatively little money on etsy, I wanted to make something myself. I went to the craft store looking for wafer paper, after seeing another blogger use it on a beautiful cake, and came upon Wilton sugar paper instead.
Along with the sugar paper, they sold punches, similar to scrapbooking tools, to cut shapes out of the paper. In fact, their entire line is called Punch, Cut, Decorate. I grabbed a sheet of white sugar paper and some luster dust, and figured I could try to use regular scrapbooking dies to cut out the shapes I wanted instead of the expensive Wilton tools. The paper alone was expensive enough.
I couldn't find much information on this product, other than bloggers who had used it at Wilton sponsored workshops. And frankly, the end products I saw on the internet we're not so spectacular. In any case, I borrowed a beautiful butterfly die from a Stamping Up rep, and painstakingly cut out my butterflies. The butterfly pattern was quite intricate and the sugar paper is pretty fragile and soft. I ripped the wings off a few butterflies, but most came out great. I brushed them with luster dust, and set them to dry. They didn't get very firm, but held their shape pretty well after a week of drying, although they were weak where I folded them and had to be handled carefully.
I was debating creating a three-tiered cake like the inspiration picture, but since the cake was only meant to serve 8 people, I settle on a three-layer six inch round cake, with a little smash cake on top for the baby. It was going to be a s'mores cake for a while, then a dulce de leche banana cake, but at the end, I kept it simple, and went for classic fluffy vanilla cake, with a vanilla bean frosting. With a twist. I colored half the batter with pink food coloring gel to create a marble effect, just to spice things up a bit. And I thought pretty pink cake crumbs and creamy white frosting would look adorable smeared all over the baby's face.

Although I found an excellent vanilla cake recipe a while back, I decided to try a new recipe by a blogger who had tried 7 different vanilla cake recipes before calling this one a winner. I wanted to see how it compared to my favorite recipe, and see if the cake would keep its shape better than my recipe. It didn't. But it was moist, and flavorful, and simple enough, so it's still a winner in my book.
Fluffy White and Pink Vanilla Cake
recipe adapted from Sweetapolita
Yield: One 3-layer, 6-inch round cake + small smash cake
6 large egg whites (6 ounces) at room temperature
1 cup whole milk ( 8.5 ounces) at room temperature
2 1/4 teaspoons pure vanilla extract
2 1/4 cups cake flour (8 ounces), sifted
1 3/4 cups sugar (12 ounces)
1 tablespoon + 1 teaspoon baking powder
3/4 teaspoon salt
12 tablespoons unsalted butter (6 ounces), at room temperature and cut into cubes
1. Preheat oven to 350°F (180°C). Grease and line with parchment, three round 6-inch pans and one small ramekin.
2. In a medium bowl or measuring cup, combine and stir the egg whites, 1/4 cup of milk, and the vanilla. Set aside.
3. In the bowl of an electric mixer fitted with the paddle attachment, combine the dry ingredients together on low speed for 30 seconds.
4. Add the butter and remaining 3/4 cup of milk, and mix on low speed until just moistened. Increase to medium speed and mix for 1 1/2 minutes.
5. Scrape the sides of the bowl and begin to add the egg mixture in 3 separate batches; beat on medium speed for 20 seconds after each addition.
6. Divide the batter in two bowls. Tint one half of the batter with pink gel food coloring, leaving the other half white. Using a 1/4 cup capacity spring release scoop, drop a scoop of white batter in the middle of each of the pans, followed by a scoop of pink batter directly on top of the white batter, alternating colors until pans are 2/3 full. Pour leftover batter in the ramekin.
7. Bake 25-35 minutes or until a cake tester comes clean when inserted into the center. Be so careful to not overbake. Check cake at 20 minutes, but not before, and once you feel it’s almost ready, set the timer for 2 minute intervals. Let cool on racks for 10 minutes before loosening the sides with a small metal spatula, and invert onto greased wire racks. Gently turn cakes back up, so the tops are up and cool completely.
8. Wrap tightly and store at room temperature for up to 2 days, refrigerator for up to 5 days, or frozen for up to 2 months. Best eaten the same day as baked.
Frost with Whipped Vanilla Bean Frosting

The frosting on the other hand, not a big fan. Truth be told, I don't like making frosting. I'd rather eat it, and if I'm going to eat it, I'd rather it be cream cheese frosting, or chocolate frosting. It did come out looking gorgeously silky. Not finicky at all to make. It spread on the cake like a charm. But I wasn't a big fan of the flavor or the mouthfeel. But it might just be me.
I added the butterflies on the cake about two hours before guests were to arrive, and they barely made it. The bigger butterflies started separating after the two-hour mark, so lesson learned, the sugar paper decorations go on the cake at the very last moment! I was happy to see that they didn't melt into the icing, but managed to stay upright. I had fun making this, and I'm happy about the results! Now I have a few days to figure out what Rosalie's other birthday cake will be. Stay tuned!
I saw the sugar papers at JoAnn's this week and wondered about them. Your cake is so beautiful! I love the butterflies and I know you daughter must have loved them. Sorry to hear that they didn't hold up that well, but they do look delicate. Happy birthday to your daughter!
ReplyDeleteJust so SprinklesBakes tweet and followed the link! What a gorgeous cake, I love the pink swirls! Happy first Birthday to your daughter. A big cake for a BIG deal! Even if the butterflies didn't stay up that well, it still looked wonderful!
ReplyDeleteI'm glad I found this web site, I couldn't find any knowledge on this matter prior to.Also operate a site and if you are ever interested in doing some visitor writing for me if possible feel free to let me know, im always look for people to check out my web site. nothing bundt cakes california locations
ReplyDelete