Showing posts with label frozen treats. Show all posts

Sunday, August 5, 2012

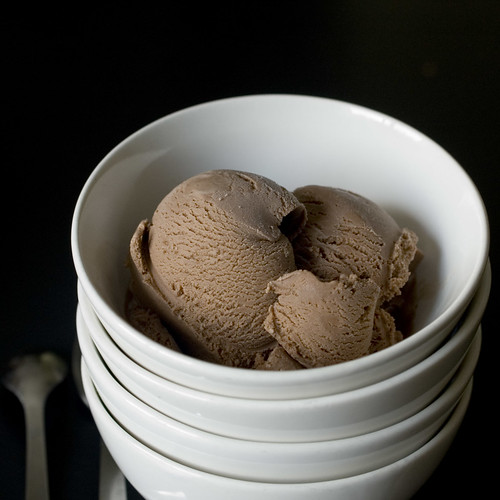
chocolate ice cream

A UK based blog, Domestic Sluttery, started this new "pudding club", where once a month, they are going to announce a new pudding theme, and participants are to make a recipe, photograph and blog about it.

So of course, I decided to join in! I like that it's very lax in its rules. You make something, post it whenever, the Domestic Sluts share the posts when they can, and recap the first Monday of every month. Plus, I'll get to discover new blogs! Always fun!

My only issue is that the Canadian in me is not so familiar with the "pudding" term. I assume that it refers to their word for dessert. But then, in their inaugural post, they used the word "puddingy". And examples of puddings for this month's theme "chocolate", were a soufflé, a mousse, or a chocolate fondant pudding. Sure, they're desserts, but they are also like actual puddings (my understanding of pudding, a creamy, egg, milk or cream based concoction...).


In honor of this month's chocolate theme, I made chocolate ice cream. See, until I can understand this better, and see what the other participants in this club made, I made something safe. It's pudding (custard) based and I eat it for dessert, so yeah. Safe!

The recipe is out of a book from a famous ice cream shop in the states that I've never actually been to. I've made a couple recipes out of it so far, and they were very good. 

Chocolate Ice Cream

6 egg yolks
12 tbsp sugar
1/4 cup cocoa powder
1 cup milk (1%)
1 3/4 cups heavy cream
1/4 tsp kosher salt
1 tsp vanilla


Their method is pretty traditional, where egg yolks and half the sugar are whisked together and set aside, and a mixture of cream, milk, sugar, salt and flavorings, in this case, cocoa powder is brought to an almost boil. The cream mixture is gradually whisked in the egg yolks to temper them, and the whole thing is transferred back to the saucepan to cook until the mixture thickens enough to coat the back of a spoon.

The mixture has to be completely chilled before being churned in an ice cream maker. Right out of the ice cream maker, the chocolate ice cream was super smooth, yet was slightly chewy. It looked like the perfect soft serve ice cream. I stuck it in the freezer overnight, and it came out perfect! The chocolate flavor isn't very pronounced, but it tastes like a milk chocolate ice cream.


For more information about the Sluttery Pudding Club, click on through to their site, and please visit the blogs of other participants in this club!

Sunday, August 28, 2011

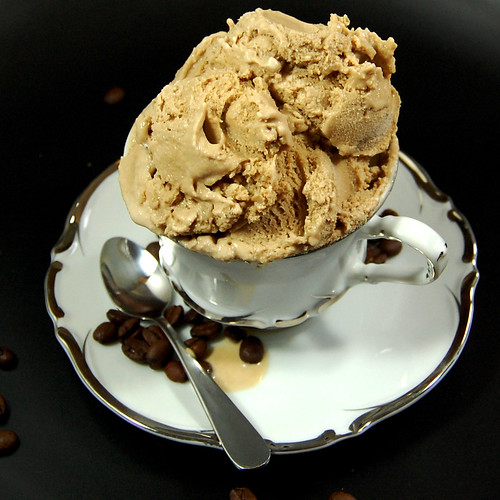
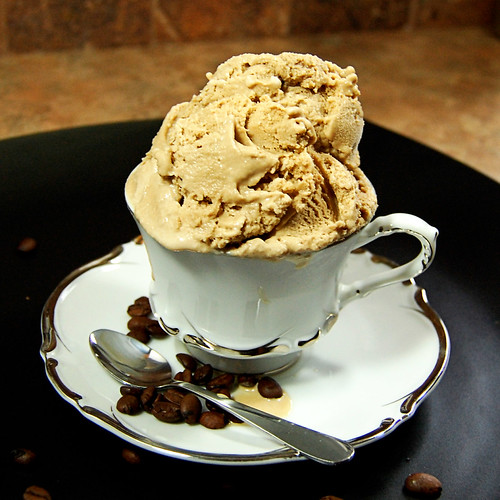
coffee ice cream for baked sunday mornings

I was really looking forward to making the grasshopper bars that were scheduled two weeks ago on the Baked Sunday Mornings calendar, but I guess life got in the way, and I just didn't take the time. Although I don't drink, crème de menthe has a special place in my heart, as it's one of my dad's favorite digestif, and reminds me of happy family gatherings. I keep a bottle of the stuff in the cupboard, just for my dad and my brother... It's still very full. They don't visit very often.

In any case, this week's recipe featured another thing I don't drink, coffee. Again, I keep the stuff in the house for guests, and espresso powder is a must if you're going to make recipes from the Baked cookbooks. I like the smell of it, and I enjoy coffee flavored baked goods if it's mixed with chocolate or lots of sugar, but not a flavor I crave on a regular basis. This week, we were to make Coffee Ice Cream.


I had egg yolks left over from all the cake baking I've been doing. 6 of them to be exact. I also had exactly 1 3/4 cups of cream in the fridge, about to expire... It's like it was meant to be! So I made sure the ice cream attachment for my kitchenaid was in the freezer and set out to make the base for the Coffee Ice Cream. The only change I made was using Frangelico instead of Kahlua, because that's what I had on hand, from making that delicious Frangelico caramel sauce a little while back. (Oh how delicious that caramel could have been on this coffee ice cream!)

Although the recipe does call for tempering eggs, I found it to be easier than the Jeni's Splendid Ice Creams at Home recipes that I've been making recently. Calls for less dirty dishes too, and I'm all for that.


I chilled the ice cream base overnight and churned it the next day. Froze it mid morning, and served it that night with birthday cake. It was nice and soft, perfectly scoopable and super creamy. The coffee flavor was very strong, and I couldn't taste the Frangelico in it. Guests that tried it really liked it, and left with a container after the party. Another container made its way to my parents house, and came back empty pretty quickly. I guess it was thoroughly enjoyed there too. I've been sneaking bites here and there from my last container and have to admit that it's pretty good. The texture is gorgeous. I'm kicking myself for not having swirled a ribbon of chocolate fudge sauce though the ice cream before freezing it, but I still have extra yolks in the fridge, so that might just happen sooner than later! Recipe is available here.


Check out the Baked Sunday Mornings facebook page to see what other bakers thought of this ice cream! Next up on the Baked Sunday Mornings baking calendar: Caramel Apple Cake! Yum

Tuesday, June 21, 2011

lemon cream ice cream

Didn't even register with me that today was the first day of summer until 2 days ago. I mean, it's been so nice out, seems like summer started a long time ago! And even though Haagen Dazs was on sale last week at the supermarket and I totally stocked up, I still wanted to blog about ice cream. Especially since my husband surprised me with two cookbooks last week, one of which is Jeni's Splendid Ice Creams at Home.


That book is way beyond your usual vanilla, strawberry and chocolate ice creams. She's got weird combos in there! And then some that I wouldn't have thought of, but would still like to try. I also like the fact that there is no egg tempering in her recipes. Well, no egg at all. She uses cream cheese, which I was very happy to see, as my go-to ice cream recipe has cream cheese in it too, and I love it! Another thing she does, is to chill the ice cream base in a ice bath, as opposed to storing it in the fridge overnight and churning it the next day. See, this way you get your ice cream sooner!

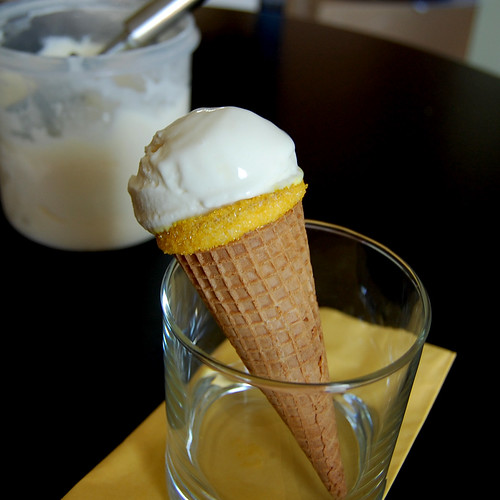
I picked the lemon ice cream to try on this first day of summer, because, well I wanted a refreshing ice cream with no chunks in it. The kind of ice cream you want to lick from a cone. Didn't hurt that I had all the ingredients on hand too! Just whole milk, cream, sugar, lemons, cream cheese, corn syrup, cornstarch and salt.


So you start by zesting 2 lemons (in big strips so it's easier to fish out before churning) and setting it aside. You then juice the lemons to make 1/2 cup of juice. You add it to a small saucepan with two tbsp sugar and heat it until the sugar is dissolved. This lemon syrup is then chilled and will be added to the churning ice cream later on.

To thicken the ice cream, you have to make a cornstarch slurry by measuring 2 cups of milk, and taking out 2 tbsp to put in a small bowl along with 1 tbsp plus 1 tsp cornstarch. That's set aside. You should also whisk 3 tbsp cream cheese and 1/8 tsp salt in a large bowl until there are no more lumps. That's also set aside.

The rest of the milk goes in a medium saucepan, along with the zest of the two lemons, 1 1/4 cups heavy cream, 2/3 cups sugar and 2 tbsp light corn syrup. That mixture is heated until boiling, and then boiled for 4 minutes. Then you take it off the heat, and add in the cornstarch. It's brought to a boil again, and cooked for 1 minute until it thickens a bit. The mixture is taken off the heat and whisked gradually in the cream cheese mixture. The whole thing is then transferred to a large zip top bag, and put into an ice bath to chill before churning with the lemon syrup made earlier. (Don't forget to take the zest out before churning.) It then chills for four hours.


It was in the freezer for four hours to the minute, when I took it out to taste it. Yes I was anxious, but by that time, my daughter had asked me about fifteen hundred times where the ice cream was and when could she eat some. She needed ice cream so she could move on... I needed her to move on. Anyways...

It's the smoothest ice cream ever. The texture is just right, melty and soft and just a tiny bit chewy. The lemon flavor came through, nice and bright, and kinda reminded me a bit of lemon cream cheese icing. That's a very good thing. It was just what was needed on the first day of summer.

Friday, May 27, 2011

chocolate marquise with hazelnut garnishes

Now this is why I joined the Daring Bakers.

I was eagerly awaiting news on the challenge on the first day of the month, and after I finished reading it that afternoon, I just shook my head. So much to take in. And I read it again. Then I had to research it, because I couldn't wrap my mind around this dessert.


The May 2011 Daring Bakers’ challenge was hosted by Emma of CookCraftGrow and Jenny of Purple House Dirt. They chose to challenge everyone to make a Chocolate Marquise. The inspiration for this recipe comes from a dessert they prepared at a restaurant in Seattle. The girls flavored their chocolate marquise with cayenne, tequila and black pepper, nestled it into a torched meringue nest, drizzled on a tequila caramel and sprinkled on some cayenne almonds and cacao nibs. Wow!

Sounded great, I mean what's not to love: some kind of frozen chocolate concoction on top of a toasted meringue, with some crispy garnishes and a sauce... that sounds good to me! Although we were free to play around with the flavorings, we had to make the chocolate marquise and the meringue. The garnishes were optional.

I knew right away that I was going to have to change the flavoring if anybody but me was going to eat this dessert. The flavor combo the girls picked sounds interesting, and I would gladly taste it, but I'm not going to make 18+ servings of a spicy/boozy chocolate dessert that people are going to be afraid to try. The people I feed are not very adventurous eaters.

So here goes the possibilities I considered:
  • Chocolate and Coffee Marquise, Toasted Meringue, Espresso Caramel, Crushed Chocolate covered Coffee Beans
  • Chocolate Marquise, Toasted Meringue, Blackberry/Rasperry coulis, fresh fruit
  • Chocolate Marquise, Toasted Meringue, Dulce de Leche drizzle, Toasted Graham Cracker bits
I finally went with a Chocolate Marquise resting on a cloud of toasted hazelnut flavored Meringue sitting on a schmear of Nutella, sprinkled with candied hazelnuts and drizzled with Frangelico caramel.


Chocolate Marquise

Servings: 18 2"x2" cubes

Chocolate Base
12 oz ( 1½ cups) bittersweet chocolate (about 70% cocoa), chopped finely
1½ cups heavy cream
1/2 teaspoon salt
1/4 cup light corn syrup
3/4 teaspoon vanilla
1/4 cup cocoa powder, sifted
1 oz (2 tbsp) unsalted butter, softened

Place the chocolate in a small mixing bowl.

In a double-boiler, warm the cream until it is hot to the touch (but is not boiling). Remove from the heat and pour over the chocolate.
Allow it to sit for a minute or two before stirring. Stir until the chocolate is melted completely and is smooth throughout.
Add the remaining ingredients and stir to combine.
Set aside until cooled to room temperature. Do not refrigerate, as the base needs to be soft when added to the marquise mixture. If you make it the day before, you may need to warm it slightly. Whisk it until it is smooth again before using it in the marquise recipe.


I made this component first, because I could let it cool while making the egg mixture. It's basically a ganache, so pretty easy to make. I was worried because mine had little lumps of cocoa that I couldn't fully incorporate to get my chocolate base smooth, but it didn't affect the final result of the dish. I let it sit on the counter for a couple of hours, and had to warm it briefly in the microwave before I could use it. (Maybe that took care of my cocoa problem?) I used half power for about 30 seconds, so I wouldn't burn it. I used a mixture of 70% chocolate, and 72 % chocolate, and it was delicious, with a strong chocolate taste.

Marquise

11 large egg yolks at room temperature
4 large whole eggs
2/3 cup ( 4 oz.) sugar
1/3 cup water
2 cups (16 fluid oz./ 500 ml.) heavy cream

In the bowl of a stand mixer, combine the egg yolks and whole eggs. Whip on high speed until very thick and pale, about 10 - 15 minutes.

When the eggs are getting close to finishing, make a sugar syrup by combining the sugar and water in a small saucepan. Bring the syrup to a boil and then cook to softball stage (235F/115C).

With the mixer running on low speed, drizzle the sugar syrup into the fluffy eggs, trying to hit that magic spot between the mixing bowl and the whisk.

When all of the syrup has been added (do it fairly quickly), turn the mixer back on high and whip until the bowl is cool to the touch. This will take at least 10 minutes.

In a separate mixing bowl, whip the heavy cream to soft peaks. Set aside.

Prepare two square 8-inch pans by lining them with parchment paper. I used one 8-inch square, and one loaf pan.

When the egg mixture has cooled, add the chocolate base to the egg mixture and whisk to combine. Try to get it as consistent as possible without losing all of the air you've whipped into the eggs. I poured the chocolate base into the eggs while the stand mixer was running on low speed.

Fold 1/3 of the reserved whipped cream into the chocolate mixture to loosen it, and then fold in the remaining whipped cream.

Pour into the prepared pans and cover with plastic wrap (directly touching the mixture so it doesn't allow in any air).

Freeze until very firm, at least 2 - 4 hours (preferably 6 – 8 hours).


Now this was the main part of making the marquise. It's pretty straightforward if you follow the steps in order. My simple syrup was a bit hotter than soft ball stage ( I could hear lazy bubbles pop at the surface while I was busy taking pictures, and removed it from the heat promptly when my thermometer hit 235. I know it would of climbed much higher than that, based on the hard as rock sugar I had to scrub off surfaces where it had dripped.) I don't think it affected the final product. Also, when I added the syrup to the eggs, the mixture didn't get very hot, and it didn't take 10 minutes to cool back down.


After reading a suggestion by a Daring Baker in the private forums, in addition to the square pan and the loaf pan, I used 3 baby food cubes, to see if they could be unmolded easily instead of cut into cubes. - They can.


While the marquise was in the freezer, I worked on the garnishes.


Frangelico Caramel

Servings: Makes about 1 cup of caramel

Ingredients
1 cup (8 oz.) sugar
1/2 cup (4 fluid oz./ 120 ml.) water
1 cup (8 fluid oz./ 240 ml.) heavy cream
1/2 teaspoon salt
2 tablespoons Frangelico

In a heavy-bottomed saucepan, combine the sugar and water on medium-high heat. Boil until the water completely evaporates and the sugar caramelizes to a dark mahogany color.

Working quickly, add the cream to the darkened caramel. It will bubble and pop vigorously, so add only as much cream as you can without overflowing the pot.

Return the pot to the stove on low heat and whisk gently to break up any hardened sugar. Add any remaining cream and continue stirring. Gradually, the hard sugar will dissolve and the caramel sauce will continue to darken. When the caramel has darkened to the point you want it, remove it from the heat. Add the salt and Frangelico and stir to combine. Set aside until ready to serve.

This caramel is sooooo good. I was a good girl and had the leftovers with some granny smith apples, but my parents had some with ice cream and raved about it. (Yeah, I gave half my batch away, so I wouldn't be tempted to drink the stuff!) Absolutely delicious. And very easy to make. Just make sure to use a large enough pot, and there won't be any problems. I was expecting a thicker caramel, but it's quite thin, even when chilled for a few hours. Perfect for drizzling or dipping.


Caramel-Dipped Hazelnuts
recipe source: Martha Stewart
24 hazelnuts, toasted and skinned
3 cups sugar
3/4 cup water

Gently insert pointed end of a long wooden skewer into the side of each hazelnut. Place a cutting board along the edge of a countertop; place newspaper on the floor, directly under cutting board.

Prepare an ice-water bath. Heat sugar and the water in a heavy saucepan over medium heat, stirring occasionally, until sugar is dissolved and syrup is clear. Stop stirring; cook until syrup comes to a boil, washing down sides of pan with a wet pastry brush to prevent crystals from forming. Continue to boil, gently swirling occasionally, until medium amber. Plunge pan into ice bath to stop the cooking; let stand until thickened, about 10 minutes. (To test: Dip a skewer in caramel and lift a few inches; if a thick drip slowly forms and holds a string, the caramel is ready.)

Dip a skewered hazelnut into caramel, letting excess drip back into pan. When dripping syrup becomes a thin string, secure opposite end of skewer under cutting board. Repeat with remaining hazelnuts. (If caramel hardens before all hazelnuts have been dipped, rewarm it over low heat.) Let stand until caramel string has hardened, about 5 minutes; break each string to desired length. Carefully remove skewers. Candied hazelnuts should be used the same day; store, uncovered, at room temperature until ready to serve cupcakes.


Oh how I messed up this component! Sure, it looks great, but one lick of the caramel, and you'll know that I badly burnt it. See, Martha says to prepare an ice bath to stop the cooking. And I was lazy, so I just poured the caramel in a cold bowl, thinking it wouldn't be in the hot pan, and wouldn't keep cooking. Right. In the picture below, the light caramel is the color it was when I stopped cooking it. The dark caramel is the color it was, 10 minutes after I poured it into a bowl to let it "cool".


Even if it was burnt, I was still able to dip the hazelnuts so I didn't bother redoing the caramel. I was doing it more for fun and plating than anything else anyway. I was also happy to see that the dripping caramel had a nice spun sugar thing going on. I've been really curious about spun sugar, and this little experiment makes me want to try it even more now that I see it's really not that complicated, if it can happen "by mistake".


Torched Meringue

Servings: This recipe is half of the original (original yield: 4 - 5 cups) to make enough meringue servings for 1 x 8” square pan of the frozen chocolate marquise.

Ingredients
5 large egg whites
1/2 cup + 3 tbsp (6 oz.) sugar
Splash of apple cider vinegar
1 tbsp Frangelico

Combine the egg whites, sugar and vinegar in the bowl of a stand mixer. Using your (clean, washed) hand, reach in the bowl and stir the three together, making sure the sugar is moistened evenly by the egg whites and they make a homogeneous liquid.

Over a saucepan of simmering water, warm the egg white mixture. Use one hand to stir the mixture continuously, feeling for grains of sugar in the egg whites. As the liquid heats up, the sugar will slowly dissolve and the egg whites will thicken. This step is complete when you don't feel any more sugar crystals in the liquid and it is uniformly warm, nearly hot.

Remove the mixing bowl from the saucepan and return it to the stand mixer with the whisk attachment. Whisk until you reach soft peaks. In the last 10 seconds of mixing, add the frangelico to the meringue and mix thoroughly.

When you're ready to plate the dessert, spoon the meringue onto a plate (or use a piping bag) and use a blowtorch to broil.


My last step before plating was to make the meringue. I think I might have used that method once to make buttercream frosting, but still, swirling egg whites and sugar with your hands is pretty... gross. It does make a beautiful meringue though. I just spooned some onto a plate, and used my blowtorch to lightly toast it.

Plating

Dutch process cocoa powder
Torched meringue
Frangelico Caramel
Candied Hazelnuts
Caramel Dipped Hazelnuts

When you're ready to plate, remove the marquise from the freezer at least 15 minutes before serving. While it's still hard, remove it from the pan by pulling on the parchment 'handles' or by flipping it over onto another piece of parchment.

Cut it into cubes and roll the cubes in cocoa powder. Or sift cocoa powder over the cubes.

Plate with the torched meringue and drizzled hazelnut sauce, and toss candied hazelnuts around for garnish. You want to handle the cubes as little as possible because they get messy quickly and are difficult to move. However, you want to wait to serve them until they've softened completely. The soft pillows of chocolate are what make this dessert so unusual and when combined with the other elements.


I've had the opportunity to serve (and eat) this dessert a few times since I made it earlier this month. First my daughter and I shared the serving I had plated to photograph. We we both eating as fast as we could so the other wouldn't eat it all. We fought over the last bite. It was that good. I gave my mother the other "pratice" serving, with untoasted meringue and marquise without cocoa, and all I could get out of her were yumm, mmmm, um... yum.

I served it again for a mother's day dinner for my in-laws. I used the leftover meringue that I had frozen, and unfortunately, the meringue wept badly. It still tasted very good, and toasted beautifully, but I know for next time to make it fresh. Now my mother in law is a very classy lady, but that didn't keep her from scraping her plate. Her reaction was genuine. She loved this dessert.

My parents, my brother and his wife also had some the next day for mother's day. The biggest surprise was my meringue hating, mousse fearing husband. He's had this dessert twice so far, and ate it all.

I've been sneaking squares of the marquise from the freezer, eating it plain, or with caramel, or with whipped cream or with ice cream... It's freaking awesome. Much better when fully soft and not half frozen, but I'm not always that patient.

I'm really glad it makes a lot, and that you can store it for up to 6 months in the freezer. I'll be serving it again and again. And then, I'll be making it again. Although the entire dessert had many components and is time consuming, it's not difficult. And the Daring Bakers had many great plating ideas that I will be stealing. Head over to the Daring Kitchen and have a look at all the wonderful creations!

Sunday, February 27, 2011

Almond Mocha Fudge Baked Alaska

I settled on individual Almond Mocha Fudge Baked Alaskas for my mom's birthday. I thought I was giving myself plenty of time, but on Friday morning, I realized that I had to get in gear if I wanted to get everything done. So while Cha was at school and Ro was napping, I quickly tackled the almond genoise that would become the base of my Baked Alaska after spending a whole 5 minutes searching through recipes. I went with an Epicurious recipe for Opera Cake (must try that soon too!). I only used the genoise recipe obviously, and decided that the ground almonds I had in the pantry would stand in for almond flour. Yeah. Right. Cake didn't rise, but that's all right. Tasted good. I used the bottoms of my mini cheesecake pan as guides to cut it into rounds with a paring knife, and placed a cake layer in each of the mini cheesecake pan mold.


I also had time to tackle the ice cream base. I used what I think might be a cheesecake ice cream recipe from David Lebovitz. I love the texture of it, and it's really simple to make. Plus, it's not too cheesecakey, so I didn't think it would clash with the rest of the flavors in the Baked Alaska. I did consult my MIL because I remember that when I first made it, it was too sweet, and we had decided to decrease the sugar. And then I forgot. So I made it according to the following recipe.

 Cheesecake Ice Cream

4 oz cream cheese, room temp
1 cup sugar
1 large egg
1/2 tsp vanilla extract
3/4 cup milk
1 1/2 cups heavy cream

Beat together the cream cheese and sugar until fluffy and smooth. Add the egg and vanilla, mix until creamy and set aside.
Bring the milk to a boil over medium-low heat. Remove from the heat and very slowly add it to the cream cheese mixture while mixer is running at medium low until combined and smooth. (If you add the hot milk to fast, your mixture will curdle.) Add the entire mixture back to the pan.
Stir over medium-low heat until thickened slightly (should take around 3 minutes). Remove from heat, strain mixture, and let cool 10 minutes.
Combine the heavy cream and cream cheese mixture together. Chill thoroughly. Pour into your ice cream machine and freeze according to manufactures instructions.


 In the afternoon, I made the chocolate mocha fudge that would be swirled into the ice cream. I spent a bit more time looking at recipes for that. I didn't want the fudge to be incorporated in the ice cream but remain a clear ribbon, with the distinct fudge swirl mouth feel, and not chocolate syrup. I went with this recipe. I was worried throughout. I melted my butter and my chocolate. Seemed all right. Added a mixture of milk and cream because I didn't have half and half. Seemed weird. Added sugar. Mixture totally separated. Added more sugar. Mixture still oily and not right. Added more sugar - at this point, it was quite thick - still oily but better. I stirred it a lot! And I added maybe 1/2 tsp instant espresso powder. Then cooked it for 25 minutes. It came out all right. Very all right actually. It's not too sweet, tastes like chocolate with a kick of coffee. Very good.

Hot fudge
barely adapted from RecipeGirl

4 ounces unsweetened chocolate, chopped
8 Tbsp. (1 stick) unsalted butter, cut into pieces
1/2 cup half-and-half
1 1/2 cups granulated sugar
instant espresso powder, to taste (optional)

1. In a double boiler, melt chocolate and butter together over simmering water. Whisk until smooth. Whisk in half & half. Add 1/2 cup sugar, whisking as you pour it in. Continue stirring until sugar has dissolved (and isn’t grainy)- about 30 seconds. Add another 1/2 cup sugar and stir until dissolved. Then add remaining 1/2 cup of sugar and stir again.

2. Cover the pan and cook, stirring occasionally, until the sauce becomes glossy and thickens slightly, about 25 minutes.

3. Serve warm.

Yield: About 2 cups


When both my ice cream base and my hot fudge sauce were cool, I churned the ice cream and when it was soft serve consistency, I used a squeeze bottle to add ribbons of fudge in it. It totally jammed the machine, so I ended up just squeezing the fudge on the ice cream and folding it in by hand. It did a really good job. Must remember to use a squeeze bottle the next time I want swirls in ice cream.

I poured the freshly churned ice cream directly in my mini cheesecake molds, on top of the almond genoise, and put the whole thing in the freezer overnight. Next morning, I unmolded them, and put them back in the freezer while I made the meringue.


Meringue is just 4 egg whites and a cup of sugar, whisked in the bowl of a stand mixer set over a pan of simmering water until it hits 110 F and then whisked until cool, about 10 minutes. Plop the whole thing in a piping bag with whatever tip you want, and go nuts covering the whole cake and ice cream with the meringue. Sounds simple enough. NOT SO. I have to admit that my freezer is not in the best condition right now, so maybe my ice cream was not as frozen as it should have been. Maybe using homemade ice cream with such a creamy texture wasn't such a good idea. The meringue kept sliding off the ice cream. The ice cream kept getting mixed in with the meringue. Piping it was easier than trying to spread it, but my piping skills need refining. But in any case, I got them covered as best as I could.


After a very copious brunch, my brother and I had fun toasting them. Well I had fun, I'm sure he was mostly humoring me.

I was kinda surprised at how much I liked that dessert. I thought, oh whatever, tiny layer of cake, ice cream and meringue, how special could it be? But it was really good. The different textures were good. The ice cream was really, really good. The toastiness from the meringue brought in some dept. Overall, a dessert I would make again. I'm not sure about the individual portions, as the covering with meringue part was a bit tedious, and I got complaints that the serving size was too big, but I would definitely consider making a big Baked Alaska that we could slice up and serve.


Happy birthday Mom!