Showing posts with label candies. Show all posts

Saturday, March 16, 2013

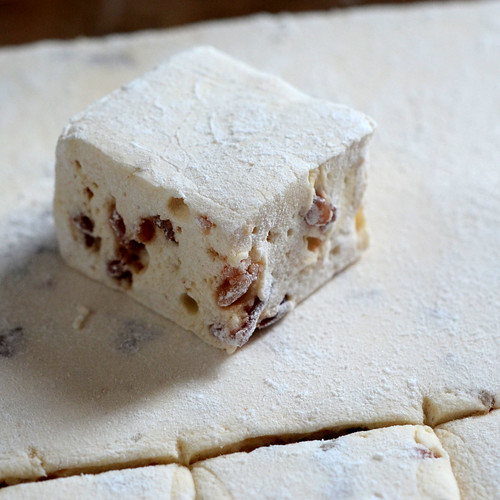
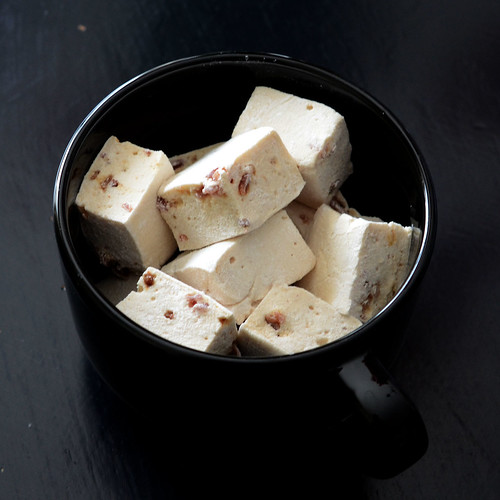
maple bacon marshmallows

I was brainstorming maple recipes this week for someone else when I came across this picture. Marshmallows had been on my to-do list for a while but they got bumped to the top of it when I saw the maple bacon combo. This time of year, you just can't escape maple everything, so might as well embrace it.


I love bacon and maple syrup together. I love maple syrup even more when there is bacon involved. So these totally made sense to me.

These taste exactly how you'd think. Strong maple flavor, and salty bacon. In a pillowy soft marshmallow. I love salty sweets, so this was a huge hit for me. Not sure we like the textural contrast between the marshmallow and the bacon. You just don't expect chewy bits in your candy. Didn't stop me from eating way more of these than I should.


Maple Bacon Marhmallows
recipe source: Marshmallow Madness by Shauna Sever via Epicurious

4 1/2 teaspoons unflavored powdered gelatin
1/2 cup cold water

2/3 cup sugar
1/2 cup Grade A dark or Grade B maple syrup
1/4 cup light corn syrup
1/4 cup water
1/4 teaspoon salt
1/8 teaspoon ground cinnamon
1/2 cup (about 1 1/2 ounces) finely chopped candied bacon*
1/2 cup 3 parts powdered sugar to 2 parts cornstarch, plus more for dusting

Lightly coat an 8-by-8-inch baking pan with cooking spray.

Whisk together the gelatin and cold water in a small bowl. Let it soften for 5 minutes.

Stir together the sugar, maple syrup, corn syrup, water, and salt in a medium saucepan. Bring it to a boil over high heat, stirring occasionally, until it hits 240°F. Be prepared to lower the heat as needed—this syrup likes to bubble up. Microwave the gelatin on high until completely melted, about 30 seconds. Pour it into the bowl of a stand mixer fitted with the whisk attachment. Set the mixer to low and keep it running.

When the syrup reaches 240°F, slowly pour it into the mixer bowl. Increase the speed to medium and beat for 5 minutes. Increase to medium-high and beat for 3 more minutes. Add the cinnamon, increase to the highest speed, and beat for 1 minute more. Quickly fold in the bacon bits. Pour the marshmallow into the prepared pan. Sift coating over top. Let it set for 6 hours in a cool, dry place. Use a knife to loosen the marshmallow from the edges of the pan. Invert the slab onto a work surface. Cut it into pieces and dust them with more coating.

*To make candied bacon, lay 6 or 7 bacon slices on a wire rack set over a sheet pan lined with foil. Combine 1/4 cup light brown sugar with 1/8 teaspoon ground cinnamon. Rub over both sides of bacon. Bake at 350°F until deeply caramelized, 30 to 35 minutes. Let cool before chopping into bits.


Sunday, April 8, 2012

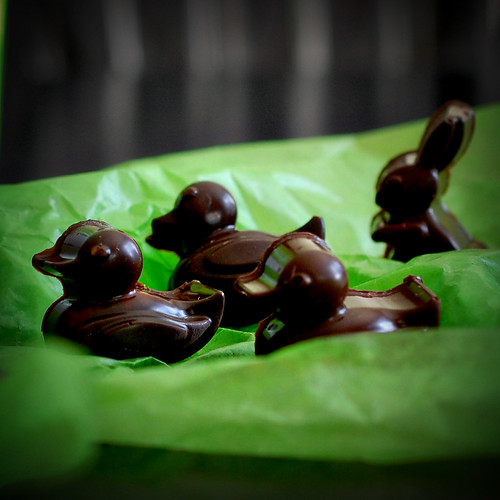
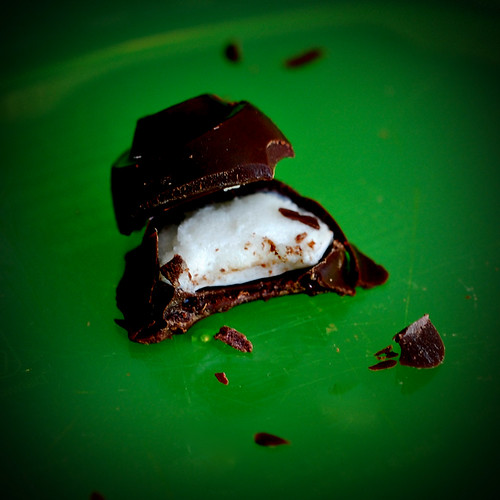
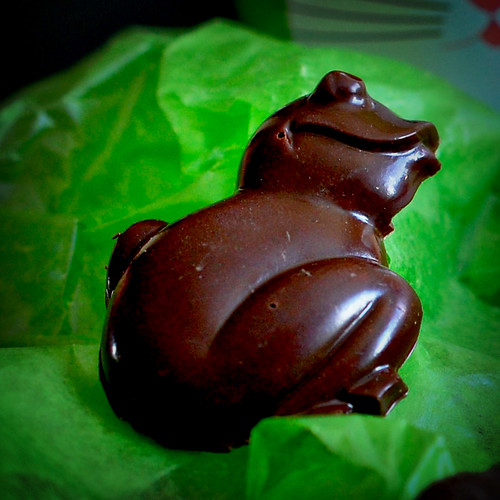
chocolate marshmallow cups and easter chocolates

Although I had all the ingredients to make this week's Baked Sunday Mornings recipe, I just kept putting it off. I'm not a big fan of working with melted chocolate.  I don't do truffles, or cake pops for this very reason. I've previously failed to temper chocolate properly when we were presented with this challenge by the Daring Bakers. I just made a mess out of everything and totally lost my cool when all my hard work was rewarded with streaky candies.


Although the Baked recipe didn't call for tempering the chocolate, I really wanted to, one to prove to myself that I could do it, and two, I wanted to use cute Easter chocolate molds that I bought especially for this recipe. I had grand plans to give home made marshmallow filled chocolate to all the kids in Charlotte's class... Yeah right! I am definitely not a chocolatière. (The kids in Cha's class did not get treats this year...)


I did manage to temper the chocolate properly. It had a nice glossy sheen and a strong snap when bitten into. The marshmallow filling was just the right texture for these candies. But the process of filling the molds, tapping the excess chocolate out, letting it set, filling the cavities with marshmallows, re tempering chocolate to finish the candies is just such a pain in the ass! I made two trays of marshmallow filled chocolates and gave up. Sooo not worth it!


The candies were very good though. They sat on the counter for a week waiting to be photographed and we ate all the ugly ones. (Note to self, silicone ice cube trays from Ikea do not make good chocolate molds). But never again. I've proved to myself that I can temper chocolate, now I'm never doing it again!


I'm sure if I had followed the method in the book everything would have been fine. For the recipe, and to see how the other Baked Sunday Mornings members fared with their chocolate marshmallow cups, hop on over the the Baked Sunday Mornings Blog.

And happy Easter to everyone. While you're enjoying beautiful chocolates, take a moment to appreciate how much work goes into making these candies! I sure will!

Sunday, October 30, 2011

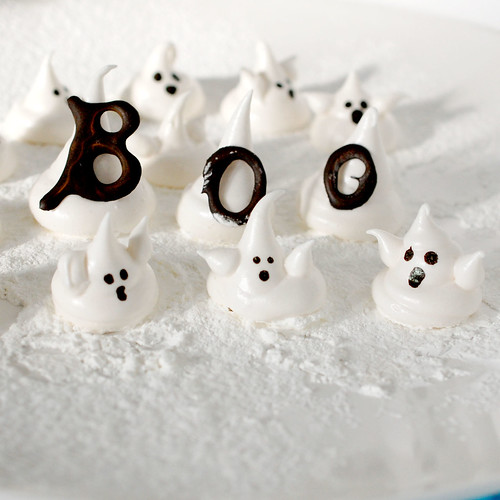
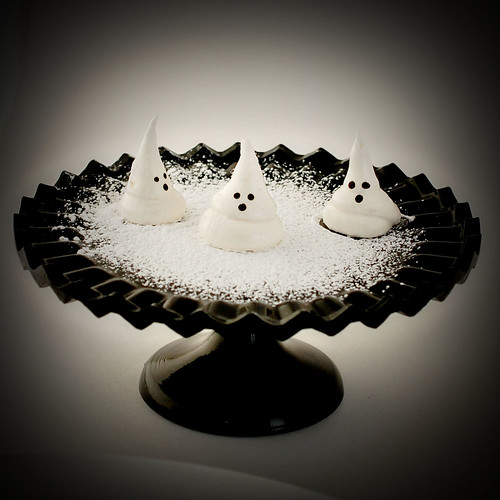
halloween ghosts

Halloween kinda snuck up on me this year. I didn't even see the month of October go by, but somehow I managed to get the kids costumes and the house decorated. Even though I bought a pumpkin to turn into a jack-o-lantern, it still sits in the truck of my car, untouched, as does the gingerbread haunted house I wanted to decorate with Cha.

I did carve out some time to make ghosts sugar cookies, and marshmallows. Figured I have a reputation to uphold, and can't send my kid to school without treats!


I made the marshmallows to bring to my nephew's birthday party. I had a few extra egg whites in the fridge, and had been meaning to try David Lebowitz's recipe, and I'm glad I did! I think it might be the only recipe I have tried of his, and love the way this one is written. Super clear. Plus, he re uses pots instead of making us wash a mountain of dishes! His post is full of useful information too! Check it out!

Marshmallows
25-50 marshmallows

recipe adapted from David Lebowitz

2 envelopes powdered gelatin
1/2 cup + 1/3 cup cold water
1 cup sugar
1/3 cup light corn syrup
4 large egg whites (1/2 cup, 110g), at room temperature
pinch of salt
2 teaspoons vanilla extract or 1 teaspoon vanilla paste

One part corn starch (or potato starch), one part powdered sugar (about 1 cup each)

1. In a small bowl, sprinkle the gelatin over the 1/2 cup cold water to dissolve and soften.

2. In a small saucepan fitted with a candy thermometer, mix the sugar and corn syrup with 1/3 cup of water. Place over medium-to-high heat.

(Note that you will use this saucepan twice, to make the syrup and melt the gelatin, eliminating the need to wash it between uses).

3. In the bowl of an electric mixer, pour in the egg whites and beat on low speed until frothy. Add the pinch of salt.

4. When the syrup reaches about 210ºF (99ºC), increase the speed of the mixer to high and beat the whites until they are thick and fluffy.

5. When the syrup reaches 245ºF (118ºC), slowly pour the hot syrup into the whites, pouring so that the syrup does not fall on the whisk since some of the syrup will splatter and stick to the sides of the bowl.

6. Scrape the gelatin and water into the pan that you used for the syrup. (There should still be residual heat left in the pan from making the syrup in it to dissolve it).

Pour the liquified gelatin slowly into the whites as they are whipping. Add the vanilla extract or paste and continue to whip for 5 minutes, until the mixture is feels completely cool when you touch the outside of the bowl.

7. Dust a baking sheet evenly and completely with a generous layer of the powdered sugar/cornstarch mixture. (I use a sifter to do this.) Make sure there are absolutely no bare spots.

8. Scoop the marshmallow mixture into a pastry bag fitted with a plain round tip. Pipe desired shapes onto the baking sheet. Allow to dry for at least 4 hours, preferably overnight, uncovered.

9. Put about 1 cup of the marshmallow mixture into a large bowl.

Dust the top of the marshmallows with some of the marshmallow mixture.  Shake the marshmallows vigorously in a wire strainer to remove the excess powder.

Storage: The marshmallows can be made up to one week in advance, and stored in an airtight container.


I let them set overnight, then I drew a face on them with food markers. They were a hit! Very smooshy and a great treat for halloween! I love the sheen that they got too! Very pretty.

As we're not allowed sending candy to school, I made cookies for Cha's classmates. My regular old sugar cookie recipe, but I tried a different recipe for the royal icing. I wasn't quite satisfied with the way the royal icing turned out the last few times I made it, so I thought I'd turn to an expert and get some pointers. Sweetopia uses a recipe from Antonia74. And that's what I used as well! Turned out great! But makes a lot of icing!

Royal Icing Recipe
recipe from Antonia74 via Sweetopia

6 oz (3/4 cup) of warm water
5 Tablespoons Meringue Powder
1 teaspoon cream of tartar
1 kilogram (2.25 lbs.) powdered icing sugar

*** Note; if your meringue powder has no vanilla flavour (vanillin powder) in it, add a teaspoon of clear vanilla to this recipe.

In mixer bowl, pour in the warm water and the meringue powder. Mix it with a whisk by hand until it is frothy and thickened…about 30 seconds.

Add the cream of tartar and mix for 30 seconds more.

Pour in all the icing sugar at once and place the bowl on the mixer.

Using the paddle attachment on the LOWEST speed, mix slowly for a full 10 minutes. Icing will get thick and creamy.

Cover the bowl with a dampened tea-towel to prevent crusting and drying.
Tint with food colourings or thin the icing with small amounts of warm water to reach the desired consistency.  


Again, the food marker came in handy to draw on ghosts faces! I had just the right amount of tiny bags that fit the ghosts perfectly. Topped with a cute sticker to close the bag, we had perfect treats for little halloween ghosts!

I'll be trick-or-treating with Strawberry Shortcake tomorrow, while my husband stays home with my tiny ghost! Wishing everyone a safe and happy halloween!


Thursday, September 1, 2011

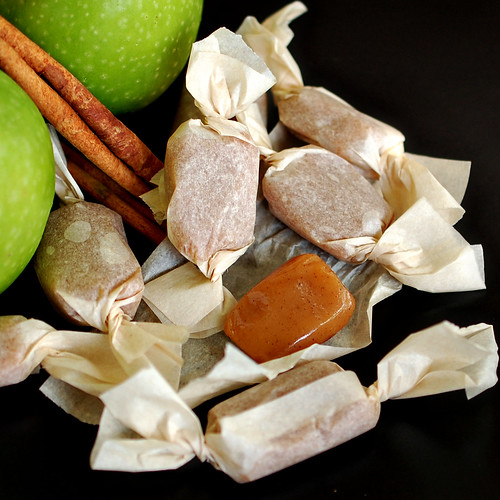
apple cider caramels

It was my daughter's first day at school today. She was ready. She's been counting down the days for a good while now. I was certainly ready. Yet, when she ran back to me for one last hug... Anyways. I warned her teachers that she can be a hard-headed handful at times and that she likes to do things her way, and have people do as she says. Her teacher said she had seen all sorts in her 22 years experience. Hopefully, my kid won't stand out too much!


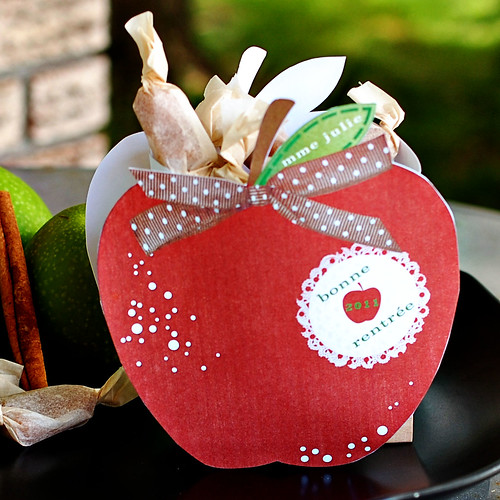
Still, to start the school year off on a good note, I made them a sweet treat. Apple cider caramels, packaged in a cute apple box. Yes. I need to go back to work. To much time on my hands.

I made fleur de sel caramels last week to top some cupcakes, but failed to get a picture, as they disappeared way too quickly. They were delicious, and I'll have to make some more soon. But I spotted these on pinterest, and thought that they would be appropriate for the start of the school year.


So I got a great big jug of apple cider, and set out to reduce 2 cups of it to 1/3 of a cup. Then made the caramels using a different method than the fleur de sel caramels, that took what it seems like way more time. But still. There's nothing difficult about making these candies, you just need to pay attention to what the thermometer says, and you'll be fine.
Apple Cider Caramels
Recipe from America's Dairy Farmers via Blondie's Cakes
2 cups apple cider
1 cup heavy cream or whipping cream, divided
1 tsp ground cinnamon
Pinch nutmeg
1/4 tsp allspice
1 1/2 cup sugar
1/3 cup light corn syrup
1/2 cup real butter, cubed
Pour cider into a medium saucepan and boil on high for about 20 minutes or until the cider is reduced to 1/3 c. Set aside to cool.
Line an 8" square pan with parchment paper, making sure to leave about 1" hanging over the edges for easy removal. Coat with a bit of vegetable oil.
In a small bowl, combine 2/3 cup cream, cinnamon, nutmeg, allspice, and reduced apple cider.
In a large, heavy saucepan, combine the sugar and the corn syrup. Measure 1/3 cup whipping cream and add enough water to reach the 1/2 cup line on the measuring cup and add that to the sugar and corn syrup. Cook over low heat until the sugar dissolves. Insert the candy thermometer and simmer until the syrup reaches 234 degrees F.
Remove from heat and slowly whisk in the cream mixture. Add the cubed butter and stir until the cream and butter are fully incorporated. Return the pan to heat and re-insert the candy thermometer. Cook over low heat, stirring frequently, until the temperature reaches 248 degrees F.
Remove from heat and pour the caramel into the prepared pan. Let the mixture cool completely at room temperature or in the refrigerator.
Cut and wrap as desired. Store in an airtight container or in the refrigerator for up to 2 weeks.

These things taste like the filling of a caramel apple pie. So freaking delicious!

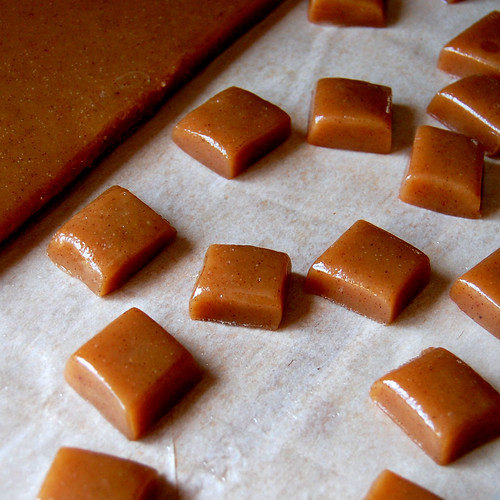
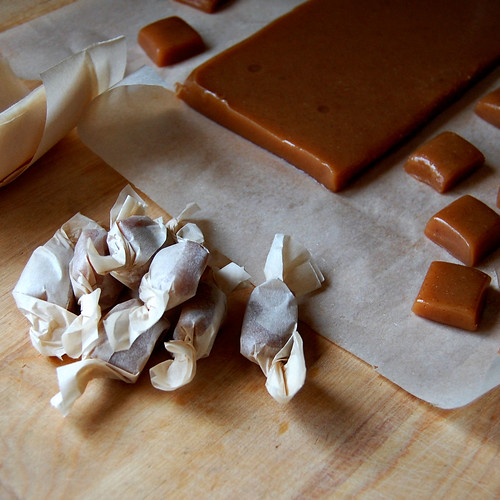
The most tedious part is probably cutting and wrapping the candies. These were soft and easy to cut after sitting on the counter overnight. Warming the knife over a flame or coating it with butter was unnecessary, and I managed to cleanly cut 64 pieces out of my 8x8 slab. Next time though, I think I might cut them a little smaller, even if it means wrapping even more of them.

The last time I wrapped candies, I used wax paper. And for some reason, the candy stuck to the wax paper like crazy. So this time around, I used parchment paper, and that worked way better. Absolutely no sticking. Just make sure to cut your paper big enough, so you don't have to start over!


While the caramels were setting, I searched the internet for cute packaging ideas, and came upon this one. With a little more browsing, I found this, and knew I had found my design. A couple of hours on photoshop, a trip to the store for a new ink cartridge and many wasted pages of cardstock later, I had cute little apples to contain my apple cider caramels.


Now I don't know Cha's new teachers, but really, who can resist caramels? Here's to a great school year!

Saturday, August 27, 2011

candies and chocolate for the daring bakers

Ever since I joined the Daring Bakers in February, the first of each month is always exciting to me, as we learn what the new challenge will be. On the first day of August, I was at my post in front of the computer refreshing the Daring Bakers forum page every few minutes, just waiting for the new challenge to be announced... And then I saw it... Candylicious.


I thought, ok, I can do this. I've made marshmallows before, and taffy (kinda), and truffles... And then I started reading the challenge post... I got overwhelmed, and fast!

The August 2011 Daring Bakers’ Challenge was hosted by Lisa of Parsley, Sage, Desserts and Line Drive and Mandy of What the Fruitcake?!. These two sugar mavens challenged us to make sinfully delicious candies! This was a special challenge for the Daring Bakers because the good folks at http://www.chocoley.com offered an amazing prize for the winner of the most creative and delicious candy!

So basically, chocolate tempering, all kinds of candies, plus a contest. For this challenge, we needed to make two candies: one chocolate one, and another one of our choice. And to participate in the competition, we had to come up with the most creative and delicious flavours in a chocolate candy. 

To get us started, Lisa and Mandy provided us with many recipes. Milk Chocolate & Hazelnut Praline Truffles, Candied Orange & Pistachio Marzipan White Chocolates (Bonbons), Chocolate Bark, Sponge Candy / Honeycomb, Paté de Fruits, Passion Fruit Caramel Filled Chocolates (Bonbons), and Peanut Butter Fudge. Visit the Daring Kitchen for the recipes, and amazing instructions on how to temper chocolate.

How good do these sound! Right away, I knew I was going to make the Milk Chocolate & Hazelnut Praline Truffles (yeah, that didn't happen). I've been wanting to try Pâte de Fruits for a while, so I knew I was going to try that one too. The Passion Fruit Caramel Filled Chocolates sounded interesting, so I thought I could get creative and try my hand at chocolate tempering with that one. My daughter and I have been on a rock sugar kick lately, and I had found a recipe to make the pretty lollipops at home, so I thought I'd give that a try too! Pretty ambitious challenge!

I though I'd ease into this with the Pâte de Fruits. I had all the ingredients and tools on hand, so I thought we'd give it a go, and get the kid to help too!


This candy is basically a fruit jelly, and made just like jam, except cooked way longer, set until solid, then cut and rolled in sugar. The original recipe called for straining the strawberry purée, but my blender got the purée pretty smooth, so I skipped that step. I also used defrosted strawberries, instead of fresh.
Strawberry Paté de Fruits
Recipe adapted from  Elizabeth LaBau, About.com Guide Yields 64 small 1-inch squares
3 cups strawberries, fresh or defrosted from frozen
1 tablespoon lemon juice, fresh
2 cups granulated white sugar
2½ tablespoons liquid pectin
granulated white sugar for rolling 
Prepare an 8”x8” pan by lining it with aluminium foil or parchment paper.
Place the strawberries in a blender or food processor and process until very well pureed. Pour them into a medium saucepan along with the 1 tbsp lemon juice and 1/2 cup of the sugar. 
Place the pan over medium-high heat, and insert a candy thermometer. Cook the mixture, stirring constantly, until it is hot, around 140°F.
Add the remaining 1.5 cups of sugar and the liquid pectin, and lower the heat to medium. Continue to cook, stirring frequently, until the mixture registers 200°F.
At this point, turn the heat to low and hold it at 200°F for 2-3 minutes.
After this, return the heat to medium and bring it up to 225°F. This process will take some time, especially with the heat on medium, so have patience and be diligent in stirring frequently so the bottom doesn't scorch.
Once the fruit paste reaches 225°F/107°C, turn the heat to low and keep it at that temperature for an additional 2-minutes.
Remove the pan from the heat and scrape the strawberry pate de fruit mixture into the prepared pan, smoothing it into an even layer.
Allow the pate de fruit mixture to set at room temperature for several hours, until completely cool and firm. Use a sharp knife to cut it into very small squares, and roll the individual pieces in granulated sugar.
The strawberry pate de fruits can be served immediately, or refrigerated in an airtight container for up to a week. If refrigerated, the pieces may need to be re-rolled in granulated sugar before serving.
Although the first few steps went quickly, bringing the fruit/sugar mixture up to a temperature of 225 degrees did take a while. From mixing together the ingredients to pouring the cooked mixture in the pan, it took about an hour. I let it set overnight, and the next morning, I peeled off the parchment, very happy that the candy came off of it pretty well considering I didn't oil the paper as recommended. I cut the candy in small squares, and got my four-year-old to coat the cubes in sugar. She had a blast doing this, but she ended up being disappointed in the candy. It was fun to make, and cool to see that you can actually make jelly candies at home, but they are not something I would go out of my way to make (or eat) again. Although the recipe states that it should be refrigerated and eaten within a week, I kept mine at room temperature in a lidded container for a good three weeks, and they were fine.


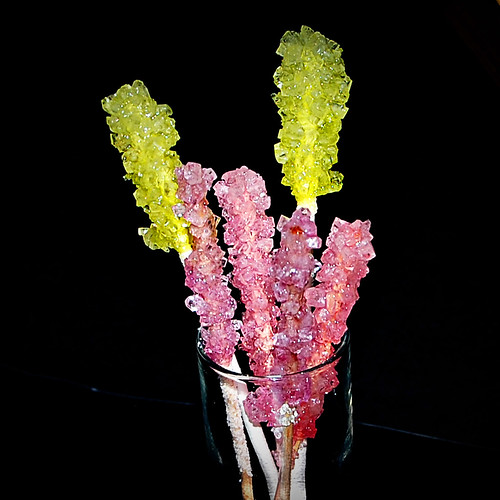
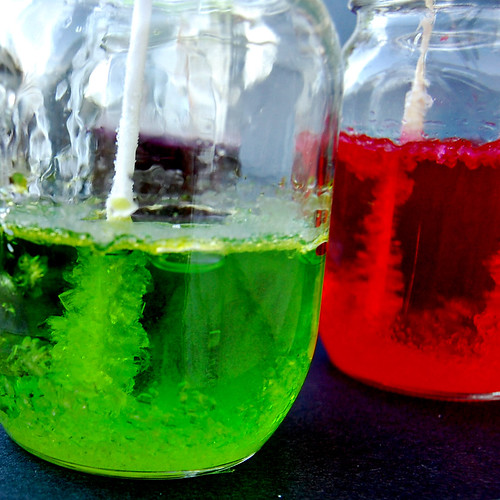
While I was still planning out what to make with the chocolate, and what equipment I needed to buy to temper the chocolate, I used my last four cups of sugar making rock candy lollipops. This is basically sugar, dissolved in water, colored and flavored.  A sugar covered lollipop stick is then inserted in the solution and left for a few days until the sugar forms crystals around the stick. 


A very simple recipe, but the prep was time consuming for me. The recipe suggest clothespins to hold the lollipop sticks, but I could only find two. So I taped chopsticks together and inserted my sticks between the two chopsticks so they could be suspended in the sugar solution. I was almost out of sugar, so I had to rummage the cupboards to find the required 4 cups. I ended up using sugar cubes to round out the last cup. 

I was also interested in finding out if the sugar used to initially coat the stick would dictate the size of the crystals, so I covered some of the sticks with fine granulated sugar, and some of them with coarse decorating sugar. Although my experiment was far from scientific, it seems that the size of the sugar grains on the stick had less impact on the finish product than the amount of sugar that was able to adhere to the stick. I guess the sugar had no problem sticking to the "paper" lollipop sticks, so they were the biggest of the bunch. The green candies were also the only ones that weren't flavored (purple was grape flavored, and red was strawberry flavored). So I'm also wondering if the flavoring hindered the growth of sugar crystals? I guess I'll have to make more to find out for sure!
Rock Candy
Recipe adapted from Elizabeth LaBau, About.com Guide
2 cups water
4 cups granulated sugar
1/2-1 tsp flavoring extract or oil (optional)
food coloring (optional)
Wash three glass jars thoroughly with hot water to clean them. Secure 6 wooden sticks to clothespins so they can be balanced in the jars without touching the bottoms and sides. 
Wet your wooden skewer, and roll it in granulated sugar. This base layer will give the sugar crystals something to “grab” when they start forming. Set the skewer aside to dry while you prepare your sugar syrup.
Place the water in a medium-sized pan and bring it to a boil. Begin adding the sugar, one cup at a time, stirring after each addition, until dissolved. Once all the sugar is dissolved in the water, continue boiling the syrup for 10-15 minutes. 
Divide the syrup between the three jars. If you are using colors or flavorings, add them at this point. If you are using an extract, add 1 tsp of extract, but if you are using flavoring oils, only add ½ tsp, and make sure you don’t stand right in front of the pan—the scent can be very strong as it rises in the steam. Add 2-3 drops of food coloring and stir to ensure even, smooth color.
Allow the sugar syrup to cool for approximately 10 minutes, then lower the sugared skewer into the syrup until it hangs about 1 inch from the bottom.
Carefully place your jars in a cool place, away from harsh lights, where it can sit undisturbed. Cover the top loosely with plastic wrap or paper towel.
You should start to see sugar crystals forming within 2-4 hours. If you have seen no change to your skewer after 24 hours, try boiling the sugar syrup again and dissolve another cup of sugar into it, then pour it back into the jar and insert the skewer again. 
Allow the rock candy to grow until it is the size you want. Once it has reached the size you want, remove it and allow it to dry for a few minutes, then enjoy or wrap in plastic wrap to save it for later.
Although this is quite fun to make at home, and see the crystals form, it's not the best use of sugar. There has to be enough syrup in the jars to reach a good portion of the skewer to form the lollipop, and since the skewer can't touch the bottom, the sides or other skewers, I was only able to fit 2 skewers per jar. So 4 cups of sugar created only 6 lollipops and I had lots of sugar syrup leftover, so that's quite a waste. Cool to make once, but easier to buy, for sure!


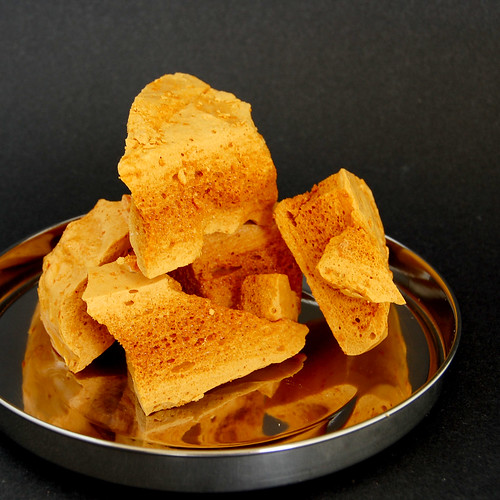
The one candy I wasn't interested in was the sponge taffy. It's hard, it tastes like baking soda... wasn't appealing to me. But when I was taking to my husband about the challenge, he got really excited about this candy ("it's like a homemade crunchie bar!"), so I figured I could make it for him, since it's not overly complicated. Many Daring Bakers made this early on in the month and posted about it in the forum, so I got to observe how they fared and which recipe they used. I guess there's a recipe out there with gelatine in it that created a candy with finer air bubbles, so I went with that, hoping that it wouldn't be as hard to bite into as I remembered this candy to be from my youth.


Sponge Taffy
recipe adapted from Wilde in the Kitchen
¼ tsp gelatin
1 tsp water
1 ½ cups sugar
½ cups corn syrup
½ cup water
scant 1 tbsp baking soda
Line a rimmed baking sheet with parchment paper. 
In a small bowl, sprinkle gelatin over 1 tsp water and allow to bloom.
In a medium stock pot with high sides, mix sugar, corn syrup and 1/2 cup water together. Heat over medium heat and stir until sugar dissolves and mixture comes to a boil. Wash down any sugar crystals from the sides with a wet pastry brush. Clip on candy thermometer and heat to 310° F. Do not stir after you have clipped the thermometer on, the sugar will self stir.
Remove from heat and let sit for two minutes, bubbling should subside. Add gelatin and whisk, be careful, the sugar syrup will bubble up. Sift baking soda over syrup and whisk vigorously. Return mixture to the heat and whisk for 30 seconds. The sugar will rise up in the pot, a lot!
Quickly pour into prepared pan, it should come out in a big blob. Do not spread the mixture, just let it settle into the pan. Allow to cool completely (about 2 hours or overnight) before removing from the pan. 
Either break into odd pieces or cut into squares (this is a messy process!). To cut into squares - using a serrated knife, score the candy at 1-inch intervals. Snap the candy apart at the score lines. Then score and break into squares.
To my surprise, it was really, really good. It was crisp, but not hard, and didn't taste of baking soda. I think I was maybe 15 seconds away from burning it, so there's a note of very caramelized sugar, but overall, it was a fine candy. It did make a lot though. I had to take the candy out of the pan I had it in to cool and transfer it to a baking sheet. Good thing I had poured it onto parchement paper.


The chocolate part of the challenge scared me. I had had bad experiences in the past trying to dip truffles in chocolate, and wasn't eager to work with chocolate again. But I thought that learning how to temper chocolate would be a great thing to know how to do, and maybe, just maybe, would make dipping things in chocolate more enjoyable.

Basically, to temper chocolate you have to melt chocolate and bring it to a certain degree on a chocolate thermometer, then cool it down by agitating it or by adding more chocolate to it, then warm it up again to a working temperature so it can be used. Properly tempered chocolate will coat things thinly and evenly, will have a nice snap when you bite into it, will not melt as fast, and will not bloom (get gray spots) when exposed to extreme temperatures. Molded chocolate should be shiny.


I had all kinds of ideas for the chocolate portion of the challenge. I wanted to make filled chocolates, and decorate them, and paint them and I wanted to dip stuff too. Then I actually tried to temper chocolate, and failed. Twice.

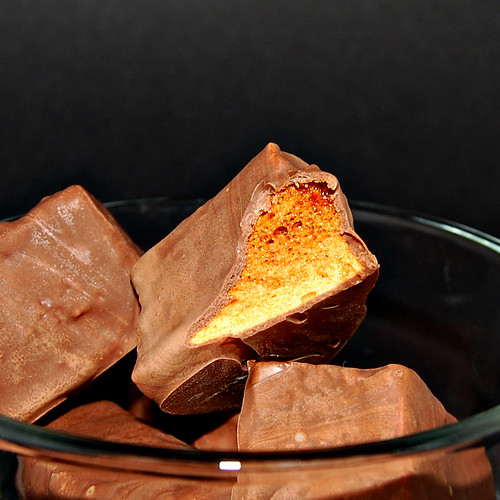
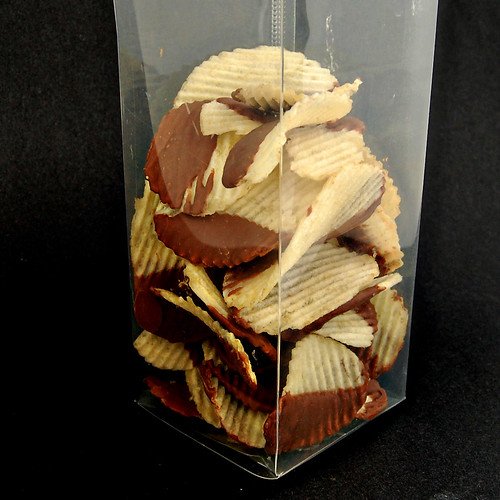
Although I failed to temper it properly, I did manage to make milk chocolate peanut butter cups, coat some pieces of the honeycomb toffee and dip plain chips in the remainder of the chocolate.


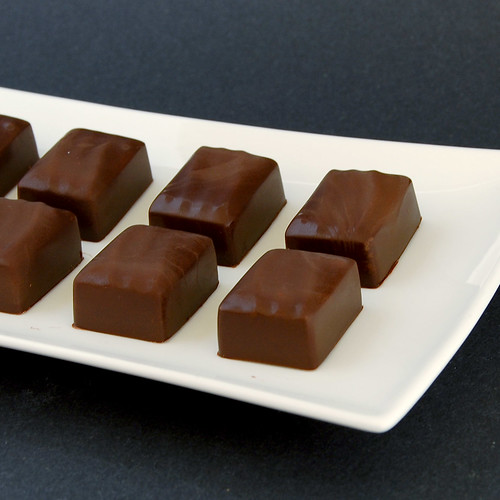
I tried to temper dark chocolate a few days later, and failed again, while trying to make bonbons with nanaimo bar filling. They came out not as soft as the milk chocolate, but the pieces of honeycomb toffee that I had dipped in that dark chocolate bloomed like crazy. They were not very good looking, but still tasted good.

So I'm blaming my thermometer for that one. I got a new thermometer because I really wanted to succeed at tempering chocolate, but life got in the way of my challenge, and next thing I knew, it was posting day (what a month it's been!). If only I had one more week! I thought about posting late, but decided against it, since even if I had one more week, I doubt I'll have time (or the energy) to try tempering again.

Overall, this challenge was pretty frustrating for me. Getting high quality chocolate, the molds, failing twice at tempering, the mess it made, yeah, August wasn't a good month for me. Plus, I was working with a broken camera lens, so I'm very not impressed with this post... Hopefully next month will be better! (And I'm hoping to get a new lens in the next few days! Yah!)

I'm going back to work in a week, after being on maternity leave for a little over a year. So gone are the days where I get to spend hours planning and executing my challenges. And reading the forums. But I'm sure I'll find the time somehow to keep up with these challenges, as they have been a blast so far! But, please, pretty please September, be gentle on me!

Oh, and my fellow Daring Bakers made incredible candies! Check out their blogs and the slideshow on the Daring Kitchen site!

Monday, June 6, 2011

grape candies

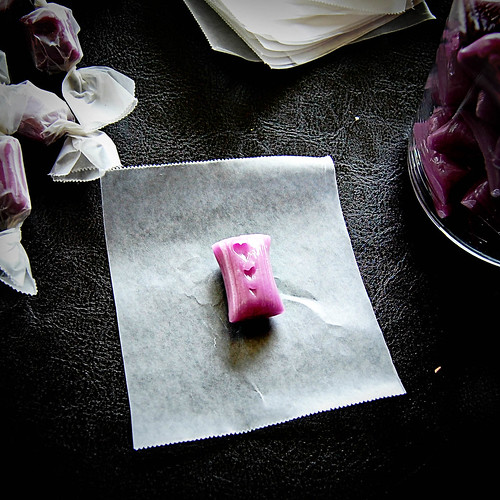
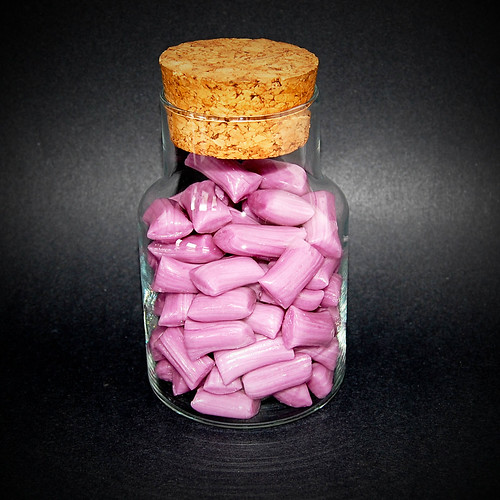
This morning I thought I'd get a head start on this Mad Tea Party coming up soon, and make wonderland-ish candy using a recipe for Grape Saltwater Taffy I had bookmarked a little while back.


I've never pulled sugar before, but the recipe made it seem simple enough. Boil sugar, cornstarch, corn syrup, water, margarine and salt until it hits hard ball stage on a candy thermometer. Then add flavoring and color, let cool and work the sugar until shiny. Then cut the candy and wrap it. Simple no?


It's funny because the blogger that shared this recipe had really soft taffy and had a hard time with it, whereas mine is more like a hard candy that you let melt in your mouth. Biting into it would surely cause a trip to the dentist! I might have cooked it too much. Or pulled it too much? The pulling part actually cause some blisters on the pad of my thumbs and fingers. Ouch!

Doesn't matter that it's too hard to be called taffy, it's still delicious! And quite fun to make, aside from the blisters.

Grape Salt Water Candy
recipe source: Wilde in the Kitchen

2 cups sugar
1 tbsp cornstarch
1 cup corn syrup
¾ cup water
2 tbsp margarine
1 tsp salt
¼ tsp grape candy oil
Purple food coloring (if you want, I didn’t use any)

In a saucepan, combine sugar, cornstarch, corn syrup water and margarine. Bring to a boil and stir until clear. Discontinue stirring and attach candy thermometer. Heat sugar mixture until it reaches 266 F, wash down any sugar crystals, from the sides of the pot, with a wet pastry brush.

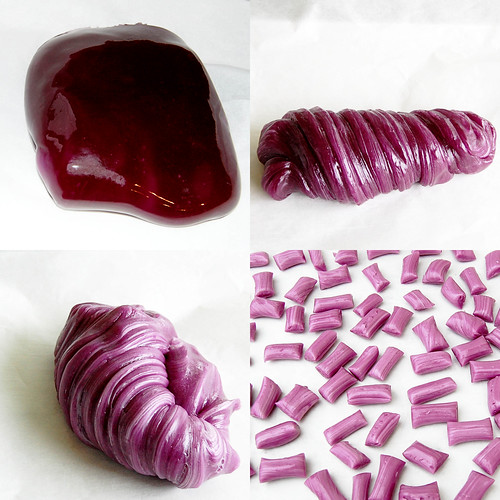
Remove pot from the heat and add oil and coloring. Stir until the color is even then pour onto a greased cookie sheet or silpat. Allow candy to cool until it is easy to handle but still has some give.

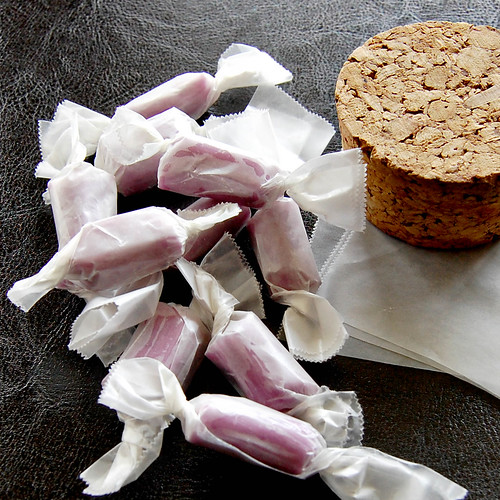
Pull the taffy until it is lightened in color and shiny. Roll into a long rope and cut into 1-inch pieces. Wrap in waxed paper and twist ends to close.


A few notes: It takes a while for the sugar to reach 266F. And I was surprised to see how cloudy the mixture was, I guess from the cornstarch and margarine. Next time, I would probably combine the sugar, cornstarch and salt before adding the wet ingredients. I poured my candy onto a piece of parchment paper on a baking sheet and left it to cool before I tried handling it. The best way to remove the sugar from the parchment paper was to handle it like a band-aid, quickly and with a short movement, or else, you'd just be stretching the sugar forever, and it would still be on the paper. It was still quite hot when I started pulling, but not so that it was intolerable. I was picturing rolling the candy into a rope like I would playdough, but by the time I was ready to start cutting, there was no way that was happening, so I kinda formed a rope by twisting and pulling it, then laying it on the counter to cut pieces off with scissors. You really have to work quickly, because it hardens pretty fast. At least mine did. 


Oh and I don't recommend putting the candies in a glass jar like the one above. They might stick together, and you might have to use chop sticks and all of your strength to pry them lose, and you might break the glass jar while you're at it and have to throw out half your candies because of possible glass shards. Just saying.

Wednesday, April 6, 2011

white chocolate lemon truffles

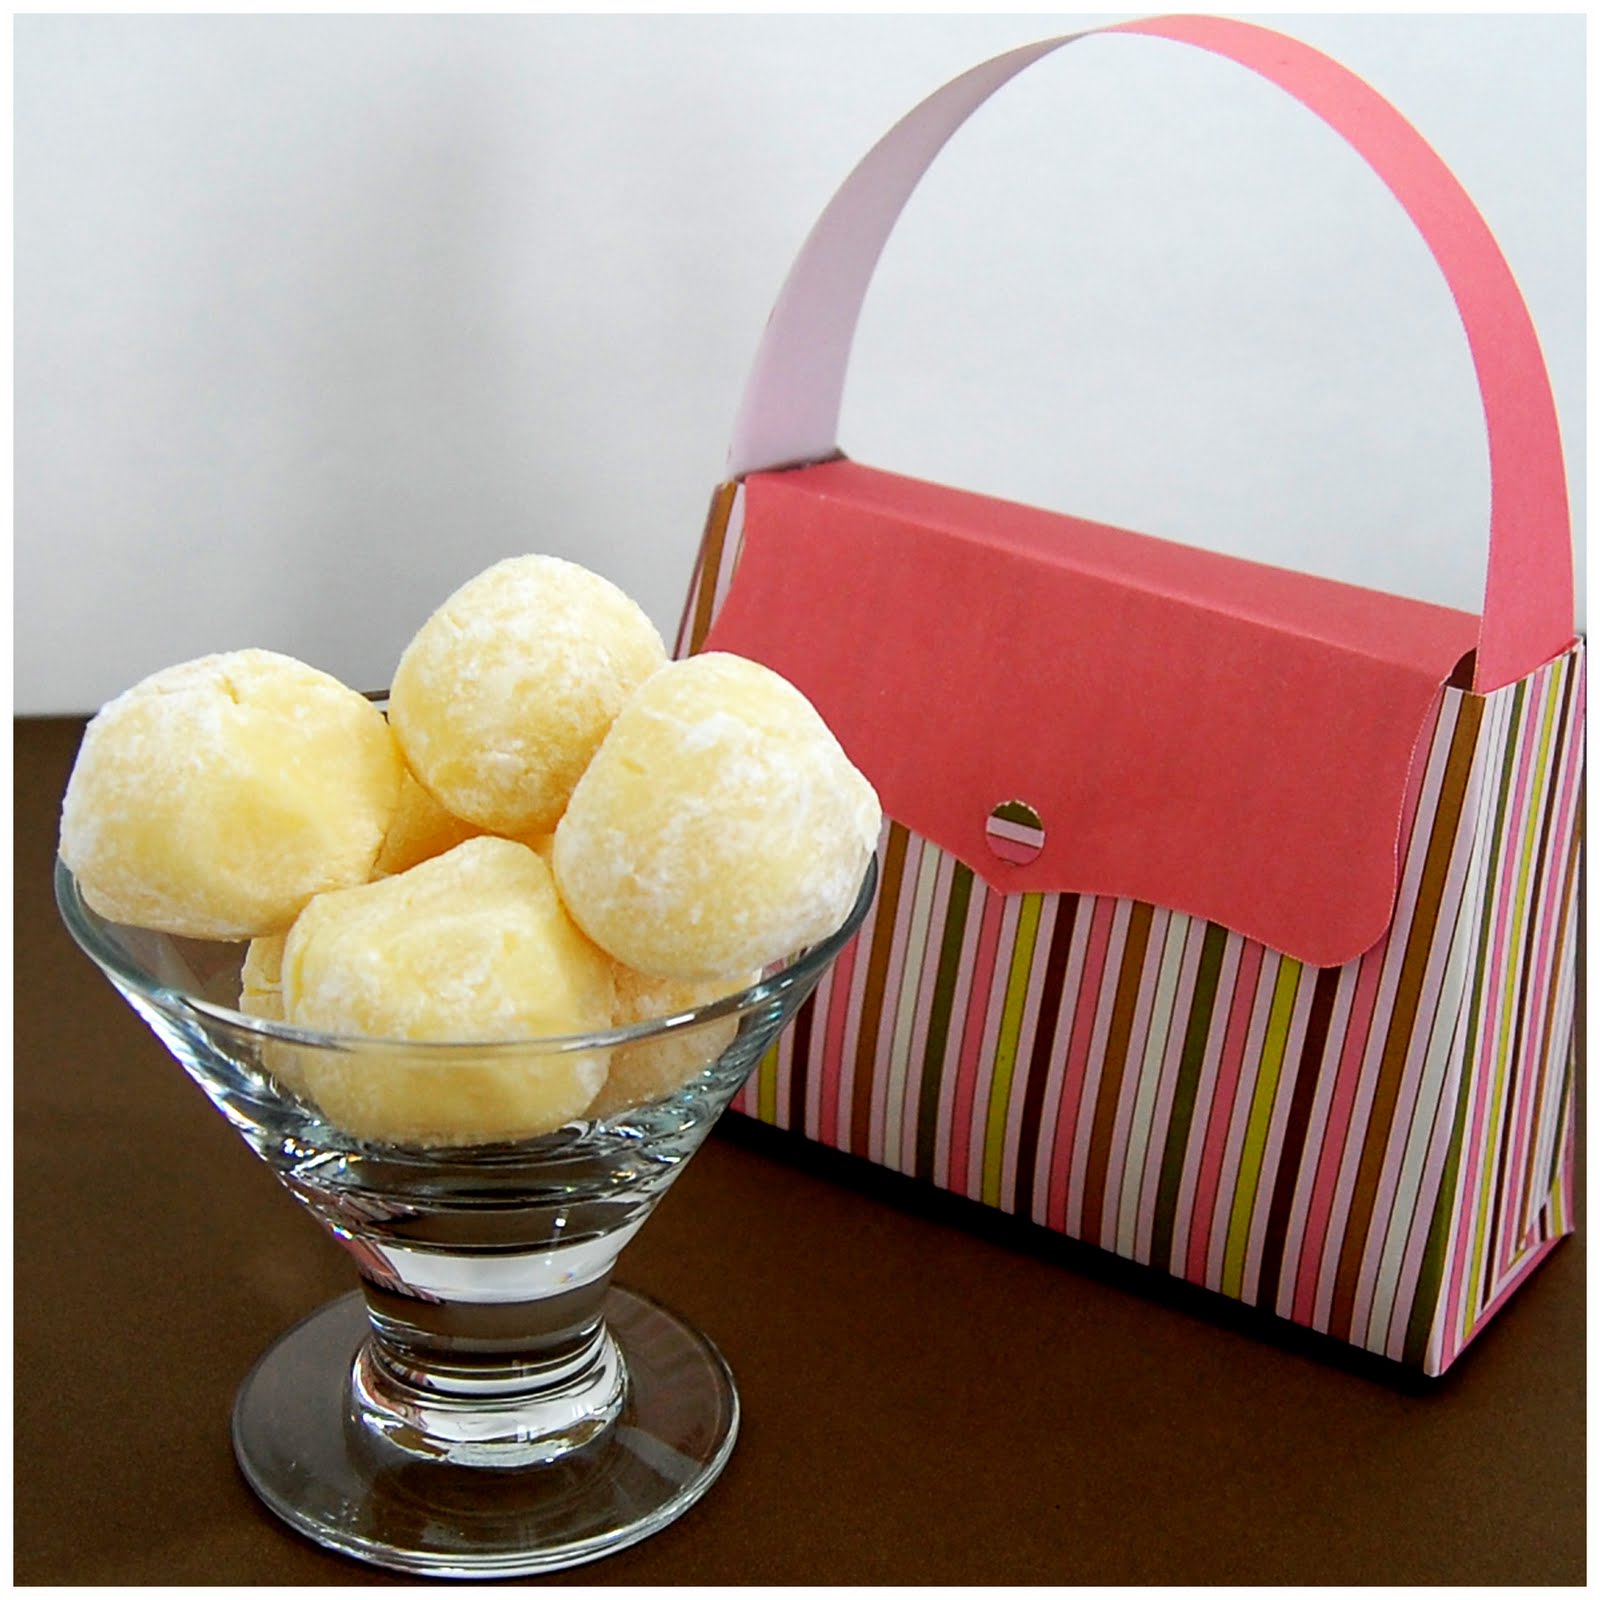
Making this recipe, I was instantly brought back to the Easters of my childhood. After I stopped believing in the Easter bunny that is. I used to request a white chocolate treat instead of the waxy chocolate one. I was a snob back then too I guess. And chopping the white chocolate for these white chocolate lemon truffles instantly reminded me of the smell you get hit with when you open the package of one of these white chocolate bunnies. Instant trip down memory lane.


Why is there a paper purse in the picture? This recipe is a trial run for treats that were requested by a friend who sells purses, jewelery, fashion accessories at home parties. She's meeting the founders her company and wants to bring them something sweet. So I was playing with packaging options for these truffles. Cute, no?

I had bookmarked this recipe last year around Easter time, and of course, like most of the recipes I bookmark, never had the opportunity to make.

White Chocolate Lemon Truffles
recipe adapted from Kitchen Simplicity

6 oz. (1 cup) white chocolate, chopped
5 Tbsp unsalted butter, cubed
3 Tbsp heavy cream
pinch salt
1 1/2 tsp lemon extract
1 tsp lemon zest (optional)
2 drops yellow food color (optional)
icing sugar, for dusting

Melt chocolate, butter and cream over a double boiler. Stir until smooth.
Stir in salt, extract, zest and food color. Allow to cool slightly before covering with plastic wrap. Refrigerate for 4 hours or until firm enough to handle. (My mixture was still sticky, but nothing a dip in icing sugar couldn't fix.) With a melon baller or small spoon scoop out mixture and form into 1 inch balls. Toss with icing sugar to coat. Store covered in the fridge for up to one week. Freeze for longer storage.

Makes: 24


Monday, February 14, 2011

happy valentine's day


I sent Chaboo to school with these strawberry marshmallow pops and valentine cards this morning. She was soooo excited! Although it would have been way easier to do them myself (and I would of spared a broken bowl), I got her to help me dip them in white and pink sprinkles last night. I had made a batch of strawberry marshmallows in the morning, poured the mixture in a 8x8 pan, let it set, then cut it into cubes. I pushed a lollipop stick in each, dipped them in some white candy melts, and got Cha to cover that with sprinkles. Et voilà! Easy enough sugary treat for a bunch of three year olds! Happy Valentine's Day!

Thursday, February 10, 2011

they're pink!

I don't remember ever liking v-day as much as I do this year! We never celebrate it as a couple because it's so close to my birthday, but this year, I'm going all out. Baking that is... Plus it probably has something to do with the fact that Chaboo is old enough to grasp that there's something special about the day this year. She wants to give out valentines to pretty much everyone she's ever met. That kid has a lot of "friends". So i'm trying to plan out treats to give out with the valentines I made for her.


 This morning, inspired by Shauna at Piece of Cake, I made Strawberry Pink Marshmallows. The original plan was to sandwich homemade marshmallows between two homemade graham crackers and a schmear of ganache for homemade smores. Now, I'm glad I tested out a graham cracker recipe last month... Don't know if it was my mad skills, or the recipe, but they turned out rock hard. Chab couldn't even bite into them. She made a mess had a blast decorating them though... So scratch the graham cracker idea. I'm hoping to make these chocolate cookies, and have them sandwich the marshmallow for some kind of chocolate strawberry sandwich cookie. Or maybe, the marshmallow would be better showcased alone? We'll see... In any case, what kid doesn't like marshmallow? Marshmallows were actually the first taste of sugar Chab ever had. I had used (store bought) marshmallows to decorate her cupcakes for her first birthday. Her eyes went wide when she managed to get those in her mouth!

 Now, I made marshmallows for the first time last xmas for a 
hot chocolate cake I brought to a family gathering. I was pretty proud of myself and thought they were awesome, but never having had homemade marshmallows before, I had no clue what they were supposed to be like. Then I read up more about them, and read that they're not supposed to have that wet jello-like mouth-feel. And although the mixture was a breeze to pour into the pan in an even layer, I had a hell of a time trying to get them off the icing sugar covered parchment paper. So, thought I'd try a different recipe.


I'm so glad I did! They are insanely good! From what I remember, the method is pretty much the same, but the ratios must be different or something... This one called for greasing the pan as opposed to covering it with icing sugar. It worked so much better!  The thicker consistency of the mixture made it much harder to get into a smooth layer. I had pretty much managed, until I decided that I wanted them to be "prettier", so I dipped a toothpick in gel color, and swirled it in the mixture. Now, there was no way they we're going to be nice and even. They're a bit too thin for my liking, although, if I end up putting them between two cookies, I think it'll be perfect. I'm definitely going to be making this recipe again, but in a 8x8 pan, to get nice chunky blocks of marshmallow to plop in my mouth! And now that I know where to get those tiny bottles of flavour... oh boy! The possibilities are endless!

Strawberry Marshmallows

Barely adapted from : Piece of Cake

Makes a 9X13 pan
2 packets unflavoured powdered gelatine (1 tbsp each)
1/3 cup cold water
1 cup sugar
1/2 cup light corn syrup, devided
1/4 cup water
Pinch of kosher salt
1/2 teaspoon clear vanilla extract
6-7 drops strawberry flavouring
2-3 drops pink gel food coloring
1 cup confectioners' sugar, sifted, for dusting

Grease a 9x13 pan with a small amount of shortening, using a paper towel to rub it lightly and evenly onto the bottom, sides and edges of the pan. Set aside.

Combine the 2 packets of gelatine and 1/3 cup cold water in a small bowl and let the gelatine soften for 5 minutes.


Place the 1 cup sugar, 1/4 cup corn syrup, 1/4 cup water and pinch of salt in a medium saucepan and stir gently. Clip a candy thermometer onto the pan, and place it over medium-high heat. Bring it to a boil, checking it occasionally--you are looking for it to eventually hit a temperature of 235-240 degrees (soft ball stage).


Meanwhile, pour the remaining 1/4 cup corn syrup into the bowl of an electric mixer fitted with the whisk attachment. Microwave the gelatine on high until it is completely melted, about 30 seconds. Turn the mixer on low, and very slowly pour the melted gelatine into the corn syrup.


Once the syrup reaches 235-240 degrees, pull it from the heat. Turn the mixer up to medium speed and slowly pour the sugar syrup into the gelatine mixture. When all the syrup has been added, crank the speed up to medium-high and let it go for about 6 to 7 minutes, until the bowl is barely warm to the touch. The candy will turn white and fluffy during this time. Beat in the vanilla.

Beat in the strawberry flavouring, just a couple drops at a time, stopping the mixer to taste the marshmallow, adding more drops until you reach the desired intensity. Beat in the food coloring, drop by drop, until you get the color you're looking for.

Pour the marshmallow into the prepared pan and use an offset spatula spritzed with a bit of cooking spray to nudge it into the corners and smooth the top. (I used a silicone spatula, and it only kinda worked. At that point, I swirled more coloring in the mixture to get a marbled effect.) Sift confectioners' sugar evenly and generously over the top. Let sit for about 6 hours.


Use a knife to loosen the marshmallow from the edges of the pan and invert it onto a confectioners' sugar-dusted work surface. Dust the marshmallow slab with more confectioners' sugar and cut into whatever size pieces you wish (a pizza cutter works great here for squares). Dip the sticky edges of the marshmallows in more confectioners' sugar, patting off the excess. Store in an airtight container for up to 1 week.