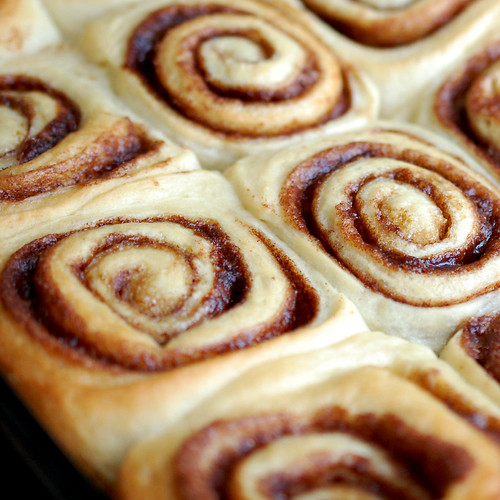
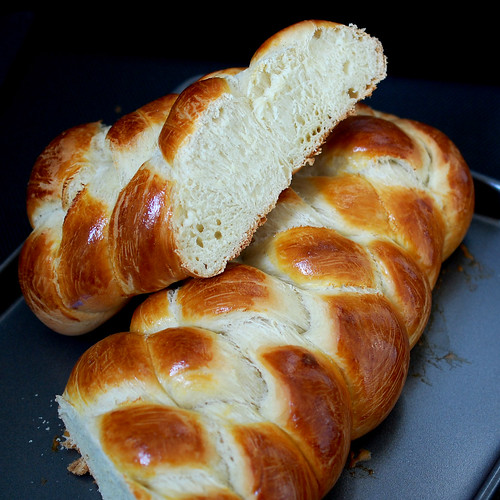
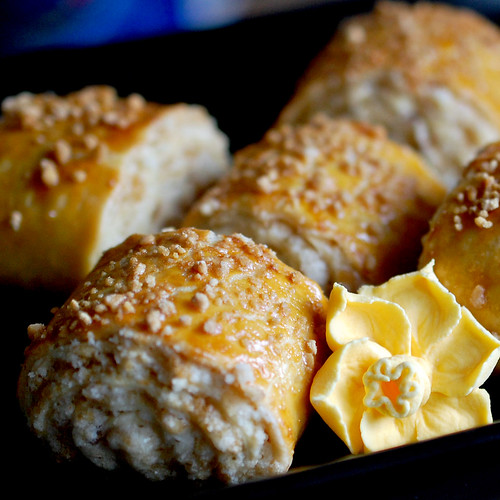
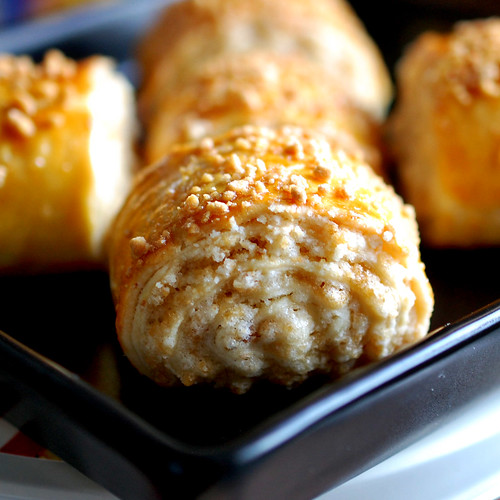
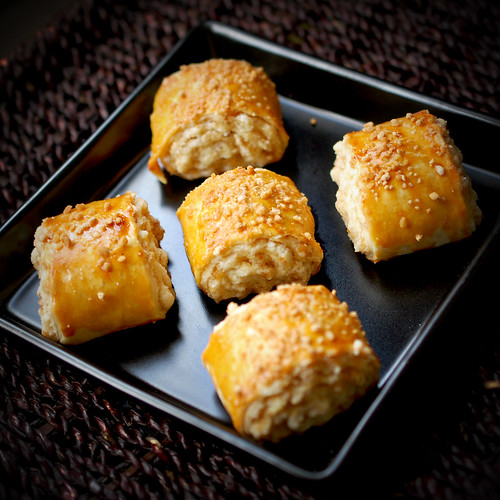
This month the Daring Bakers kept our creativity rolling with cinnamon bun inspired treats. Shelley from C Mom Cook dared us to create our own dough and fill it with any filling we wanted to craft tasty rolled treats, cinnamon not required!
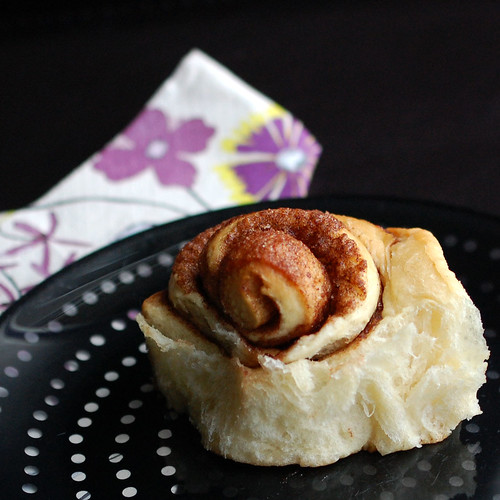
I had never made cinnamon buns before, so I stuck to the provided recipe and made the classic pastries filled with cinnamon sugar.
Although whenever we buy cinnamon rolls, we get the kind frosted with a thick layer of cream cheese frosting, I glazed these with a powdered sugar, milk and vanilla mixture, and we quickly ripped into them, effectively ruining our dinner.
Cinnamon Buns
(from The Bread Baker's Apprentice by Peter Reinhart)
Makes 8-12 large or 12-16 smaller buns
Ingredients
6½ tablespoons (100 ml) (3 oz) (90 gm) granulated sugar
1 teaspoon (5 ml) (6 gm) salt
5½ tablespoons (85 ml) (2¾ oz) (80 gm) shortening, unsalted butter or margarine, at room temperature
1 large egg, slightly beaten
1 teaspoon (5 ml) lemon extract OR vanilla extract OR 1 teaspoon (5 ml) grated lemon zest
3½ cups (840 ml) (16 oz) (450 gm) unbleached bread (or all-purpose/plain) flour
2 teaspoons (10 ml) (¼ oz) (6 gm) instant yeast (active dry worked as well)
1 1/8 – 1 ¼ cups (270-300 ml) whole milk or buttermilk, at room temperature
½ cup (120 ml) (3½ oz) (100 gm) cinnamon sugar (6½ tablespoons (100ml) (3 oz) (90 gm) granulated sugar plus 1½ tablespoons (20 ml) (1/3 oz) (10 gm) ground cinnamon)
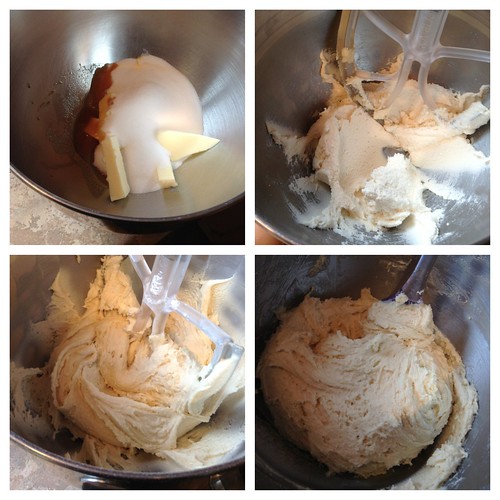
In a stand mixer fitted with the paddle attachment, cream together sugar, salt and shortening. Add the egg and extract to the creamed sugar and shortening and mix together until smooth. Add the flour, yeast and milk to the mixer and mix on low speed until the dough begins to form a ball.
At this point, switch to the dough hook attachment and knead for 10 minutes. The dough will be silky and supple, but not overly sticky. You may need to add a touch of flour if your dough is too sticky.
Lightly oil a bowl, turn the kneaded dough out into it, turning to coat, then cover the bowl with plastic wrap.
Allow the dough to rest (ferment) until it has doubled in size, approximately 2 hours.
Once the dough has rested and risen, you are ready to shape the cinnamon buns. Prepare your a sheet pan by lining it with parchment paper.
Spray your work surface lightly with cooking spray and turn the dough out onto the work surface. Using a rolling pin, roll the dough, into a rectangle about 2/3 an inch (15 mm) thick, 14 inches (350 mm) wide and 12 inches (300 mm) long (for large buns) (or 18 inches (450 mm) wide by 9 inches (230 mm) long for smaller ones). You may need to sprinkle the dough and/or work surface with a bit of flour to keep the dough from sticking. Sprinkle the cinnamon sugar filling over the surface of the dough.
Starting with a long end, roll the dough, creating a spiral, into a log shape, making sure to end with the seam side down. Cut the dough into pieces approximately 1¾ inches (45 mm) thick (for large buns) (1¼ inch (30 mm) for smaller buns).
Place buns approximately ½ inch (15 mm) apart on the prepared pan. They shouldn't be touching at this time.
Allow the shaped buns to proof at room temperature for 75 – 90 minutes until they have nearly doubled in size. They will now be touching each other.
If you are not planning on baking the buns the same day as you are preparing them, you can place them into the refrigerator after they are shaped (before this rise) for up to 2 days. If you do so, you will need to allow them to return to room temperature prior to baking, which means removing them from the refrigerator about 3 or 4 hours before baking.
Preheat the oven to moderate 350°F/180°C/gas mark 4 degrees at the end of this proofing time.
Bake the buns for 20 – 30 minutes, until golden brown
Allow the buns to cool for 10 minutes in the pan, then drizzle with glaze (recipe below). Remove the buns from the pan to a cooling rack and allow them to cool for at least 20 minutes before eating.
White fondant glaze
Sift 4 cups (500 gm) (17½ oz) of confectioners' (icing) sugar into a large bowl. Add 1 teaspoon (5 ml) of lemon, orange or vanilla extract and between 6 tablespoons to ½ cup (90 to 120 ml) warm milk, whisking well until all of the sugar is dissolved. (Add the smaller amount of milk first, whisking briskly, then add slowly until you have the consistency you want for drizzling over the buns.)
I used lemon extract in the dough, and next time, I'll use vanilla instead. I also used shortening in the dough, mainly because I was too lazy to let the butter reach room temperature. I used 1/3 cup of white sugar, and 1/3 cup of dark brown sugar, plus 2 tbsp cinnamon for the filling. I also spread some butter on the dough before rolling it up.
It's a good thing it takes a good part of the day to make cinnamon roll, because fresh out of the oven, they are amazingly soft and delicious! I'm very happy the Daring Bakers pushed me to make this! Another item off my to bake list!
Thanks Shelley for an amazing challenge, and for compiling all of this month's variations on Pinterest! I loved seeing how every Daring Baker interpreted this challenge differently!
Showing posts with label daring bakers. Show all posts
Monday, June 30, 2014
Thursday, February 27, 2014
shaped breads
February's Daring Bakers challenge was so dangerous! Easy, simple ingredients, so yummy, and pretty on top of it!
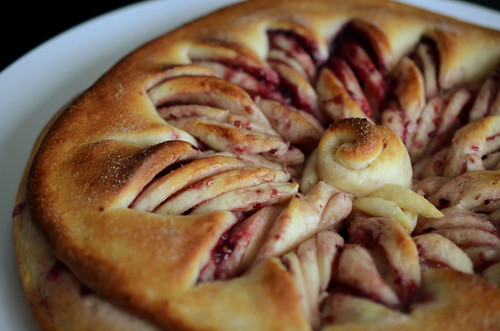
Daring Baker Sawsan, of Chef in Disguise, challenged us to make beautiful, filled breads.
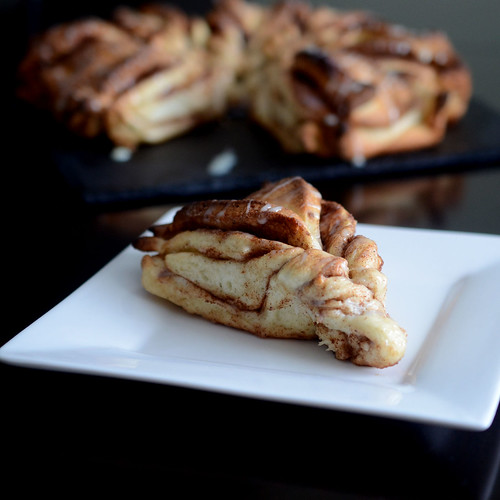
Sawsan provided us with two recipes, and two shaped breads to attempt. The first one I made was filled with cinnamon sugar. The other recipe made two "loaves" one of which i filled with nutella, the other, with berry preserves.
Cinnamon bread
Servings: 8
1/4 cup (60 ml) warm water
3/4 cup (180 ml) warm milk
1 large egg
1/4 cup (60 ml) (60 gm) (2 oz) butter, softened
1/4 cup (60 ml) (50 gm) (1-3/4 oz) white sugar
1/2 teaspoon (3 gm) salt
3-1/4 cups (780 ml) (450 gm) (16 oz) plain (all-purpose) flour, approximately
2 teaspoons (10 ml) (8 gm) dry yeast
1/4 teaspoon (1 gm) cardamom, optional
1/4 cup (60 ml) of milk
1 tablespoon (15 gm) (1/2 oz) sugar
1/2 stick (4 tablespoons) (1/4 cup) (60 ml) (60 gm) (2 oz) butter
4 tablespoons (60 ml) (25 gm) (1 oz) cinnamon
1/2 cup (120 ml) (100 gm) (3-1/2 oz) sugar
1 can (400 gm) (14 oz) sweetened condensed milk
In a bowl whisk the egg with milk, water, sugar, butter and yeast. Set aside
In another bowl sift the flour with the salt and the optional cardamom. Add the liquid ingredients to the dry ingredients and knead until you get a smooth dough.
Note: This recipe requires between 3-1/4 and 3-1/2 cups of flour depending on the weather, humidity and the flour brand. Start with 3-1/4 cups and if you feel that the dough is too soft, add the extra 1/4 cup.
Place the dough in a bowl you have brushed with some oil and cover it with a wet cloth and leave it in a warm place to double.
Turn the dough out onto a lightly floured surface. Divide the dough into 4 parts. Roll each part into a circle at least 20 cm (8 inch) in diameter.
Brush the first layer with butter then sprinkle with sugar and cinnamon. Place the second layer on the first layer repeat the brushing and sprinkling and then do the same with the third layer. Top with the fourth layer, this time only brush it with butter.
Using a knife make cuts that divide the dough circles into 8 triangles. Make cuts that go 2/3 of the way in the middle of each triangle. The cuts should not reach the base of the triangle nor the tip. Take the tip of each triangle and insert it into the cut you made and pull it from the underside.
Arrange the triangles on your baking sheet. Pinch the two angles at the base of the triangle together.
Brush the dough with milk.
Allow to rest for 15 minutes during which you would heat your oven to very hot 500°F/240°C/gas mark 9 (rack in the middle). (Go for the hottest your oven will do).
Bake for 5 minutes on very hot 460°F/240°C/gas mark 9, then lower the temperature to moderately hot 390°F/200°C/gas mark 6 and bake for 15-20 more minutes
Note: ovens do differ greatly, so the time may differ,what you want is to bake it until the under side is golden brown and the bread is baked all the way to the center. If the top of the bread is not golden brown by that time and you have a broiler (grill) in your oven. Turn on the broiler (grill) for a couple of minutes until the bread is golden brown on top. If on the other hand the top is getting too dark, consider lowering the oven temperature and covering the top of the bread with foil to stop it from over browning
Take it out of the oven and allow to cool for 5 minutes then transfer to a wire rick and drizzle with sweetened condensed milk while it is still warm.
Nutella twists
Servings: This dough recipe makes two loaves, 16 small pieces each
1 can (400 gm) (14 oz) sweetened condensed milk
3 large eggs
1 cup (240 ml) vegetable oil
1 cup (240 ml) warm water
3 teaspoons (15 ml) (12 gm) yeast
7 cups (1 kg) (2.2 lbs) all-purpose (plain) flour, approximately
Pinch of salt
Instead of the eggwash use
2 tablespoons (30 ml) (25 gm) (1 oz) milk powder
3 tablespoons (45 ml) lukewarm water
1teaspoon (5 ml) (5 gm) sugar
1/4 teaspoon (1 gm) instant coffee
For the filling
½ jar (200 gm) (7 oz) of nutella (or similar)
Mix the condensed milk, yeast, oil, water, and eggs in the bowl of your mixer. Add the flour one cup at a time and knead using the kneading attachment or by hand till you get a soft dough. The dough will be slightly sticky due to the sweetened condensed milk, don’t worry once the dough rests it will have a wonderful consistency.
Place the dough in a lightly oiled bowl, cover and allow to rest till it doubles in size
Punch down the dough and divide it into 2 parts. Wrap one part in a plastic bag and work with the other. Divide the dough ball into 4 parts. Roll each part into a circle at least 20 cm (8 inch) in diameter. You can use a plate or any other round item as a template if you want your layers to be identical and uniform.
Spread the Nutella (or similar filling) on the first layer. Place the second layer on top of the first and repeat. Top with the fourth layer, this time only brush it with butter.
Note: To help with the slippery Nutella, you can place the filled layers before cutting into the fridge for 20-30 minutes, this will help the Nutella to firm up. That will make the cuts and twists easier.
Using a knife make cuts that divide the dough circles into 8 triangles starting at the center but don’t go all the way to the outer edge. Then divide each triangle into two. That gives you a total of 16 triangles. Gently lift the triangles one at a time and twist them.
Repeat for the other dough ball.
Brush the dough with egg wash replacement. Allow to rest for 15 minutes during which you would heat your oven to very hot 500°F/240°C/gas mark 9.
Bake for 5 minutes on very hot 460°F/240°C/gas mark 9, then lower the temperature to moderately hot 390°F/200°C/gas mark 6 and bake for 15-20 more minutes.
Note: Ovens do differ greatly, so the time may differ,what you want is to bake it until the under side is golden brown and the bread is baked all the way to the center. If the top of the bread is not golden brown by that time and you have a broiler (grill) in your oven. Turn on the broiler (grill) for a couple of minutes until the bread is golden brown on top. If on the other hand the top is getting too dark, consider lowering the oven temperature and covering the top of the bread with foil to stop it from over browning.
This challenge was very dangerous for me. I could have made bread all month long! So delicious! Thanks Sawsan for the great challenge!
Friday, December 27, 2013
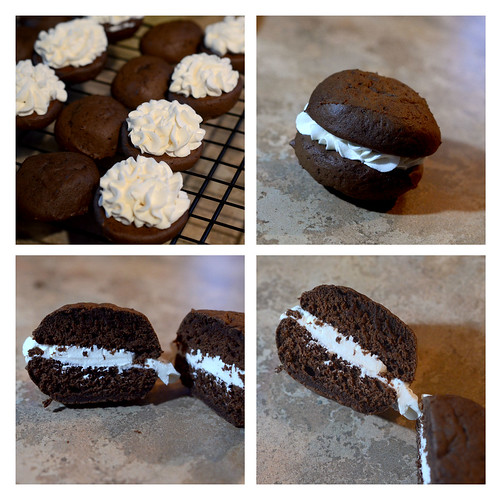
whoopie pies - daring bakers challenge
I had the pleasure of hosting this month's Daring Baker's challenge for the Daring Kitchen. Each month, a challenge is presented, and the members have until the end of the month to make the recipes and blog about them, starting on the 27th of the month. I've been a member of this monthly "baking club" since 2011 but I've been a pretty absent member in 2013. I blame life. And my job. And life.
So I chose to challenge my fellow bakers to make whoopie pies for my first time hosting. I figured something that was not all that common, easy enough and that wasn't too time consuming because, after all, December is an insanely busy time for us bakers (and non-bakers!).
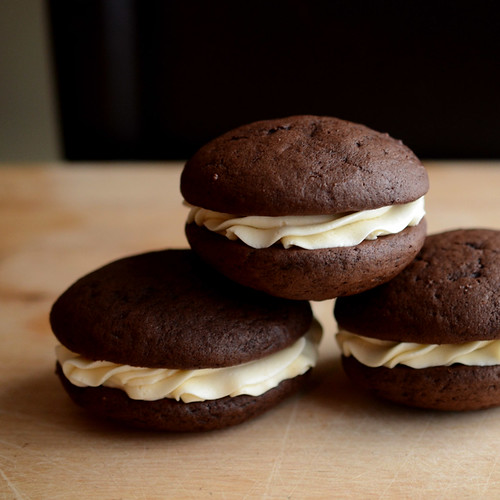
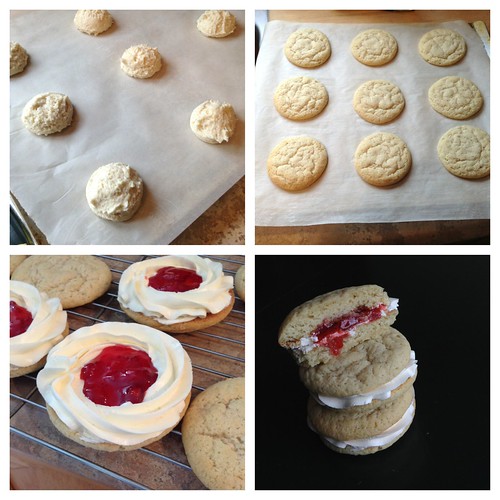
Whoopie pies are a cross between a cookie and a cake (not a pie!), with two round, mound-shaped halves sandwiching a sweet creamy filling.
According to Wikipedia, Whoopie pies are considered a New England phenomenon and a Pennsylvania Amish tradition. It is also Maine’s official state treat. The traditional Whoopie pie consists of a chocolate cake and a vanilla marshmallow filling, but pumpkin and gingerbread cake is also common enough. Want to know why they are named Whoopie pies? Check Wikipedia for the cute story!
I personally love them because of the infinite flavor combination possible. They remind me of cupcakes, but more portable and easier to eat. So I provided three recipes for the cookie/cake, and three filling recipes, and challenged the bakers to come up with some delicious flavor combination of their own.
CLASSIC CHOCOLATE WHOOPIE PIES WITH MARSHMALLOW CREME FILLING
Recipe source: King Arthur Flour
Servings: 8 large or 16 small whoopie pies
Ingredients
For the Whoopie Pies
1/2 cup (120 ml) (4 oz) (115 gm) butter
1 cup (240 ml) (7 oz) (200 gm) brown sugar, firmly packed
1 teaspoon (5 ml) (5 gm) espresso coffee powder, optional
1 teaspoon (5 ml) (5 gm) baking powder
1/2 teaspoon (3 gm) baking soda
3/4 teaspoon (4½ gm) salt
1 teaspoon (5 ml) vanilla extract
1 large egg
1/2 cup (120 ml) (1½ oz) (45 gm) Dutch-process cocoa, sifted
2 1/3 cups (560 ml) (10 oz) (285 gm) unbleached all-purpose (plain) flour
1 cup (240 ml) milk
Directions:
1) Preheat oven to moderate 350°F/180°C/gas mark 4. Lightly grease (or line with parchment) two baking sheets.
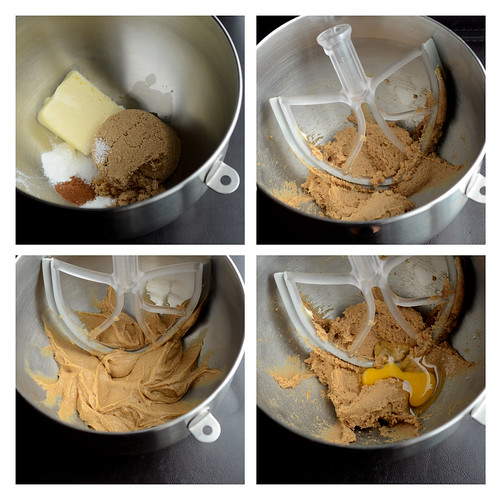
2) In a large mixing bowl, beat together the butter, brown sugar, espresso coffee powder (if using), baking powder, baking soda, salt, and vanilla till smooth. Add the egg, again beating till smooth.
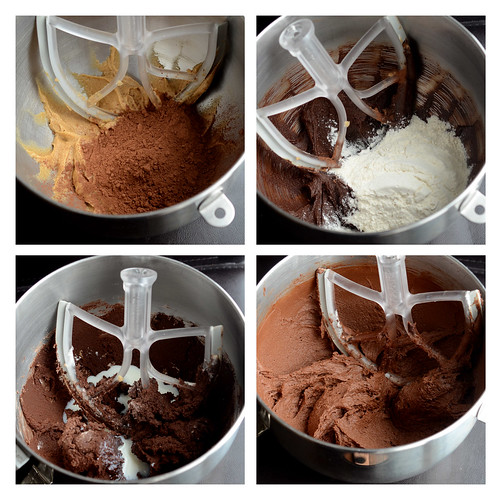
3) Add the cocoa, stirring to combine.
4) Add the flour to the batter alternately with the milk, beating till smooth. Scrape down the sides and bottom of the bowl, and beat again briefly to soften and combine any chunky scrapings.
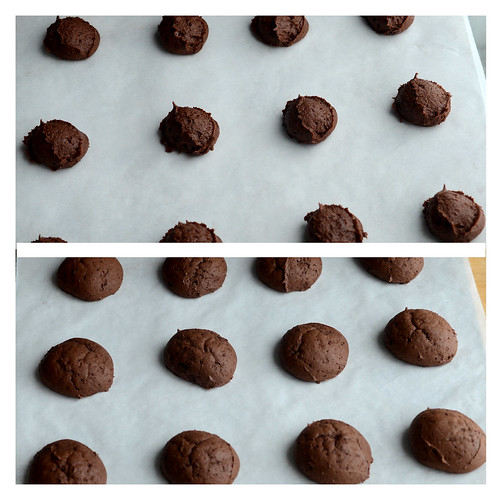
5) Drop the dough by the 1/4-cupful (60 ml) onto the prepared baking sheets, leaving plenty of room between the cakes; they'll spread. A muffin scoop works well here.
6) Bake the cakes in a preheated moderate oven for 15 to 16 minutes, till they're set and firm to the touch. Remove them from the oven, and cool on the pans. While still lukewarm, use a spatula to separate them from the pan or parchment; then allow to cool completely.
Ingredients
For the Marshmallow Creme Filling
1 cup (240 ml) (6 oz) (175 gm) vegetable shortening
1 cup (240 ml) (7 oz) (4½ oz) (125 gm) confectioners' sugar or glazing sugar
1-1/3 cups (320 ml) (4 oz) (115 gm) Marshmallow Fluff or marshmallow creme
¼ teaspoon (1½ gm) salt dissolved in 1 tablespoon (15 ml) water
1½ teaspoons vanilla extract
Directions:
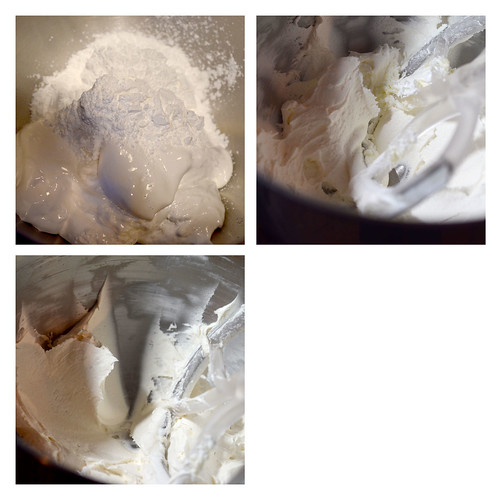
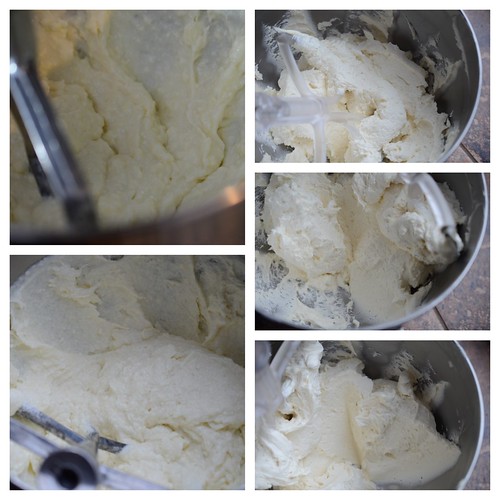
1) (To make the filling:) Beat together the shortening, confectioners' sugar, and marshmallow until well combined.
2) Dissolve the salt in the water, and add to the marshmallow mixture. Add the vanilla, and beat until smooth. If the filling is too thin, add confectioners’ sugar until desired consistency is reached.
Assemble the Whoopie Pies
1) Spread or pipe filling onto the flat side of half the cakes (with the filling). Top with the remaining cakes, flat side towards the filling. Wrap individually, in plastic wrap, until ready to serve.
The whoopie pies will keep for up to 3 days on a parchment lined baking sheet covered with plastic wrap, in the refrigerator.
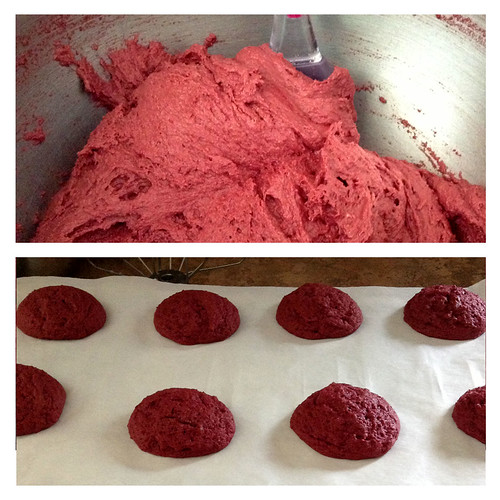
RED VELVET WHOOPIE PIES WITH CREAM CHEESE FILLING
Recipe source: Baked Explorations, by Matt Lewis and Renato Poliafito
Servings: 18 small whoopies
Ingredients
For the Whoopie Pies
2 1/2 cups (600 gm) (10 ½ oz)) (300 gm) all-purpose (plain) flour
3 tablespoons (45 ml) (3/4 oz) (22 gm) dark unsweetened cocoa powder, sifted
1/2 teaspoon (2½ gm) baking powder
1/2 teaspoon (2½ gm) baking soda
1/2 teaspoon (3 gm) salt
1/4 cup (60 ml) canola oil
1/2 cup plus 2 tablespoons (150 ml) buttermilk
2 tablespoons (30 ml) liquid red food coloring
1/2 cup (1 stick) (120 ml) (4 oz) (115 oz) butter, softened, cut into pieces
1 tablespoon (15 ml) (12½ gm) vegetable shortening, at room temperature
3/4 cup (180 ml) (5-1/4 oz) (150 gm) dark brown sugar, firmly packed
1/4 cup (60 ml) (2 oz) (55 gm) granulated sugar
1 large egg
1 teaspoon (5 ml) pure vanilla extract
Directions:
1. In a large bowl, sift together the flour, cocoa powder, baking powder, baking soda and salt.
2. In a small bowl, whisk together the canola oil, buttermilk and red food coloring.
3. In the bowl of an electric mixer fitted with the paddle attachment, cream the butter and shortening until smooth. Scrape down the bowl and add the sugars. Beat until the mixture is light and fluffy, about 5 minutes. Add the egg and vanilla extract and beat until combined. Scrape down the sides and bottom of the bowl then mix on low speed for a few more seconds. Do not over mix.
4. Turn the mixer to low. Add the flour mixture, alternating with the buttermilk mixture, in three separate additions, beginning and ending with the flour mixture until just combined. Scrape down the sides and bottom of the bowl, then mix on low speed for a few more seconds.
5. Cover with plastic wrap and chill the batter in the refrigerator for about 15 minutes.
6. While the batter is chilling, preheat the oven to moderate 350°F/180°C/gas mark 4. Line two baking sheets with parchment paper.
7. Remove the batter from the refrigerator. Use a small ice cream scoop with a release mechanism to drop tablespoons of the dough onto the prepared baking sheets about 1-inch (25 mm) apart. Bake in a preheated moderate oven for 10-12 minutes, until the cookies are just starting to crack on top and a toothpick inserted into the center of a cookie comes out clean. Let the cookies cool completely on the pan while you make the filling.
Ingredients
For the Cream Cheese Filling
3 cups (750 ml) (13 ¼ oz) (375 gm) confectioners’ sugar
1/2 cup (120 ml) (1 stick) (4 oz) (115 gm) unsalted butter, softened
8 ounces (225 gm) cream cheese, softened
1 teaspoon (5 ml) pure vanilla extract
1/4 teaspoon (1½ gm) salt
Directions:
1. Sift the confectioners’ sugar into a medium bowl and set aside.
2. In the bowl of an electric mixer fitted with the paddle attachment, beat the butter until it is completely smooth. Add the cream cheese and beat until combined.
3. Add the confectioner’s sugar, vanilla, and salt and beat until smooth. Be careful not to over beat the filling or it will lose structure.
(The filling can be made 1 day ahead. Cover the bowl tightly and put it in the refrigerator. Let the filling soften at room temperature before using.)
Assemble the Whoopie Pies
1. Turn half of the cooled cookies upside down (flat side facing up)
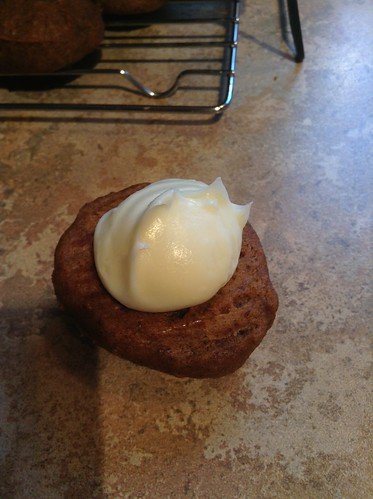
2. Use an ice cream scoop or a tablespoon to drop a large dollop of filling onto the flat side of the cookie.
(cream cheese filling pictured on a pumpkin whoopie pie)
3. Place another cookie, flat side down, on top of the filling.
4. Press down slightly so that the filling spreads to the edges of the cookie.
5. Put the whoopie pies in the refrigerator for about 30 minutes to firm up before serving.
The whoopie pies will keep for up to 3 days on a parchment lined baking sheet covered with plastic wrap, in the refrigerator.
(Mini whoopie pies are pictured with standard American buttercream frosting as a filling. Cream cheese filling will be much looser and will not hold its shape if piped.)
VANILLA WHOOPIE PIES
Recipe source: FoodNetwork Magazine
Servings: 8 whoopies
Ingredients
2 ¾ cups(660 ml) (11-2/3 oz) (330 gm) flour
1 teaspoon (5 ml) (5 gm) baking soda
¾ teaspoon (3¾ gm) baking powder
¾ teaspoon salt
½ cup (1 stick) (4 oz) (115 gm) butter, softened
1 1/3 cups (320 ml) ( (10-2/3 oz) (300 gm) granulated sugar
2 teaspoons (10 ml) vanilla
1 large egg
2/3 cup (160 ml) buttermilk
Whisk flour, baking soda, baking powder and salt in a bowl. In a separate bowl, beat butter, granulated sugar and vanilla with a mixer on medium-high speed until fluffy; beat in the egg. On low speed, beat in the flour mixture in 3 batches, alternating with the buttermilk in 2 batches; beat until just combined.
Line 2 baking sheets with parchment paper. Scoop 16 mounds of batter onto the baking sheets, about 2 inches (50 mm) apart (about 2 tablespoons (30 ml) batter per cookie); gently form into rounds with damp fingers and smooth the tops. Refrigerate until firm, about 30 minutes.
Preheat the oven to moderately hot 400°F/200°C/gas mark 6. Bake the cookies until they spring back when pressed, 10 to 12 minutes. Cool 5 minutes, then remove to a rack to cool completely.
OLD FASHIONED VANILLA FILLING
Recipe source: Baked Explorations, by Matt Lewis and Renato Poliafito
Servings: way more than you actually need to fill the whoopies
Ingredients
1 cup (240 ml) (8 oz) (225 gm) granulated sugar
1/4 cup (60 ml) (1 oz) (30 gm) all-purpose (plain) flour
1 cup (240 ml) whole milk
1/4 cup (60 ml) heavy cream (about 35%)
1 cup (2 sticks) (8 oz) (225 gm) unsalted butter, cool but not cold, cut into ½-inch (15 mm) cubes
1 teaspoon (5 ml) pure vanilla extract
In a medium, heavy-bottomed saucepan, whisk the sugar and flour together. Add the milk and cream and cook over medium heat, whisking occasionally, until the mixture comes to a boil and has thickened, 10 to 15 minutes.
Transfer the mixture to the bowl of a stand mixer fitted with the paddle attachment. Beat on high speed until cool, at least 7 minutes. (You can speed up the process by pressing bags of frozen berries or frozen corn against the sides and bottom of the mixing bowl.) Reduce the speed to low and add the butter; mix until thoroughly incorporated. Increase the speed to medium-high and beat until the frosting is light and fluffy. You can’t overbeat this mixture. Just let it go until it’s nice and smooth.
Add the vanilla and continue mixing until combined. If the frosting is too soft, put the bowl in the refrigerator to chill slightly, then beat again until it is the proper consistency. If the frosting is too firm, set the bowl over a pot of simmering water and beat with a wooden spoon until it is the proper consistency.
At first I was afraid my challenge was too simple, or boring, but the members of this group quickly got on the whoopie pie making bandwagon and created all kinds of delicious combinations of cookies and filling. A huge THANK YOU to everyone who has participated this month, especially after the passing of founding member Lis in November. Also, kudos to Ruth and Shelley who are making sure the Daring Kitchen community stays strong. Thank you guys!
For more information about this community of bakers, please visit The Daring Kitchen.
So I chose to challenge my fellow bakers to make whoopie pies for my first time hosting. I figured something that was not all that common, easy enough and that wasn't too time consuming because, after all, December is an insanely busy time for us bakers (and non-bakers!).
Whoopie pies are a cross between a cookie and a cake (not a pie!), with two round, mound-shaped halves sandwiching a sweet creamy filling.
According to Wikipedia, Whoopie pies are considered a New England phenomenon and a Pennsylvania Amish tradition. It is also Maine’s official state treat. The traditional Whoopie pie consists of a chocolate cake and a vanilla marshmallow filling, but pumpkin and gingerbread cake is also common enough. Want to know why they are named Whoopie pies? Check Wikipedia for the cute story!
I personally love them because of the infinite flavor combination possible. They remind me of cupcakes, but more portable and easier to eat. So I provided three recipes for the cookie/cake, and three filling recipes, and challenged the bakers to come up with some delicious flavor combination of their own.
CLASSIC CHOCOLATE WHOOPIE PIES WITH MARSHMALLOW CREME FILLING
Recipe source: King Arthur Flour
Servings: 8 large or 16 small whoopie pies
Ingredients
For the Whoopie Pies
1/2 cup (120 ml) (4 oz) (115 gm) butter
1 cup (240 ml) (7 oz) (200 gm) brown sugar, firmly packed
1 teaspoon (5 ml) (5 gm) espresso coffee powder, optional
1 teaspoon (5 ml) (5 gm) baking powder
1/2 teaspoon (3 gm) baking soda
3/4 teaspoon (4½ gm) salt
1 teaspoon (5 ml) vanilla extract
1 large egg
1/2 cup (120 ml) (1½ oz) (45 gm) Dutch-process cocoa, sifted
2 1/3 cups (560 ml) (10 oz) (285 gm) unbleached all-purpose (plain) flour
1 cup (240 ml) milk
Directions:
1) Preheat oven to moderate 350°F/180°C/gas mark 4. Lightly grease (or line with parchment) two baking sheets.
2) In a large mixing bowl, beat together the butter, brown sugar, espresso coffee powder (if using), baking powder, baking soda, salt, and vanilla till smooth. Add the egg, again beating till smooth.
3) Add the cocoa, stirring to combine.
4) Add the flour to the batter alternately with the milk, beating till smooth. Scrape down the sides and bottom of the bowl, and beat again briefly to soften and combine any chunky scrapings.
5) Drop the dough by the 1/4-cupful (60 ml) onto the prepared baking sheets, leaving plenty of room between the cakes; they'll spread. A muffin scoop works well here.
6) Bake the cakes in a preheated moderate oven for 15 to 16 minutes, till they're set and firm to the touch. Remove them from the oven, and cool on the pans. While still lukewarm, use a spatula to separate them from the pan or parchment; then allow to cool completely.
(pictured are mini whoopie pies, using 1 tablespoon batter)
Ingredients
For the Marshmallow Creme Filling
1 cup (240 ml) (6 oz) (175 gm) vegetable shortening
1 cup (240 ml) (7 oz) (4½ oz) (125 gm) confectioners' sugar or glazing sugar
1-1/3 cups (320 ml) (4 oz) (115 gm) Marshmallow Fluff or marshmallow creme
¼ teaspoon (1½ gm) salt dissolved in 1 tablespoon (15 ml) water
1½ teaspoons vanilla extract
Directions:
1) (To make the filling:) Beat together the shortening, confectioners' sugar, and marshmallow until well combined.
2) Dissolve the salt in the water, and add to the marshmallow mixture. Add the vanilla, and beat until smooth. If the filling is too thin, add confectioners’ sugar until desired consistency is reached.
Assemble the Whoopie Pies
1) Spread or pipe filling onto the flat side of half the cakes (with the filling). Top with the remaining cakes, flat side towards the filling. Wrap individually, in plastic wrap, until ready to serve.
The whoopie pies will keep for up to 3 days on a parchment lined baking sheet covered with plastic wrap, in the refrigerator.
RED VELVET WHOOPIE PIES WITH CREAM CHEESE FILLING
Recipe source: Baked Explorations, by Matt Lewis and Renato Poliafito
Servings: 18 small whoopies
Ingredients
For the Whoopie Pies
2 1/2 cups (600 gm) (10 ½ oz)) (300 gm) all-purpose (plain) flour
3 tablespoons (45 ml) (3/4 oz) (22 gm) dark unsweetened cocoa powder, sifted
1/2 teaspoon (2½ gm) baking powder
1/2 teaspoon (2½ gm) baking soda
1/2 teaspoon (3 gm) salt
1/4 cup (60 ml) canola oil
1/2 cup plus 2 tablespoons (150 ml) buttermilk
2 tablespoons (30 ml) liquid red food coloring
1/2 cup (1 stick) (120 ml) (4 oz) (115 oz) butter, softened, cut into pieces
1 tablespoon (15 ml) (12½ gm) vegetable shortening, at room temperature
3/4 cup (180 ml) (5-1/4 oz) (150 gm) dark brown sugar, firmly packed
1/4 cup (60 ml) (2 oz) (55 gm) granulated sugar
1 large egg
1 teaspoon (5 ml) pure vanilla extract
Directions:
1. In a large bowl, sift together the flour, cocoa powder, baking powder, baking soda and salt.
2. In a small bowl, whisk together the canola oil, buttermilk and red food coloring.
3. In the bowl of an electric mixer fitted with the paddle attachment, cream the butter and shortening until smooth. Scrape down the bowl and add the sugars. Beat until the mixture is light and fluffy, about 5 minutes. Add the egg and vanilla extract and beat until combined. Scrape down the sides and bottom of the bowl then mix on low speed for a few more seconds. Do not over mix.
4. Turn the mixer to low. Add the flour mixture, alternating with the buttermilk mixture, in three separate additions, beginning and ending with the flour mixture until just combined. Scrape down the sides and bottom of the bowl, then mix on low speed for a few more seconds.
5. Cover with plastic wrap and chill the batter in the refrigerator for about 15 minutes.
6. While the batter is chilling, preheat the oven to moderate 350°F/180°C/gas mark 4. Line two baking sheets with parchment paper.
7. Remove the batter from the refrigerator. Use a small ice cream scoop with a release mechanism to drop tablespoons of the dough onto the prepared baking sheets about 1-inch (25 mm) apart. Bake in a preheated moderate oven for 10-12 minutes, until the cookies are just starting to crack on top and a toothpick inserted into the center of a cookie comes out clean. Let the cookies cool completely on the pan while you make the filling.
Ingredients
For the Cream Cheese Filling
3 cups (750 ml) (13 ¼ oz) (375 gm) confectioners’ sugar
1/2 cup (120 ml) (1 stick) (4 oz) (115 gm) unsalted butter, softened
8 ounces (225 gm) cream cheese, softened
1 teaspoon (5 ml) pure vanilla extract
1/4 teaspoon (1½ gm) salt
Directions:
1. Sift the confectioners’ sugar into a medium bowl and set aside.
2. In the bowl of an electric mixer fitted with the paddle attachment, beat the butter until it is completely smooth. Add the cream cheese and beat until combined.
3. Add the confectioner’s sugar, vanilla, and salt and beat until smooth. Be careful not to over beat the filling or it will lose structure.
(The filling can be made 1 day ahead. Cover the bowl tightly and put it in the refrigerator. Let the filling soften at room temperature before using.)
Assemble the Whoopie Pies
1. Turn half of the cooled cookies upside down (flat side facing up)
2. Use an ice cream scoop or a tablespoon to drop a large dollop of filling onto the flat side of the cookie.
(cream cheese filling pictured on a pumpkin whoopie pie)
3. Place another cookie, flat side down, on top of the filling.
4. Press down slightly so that the filling spreads to the edges of the cookie.
5. Put the whoopie pies in the refrigerator for about 30 minutes to firm up before serving.
The whoopie pies will keep for up to 3 days on a parchment lined baking sheet covered with plastic wrap, in the refrigerator.
(Mini whoopie pies are pictured with standard American buttercream frosting as a filling. Cream cheese filling will be much looser and will not hold its shape if piped.)
VANILLA WHOOPIE PIES
Recipe source: FoodNetwork Magazine
Servings: 8 whoopies
Ingredients
2 ¾ cups(660 ml) (11-2/3 oz) (330 gm) flour
1 teaspoon (5 ml) (5 gm) baking soda
¾ teaspoon (3¾ gm) baking powder
¾ teaspoon salt
½ cup (1 stick) (4 oz) (115 gm) butter, softened
1 1/3 cups (320 ml) ( (10-2/3 oz) (300 gm) granulated sugar
2 teaspoons (10 ml) vanilla
1 large egg
2/3 cup (160 ml) buttermilk
Whisk flour, baking soda, baking powder and salt in a bowl. In a separate bowl, beat butter, granulated sugar and vanilla with a mixer on medium-high speed until fluffy; beat in the egg. On low speed, beat in the flour mixture in 3 batches, alternating with the buttermilk in 2 batches; beat until just combined.
Line 2 baking sheets with parchment paper. Scoop 16 mounds of batter onto the baking sheets, about 2 inches (50 mm) apart (about 2 tablespoons (30 ml) batter per cookie); gently form into rounds with damp fingers and smooth the tops. Refrigerate until firm, about 30 minutes.
Preheat the oven to moderately hot 400°F/200°C/gas mark 6. Bake the cookies until they spring back when pressed, 10 to 12 minutes. Cool 5 minutes, then remove to a rack to cool completely.
OLD FASHIONED VANILLA FILLING
Recipe source: Baked Explorations, by Matt Lewis and Renato Poliafito
Servings: way more than you actually need to fill the whoopies
Ingredients
1 cup (240 ml) (8 oz) (225 gm) granulated sugar
1/4 cup (60 ml) (1 oz) (30 gm) all-purpose (plain) flour
1 cup (240 ml) whole milk
1/4 cup (60 ml) heavy cream (about 35%)
1 cup (2 sticks) (8 oz) (225 gm) unsalted butter, cool but not cold, cut into ½-inch (15 mm) cubes
1 teaspoon (5 ml) pure vanilla extract
In a medium, heavy-bottomed saucepan, whisk the sugar and flour together. Add the milk and cream and cook over medium heat, whisking occasionally, until the mixture comes to a boil and has thickened, 10 to 15 minutes.
Transfer the mixture to the bowl of a stand mixer fitted with the paddle attachment. Beat on high speed until cool, at least 7 minutes. (You can speed up the process by pressing bags of frozen berries or frozen corn against the sides and bottom of the mixing bowl.) Reduce the speed to low and add the butter; mix until thoroughly incorporated. Increase the speed to medium-high and beat until the frosting is light and fluffy. You can’t overbeat this mixture. Just let it go until it’s nice and smooth.
Add the vanilla and continue mixing until combined. If the frosting is too soft, put the bowl in the refrigerator to chill slightly, then beat again until it is the proper consistency. If the frosting is too firm, set the bowl over a pot of simmering water and beat with a wooden spoon until it is the proper consistency.
***
At first I was afraid my challenge was too simple, or boring, but the members of this group quickly got on the whoopie pie making bandwagon and created all kinds of delicious combinations of cookies and filling. A huge THANK YOU to everyone who has participated this month, especially after the passing of founding member Lis in November. Also, kudos to Ruth and Shelley who are making sure the Daring Kitchen community stays strong. Thank you guys!
For more information about this community of bakers, please visit The Daring Kitchen.
Saturday, July 27, 2013
blueberry pie
For the Daring Baker's July challenge, Lisa asked all of us to search through the Daring Kitchen archives and pick any one we'd like!
I've been a member of Daring Bakers since March 2011, and since then, I've made : Yeasted Meringue Coffee Cakes, Maple Mousse served in an edible container, Marquise on meringue, Baklava, Fraisier, Candies, Povitica, Sans Rival, Quick Bread, Dutch Crunch Bread, Armenian Nazook, Challah (Pulla), Battenburg Cake, Crackers, Filled Pâte à Choux Swans, Empanada Gallega, Pannettone, Gevulde Speculaas, Muffins with Hidden Veggies and Swedish Princesstarta.
I skipped the Fresh, Fluffy, French Croissants challenge, because I'm not patient enough and I don't like croissants. I didn't make the scones (biscuits), because I ran out of time that month, but I've made them before and make scones frequently, so I don't feel too bad about missing this one. The Mille-Feuille/Napoleon challenge is one I feel bad about missing and that I will make up one of these days. Although I had made piped shortbread, I skipped the Christmas cookies challenge because they just didn't turn out as I had hoped and I didn't want to take pictures of an ugly cookie. I skipped the Crisp Crackers and Flatbreads because it was too similar to the other Crackers challenge, and although I have made Savarin once before the actual challenge, I didn't get around to it that month. The last challenge that I skipped was Life of Pie, and this is the one I chose to do this month in a "celebration" of past Daring Baker challenges.
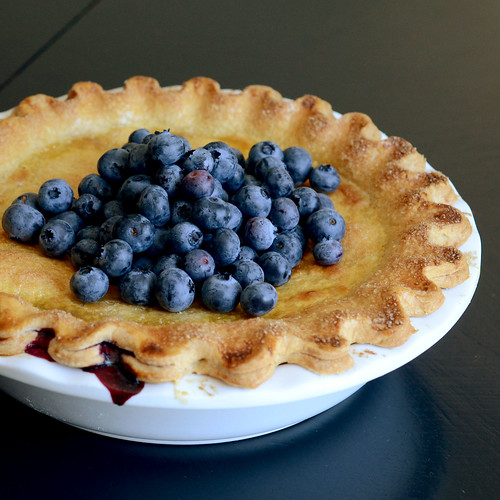
I think pie is my husband's most favorite dessert, and yet, it's a real challenge for me. I did make a tart last month when the Life of Pie challenge was actually on, but the top crust gave me issues, I got frustrated and chucked it in the garbage. So although we ate the tart, I didn't post it. So I took this month's challenge as an opportunity to face my fears and make pie.
As blueberries are in season, I picked that fruit as the filling of my pie. My last attempt at berry pie left me with a lake of berry juices at the bottom of the pie plate, so I went on a search for a different recipe. I picked a recipe where the filling is cooked before being placed in the pie crust, hoping it would result in a firmer filling.
I made a basic all butter pie dough recipe from Baked, but it seemed quite sticky when I got it out of the food processor, so I'm pretty sure I screwed up there somewhere. I put it in the fridge to firm up some, and had no trouble whatsoever rolling it out, so that also tells me I did something wrong. Isn't pie dough supposed to be fragile and delicate? Mine looked more like cookie dough...
The filling came together nicely, but I added a bit too much nutmeg to the mixture, and I forgot to add butter to it. Oops.
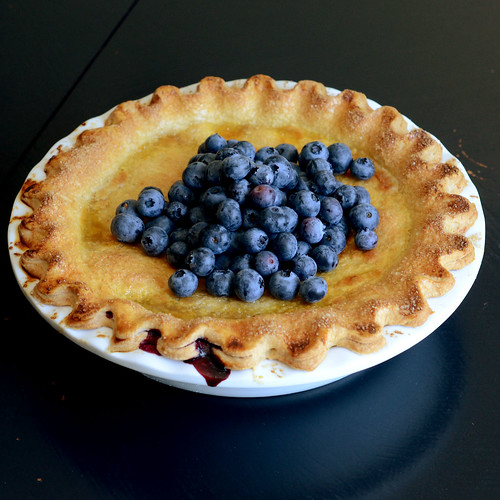
I was about to attempt a lattice top when my husband whispered "baby-steps" in my ear, so I went with a standard pie crust for the top. A quick brush with egg wash and a sprinkling of raw sugar before going into the oven.
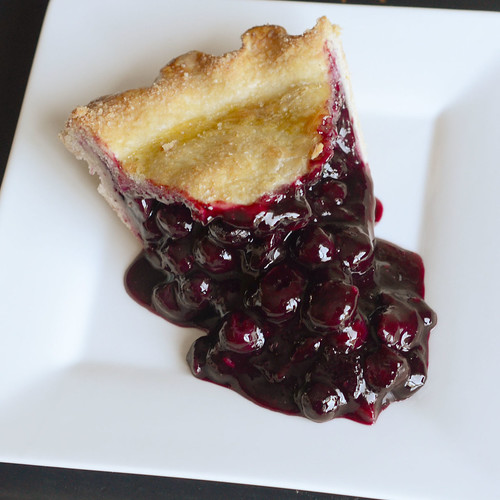
I was pretty happy with the golden pastry once out of the oven. We waited until the next day to dig into it, and when we did... the filling oozed all over the place. But I have to admit that I loved the texture of the filling. It was a great blueberry sauce!
And it was too nutmeg-y. And the crust was tough (although, I really liked it, but I don't like flaky pastries, so my opinion doesn't count apparently). But still. I made pie, and my husband had seconds. So I win anyways. Now I can go back to not making pies.Classic Pie Dough
Recipe source Baked Elements, page 161
Yield: 2 9-inch single crust pies or 1 double-crust pie
3 cups all-purpose flour, chilled
1 tablespoon sugar
1 teaspoon fine sea salt
8 ounces (2 sticks) cold unsalted butter, cut into ½-inch cubes
In a medium bowl, whisk the flour, sugar, and salt together. In a measuring cup, stir 3/4 cup of water with several ice cubes until it is very cold, discarding any remaining ice.
Toss the butter in the flour mixture to coat. Put the mixture in a food processor and pulse in short bursts until the butter pieces are the size of hazelnuts.
Pulsing in 4-second bursts, slowly drizzle the water into the food processor through the feed tube. As soon as the dough comes together in a ball, stop adding water.
Remove the dough from the food processor and divide it in half. Flatten each piece into a disk and wrap each disk first in parchment paper and then in plastic wrap. Refrigerate the dough until firm, about 1 hour.
Yield: 2 9-inch single crust pies or 1 double-crust pie
3 cups all-purpose flour, chilled
1 tablespoon sugar
1 teaspoon fine sea salt
8 ounces (2 sticks) cold unsalted butter, cut into ½-inch cubes
In a medium bowl, whisk the flour, sugar, and salt together. In a measuring cup, stir 3/4 cup of water with several ice cubes until it is very cold, discarding any remaining ice.
Toss the butter in the flour mixture to coat. Put the mixture in a food processor and pulse in short bursts until the butter pieces are the size of hazelnuts.
Pulsing in 4-second bursts, slowly drizzle the water into the food processor through the feed tube. As soon as the dough comes together in a ball, stop adding water.
Remove the dough from the food processor and divide it in half. Flatten each piece into a disk and wrap each disk first in parchment paper and then in plastic wrap. Refrigerate the dough until firm, about 1 hour.
Blueberry Pie Filling
Adapted from Nick Malgieri via That Skinny Chick can Bake
2 pints blueberries (4+ cups), rinsed
3/4 cup sugar
3 tablespoons cornstarch
3 tablespoons water
1 teaspoon grated lemon zest
1/2 teaspoon cinnamon
A few gratings of fresh nutmeg
2 tablespoons butter
Place the pie on a parchment lined baking sheet (to catch drips) and put on a lower shelf of your oven. Immediately reduce the temperature to 375º. Bake for about 40 minutes, until the crust golden and the filling is bubbling. Cool the pie on a rack.
For more information about the Daring Bakers challenges, click on through to the Daring Kitchen.
Adapted from Nick Malgieri via That Skinny Chick can Bake
2 pints blueberries (4+ cups), rinsed
3/4 cup sugar
3 tablespoons cornstarch
3 tablespoons water
1 teaspoon grated lemon zest
1/2 teaspoon cinnamon
A few gratings of fresh nutmeg
2 tablespoons butter
Combine 2 cups of the blueberries with the sugar in a saucepan. Bring to a simmer, stirring occasionally, till sugar is melted, about 5 minutes. Combine the cornstarch and water in a small bowl and whisk the blueberry and sugar mixture into it. Return mixture to the pan and cook, stirring constantly, over low heat, until it boils, thickens and becomes clear. Pour into a large bowl and mix in the lemon zest, cinnamon, nutmeg and butter. Mix in the rest of the blueberries. Cool.
Assembly
Egg wash: 1 egg well beaten with a pinch of salt
Sugar to sprinkle over top before baking
Preheat to 400º. Roll out the bottom crust and place in bottom of pie plate. Trim the edges, then add the blueberry filling. Roll out top crust and place over fruit filling. Seal and crimp the edges as desired. Sprinkle the top of the pie with sugar.
Place the pie on a parchment lined baking sheet (to catch drips) and put on a lower shelf of your oven. Immediately reduce the temperature to 375º. Bake for about 40 minutes, until the crust golden and the filling is bubbling. Cool the pie on a rack.
For more information about the Daring Bakers challenges, click on through to the Daring Kitchen.
Sunday, March 31, 2013
daring bakers: hidden veggies
Using veggies in sweet applications is something I've done before, but only with the very obvious carrot, pumpkin, zucchini and rhubarb (if it counts as a vegetable).
Ruth from Makey-Cakey was our March 2013 Daring Bakers’ challenge host. She encouraged us all to get experimental in the kitchen and sneak some hidden veggies into our baking, with surprising and delicious results!
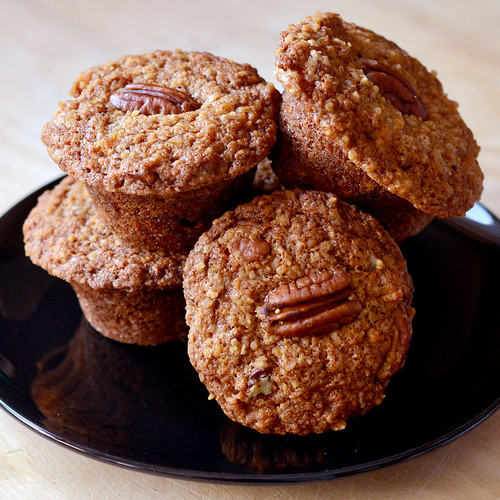
So I quickly went to the kitchen and grabbed a sweet potato I had been meaning to roast, and microwaved it to make muffins with pecans and flavored with maple syrup.
Maple Sweet Potato Muffins
recipe slightly adapted from : Ontario Sweet Potato
1 cup mashed sweet potatoes
1 ½ cups all-purpose flour
¾ cup firmly packed brown sugar
2 tsp. baking powder
1 tsp. baking soda
¾ tsp. ground cinnamon
Dash salt
2 large eggs, slightly beaten
¾ cup salad oil
¼ cup maple syrup
½ cup chopped toasted pecans
1. In large bowl, combine sweet potatoes, flour, brown sugar, baking powder, baking soda, cinnamon and salt. Add eggs, oil and maple syrup; blend well. Stir in pecans and currants.
2. Spoon evenly into greased muffin cups, filling each ¾ full. Bake at 350 degrees Fahrenheit for 15 minutes or until muffins spring back when lightly touched. Remove muffins from pan and serve warm. Makes 1 ½ dozen muffins.
I thought they were really good, especially the top of the muffins where I had sprinkled some maple sugar! They were pretty greasy though, so I would add some applesauce next time so I can reduce the amount of oil.
1 cup mashed sweet potatoes
1 ½ cups all-purpose flour
¾ cup firmly packed brown sugar
2 tsp. baking powder
1 tsp. baking soda
¾ tsp. ground cinnamon
Dash salt
2 large eggs, slightly beaten
¾ cup salad oil
¼ cup maple syrup
½ cup chopped toasted pecans
1. In large bowl, combine sweet potatoes, flour, brown sugar, baking powder, baking soda, cinnamon and salt. Add eggs, oil and maple syrup; blend well. Stir in pecans and currants.
2. Spoon evenly into greased muffin cups, filling each ¾ full. Bake at 350 degrees Fahrenheit for 15 minutes or until muffins spring back when lightly touched. Remove muffins from pan and serve warm. Makes 1 ½ dozen muffins.
I thought they were really good, especially the top of the muffins where I had sprinkled some maple sugar! They were pretty greasy though, so I would add some applesauce next time so I can reduce the amount of oil.
Sunday, January 27, 2013
Gevulde Speculaas
It's Daring Bakers' reveal day!
Gevulde Speculaas
Slightly adapted from a Dutch traditional recipe provided by Francijn
Francijn of Koken in de Brouwerij was our January 2013 Daring Bakers’ Hostess and she challenged us to make the traditional Dutch pastry, Gevulde Speculaas from scratch! That includes making our own spice mix, almond paste and dough!
The only speculaas I ever had is a crisp, buttery cookie made with spices including cinnamon, cloves, mace and ginger, pepper, cardamom, coriander, anise seeds and nutmeg and shaped like a windmill. We were challenged by Francijn to make a stuffed speculaas, which is more like a pastry than a cookie, including the spice mix, the dough and the almond paste.
I hurried to make this before going back to work in early January, and luck was on my side, as I had all the ingredients needed.
As Francijn told us that the different components get more flavorful as they sit before they get assembled, I made them two days before baking the pastry.
For the spice mixture, I used cinnamon, cloves, ginger, white pepper, cardamom and nutmeg, basically, the spices I had on hand. I know that mace is a must, but I couldn't find it in stores.
The dough quickly comes together, basically blending room temperature butter into flour, sugar (I used dark brown sugar), baking powder, salt and the spice mixture. It seemed pretty dry to me, but I formed it into a cylinder using plastic wrap to keep everything together.
The almond paste is quickly made in the food processor. I used almond meal, an egg, sugar and lemon zest, and let that sit for a couple of days.
I used a 8-3/4 inch springform pan to bake my pastry in, using the removable bottom to cut out two rounds of dough that I had flattened with a rolling pin.
Our host instructed to roll out the almond paste before layering it between two layers of dough, but mine was soft enough to be spread on top of the dough. The three layers were held together with some beaten egg, that I didn't beat enough, as I could see little bits of cooked egg between my layers.
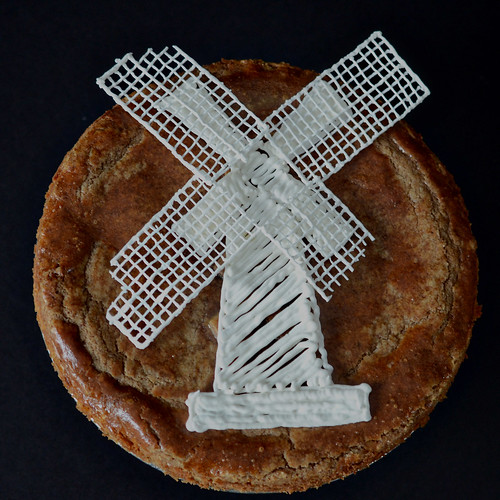
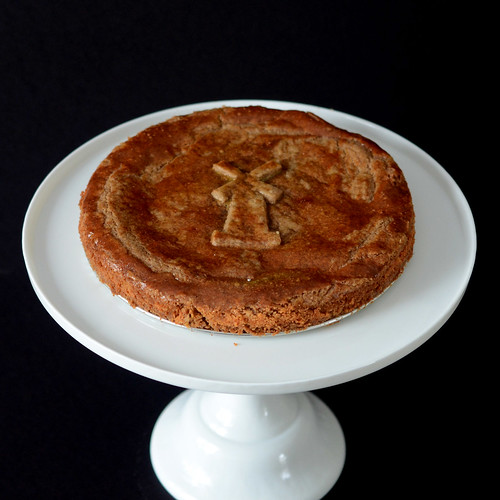
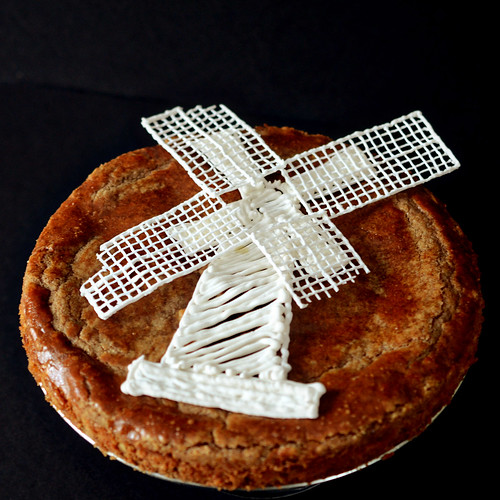
With my dough scraps, I quickly cut out a small windmill to decorate the top of my pastry, brushed it with more beaten egg, and baked the whole thing for 40 minutes.
I also made some royal icing decorations to pretty it up some. At first, I was only going to use the windmill blades on the cake, to hint at the Dutch origin of the pastry, but the result was not quite what I had in mind. I had some icing leftover, so quickly piped a windmill, not really planning on using it. But when I looked at my work table a little while after, one of my daughters had put the blades on top of the windmill, and together, it looked pretty good!
The resulting pastry is a lot more like cake like than I would have imagined, and quite delicious. The texture is very addicting, and the spices give a wonderful flavor. It smelled amazing while baking, and I couldn't wait to cut into it while I was taking pictures.
Slightly adapted from a Dutch traditional recipe provided by Francijn
Spice mix
Almond paste
1-1/3 cups (320 ml)(125 gm) (4½ oz) ground almonds
1 teaspoon ground cloves
½ teaspoon ginger
½ teaspoon white pepper
½ teaspoon cardamom
1 teaspoon nutmeg
3 ½ tsp cinnamon
3 ½ tsp cinnamon
Combine all spices together and store in an airtight container.
Almond paste
1-1/3 cups (320 ml)(125 gm) (4½ oz) ground almonds
5/8 cup (150 ml) (125 grams) (4½ oz) granulated sugar
1 large egg
1 teaspoon (5 ml) (3 gm) lemon zest
Add the ground almonds and the sugar to the bowl of a food processor, and grind for one or two minutes. It must be very fine. Add the egg and lemon zest and let the food processor combine it until a paste forms.
Store the almond paste in an airtight container in the refrigerator. Although the flavor gets better as days pass by, it is not wise to store the paste for too long, as it contains a raw egg. For the same reason you should not eat the paste unbaked.
Speculaas Dough
1¾ cups (250 gm) (9 oz) all purpose (plain) flour
1 teaspoon (5 ml) (5 gm) baking powder
¾ cup (150 grams) (5-1/3 oz) brown sugar, firmly packed
a pinch salt
2 tablespoons (30 ml) (15 gm) (½ oz) speculaas spices
3/4 cup (1½ stick) (175 gm) (6 oz) unsalted butter
Put flour, baking powder, sugar, salt and spices in a bowl.
Dice the butter and add to the dry ingredients.
Mix until smooth.
Feel free to add a little milk if the dough is too dry.
Wrap in clingfoil and put in the refrigerator for two hours.
You can choose to make the dough a few days in advance, just like the almond paste, that will benefit the flavor.
Assembling and baking the Gevulde Speculaas
1 recipe speculaas dough
1 recipe almond paste
1 large egg
Grease a 9 inch springform pan
Preheat the oven to moderate 350°F/180°C/gas 4
Divide the dough into two portions.
Roll out both portions on a lightly floured surface, until they are exactly as big as the baking pan.
Put one of the layers in the pan and press it lightly to fill the bottom.
Lightly beat the egg with a teaspoon cold water.
Smear 1/3 of the egg over the dough in the pan.
Roll out the almond paste between two sheets of clingfoil, until it is exactly as big as the pan, and put it on the dough in the pan.
Press the paste lightly down to fit in the pan, and smear the next 1/3 of the egg over it.
Now put the second layer of dough on top of the paste, press it lightly, and make as smooth as possible.
Smear the last 1/3 of the egg over the dough.
Bake for 40 minutes in the preheated oven.
Let cool completely in the pan, then cut it in portions as you like.
1 large egg
1 teaspoon (5 ml) (3 gm) lemon zest
Add the ground almonds and the sugar to the bowl of a food processor, and grind for one or two minutes. It must be very fine. Add the egg and lemon zest and let the food processor combine it until a paste forms.
Store the almond paste in an airtight container in the refrigerator. Although the flavor gets better as days pass by, it is not wise to store the paste for too long, as it contains a raw egg. For the same reason you should not eat the paste unbaked.
Speculaas Dough
1¾ cups (250 gm) (9 oz) all purpose (plain) flour
1 teaspoon (5 ml) (5 gm) baking powder
¾ cup (150 grams) (5-1/3 oz) brown sugar, firmly packed
a pinch salt
2 tablespoons (30 ml) (15 gm) (½ oz) speculaas spices
3/4 cup (1½ stick) (175 gm) (6 oz) unsalted butter
Put flour, baking powder, sugar, salt and spices in a bowl.
Dice the butter and add to the dry ingredients.
Mix until smooth.
Feel free to add a little milk if the dough is too dry.
Wrap in clingfoil and put in the refrigerator for two hours.
You can choose to make the dough a few days in advance, just like the almond paste, that will benefit the flavor.
Assembling and baking the Gevulde Speculaas
1 recipe speculaas dough
1 recipe almond paste
1 large egg
Grease a 9 inch springform pan
Preheat the oven to moderate 350°F/180°C/gas 4
Divide the dough into two portions.
Roll out both portions on a lightly floured surface, until they are exactly as big as the baking pan.
Put one of the layers in the pan and press it lightly to fill the bottom.
Lightly beat the egg with a teaspoon cold water.
Smear 1/3 of the egg over the dough in the pan.
Roll out the almond paste between two sheets of clingfoil, until it is exactly as big as the pan, and put it on the dough in the pan.
Press the paste lightly down to fit in the pan, and smear the next 1/3 of the egg over it.
Now put the second layer of dough on top of the paste, press it lightly, and make as smooth as possible.
Smear the last 1/3 of the egg over the dough.
Bake for 40 minutes in the preheated oven.
Let cool completely in the pan, then cut it in portions as you like.
If you wrap the stuffed speculaas in clingfoil, after it has cooled completely, you can store it a few days at room temperature. Freezing is possible, but fresh speculaas tastes better.
For the complete challenge and to see how the rest of the Daring Bakers liked this recipe, please visit The Daring Kitchen.
Thursday, December 27, 2012
triple chocolate toffee panettone
I waited until the last minute to complete this month's Daring Bakers challenge. Had many projects on the go this month, and had to wait until after Christmas to be able to focus on this project.
The December 2012 Daring Bakers’ challenge was hosted by the talented Marcellina of Marcellina in Cucina. Marcellina challenged us to create our own custom Panettone, a traditional Italian holiday bread!
Panettone
Makes 2 Panettoni
Sponge
1 satchel (2¼ teaspoons) (7 gm) active dry yeast
1/3 cup (80 ml) warm water
½ cup (70 gm) unbleached all purpose flour
First Dough
1 satchel (2¼ teaspoons) (7 gm) active dry yeast
3 tablespoons (45 ml) warm water
2 large eggs, at room temp
1¼ cup (175 gm) unbleached all-purpose (plain) flour
¼ cup (55 gm) (2 oz) sugar
½ cup (1 stick) (115 gm) unsalted butter, at room temp
In the bowl of a stand mixer, mix together the yeast and water and allow to stand until creamy, about 10 minutes or so. With the paddle attached mix in the sponge, eggs, flour, and sugar. Add in the butter and mix for 3 minutes until the dough is smooth and even. Cover with plastic wrap and allow double in size, about 1 – 1 ¼ hours
Second dough
2 large eggs
3 large egg yolks
2/3 cup (150 gm) (5-2/3 oz) sugar
3 tablespoons (45 ml) honey
1 tablespoon (15 ml) vanilla extract
1 teaspoon (5 ml) (6 gm) salt
1 cup (2 sticks) (225 gm) unsalted butter, at room temp
3 cups (420 gm) (15 oz) unbleached all-purpose (plain) flour; plus up to (2/3 cup) 100 gm for kneading
With the paddle mix in thoroughly the eggs, egg yolks, sugar, honey, vanilla, and salt. Mix in the butter until smooth. Add the flour and slowly incorporate. At this stage the dough will seem a little too soft, like cookie dough. Replace the paddle with the dough hook and knead for about 2 minutes. Turn out the dough and knead it on a well-floured surface until it sort of holds its shape.
Don’t knead in too much flour but you may need as much as 2/3 cup (100 gm). Be careful the excess flour will affect the finished product.
First Rise
Oil a large bowl lightly, plop in your dough and cover with plastic wrap. Rise in a warm place for 2 – 4 hours, until tripled in size.
I've never had panettone before, but have seen tall boxes of it in stores. I'm kinda leery about pastry that comes in a box and has a long shelf life. That, combined with pictures of panettone that I've seen made me imagine a tall crusty bread with a dry crumb.
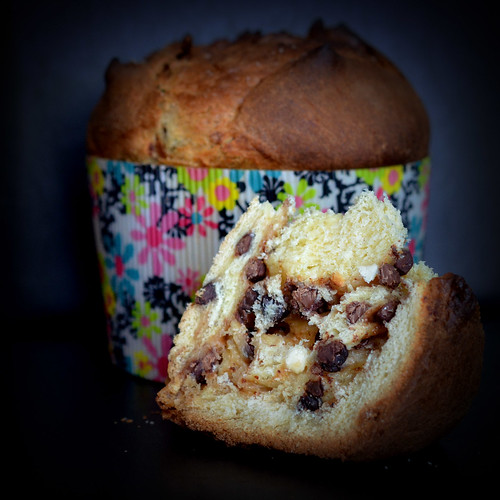
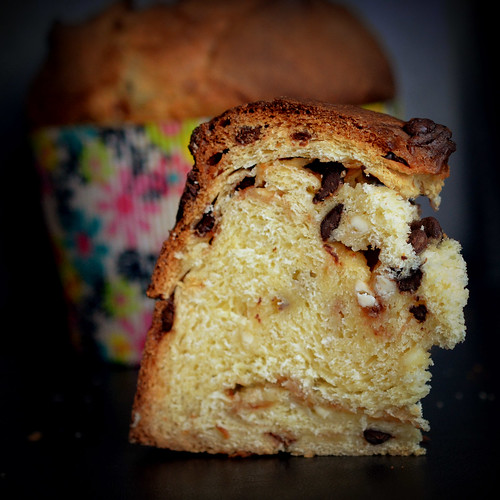
Although traditional panettone has dried fruits and candied citrus peel in the recipe, that flavor combination did not appeal to me. I chose to replace the traditional filling with three kinds of chocolate chips, toffee chips and coarse sugar.
I decided to make the entire recipe over the course of one day, starting at 8 am and pulled it out of the oven at 9 pm. Most of the work is waiting for the dough to rise.
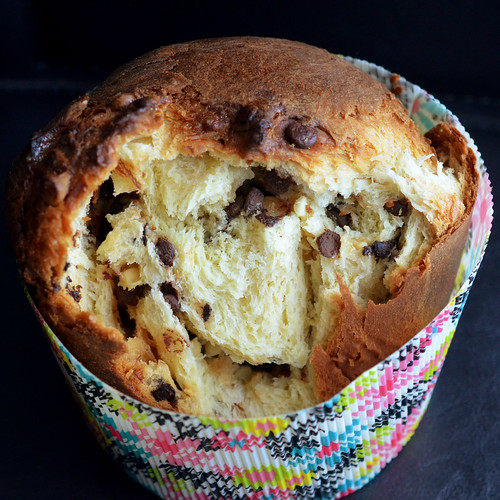
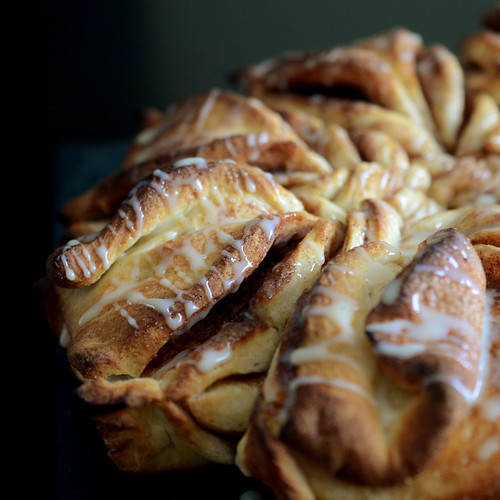
One of my loaves rose more than the other and the shorter one kinda collapsed a bit in the middle after I took it out of the oven. I was worried about having under baked it, so I peeked in and couldn't resist pulling pieces of dough out for a taste.
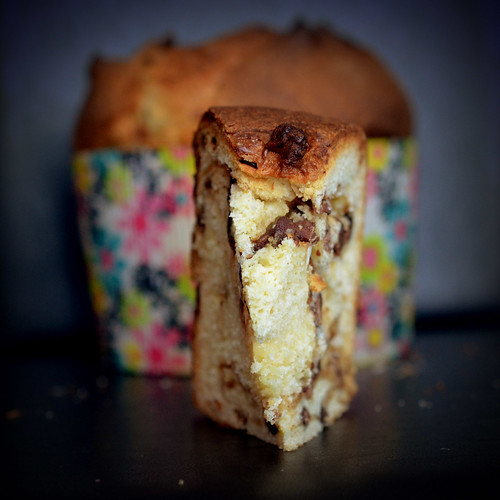
The texture of this bread is really something else. Flaky and fluffy at the same time. Straight out of the oven, it was amazing! Not dry at all! I had to stop myself from going back and plucking just another piece from the interior of the bread, or else I'd have had nothing left to photograph.
I really loved the flavor combination too! Not sure I'd make it again, after all, it calls for almost a pound of butter, and you need to dedicate an entire day to make it, but I really enjoyed this challenge.
The only issue I had was finding the right papers to bake this in. I ended up using a 6-inch store-bought disposable pan that had a tube in the middle. I cut out the tube and added a cake board to the bottom of the pan. I also I had butter dripping to the bottom of my oven and smoking up the kitchen when I put my bread in. Of course, instead of staying on top of the dough, the butter just melted right off the side of the bread. I should have seen this coming, but no. Regardless, the mess worth it!
Here's the recipe that was provided for us with a few modifications regarding flavoring. For the original recipe, please click here.
Panettone
Makes 2 Panettoni
Sponge
1 satchel (2¼ teaspoons) (7 gm) active dry yeast
1/3 cup (80 ml) warm water
½ cup (70 gm) unbleached all purpose flour
Mix the yeast and water in a small bowl and allow to stand until creamy, about 10 minutes or so. Mix in the flour. Cover with plastic wrap and allow to double in size for about 20 to 30 minutes.
First Dough
1 satchel (2¼ teaspoons) (7 gm) active dry yeast
3 tablespoons (45 ml) warm water
2 large eggs, at room temp
1¼ cup (175 gm) unbleached all-purpose (plain) flour
¼ cup (55 gm) (2 oz) sugar
½ cup (1 stick) (115 gm) unsalted butter, at room temp
In the bowl of a stand mixer, mix together the yeast and water and allow to stand until creamy, about 10 minutes or so. With the paddle attached mix in the sponge, eggs, flour, and sugar. Add in the butter and mix for 3 minutes until the dough is smooth and even. Cover with plastic wrap and allow double in size, about 1 – 1 ¼ hours
Second dough
2 large eggs
3 large egg yolks
2/3 cup (150 gm) (5-2/3 oz) sugar
3 tablespoons (45 ml) honey
1 tablespoon (15 ml) vanilla extract
1 teaspoon (5 ml) (6 gm) salt
1 cup (2 sticks) (225 gm) unsalted butter, at room temp
3 cups (420 gm) (15 oz) unbleached all-purpose (plain) flour; plus up to (2/3 cup) 100 gm for kneading
With the paddle mix in thoroughly the eggs, egg yolks, sugar, honey, vanilla, and salt. Mix in the butter until smooth. Add the flour and slowly incorporate. At this stage the dough will seem a little too soft, like cookie dough. Replace the paddle with the dough hook and knead for about 2 minutes. Turn out the dough and knead it on a well-floured surface until it sort of holds its shape.
Don’t knead in too much flour but you may need as much as 2/3 cup (100 gm). Be careful the excess flour will affect the finished product.
First Rise
Oil a large bowl lightly, plop in your dough and cover with plastic wrap. Rise in a warm place for 2 – 4 hours, until tripled in size.
Filling and final dough
1½ cups chocolate chips (combination of milk, white and semi-sweet)
½ cup toffee chips
1/2 cup coarse sugar
1½ cups chocolate chips (combination of milk, white and semi-sweet)
½ cup toffee chips
1/2 cup coarse sugar
Combine all your filling ingredients and mix well
Press out one portion of dough into an oval shape
Sprinkle over one quarter of the filling and roll up the dough into a log
Press out again into an oval shape and sprinkle over another quarter of the filling
Roll into a log shape again.
Repeat with the second portion of dough
Shape each into a ball and slip into your prepared pans, panettone papers or homemade panettone papers.
Cut an X into the top of each panettone and allow to double in size.
Rising time will vary but ff it has been rising in a warm place it should be doubled in about 2 hours.
Baking
Press out one portion of dough into an oval shape
Sprinkle over one quarter of the filling and roll up the dough into a log
Press out again into an oval shape and sprinkle over another quarter of the filling
Roll into a log shape again.
Repeat with the second portion of dough
Shape each into a ball and slip into your prepared pans, panettone papers or homemade panettone papers.
Cut an X into the top of each panettone and allow to double in size.
Rising time will vary but ff it has been rising in a warm place it should be doubled in about 2 hours.
Baking
When you think your dough has only about 30 minutes left to rise preheat your oven to moderately hot 400°F/200°C/gas mark 6 and adjust your oven racks.
Just before baking carefully (don’t deflate it!) cut the X into the dough again and place in a knob (a nut) of butter on top.
Place your panettoni in the oven and bake for 10 minutes
Reduce the heat to moderate 350°F/180°C/gas mark 4 and bake for another 10 minutes
Reduce the heat again to moderate 325°F/160°C/gas mark 3 and bake for 30 minutes until the tops are well browned and a skewer inserted into the panettone comes out clean.
Cooling your panettone is also important. If you have use papers (commercial or homemade) lie your panettoni on their side cushioned with rolled up towels. Turn gently as they cool. If you have used pans cool in the pans for 30 minutes then remove and cushion with towels as above.
Just before baking carefully (don’t deflate it!) cut the X into the dough again and place in a knob (a nut) of butter on top.
Place your panettoni in the oven and bake for 10 minutes
Reduce the heat to moderate 350°F/180°C/gas mark 4 and bake for another 10 minutes
Reduce the heat again to moderate 325°F/160°C/gas mark 3 and bake for 30 minutes until the tops are well browned and a skewer inserted into the panettone comes out clean.
Cooling your panettone is also important. If you have use papers (commercial or homemade) lie your panettoni on their side cushioned with rolled up towels. Turn gently as they cool. If you have used pans cool in the pans for 30 minutes then remove and cushion with towels as above.
Saturday, October 13, 2012
tiramisu
I traded a cardboard house for dessert last summer. I was working at a fair with a colleague I rarely see. We both wanted the cardboard houses on display at one of the booths and she ended up getting the last one at the end of the day, but gave it to me instead of keeping it for her own daughter. I said I'd make her whatever dessert she wanted the next time I saw her. She picked tiramisu. Kinda took me off guard since I've never had tiramisu, let alone made it, but whatever. I'm up for a challenge!
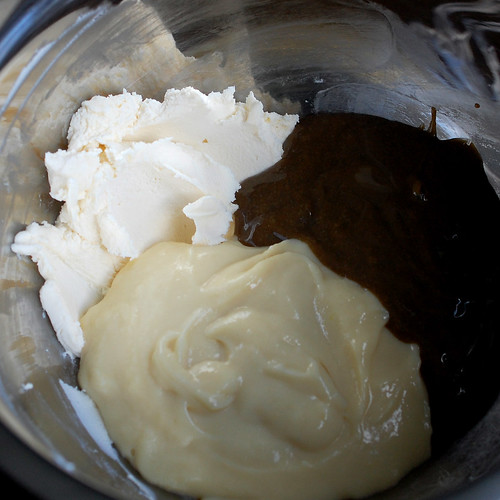
So tiramisu is layers of cookies (savoiardi or ladyfingers or langues de chat) dipped in sweetened espresso, and creamy filling, this one made by combining mascarpone, vanilla pastry cream, zabaglione and whipped cream. Then the whole thing is dusted in cocoa powder.
I picked the recipe the Daring Bakers had made back in February 2010, a full year before I joined.
In the challenge, they were supposed to make the mascarpone from scratch, but I ran out of time and didn't plan ahead properly, so I bought it. And the zabaglione was supposed to be flavored with marsala wine, but there was an option to use coffee, so that's what I did. I don't know my colleague very well, and didn't know if she liked wine. What I do know is that she's trying to get pregnant, so I chose to go with coffee in case she's avoiding alcohol. Now I don't know if coffee zabaglione is even a thing, since I think zabaglione is a custard made with alcohol. But whatever, I'm going with zabaglione anyways.
I made the zabaglione and the pastry cream the first day, let the mixtures chill overnight. Felt really fancy flavoring the zabaglione with coffee and lemon zest. Felt European. Although I don't drink coffee, I love the smell of it. And this mixture smelled so good! The next morning, I made the savoiardi, whipped the cream and combined the four components of the creamy filling. I made the required 2 cups of sweet espresso (which was a cup too many) and layered the dessert.
Dipping the cookies in coffee before layering them with the creamy filling seemed wrong. Soggy cookies are gross, unless it's because oreos were dipped in milk. And even at that, they need to be dipped quickly, and consumed immediately. But then again, the cookies by themselves were not that delicious either. They had a crispy meringue-like shell, but a dry cookie texture inside. And I was surprised that they kept their shape in the oven, just puffing up a bit, just barely spreading.
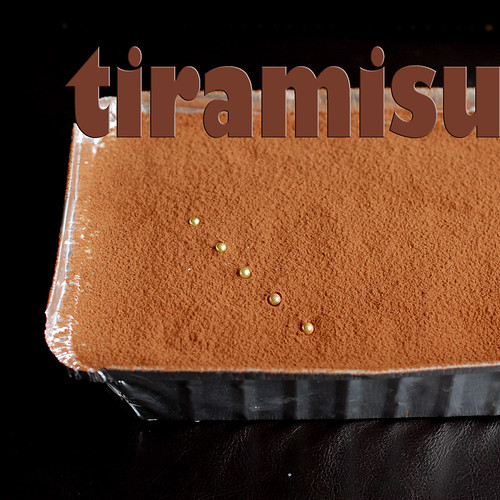
I wish I could have prettied up the dessert a bit, but it needed to travel a couple of hours by car, then spend the day hanging out in a small fridge before travelling a couple more hours to it's final destination, so I played it safe, and left it in its throwaway container.
This dessert got rave reviews. I was told the flavors were perfect, and the sugar didn't overwhelmed the coffee. The cookies were not soggy and the final product could have been served in an Italian Piazza. Score 1 for the tiramisu.
LADYFINGERS/ SAVOIARDI BISCUITS
(Source: Recipe from Cordon Bleu At Home)
3 eggs, separated
6 tablespoons granulated sugar
3/4 cup cake flour, sifted
6 tablespoons confectioner's sugar
Preheat your oven to 350 F degrees, line 2 baking sheets with parchment paper.
Beat the egg whites using a hand held electric mixer until stiff peaks form. Gradually add the granulated sugar and continue beating until the egg whites become stiff again, glossy and smooth.
In a small bowl, beat the egg yolks lightly with a fork and fold them into the meringue. Sift the flour over this mixture and fold gently until just mixed.
Fit a pastry bag with a plain tip and fill with the batter. Pipe the batter into 5" long and 3/4" wide strips leaving about 1" space in between the strips.
Sprinkle half the confectioner's sugar over the ladyfingers and wait for 5 minutes. Sprinkle the remaining sugar.
Bake the ladyfingers for 10 minutes, then rotate the sheets and bake for another 5 minutes or so until the puff up, turn lightly golden brown and are still soft.
Allow them to cool slightly on the sheets for about 5 minutes and then remove the ladyfingers from the baking sheet with a metal spatula while still hot, and cool on a rack.
Store them in an airtight container till required. They should keep for 2 to 3 weeks.
TIRAMISU
(Recipe source: Carminantonio's Tiramisu from The Washington Post, July 11 2007 )
For the zabaglione:
2 large egg yolks
3 tablespoons sugar
1/4 cup Marsala wine (or port or coffee)
1/4 teaspoon vanilla extract
1/2 teaspoon finely grated lemon zest
For the vanilla pastry cream:
1/4 cup sugar
1 tablespoon all purpose flour
1/2 teaspoon finely grated lemon zest
1/2 teaspoon vanilla extract
1 large egg yolk
3/4 cup whole milk
For the whipped cream:
1 cup chilled heavy cream
1/4 cup sugar
1/2 teaspoon vanilla extract
To assemble the tiramisu:
2 cups brewed espresso, warmed
1 teaspoon rum extract (optional)
1/2 cup sugar
1/3 cup mascarpone cheese
1 recipe savoiardi/ladyfinger biscuits
2 tablespoons unsweetened cocoa powder
For the zabaglione:
Heat water in a double boiler. If you don’t have a double boiler, place a pot with about an inch of water in it on the stove. Place a heat-proof bowl in the pot making sure the bottom does not touch the water.
In a large mixing bowl (or stainless steel mixing bowl), mix together the egg yolks, sugar, the Marsala (or espresso/ coffee), vanilla extract and lemon zest. Whisk together until the yolks are fully blended and the mixture looks smooth.
Transfer the mixture to the top of a double boiler or place your bowl over the pan/ pot with simmering water. Cook the egg mixture over low heat, stirring constantly, for about 8 minutes or until it resembles thick custard. It may bubble a bit as it reaches that consistency. Strain into a bowl and let cool to room temperature. Cover and refrigerate at least 4 hours or overnight, until thoroughly chilled.
For the pastry cream:
Mix together the sugar, flour, lemon zest and vanilla extract in a medium heavy-bottomed saucepan. To this add the egg yolk and half the milk. Whisk until smooth.
Now place the saucepan over low heat and cook, stirring constantly to prevent the mixture from curdling.
Add the remaining milk a little at a time, still stirring constantly. After about 12 minutes the mixture will be thick, free of lumps and beginning to bubble. Strain the cream into a bowl and cool to room temperature. Cover with plastic film and refrigerate at least 4 hours or overnight, until thoroughly chilled.
For the whipped cream:
Combine the cream, sugar and vanilla extract in a mixing bowl. Beat with an electric hand mixer until the mixture holds stiff peaks. Set aside.
To assemble the tiramisu:
Have ready a 8" by 8" serving dish.
Mix together the warm espresso, rum extract and sugar in a shallow dish, whisking to mix well. Set aside to cool.
In a large bowl, beat the mascarpone cheese with a spoon to break down the lumps and make it smooth. This will make it easier to fold. Add the prepared and chilled zabaglione and pastry cream, blending until just combined. Gently fold in the whipped cream. Set this cream mixture aside.
Now to start assembling the tiramisu.
Workings quickly, dip 12 of the ladyfingers in the sweetened espresso, about 1 second per side. They should be moist but not soggy. Immediately transfer each ladyfinger to the platter, placing them side by side in a single row. You may break a lady finger into two, if necessary, to ensure the base of your dish is completely covered.
Spoon one-third of the cream mixture on top of the ladyfingers, then use a rubber spatula or spreading knife to cover the top evenly, all the way to the edges.
Repeat to create 2 more layers, using 12 ladyfingers and the cream mixture for each layer. Clean any spilled cream mixture; cover carefully with plastic wrap and refrigerate the tiramisu overnight.
To serve, carefully remove the plastic wrap and sprinkle the tiramisu with cocoa powder using a fine-mesh strainer or decorate as you please. Cut into individual portions and serve.
So tiramisu is layers of cookies (savoiardi or ladyfingers or langues de chat) dipped in sweetened espresso, and creamy filling, this one made by combining mascarpone, vanilla pastry cream, zabaglione and whipped cream. Then the whole thing is dusted in cocoa powder.
I picked the recipe the Daring Bakers had made back in February 2010, a full year before I joined.
In the challenge, they were supposed to make the mascarpone from scratch, but I ran out of time and didn't plan ahead properly, so I bought it. And the zabaglione was supposed to be flavored with marsala wine, but there was an option to use coffee, so that's what I did. I don't know my colleague very well, and didn't know if she liked wine. What I do know is that she's trying to get pregnant, so I chose to go with coffee in case she's avoiding alcohol. Now I don't know if coffee zabaglione is even a thing, since I think zabaglione is a custard made with alcohol. But whatever, I'm going with zabaglione anyways.
I made the zabaglione and the pastry cream the first day, let the mixtures chill overnight. Felt really fancy flavoring the zabaglione with coffee and lemon zest. Felt European. Although I don't drink coffee, I love the smell of it. And this mixture smelled so good! The next morning, I made the savoiardi, whipped the cream and combined the four components of the creamy filling. I made the required 2 cups of sweet espresso (which was a cup too many) and layered the dessert.
Dipping the cookies in coffee before layering them with the creamy filling seemed wrong. Soggy cookies are gross, unless it's because oreos were dipped in milk. And even at that, they need to be dipped quickly, and consumed immediately. But then again, the cookies by themselves were not that delicious either. They had a crispy meringue-like shell, but a dry cookie texture inside. And I was surprised that they kept their shape in the oven, just puffing up a bit, just barely spreading.
I wish I could have prettied up the dessert a bit, but it needed to travel a couple of hours by car, then spend the day hanging out in a small fridge before travelling a couple more hours to it's final destination, so I played it safe, and left it in its throwaway container.
This dessert got rave reviews. I was told the flavors were perfect, and the sugar didn't overwhelmed the coffee. The cookies were not soggy and the final product could have been served in an Italian Piazza. Score 1 for the tiramisu.
LADYFINGERS/ SAVOIARDI BISCUITS
(Source: Recipe from Cordon Bleu At Home)
3 eggs, separated
6 tablespoons granulated sugar
3/4 cup cake flour, sifted
6 tablespoons confectioner's sugar
Preheat your oven to 350 F degrees, line 2 baking sheets with parchment paper.
Beat the egg whites using a hand held electric mixer until stiff peaks form. Gradually add the granulated sugar and continue beating until the egg whites become stiff again, glossy and smooth.
In a small bowl, beat the egg yolks lightly with a fork and fold them into the meringue. Sift the flour over this mixture and fold gently until just mixed.
Fit a pastry bag with a plain tip and fill with the batter. Pipe the batter into 5" long and 3/4" wide strips leaving about 1" space in between the strips.
Sprinkle half the confectioner's sugar over the ladyfingers and wait for 5 minutes. Sprinkle the remaining sugar.
Bake the ladyfingers for 10 minutes, then rotate the sheets and bake for another 5 minutes or so until the puff up, turn lightly golden brown and are still soft.
Allow them to cool slightly on the sheets for about 5 minutes and then remove the ladyfingers from the baking sheet with a metal spatula while still hot, and cool on a rack.
Store them in an airtight container till required. They should keep for 2 to 3 weeks.
TIRAMISU
(Recipe source: Carminantonio's Tiramisu from The Washington Post, July 11 2007 )
For the zabaglione:
2 large egg yolks
3 tablespoons sugar
1/4 cup Marsala wine (or port or coffee)
1/4 teaspoon vanilla extract
1/2 teaspoon finely grated lemon zest
For the vanilla pastry cream:
1/4 cup sugar
1 tablespoon all purpose flour
1/2 teaspoon finely grated lemon zest
1/2 teaspoon vanilla extract
1 large egg yolk
3/4 cup whole milk
For the whipped cream:
1 cup chilled heavy cream
1/4 cup sugar
1/2 teaspoon vanilla extract
To assemble the tiramisu:
2 cups brewed espresso, warmed
1 teaspoon rum extract (optional)
1/2 cup sugar
1/3 cup mascarpone cheese
1 recipe savoiardi/ladyfinger biscuits
2 tablespoons unsweetened cocoa powder
For the zabaglione:
Heat water in a double boiler. If you don’t have a double boiler, place a pot with about an inch of water in it on the stove. Place a heat-proof bowl in the pot making sure the bottom does not touch the water.
In a large mixing bowl (or stainless steel mixing bowl), mix together the egg yolks, sugar, the Marsala (or espresso/ coffee), vanilla extract and lemon zest. Whisk together until the yolks are fully blended and the mixture looks smooth.
Transfer the mixture to the top of a double boiler or place your bowl over the pan/ pot with simmering water. Cook the egg mixture over low heat, stirring constantly, for about 8 minutes or until it resembles thick custard. It may bubble a bit as it reaches that consistency. Strain into a bowl and let cool to room temperature. Cover and refrigerate at least 4 hours or overnight, until thoroughly chilled.
For the pastry cream:
Mix together the sugar, flour, lemon zest and vanilla extract in a medium heavy-bottomed saucepan. To this add the egg yolk and half the milk. Whisk until smooth.
Now place the saucepan over low heat and cook, stirring constantly to prevent the mixture from curdling.
Add the remaining milk a little at a time, still stirring constantly. After about 12 minutes the mixture will be thick, free of lumps and beginning to bubble. Strain the cream into a bowl and cool to room temperature. Cover with plastic film and refrigerate at least 4 hours or overnight, until thoroughly chilled.
For the whipped cream:
Combine the cream, sugar and vanilla extract in a mixing bowl. Beat with an electric hand mixer until the mixture holds stiff peaks. Set aside.
To assemble the tiramisu:
Have ready a 8" by 8" serving dish.
Mix together the warm espresso, rum extract and sugar in a shallow dish, whisking to mix well. Set aside to cool.
In a large bowl, beat the mascarpone cheese with a spoon to break down the lumps and make it smooth. This will make it easier to fold. Add the prepared and chilled zabaglione and pastry cream, blending until just combined. Gently fold in the whipped cream. Set this cream mixture aside.
Now to start assembling the tiramisu.
Workings quickly, dip 12 of the ladyfingers in the sweetened espresso, about 1 second per side. They should be moist but not soggy. Immediately transfer each ladyfinger to the platter, placing them side by side in a single row. You may break a lady finger into two, if necessary, to ensure the base of your dish is completely covered.
Spoon one-third of the cream mixture on top of the ladyfingers, then use a rubber spatula or spreading knife to cover the top evenly, all the way to the edges.
Repeat to create 2 more layers, using 12 ladyfingers and the cream mixture for each layer. Clean any spilled cream mixture; cover carefully with plastic wrap and refrigerate the tiramisu overnight.
To serve, carefully remove the plastic wrap and sprinkle the tiramisu with cocoa powder using a fine-mesh strainer or decorate as you please. Cut into individual portions and serve.
Thursday, September 27, 2012
empanadas
Patri of the blog, Asi Son Los Cosas, was our September 2012 Daring Bakers’ hostess and she decided to tempt us with one of her family’s favorite recipes for Empanadas! We were given two dough recipes to choose from and encouraged to fill our Empanadas as creatively as we wished!
I had spotted this cute mini apple pie cutter/maker at the store and couldn't help but using it for this challenge! I don't like to make pie dough, and as i'm more comfortable with yeasted dough I thought this would be perfect. Turns out that yeasted dough doesn't really like to be rolled thinly and cut using a plastic cutter. The dough tends to shrink back. It did work out, but it was a bit finicky.
I wasn't very creative. I filled my Empanadas with apple pie filling. Brushed them with some an egg wash, sprinkled on some raw sugar, and baked them.
I had spotted this cute mini apple pie cutter/maker at the store and couldn't help but using it for this challenge! I don't like to make pie dough, and as i'm more comfortable with yeasted dough I thought this would be perfect. Turns out that yeasted dough doesn't really like to be rolled thinly and cut using a plastic cutter. The dough tends to shrink back. It did work out, but it was a bit finicky.
We weren't big fans of this, but it's probably my fault. Maybe I should have sweetened the dough more. Or flavored it in some way. I did use butter instead of oil, thinking it would impart it with a buttery taste. I cut some of the salt and added a tbsp of sugar. But it wasn't enough. I also used a mixture of all purpose and bread flour because I didn't have enough bread flour. So that probably had an impact on the texture of the baked dough.
I'm sure my fellow Daring Bakers fared much better than I at this challenge! Hop on over to the Daring Kitchen and have a look at what they came up with!
Monday, August 27, 2012
pâte à choux swans
It's Daring Baker's reveal day!
I was very excited when I saw August's challenge! Kat of The Bobwhites was our August 2012 Daring Baker hostess who inspired us to have fun in creating pate a choux shapes, filled with crème patisserie or Chantilly cream. We were encouraged to create swans or any shape we wanted and to go crazy with filling flavors allowing our creativity to go wild!
A couple weeks prior to the challenge being announced, I had played with pâte à choux for the first time, planning on making eclairs to bring to a family gathering. Although my eclairs shells turned out fine, I undercooked my pastry cream and it was too soupy to pipe in the shells. So that was a fail!
I was quite ready to give it another go, and this time, it did turn out!
I used the pâte à choux recipe provided by our hostess, but took the lazy way out, and used the stand mixer to finish the dough. There doesn't seem to be much variations between pâte à choux recipes, so you can't go wrong!
Pâte à choux
½ cup (120 ml) (115 gm) (4 oz) butter
1 cup (240 ml) water
¼ teaspoon (1½ gm) salt
1 tsp sugar
1 cup (240 ml) (140 gm) (5 oz) all-purpose flour
4 large eggs
Line at least two baking sheets with silicone mats or parchment paper, or grease pans well.
Preheat oven to moderately hot 375°F/190°C/gas mark 5 .
In a small saucepan, combine butter, water, salt and sugar. Heat over medium until butter melts, then remove from stove.
Add flour all at once and beat the mixture until the dough pulls away from the sides of the pot.
Transfer the mixture to the bowl of a stand mixer, and using the paddle attachment and a low speed, mix briefly before adding the first egg. Beat for about a minute, until well combined. Add remaining eggs one at a time, beating for about a minute after each addition. Resulting mixture should be somewhat glossy, very smooth, and somewhat thick.
Scoop or pipe the mixture in desired shapes and bake in a 375 F oven. Start checking the progress at 20 minutes (10 minutes for the swan heads). The dough should be golden.
I chose a crème chiboust to fill my pastries with. I had never heard of this kind creamy filling before researching pâte à choux, but a crème chiboust is a pastry cream combined with italian meringue. It's traditionally used to make St-Honoré cake.
1 envelope unflavored gelatin
1/4 cup cold water
1/2 cup + 2 Tablespoons sugar
½ cup all-purpose flour
1/4 teaspoon salt
5 egg yolks
2 cups whole milk
1 Tbsp vanilla
¼ cup whipping cream
5 egg whites
dash of salt
1 cup sugar
Bloom the gelatin in the 1/4 cup of cold water.
Put the sugar, flour, and salt into a saucepan and stir together with a whisk. Add the yolks and enough milk to make a paste. Whisk in the remainder of the milk. Place over low heat and stirring constantly, cook until thick. Remove from heat and stir in the vanilla and the gelatin. Stir until the gelatin is completely dissolved. Stir in the whipping cream.
In another saucepan, boil together the sugar and water to around 240°F, which takes 2-3 minutes. While the sugar is boiling, whisk the egg whites to firm peaks. Gradually pour the boiled sugar onto the egg whites, whisking all the time; slowly continue to whisk the egg whites until just warm. Fold the meringue into the custard.
I was afraid the crème chiboust would set solidly if I let it cool, so I used it immediately. It was a bit soft for piping, but held up anyways. I should have strained the pastry cream before combining it with the italian meringue, as it was a bit lumpy, but still, super delicious! Once cold, it did set very solidly, so next time I would decrease the amount of gelatine, but it was still very delicious!
Now that I know how simple make cream puffs can be, and what pretty creations you can make with them, this could get very, very dangerous!
Thanks for the challenge Kat. Can't wait to see what challenge September brings!
I was very excited when I saw August's challenge! Kat of The Bobwhites was our August 2012 Daring Baker hostess who inspired us to have fun in creating pate a choux shapes, filled with crème patisserie or Chantilly cream. We were encouraged to create swans or any shape we wanted and to go crazy with filling flavors allowing our creativity to go wild!
A couple weeks prior to the challenge being announced, I had played with pâte à choux for the first time, planning on making eclairs to bring to a family gathering. Although my eclairs shells turned out fine, I undercooked my pastry cream and it was too soupy to pipe in the shells. So that was a fail!
I was quite ready to give it another go, and this time, it did turn out!
I used the pâte à choux recipe provided by our hostess, but took the lazy way out, and used the stand mixer to finish the dough. There doesn't seem to be much variations between pâte à choux recipes, so you can't go wrong!
Pâte à choux
½ cup (120 ml) (115 gm) (4 oz) butter
1 cup (240 ml) water
¼ teaspoon (1½ gm) salt
1 tsp sugar
1 cup (240 ml) (140 gm) (5 oz) all-purpose flour
4 large eggs
Line at least two baking sheets with silicone mats or parchment paper, or grease pans well.
Preheat oven to moderately hot 375°F/190°C/gas mark 5 .
In a small saucepan, combine butter, water, salt and sugar. Heat over medium until butter melts, then remove from stove.
Add flour all at once and beat the mixture until the dough pulls away from the sides of the pot.
Transfer the mixture to the bowl of a stand mixer, and using the paddle attachment and a low speed, mix briefly before adding the first egg. Beat for about a minute, until well combined. Add remaining eggs one at a time, beating for about a minute after each addition. Resulting mixture should be somewhat glossy, very smooth, and somewhat thick.
Scoop or pipe the mixture in desired shapes and bake in a 375 F oven. Start checking the progress at 20 minutes (10 minutes for the swan heads). The dough should be golden.
To make the swan bodies, pipe the dough in a tear drop-like shape, about 1.5 inch long and 1 inch wide.
The swan heads are piped using a much smaller plain tip, in a 2 shape.
I chose a crème chiboust to fill my pastries with. I had never heard of this kind creamy filling before researching pâte à choux, but a crème chiboust is a pastry cream combined with italian meringue. It's traditionally used to make St-Honoré cake.
The pastry cream is made by combining flour, salt, sugar, egg yolks and milk in a saucepan, and cooking it while constantly stirring until thick. Gelatine is then added in, with vanilla, and a bit of heavy cream. The pastry cream is kept warm while the italian meringue is being made, by heating water and sugar to 240F degrees, then adding it to whipped egg whites and whipping the resulting meringue until the mixture is cooler, but still warm. The two mixtures are then combined to make chiboust cream.
Crème Chiboust
recipe adapted from Tartelette and Gary Rhodes
1/4 cup cold water
1/2 cup + 2 Tablespoons sugar
½ cup all-purpose flour
1/4 teaspoon salt
5 egg yolks
2 cups whole milk
1 Tbsp vanilla
¼ cup whipping cream
5 egg whites
dash of salt
1 cup sugar
Bloom the gelatin in the 1/4 cup of cold water.
Put the sugar, flour, and salt into a saucepan and stir together with a whisk. Add the yolks and enough milk to make a paste. Whisk in the remainder of the milk. Place over low heat and stirring constantly, cook until thick. Remove from heat and stir in the vanilla and the gelatin. Stir until the gelatin is completely dissolved. Stir in the whipping cream.
In another saucepan, boil together the sugar and water to around 240°F, which takes 2-3 minutes. While the sugar is boiling, whisk the egg whites to firm peaks. Gradually pour the boiled sugar onto the egg whites, whisking all the time; slowly continue to whisk the egg whites until just warm. Fold the meringue into the custard.
I was afraid the crème chiboust would set solidly if I let it cool, so I used it immediately. It was a bit soft for piping, but held up anyways. I should have strained the pastry cream before combining it with the italian meringue, as it was a bit lumpy, but still, super delicious! Once cold, it did set very solidly, so next time I would decrease the amount of gelatine, but it was still very delicious!
Now that I know how simple make cream puffs can be, and what pretty creations you can make with them, this could get very, very dangerous!
Thanks for the challenge Kat. Can't wait to see what challenge September brings!
Friday, July 27, 2012
crackers for daring bakers
Our July 2012 Daring Bakers’ host was Dana McFarland and she challenged us to make homemade crackers! Dana showed us some techniques for making crackers and encouraged to use our creativity to make each cracker our own by using ingredients we love.
I've made crackers a few times before. Cheddar coins that were rolled too thickly and maybe under-baked, and graham crackers that were so hard, we couldn't eat them. But since I've conquered my fear of rolling out dough, I took on the challenge and made the recipe provided for Pepper Jack and Oregano Crackers. I had to modify slightly, because I realized I was out of oregano, and the store only had regular jack cheese. So instead of the oregano, I went with italian spices, and added a good pinch of red pepper flakes to compensate for the lack of heat in the cheese.
They were very flavorful, but spicy enough that I didn't dare give them to the kiddos to taste-test. They were too spicy for my husband, but after leaving the spice topping of a few of them, he happily eat them. I don't often eat crackers, but I found myself going to the kitchen again and again to steal some of those off the cooling rack.
Pepper Jack and Oregano Crackers
Servings: Approximately 80 crackers
1⅔ cups (400 ml) (235 gm) (8¼ oz) all-purpose flour
2¼ cups (540 ml) (225 gm/8 oz) grated pepper jack cheese, firmly packed
2 teaspoons (10 ml) (1 gm) dried oregano
½ teaspoon (2½ ml) (3 gm) salt
½ teaspoon (2½ ml) (½ gm) black pepper
½ cup (120 ml) (4 fl oz) vegetable oil
½ cup (120 ml) (4 fl oz) water
Spice topping
¼ teaspoon (1¼ ml) (1/8 gm) cayenne
1 teaspoon (5 ml) (3 gm) kosher salt
1 teaspoon (5 ml) (5 gm) sugar
1. Combine the spice topping and set aside.
2. Grate the cheese and put in the bowl of a food processor with flour, oregano, salt and pepper and pulse to combine. This can also be done by hand.
3. Add the oil and pulse until the consistency of wet sand is reached.
4. Add enough water for the dough to come together.
5. Form the dough into two disks, wrap with cling film and refrigerate for several hours or overnight.
6. Heat the oven to moderate 325°F/160°C/gas mark 3.
7. Working with a quarter of the dough at a time, either use a rolling pin or roll out in your pasta rollers to 1/8 of an inch (3 mm) thick. If you use pasta rollers, ensure the dough is well floured so as not to stick.
8. Cut the strips into cracker shapes or cut out using a cookie cutter.
9. Transfer to a parchment lined cookies sheet and sprinkle with the spice mixture.
10. Bake for 20-25 minutes until medium golden brown.
11. Store in an airtight container and eat within three days
The challenge was to make at least two cracker recipes, using two of three methods: hand rolling, using a pasta machine, or slice and bake crackers. I hate, *hate* the pasta machine and I didn't find an ice box cracker recipe I wanted to try, but I did spot a cracker recipe in LCBO's summer magazine: biscuits au cheddar et aux anchois - cheddar and anchovy crackers. And bonus, I had all the ingredients on hand!
They quickly came together in the food processor, and unlike the pepper jack crackers, did not need to be refrigerated before rolling out. As I gathered the dough to roll it out, it smelled just like a ceasar salad. Very savory. I would totally use these crackers in a salad instead of croutons, or eat them alongside a bowl of creamy tomato soup.
Cheddar and anchovy crackers
recipe source: LCBO's summer 2012 À bon verre, bonne table
1 cup all purpose flour
1/4 cup butter
1 clove garlic, peeled
2 tbsp anchovy paste
1 cup sharp cheddar, shredded
2 tbsp whipping cream
Combine all ingredients except whipping cream in a food processor, pulsing until evenly distributed. Add the cream and processes until dough comes together.
Turn out the dough on a floured surface, and roll out to 1/4 inch thickness. Cut out circles. Place them on a parchment paper lined baking sheet, and bake at 375 F for 10 minutes, until crackers appear puffed. Let cool.
Out of these two, the cheddar and anchovy cracker was greatly prefered. Thanks for the challenge Dana! Can't wait to see what next month brings!
I've made crackers a few times before. Cheddar coins that were rolled too thickly and maybe under-baked, and graham crackers that were so hard, we couldn't eat them. But since I've conquered my fear of rolling out dough, I took on the challenge and made the recipe provided for Pepper Jack and Oregano Crackers. I had to modify slightly, because I realized I was out of oregano, and the store only had regular jack cheese. So instead of the oregano, I went with italian spices, and added a good pinch of red pepper flakes to compensate for the lack of heat in the cheese.
They were very flavorful, but spicy enough that I didn't dare give them to the kiddos to taste-test. They were too spicy for my husband, but after leaving the spice topping of a few of them, he happily eat them. I don't often eat crackers, but I found myself going to the kitchen again and again to steal some of those off the cooling rack.
Pepper Jack and Oregano Crackers
Servings: Approximately 80 crackers
1⅔ cups (400 ml) (235 gm) (8¼ oz) all-purpose flour
2¼ cups (540 ml) (225 gm/8 oz) grated pepper jack cheese, firmly packed
2 teaspoons (10 ml) (1 gm) dried oregano
½ teaspoon (2½ ml) (3 gm) salt
½ teaspoon (2½ ml) (½ gm) black pepper
½ cup (120 ml) (4 fl oz) vegetable oil
½ cup (120 ml) (4 fl oz) water
Spice topping
¼ teaspoon (1¼ ml) (1/8 gm) cayenne
1 teaspoon (5 ml) (3 gm) kosher salt
1 teaspoon (5 ml) (5 gm) sugar
1. Combine the spice topping and set aside.
2. Grate the cheese and put in the bowl of a food processor with flour, oregano, salt and pepper and pulse to combine. This can also be done by hand.
3. Add the oil and pulse until the consistency of wet sand is reached.
4. Add enough water for the dough to come together.
5. Form the dough into two disks, wrap with cling film and refrigerate for several hours or overnight.
6. Heat the oven to moderate 325°F/160°C/gas mark 3.
7. Working with a quarter of the dough at a time, either use a rolling pin or roll out in your pasta rollers to 1/8 of an inch (3 mm) thick. If you use pasta rollers, ensure the dough is well floured so as not to stick.
8. Cut the strips into cracker shapes or cut out using a cookie cutter.
9. Transfer to a parchment lined cookies sheet and sprinkle with the spice mixture.
10. Bake for 20-25 minutes until medium golden brown.
11. Store in an airtight container and eat within three days
The challenge was to make at least two cracker recipes, using two of three methods: hand rolling, using a pasta machine, or slice and bake crackers. I hate, *hate* the pasta machine and I didn't find an ice box cracker recipe I wanted to try, but I did spot a cracker recipe in LCBO's summer magazine: biscuits au cheddar et aux anchois - cheddar and anchovy crackers. And bonus, I had all the ingredients on hand!
They quickly came together in the food processor, and unlike the pepper jack crackers, did not need to be refrigerated before rolling out. As I gathered the dough to roll it out, it smelled just like a ceasar salad. Very savory. I would totally use these crackers in a salad instead of croutons, or eat them alongside a bowl of creamy tomato soup.
Cheddar and anchovy crackers
recipe source: LCBO's summer 2012 À bon verre, bonne table
1 cup all purpose flour
1/4 cup butter
1 clove garlic, peeled
2 tbsp anchovy paste
1 cup sharp cheddar, shredded
2 tbsp whipping cream
Combine all ingredients except whipping cream in a food processor, pulsing until evenly distributed. Add the cream and processes until dough comes together.
Turn out the dough on a floured surface, and roll out to 1/4 inch thickness. Cut out circles. Place them on a parchment paper lined baking sheet, and bake at 375 F for 10 minutes, until crackers appear puffed. Let cool.
Out of these two, the cheddar and anchovy cracker was greatly prefered. Thanks for the challenge Dana! Can't wait to see what next month brings!
Wednesday, June 27, 2012
battenberg cake
Daring Bakers' reveal day kind of snuck up on me. Mandy of What The Fruitcake?! came to our rescue last minute to present us with the Battenberg Cake challenge! She highlighted Mary Berry’s techniques and recipes to allow us to create this unique little cake with ease.
I made this early in the month, and since I wasn't super pleased with the results, I had plans to adapt it to better suit our taste, but I just didn't get around to it.
So, for my Daring Bakers' submission, I made a pink and yellow Batterberg Cake. The yellow cake was flavored with lemon extract, and the pink, with framboise liquor and raspberry flavoring. I thought the cake was dry and the flavor pretty artificial, but that's to be expected, since I used artificial extracts to flavor it! As for the texture, when our host said we could probably make this cake without a stand mixer, for some reason I thought I could make it all with a bowl and a wooden spoon, and quickly discovered I have no clue how to make cake without a mixer... pretty sad!
I covered the cake with white fondant, on a super hot and humid day, so it turned out... the way it did! Not awesome.
Although my cake didn't quite turn out the way I wanted it to, I had a fun time making and assembling it, and I'm sure I'll use the technique again in the future. I also enjoyed reading about the adventures my fellow Daring Bakers had with chocolate plastic in the private forums! I'll have to try my hand at that some day too!
Thanks for the challenge Mandy!
Want to try making your own? Click here for the challenge and the recipes provided!
Sunday, May 27, 2012
pulla
May’s Daring Bakers’ Challenge was pretty twisted – Ruth from The Crafts of Mommyhood challenged us to make challah! Using recipes from all over, and tips from “A Taste of Challah,” by Tamar Ansh, she encouraged us to bake beautifully braided breads.
But really, the mandatory item was to make an enriched bread which is braided or shaped, so I took this opportunity to make Pulla for the first time. Pulla is a braided bread, enriched with eggs, butter and milk, and flavored with cardamom. My husband's mom's family is from Finland, and although I've had pulla a couple of times over the last decade, but my husband fondly remembers his papa making it and having in the afternoon with his grandparents. So I thought it was about time I learned to make it myself.
When I was about ready to make this, my in-laws were moving house, so I didn't think it was the best time for me to ask for a recipe. Back when I first joined the Daring Bakers, we had made a yeasted coffee cake that had a similar texture to pulla, and Audax, one of the most active members of the group had suggested a recipe for pulla, the one I used for this challenge, with slight modifications.
Pulla
recipe adapted from allrecipes.com
2 cups milk
1/2 cup warm water (110 degrees F/45 degrees C)
1 (.25 ounce) package active dry yeast
1 cup white sugar
1 teaspoon salt
2 teaspoon ground cardamom
4 eggs, beaten
9 cups all-purpose flour
1/2 cup butter, melted
2 egg yolks, beaten
Warm the milk in microwave. In the bowl of a stand mixer, dissolve the yeast in the warm water. Stir in the lukewarm milk, sugar, salt, cardamom, 4 eggs, and enough flour to make a batter (approximately 2 cups). Beat until the batter is smooth. Add about 3 cups of the flour and beat well; the dough should be smooth and elastic in appearance. Add the melted butter or margarine, and stir well. Beat again until the dough looks glossy. Stir in the remaining flour until the dough is stiff. Let rest for 15 minutes.
But really, the mandatory item was to make an enriched bread which is braided or shaped, so I took this opportunity to make Pulla for the first time. Pulla is a braided bread, enriched with eggs, butter and milk, and flavored with cardamom. My husband's mom's family is from Finland, and although I've had pulla a couple of times over the last decade, but my husband fondly remembers his papa making it and having in the afternoon with his grandparents. So I thought it was about time I learned to make it myself.
When I was about ready to make this, my in-laws were moving house, so I didn't think it was the best time for me to ask for a recipe. Back when I first joined the Daring Bakers, we had made a yeasted coffee cake that had a similar texture to pulla, and Audax, one of the most active members of the group had suggested a recipe for pulla, the one I used for this challenge, with slight modifications.
Pulla
recipe adapted from allrecipes.com
2 cups milk
1/2 cup warm water (110 degrees F/45 degrees C)
1 (.25 ounce) package active dry yeast
1 cup white sugar
1 teaspoon salt
2 teaspoon ground cardamom
4 eggs, beaten
9 cups all-purpose flour
1/2 cup butter, melted
2 egg yolks, beaten
Warm the milk in microwave. In the bowl of a stand mixer, dissolve the yeast in the warm water. Stir in the lukewarm milk, sugar, salt, cardamom, 4 eggs, and enough flour to make a batter (approximately 2 cups). Beat until the batter is smooth. Add about 3 cups of the flour and beat well; the dough should be smooth and elastic in appearance. Add the melted butter or margarine, and stir well. Beat again until the dough looks glossy. Stir in the remaining flour until the dough is stiff. Let rest for 15 minutes.
Knead the dough until smooth and satiny, about 8 minutes with the stand mixer. Place in a lightly greased mixing bowl, and turn the dough to grease the top. Cover with a clean dishtowel. Let rise in a warm place until doubled in bulk, about 1 hour. Punch down, and let rise again until almost doubled.
Turn out onto a floured surface, and divide into 2 parts. Divide each half into 4. Roll each piece into a 12 to 16 inch strip. Braid 4 strips into a loaf. Lift the braids onto greased baking sheets. Let rise for 20 minutes. Brush each loaf with egg wash. Bake at 350 degrees F for 25 to 30 minutes.
Now going over the recipe, I realize that I didn't let the dough rise twice, but without ill effects, as we thought this bread was close to being perfect! I used Ruth's method to braid the dough with four strands, which was way easier than anticipated, especially when singing the process to myself: over, under, over, next, over, under, over next...
I made two loaves, and learned the hard way why you need to taper the ends of the dough strips: my second loaf came out pretty misshapen, with the middle being nice straight and skinny, and the ends being thick and round. I stuck it in the freezer so we could enjoy it later!
Way too sweet to eat it alongside a meal, I love it toasted, with butter, honey or nutella! Thanks for the challenge Ruth!
To see what other Daring Bakers thought of this challenge, check out the www.thedaringkitchen.com
Friday, April 27, 2012
maple nazook
This month's Daring Baker's challenge was an interesting one. Armenian desserts.The Daring Bakers’ April 2012 challenge, hosted by Jason at Daily Candor, were two Armenian standards: nazook and nutmeg cake. Nazook is a layered yeasted dough pastry with a sweet filling, and nutmeg cake is a fragrant, nutty coffee-style cake.
Although I really wanted to make both, I had a weird month, so I made the nazook early on, and am saving the nutmeg cake for when I have more free time.
Although a few months ago I would have been totally stressed out by this recipe because of the rolling pin involved, but I think my skills really evolved recently, and this recipe was fairly easy. The dough came together just fine and didn't behave like a yeast dough. After chilling in the fridge overnight, it rolled out without tearing and I don't think I even cursed once!
For the filling, I substituted a cup of the sugar for maple sugar, added 1 tsp maple extract instead of the vanilla called for in the original recipe below. I also sprinkled a bit of maple sugar on top of the egg-washed pastries before baking.
Nazook
Pastry dough
3 cups all-purpose flour, sifted
2½ teaspoons active dry yeast
1 cup sour cream
1 cup softened butter (room temperature)
Filling
1 1/2 cups all-purpose flour, sifted
1 1/2 cups sugar
3/4 cup softened butter (room temperature)
2 teaspoons vanilla extract
Wash
1-2 egg yolks
Make the pastry dough
1. Place the sifted flour into a large bowl.
2. Add the dry yeast, and mix it in.
3. Add the sour cream, and the softened butter.
4. Use your hands, or a standing mixer with a paddle attachment, to work it into a dough.
5. If using a standing mixer, switch to a dough hook. If making manually, continue to knead for about 10 minutes, or until the dough no longer sticks to the bowl or your hands. If it remains very sticky, add some flour, a little at a time.
6. Cover the dough and refrigerate for 3-5 hours, or overnight if you like.
Make the filling
7. Mix the flour, sugar, and the softened butter in a medium bowl.
8. Add the vanilla extract.
9. Mix the filling until it looks like clumpy, damp sand. It should not take long. Set aside.
Make the nazook
10. Preheat the oven to moderate 350°F/175°C/gas mark 4.
11. Cut the refrigerated dough into quarters.
12. Form one of the quarters into a ball. Dust your working surface with a little flour.
13. Roll out the dough into a large rectangle or oval. The dough should be thin, but not
transparent.
14. Spread 1/4 of the filling mixture across the rolled-out dough in an even layer. Try to spread the filling as close as possible to the edges on the short sides, but keep some of pastry dough uncovered (1 inch/2.5 cm) along the long edges.
15. From one of the long sides, start slowly rolling the dough across. Be careful to make sure the filling stays evenly distributed. Roll all the way across until you have a long, thin loaf.
16. Pat down the loaf with your palm and fingers so that it flattens out a bit (just a bit).
17. Apply your egg yolk wash with a pastry brush.
18. Use your crinkle cutter (or knife) to cut the loaf into 10 equally-sized pieces. Put onto an ungreased cookie sheet.
19. Place in a preheated moderate oven for about 30 minutes, until the tops are a rich, golden brown.
20. Allow to cool and enjoy!
3 cups all-purpose flour, sifted
2½ teaspoons active dry yeast
1 cup sour cream
1 cup softened butter (room temperature)
Filling
1 1/2 cups all-purpose flour, sifted
1 1/2 cups sugar
3/4 cup softened butter (room temperature)
2 teaspoons vanilla extract
Wash
1-2 egg yolks
Make the pastry dough
1. Place the sifted flour into a large bowl.
2. Add the dry yeast, and mix it in.
3. Add the sour cream, and the softened butter.
4. Use your hands, or a standing mixer with a paddle attachment, to work it into a dough.
5. If using a standing mixer, switch to a dough hook. If making manually, continue to knead for about 10 minutes, or until the dough no longer sticks to the bowl or your hands. If it remains very sticky, add some flour, a little at a time.
6. Cover the dough and refrigerate for 3-5 hours, or overnight if you like.
Make the filling
7. Mix the flour, sugar, and the softened butter in a medium bowl.
8. Add the vanilla extract.
9. Mix the filling until it looks like clumpy, damp sand. It should not take long. Set aside.
Make the nazook
10. Preheat the oven to moderate 350°F/175°C/gas mark 4.
11. Cut the refrigerated dough into quarters.
12. Form one of the quarters into a ball. Dust your working surface with a little flour.
13. Roll out the dough into a large rectangle or oval. The dough should be thin, but not
transparent.
14. Spread 1/4 of the filling mixture across the rolled-out dough in an even layer. Try to spread the filling as close as possible to the edges on the short sides, but keep some of pastry dough uncovered (1 inch/2.5 cm) along the long edges.
15. From one of the long sides, start slowly rolling the dough across. Be careful to make sure the filling stays evenly distributed. Roll all the way across until you have a long, thin loaf.
16. Pat down the loaf with your palm and fingers so that it flattens out a bit (just a bit).
17. Apply your egg yolk wash with a pastry brush.
18. Use your crinkle cutter (or knife) to cut the loaf into 10 equally-sized pieces. Put onto an ungreased cookie sheet.
19. Place in a preheated moderate oven for about 30 minutes, until the tops are a rich, golden brown.
20. Allow to cool and enjoy!
Pastries were good. I'm not a big fan of pastries in general, but I had a lot more than I should have, then gifted the rest... the containers came back empty! I'm glad to have discovered desserts from another culture! Can't wait to see what the Daring Bakers have up their sleeve for us next month!
UPDATE: Flower is royal icing, not butter :) Can it be done with butter?! If so, totally want to learn!
Subscribe to:
Posts (Atom)