Friday, July 27, 2012

crackers for daring bakers

Our July 2012 Daring Bakers’ host was Dana McFarland and she challenged us to make homemade crackers! Dana showed us some techniques for making crackers and encouraged to use our creativity to make each cracker our own by using ingredients we love.


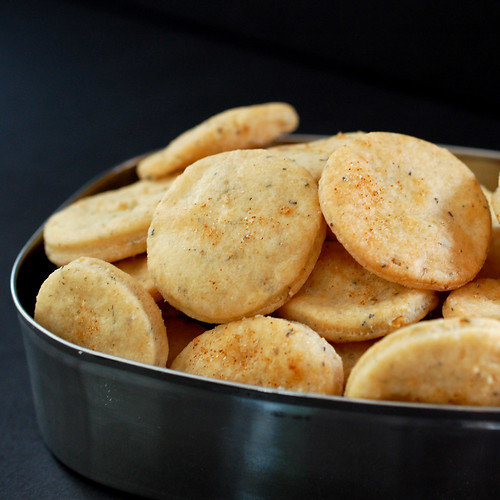
I've made crackers a few times before. Cheddar coins that were rolled too thickly and maybe under-baked, and graham crackers that were so hard, we couldn't eat them. But since I've conquered my fear of rolling out dough, I took on the challenge and made the recipe provided for Pepper Jack and Oregano Crackers. I had to modify slightly, because I realized I was out of oregano, and the store only had regular jack cheese. So instead of the oregano, I went with italian spices, and added a good pinch of red pepper flakes to compensate for the lack of heat in the cheese.

They were very flavorful, but spicy enough that I didn't dare give them to the kiddos to taste-test. They were too spicy for my husband, but after leaving the spice topping of a few of them, he happily eat them. I don't often eat crackers, but I found myself going to the kitchen again and again to steal some of those off the cooling rack.

Pepper Jack and Oregano Crackers

Servings: Approximately 80 crackers

1⅔ cups (400 ml) (235 gm) (8¼ oz) all-purpose flour
2¼ cups (540 ml) (225 gm/8 oz) grated pepper jack cheese, firmly packed
2 teaspoons (10 ml) (1 gm) dried oregano
½ teaspoon (2½ ml) (3 gm) salt
½ teaspoon (2½ ml) (½ gm) black pepper
½ cup (120 ml) (4 fl oz) vegetable oil
½ cup (120 ml) (4 fl oz) water

Spice topping

¼ teaspoon (1¼ ml) (1/8 gm) cayenne
1 teaspoon (5 ml) (3 gm) kosher salt
1 teaspoon (5 ml) (5 gm) sugar

1. Combine the spice topping and set aside.
2. Grate the cheese and put in the bowl of a food processor with flour, oregano, salt and pepper and pulse to combine. This can also be done by hand.
3. Add the oil and pulse until the consistency of wet sand is reached.
4. Add enough water for the dough to come together.
5. Form the dough into two disks, wrap with cling film and refrigerate for several hours or overnight.
6. Heat the oven to moderate 325°F/160°C/gas mark 3.
7. Working with a quarter of the dough at a time, either use a rolling pin or roll out in your pasta rollers to 1/8 of an inch (3 mm) thick. If you use pasta rollers, ensure the dough is well floured so as not to stick.
8. Cut the strips into cracker shapes or cut out using a cookie cutter.
9. Transfer to a parchment lined cookies sheet and sprinkle with the spice mixture.
10. Bake for 20-25 minutes until medium golden brown.
11. Store in an airtight container and eat within three days
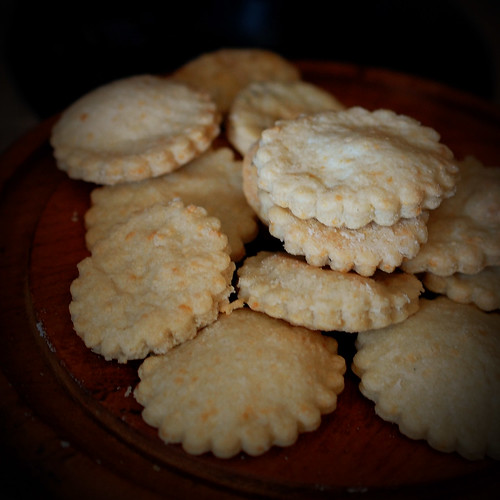

The challenge was to make at least two cracker recipes, using two of three methods: hand rolling, using a pasta machine, or slice and bake crackers. I hate, *hate* the pasta machine and I didn't find an ice box cracker recipe I wanted to try, but I did spot a cracker recipe in LCBO's summer magazine: biscuits au cheddar et aux anchois - cheddar and anchovy crackers. And bonus, I had all the ingredients on hand!

They quickly came together in the food processor, and unlike the pepper jack crackers, did not need to be refrigerated before rolling out. As I gathered the dough to roll it out, it smelled just like a ceasar salad. Very savory. I would totally use these crackers in a salad instead of croutons, or eat them alongside a bowl of creamy tomato soup.

Cheddar and anchovy crackers
recipe source: LCBO's summer 2012 À bon verre, bonne table

1 cup all purpose flour
1/4 cup butter
1 clove garlic, peeled
2 tbsp anchovy paste
1 cup sharp cheddar, shredded
2 tbsp whipping cream

Combine all ingredients except whipping cream in a food processor, pulsing until evenly distributed. Add the cream and processes until dough comes together.

Turn out the dough on a floured surface, and roll out to 1/4 inch thickness. Cut out circles. Place them on a parchment paper lined baking sheet, and bake at 375 F for 10 minutes, until crackers appear puffed. Let cool.

Out of these two, the cheddar and anchovy cracker was greatly prefered. Thanks for the challenge Dana! Can't wait to see what next month brings!

Wednesday, July 11, 2012

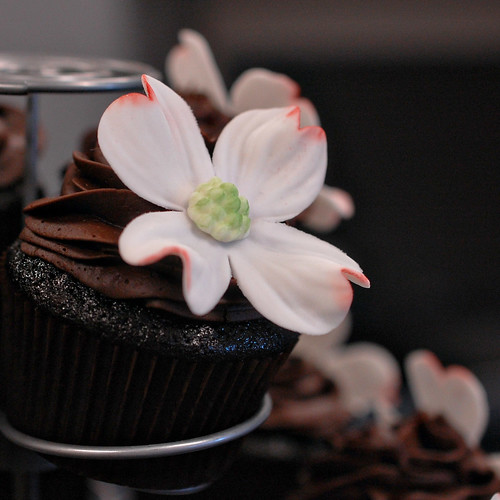
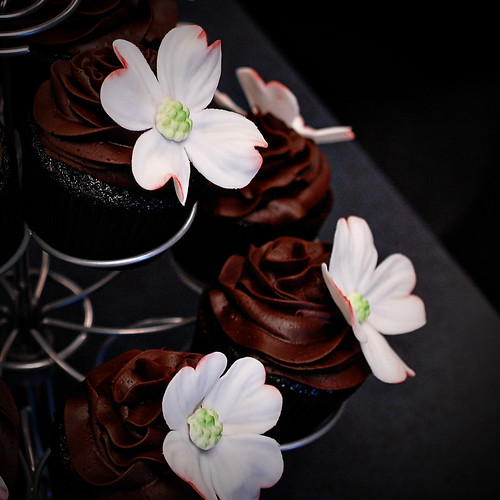
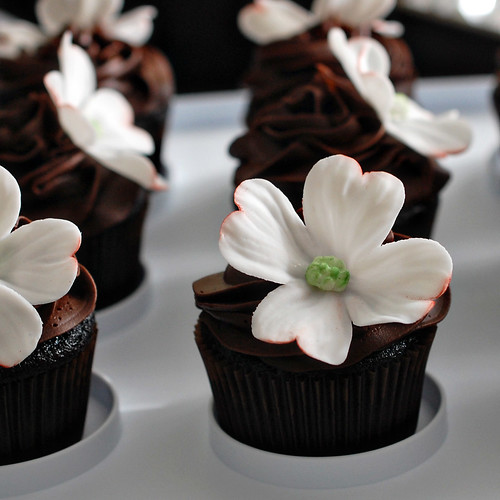
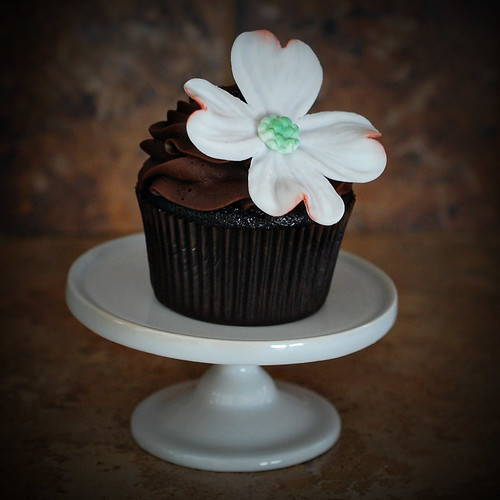
dogwood topped coca-cola cupcakes

I went back to an old recipe (well, relatively) for these cupcakes. A recipe out of the first Baked cookbook for a root beer bundt cake. I've made it many times over the years: as a bundt cake, as a layer cake, as cupcakes. With root beer, with coke, with hot chocolate, with coffee. It's a sturdy cake, with a really moist crumb, a nice dome and excellent flavor and texture. I had forgotten how good it really was!


The cake batter is made by boiling coke, butter and cocoa. White and dark brown sugar are then whisked in the mixture until dissolved, then left to cool. In the past, when I made this recipe, I sometimes got little bits of baking soda that were not incorporated in the batter properly. An embarrassing situation. So this time around, I whisked the baking soda with the eggs before incorporating them in the butter/cocoa/coke/sugar mixture. Then flour and salt get folded in. In the end, I added a splash of vanilla, just because.


The cupcakes get baked for 20 minutes at 325 degrees F. This recipe gave me 2 dozen cupcakes.

Coca-Cola Cupcakesadapted from Baked: New Frontiers in Baking


2 cups coke
1 cup dark unsweetened cocoa powder
1/2 cup (1 stick) unsalted butter, cut into 1-inch pieces
1 1/4 cup granulated sugar
1/2 cup firmly packed dark brown sugar
2 cups all-purpose flour
1 tsp salt
1 1/4 tsp baking soda
2 large eggs

Preheat the oven to 325 degrees F. Line two cupcake tins with paper liners. 

In a small saucepan, heat the coke, cocoa powder, and butter over medium heat until the butter is melted. Add the sugars and whisk until dissolved. Remove from the heat and let cool.

In a small bowl, whisk the eggs with the baking soda then whisk the eggs into the cooled cocoa mixture until combined. Gently fold the flour and salt into the cocoa mixture. The batter will be slightly lumpy--do not overmix, as it could cause the cake to be tough. Portion out the batter in the cupcake tins and bake for 20 minutes until a toothpick inserted into the cupcakes comes out clean. 


Too lazy to make frosting from scratch, I went with canned chocolate frosting, which everyone likes. Swirled it with a 1M tip, and topped it with a fondant dogwood flower, these cupcakes were as pretty as can be! It was my first time making these flowers, and I really had a blast making them. They are quite simple, and since I made them with fondant instead of gumpaste, the process was much quicker, as I had more time to work before the sugarpaste dried! 


Oh, and the cupcakes don't really taste like coke... The flavor intensifies after a few days, but even at that, you can't really tell what the secret ingredient is! Also, they stay moist forever, and freeze beautifully. They don't get rock hard, so you can actually eat them while still frozen! I'm thinking an excellent base for an ice cream cake!


Sunday, July 8, 2012

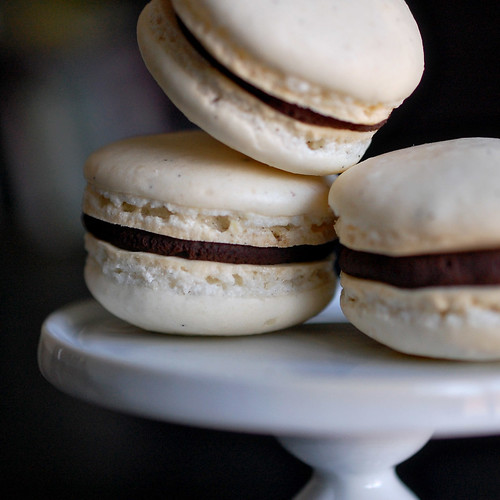
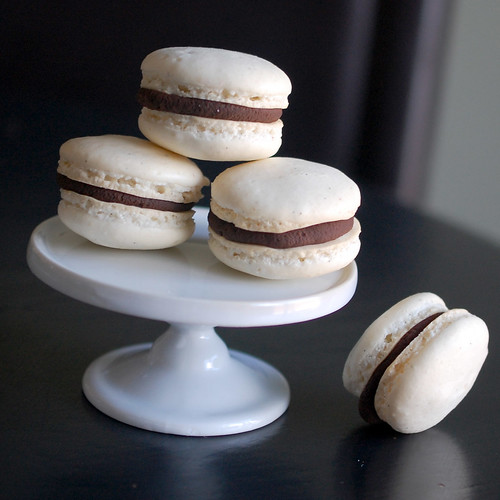
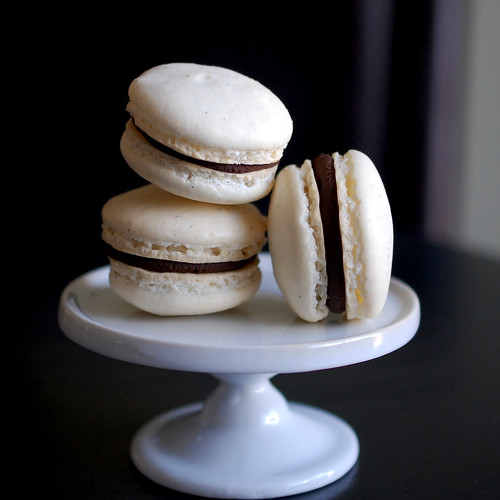
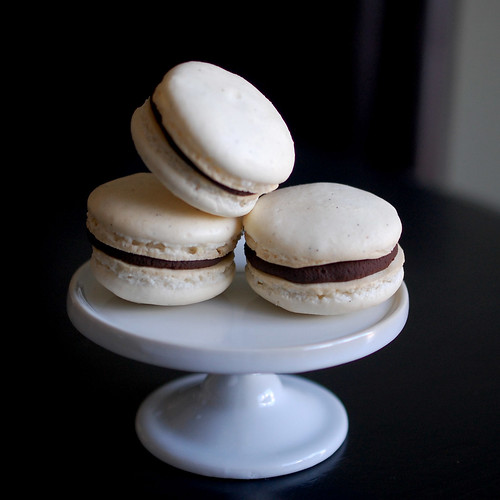
vanilla bean macarons filled with nutella ganache

Although macarons have been all over the internet for a good while, I had never tried to make them before now. Mainly because I was afraid: Every second blog post about these french cookies seem to revolve around the fact that they are very finicky and difficult to make successfully. But between reading posts on Bravetart and eat.live.travel.write, I decided to give it a go.


They require very little ingredients : egg  whites, sugar, salt, vanilla, powdered sugar and almonds. Basically, the egg whites, sugar, salt and vanilla are whipped until very stiff. Then, the twice-sifted powdered sugar and almonds are incorporated. The mixture is piped in circles, and baked. And if all goes well, the mixture rises up instead of spreading out, and bakes perfectly, without cracking. 

The most tedious part for me was the process of pulverizing the almonds and powdered sugar in the food processor to be able to sift the mixture. And I was even using ground almonds! But it was a slow process of pushing the mixture through the sieve, then putting the bigger chunks of almonds back in the food processor so that they could be sifted with the powdered sugar.

The stand mixer makes it easy to whip up the egg whites, and the directions in the recipe are very clear. I thought that the folding of the almond mixture in the egg whites went pretty well, but I might have over mixed my first batch a tiny bit, and undermixed the next.

In order to get cookies that are mostly the same size, I traced 1.5 inch circles on the back of the parchment paper lining my baking trays. Even at that, I got macarons of all sizes. I guess I still need to practice my piping skills!

After letting them rest/set/dry for half an hour, I baked my first batch on a rimmed cookie sheet. Most of them cracked, and some of them came out pretty much perfect! The second batch baked on an identical rimmed cookie sheet gave me the same results, but the last bit of the batter, I baked on a rim less cookie sheet, and none of the cookies cracked. So I guess that's the secret, for baking macarons in my oven. Also, I found that if the parchment paper is not quite flat, it affects the "feet" of the cookies. So I now know not to use wavy parchment paper.


Vanilla bean macaron recipe (French meringue)
Recipe slighly adapted from: Mardi Michels, adapted from Stella Parks (bravetart.com)

115g ground almonds
230g icing sugar
144g egg whites, covered in plastic wrap and left at room temperature for a few hours.
72g granulated sugar
pinch of salt

seeds from 1 vanilla bean

Line two baking trays with parchment paper.
Prepare a 14” piping bag with a plain tip, twist the bag at the tip to keep the mixture from leaking out and place inside a tall glass to facilitate filling the bag.
Combine almond flour and powdered sugar in a food processor, pulsing about 10 times for a few seconds, until all ingredients thoroughly incorporated.
Sift dry ingredients twice using a fine sieve and pressing the mixture through with your hands and set aside.
Using a stand mixer, beat the egg whites, salt, sugar and vanilla seeds at a low speed (Kitchen Aid speed four) for 2 minutes, medium speed (Kitchen Aid six) for 2 minutes and a high speed (Kitchen Aid eight) for 2 minutes. The egg whites will be very stiff at this point.
Mix for one more minute at the highest speed (Kitchen Aid ten).
Add the dry ingredients to the egg whites.
Fold the mixture, pressing it against the sides of the bowl to deflate the mixture. Fold about 40 times (counting single strokes), stopping every couple of strokes after 25 to check the consistency. It should be lava-like, flowing in ribbons off the spatula.
Transfer half the mixture to the piping bag, sealing the open end with a twist and holding firmly with the hand that will not be actively piping.
Pipe four tiny dots of mixture under the corners of the parchment paper to make sure it stays put.
Pipe your macarons in a 1.5 inch circles.
Rap the tray 3-4 times on a hard surface. You’ll see air bubbles coming to the surface of the unbaked shells.
Fill the bag with the rest of the mixture and pipe and rap the second tray.
Preheat the oven to 300˚F.
Rest the trays of macaron shells for 30 minutes before baking.
Place one tray of macarons on an empty baking tray and bake on the middle rack of the oven for 16 minutes at 300˚F, turning the tray from back to front halfway through.
Remove from oven and let the tray sit for a few minutes.
Remove the parchment from the tray and allow to sit on a cool surface for at least 30 minutes, then remove macaron shells to a cooling rack.
Store in an airtight container overnight.
Pair up like shells to facilitate the filling process.
Once completely cool, fill with ganache or cream filling of your choice.
Best enjoyed 24 hours after filling.


For the filling, I used a mixture of chocolate chips, melted with nutella and heavy cream, the same filling used in my nutella s'mores bars. So yummy!

Nutella Ganache

1/2 cup Nutella
1 cup semisweet chocolate chips
3 tablespoons heavy cream (or half and half)

Combine the Nutella, chocolate chips, and heavy cream in a large microwaveable bowl. Microwave on high at 15 second intervals until the chocolate chips have melted, for about 45 seconds total. Whisk the mixture until it is smooth and shiny. If necessary, add a few extra drops of cream if the mixture seems too thick.


Now the only problem is, I've never had a macaron before making my own, so I have nothing to compare them to. Mine a crispy, but I was under the impression that they should be chewy? I might have waited too long to fill them too. I baked them, let them cool on racks overnight, then stored them in an airtight container, filled them on day 3, then stored them in the fridge. I might have done something wrong in there somewhere... Back into the kitchen to try again!

Friday, June 29, 2012

nutella s'mores bars

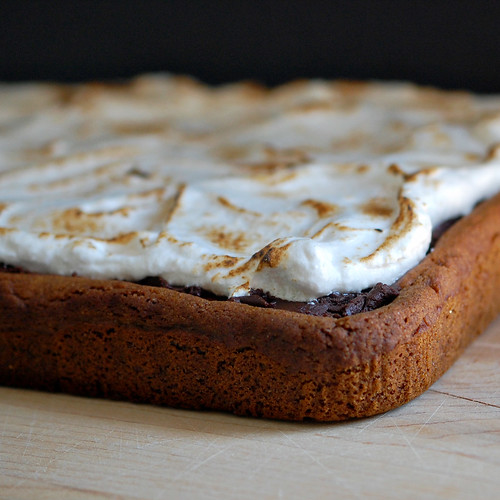
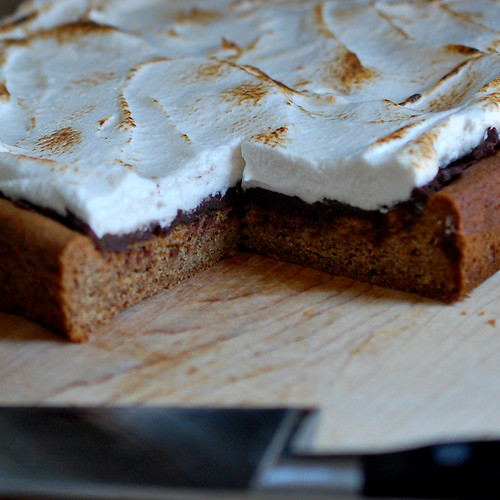
This dessert has been on my to bake list for a while. So when a friend requested a dessert to bring to the cottage for the long weekend, this is what I picked. And of course, I made a double batch so we could have a taste too!  And it was so good, I just had to give some away, ASAP.


The cookie layer is nice and thick, chewy, and very flavorful. Not as strong as gingerbread, but similar. I guess the honey and the dark brown sugar makes it taste like a graham cracker. I mistakenly cooked it at 375 instead of 350, and almost as soon as it started to bake, it smelled wonderful! I was afraid it would be to hard to cut, but it was perfect!

The chocolate layer is a combination of chocolate, nutella and cream. By itself, it's a pretty heavenly concoction. It's smooth, and just melts in the mouth. My topping was very soft and goopy, definitely more marshmallow fluff than marshmallow. Next time, I'll try making a batch of actual marshmallows to spread on top instead! I'm thinking it might cut the sweetness a bit too.


nutella s'mores bars
recipe from My Baking Addiction

For the cookie layer
3/4 cup (1 1/2 sticks) unsalted butter, softened
3/4 cup granulated sugar
1/2 cup dark brown sugar
1/4 cup honey
1 1/2 teaspoons baking powder
1 teaspoon ground cinnamon
1 teaspoon pure vanilla extract
1/2 teaspoon baking soda
1/2 teaspoon salt
1 egg
2 1/2 cups all purpose flour

For the chocolate layer
1/2 cup Nutella
1 cup semisweet chocolate chips
3 tablespoons heavy cream (or half and half)
For the marshmallow fluff layer
2 egg whites

For the marshmallow layer
1/2 cup granulated sugar
1/4 cup light corn syrup
2 tablespoons water
1 1/2 teaspoons pure vanilla extract
Pinch of sea salt

Preheat the oven to 350°F. Lightly grease a 9×13-inch baking pan and line with parchment paper, creating handles to lift the bars out of the pan once baked.

To prepare the cookie dough, cream together the butter, sugar, brown sugar, honey, baking powder, cinnamon, vanilla, baking soda, and salt. Add the egg and beat until incorporated into the creamed mixture. Stir in the flour.

Spread it in an even layer in the bottom of the prepared baking pan. Bake for about 30 minutes, until the top is golden, and a toothpick inserted in the center of the pan comes out clean (or with just a few moist crumbs). Let the cookie layer cool completely in the pan on a wire rack.

Once the cookie layer has cooled, prepare the chocolate filling. Combine the Nutella, chocolate chips, and heavy cream in a large microwaveable bowl. Microwave on high at 15 second intervals until the chocolate chips have melted, for about 45 seconds total. Whisk the mixture until it is smooth and shiny. If necessary, add a few extra drops of cream if the mixture seems too thick.

Pour the thick ganache on top of the cooled cookie bars, and spread evenly with a spatula. Let the ganache cool and set up a bit before you lift the cookie bars out of the pan. Transfer the bars to a large cutting board or a serving platter. Be sure to tuck the edges of the parchment paper out of the way before adding the marshmallow.

Make the marshmallow fluff layer. Bring about 2 inches of water to a simmer in the bottom of a large saucepan.

Combine all of the ingredients in a metal mixing bowl that fits in the top of the saucepan without the bottom touching the water. Place the mixing bowl over the simmering water, and beat the mixture with an electric hand mixer for about 8 minutes. The mixture will gradually become fluffy and then will thicken and turn white and slightly glossy.

Remove the mixing bowl from the simmering water. Continue to beat on high for an additional minute or two. The marshmallow will thicken just a bit more. Allow the marshmallow to cool before spreading it over the chocolate layer. Then, use a kitchen torch to toast the marshmallow topping until it is golden brown on top.


Although the recipe seems long, it's pretty simple, all three layers being a matter of combining all the ingredients in one bowl. Totally worth making!

Wednesday, June 27, 2012

battenberg cake

Daring Bakers' reveal day kind of snuck up on me. Mandy of What The Fruitcake?! came to our rescue last minute to present us with the Battenberg Cake challenge! She highlighted Mary Berry’s techniques and recipes to allow us to create this unique little cake with ease.


I made this early in the month, and since I wasn't super pleased with the results, I had plans to adapt it to better suit our taste, but I just didn't get around to it.

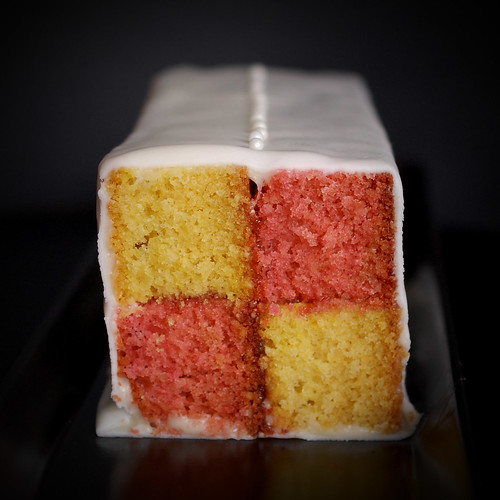
So, for my Daring Bakers' submission, I made a pink and yellow Batterberg Cake. The yellow cake was flavored with lemon extract, and the pink, with framboise liquor and raspberry flavoring. I thought the cake was dry and the flavor pretty artificial, but that's to be expected, since I used artificial extracts to flavor it! As for the texture, when our host said we could probably make this cake without a stand mixer, for some reason I thought I could make it all with a bowl and a wooden spoon, and quickly discovered I have no clue how to make cake without a mixer... pretty sad!


I covered the cake with white fondant, on a super hot and humid day, so it turned out... the way it did! Not awesome.

Although my cake didn't quite turn out the way I wanted it to, I had a fun time making and assembling it, and I'm sure I'll use the technique again in the future. I also enjoyed reading about the adventures my fellow Daring Bakers had with chocolate plastic in the private forums! I'll have to try my hand at that some day too!

Thanks for the challenge Mandy!

Sunday, June 17, 2012

chocolate pudding cups

I'm not a big fan of graham cracker crusts. I don't like crumbs in general, and the graham cracker crusts that I make, always fall apart on me (thinking of *you* magic bars that are impossible to cut or eat cleanly). So I was only mildly interested  in this week's recipe for Baked Sunday Mornings, Aunt Sabra King's pudding bars. They sound intriguing, but really, it's just a spiked chocolate pudding on a graham cracker crust.


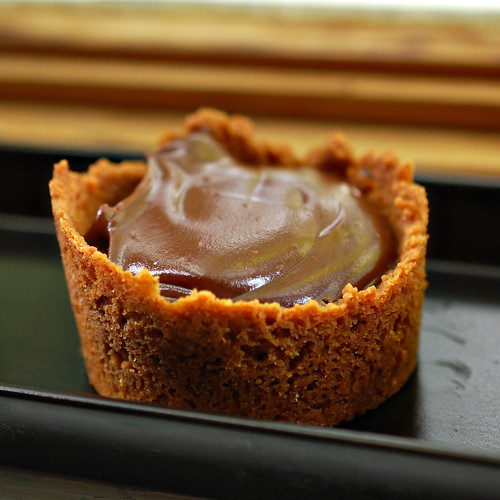
So I made the crust in individual molds, and in the chocolate pudding, I used Frangelico instead of Whisky, since that's what I had on hand. I started eating the delicious pudding on its own, but eventually paired it with the graham cups I had made and was very surprised at how much it added to the dessert. They were nice and chewy, and not at all crumbly! I'm assuming the massive amount of butter that went into the crumbs had something to do with it!

For the recipe and to see how the other members of the group fared with this one, visit the Baked Sunday Mornings site!

Sunday, June 3, 2012

strawberry pretzel salad

When I offered to bring dessert to a mother's day bbq a couple of weeks ago, I didn't have a clue what to bring. So I looked ahead on the Baked Sunday Mornings recipe schedule, and decided to kill two birds with one stone, and make the Strawberry Pretzel Salad scheduled for this week.

In the book, Matt explains that there are many, many variations of this. In my family, there are two. One of which I've blogged about before (and my personal favorite) made with a pretzel crust, sweetened condensed milk, vanilla pudding and cool whip, and topped with raspberry pie filling. The other has a graham cracker crust, some kind of creamy filling (i'm sure cool whip is involved) and topped with jello.


This Baked version is a combination of the two. A pretzel crust, whipped cream and cream cheese filling, and strawberry jello. Although the crust and the filling is pretty fool proof, I had never made the one topped with jello and struggled with the instruction to wait until the jello is partially set before pouring it over the dessert. I guess I waited to long, because my jello was slightly lumpy. I took a blow torch to it, thinking it would melt down a bit and get smoother, it helped a bit, but it didn't have a significant impact on the over all look. My jello layer remained lumpy.


I waited until we cut into it and served it to whip out the camera, but it was a mess. A delicious mess, but a mess nonetheless. It was basically impossible to cut neat squares of this dessert. The jello layer was way too soft, and was sliding everywhere.


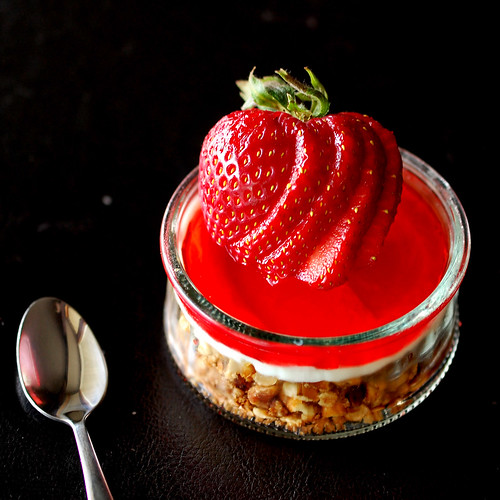
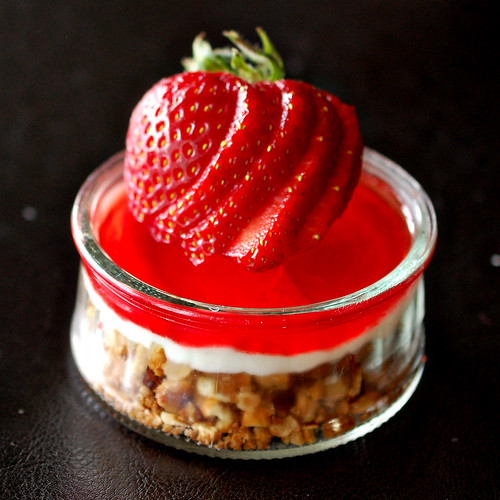
So I decided to make it again, but in a way I could get cute pictures out of it. I made a half batch and got 10 servings out of it. And again, I screwed up the jello layer, letting it set too much before pouring it on the creamy filling. So I started over, and as soon as the liquid jello was cool I poured it on the dessert to get a nice, smooth final layer. I let it set, and added sliced strawberries to the top.

I'm a huge fan of desserts using pretzel crusts (see this insanely delicious tart, here), and you really can't go wrong with a filling of whipped cream, sugar and cream cheese, although, I'm not a big fan of the jello. Ever since my first pregnancy, I have had a weird thing with artificial flavors. So that's basically all I could taste. Still, I thought it was a refreshing dessert, perfect for a summer bbq!


The recipe can be found on the Baked Sunday Mornings website.