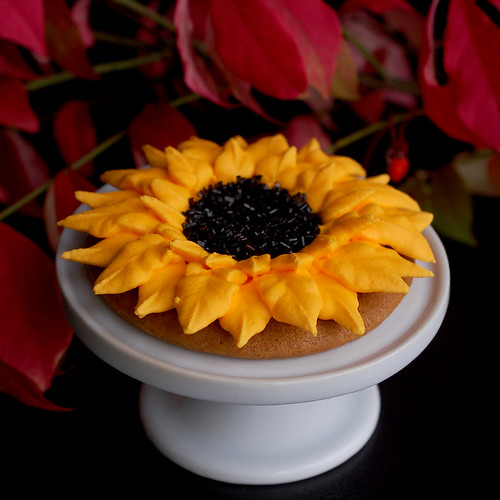
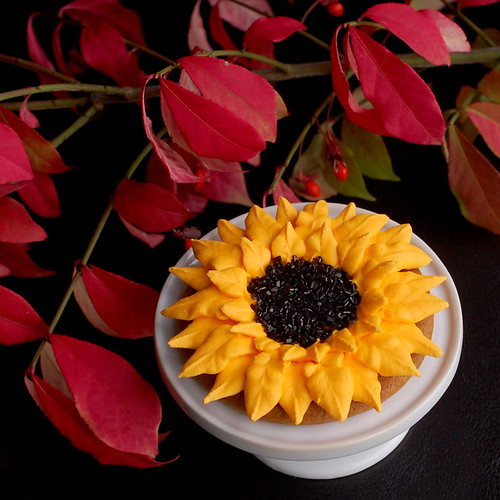
This morning's Baked Sunday Mornings recipe is Joe Froggers, or Ginger Rum Molasses Cookies, except without the rum because I didn't have any, plus vanilla, because... just because.
These cookies were supposed to be sprinkled with coarse sugar and baked, then eaten as is. But I couldn't resist prettying them up with some royal icing.
But truth be told, they were much better plain. I baked them for around 9 minutes and they baked perfectly soft, although I wish I had made them a bit thicker. They reminded me of soft gingerbread cookies, or a bear claw cookie.
The dough was quite soft, although probably not as soft as it would have been if I had added the rum the recipe called for. I still rolled the dough between two sheets of parchment, and placed the rolled out dough back in the fridge before cutting it out with cookie cutters. I was lazy and only baked two trays of cookies, stored the rest of the dough in the freezer until the next time I get the urge to bake cookies.
These are perfect for fall and winter. If I had added a thin layer of icing as opposed to three, they would make a great base for a cut out cookie, although they do spread some.
For the recipe and to see how the rest of the Baked Sunday Mornings bloggers liked these, click on through to the Baked Sunday Mornings site.
Sunday, October 21, 2012
Monday, October 15, 2012
apple pie layer cake
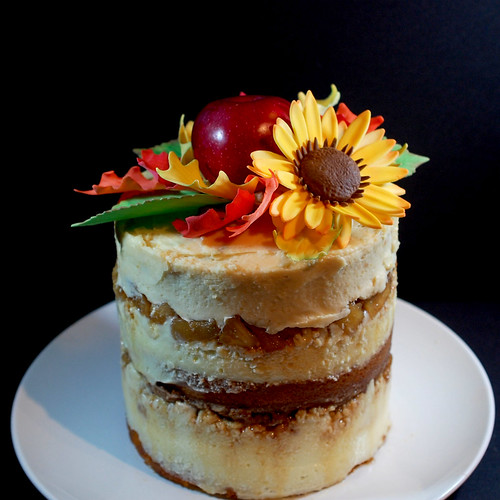
I have been baking from Momofuku Milk Bar for quite a while but haven't managed to write about anything I made until now. The recipes are delicious, but they are just not made to be pretty. I finally found a way to pretty up an ugly cake enough to blog about it!
Milk Bar is a great cookbook full of treats that are far from run of the mill. The recipes are complicated. They require many components and special ingredients. The preparation of said recipes is a bit quirky. And I love it! The more complicated the better.
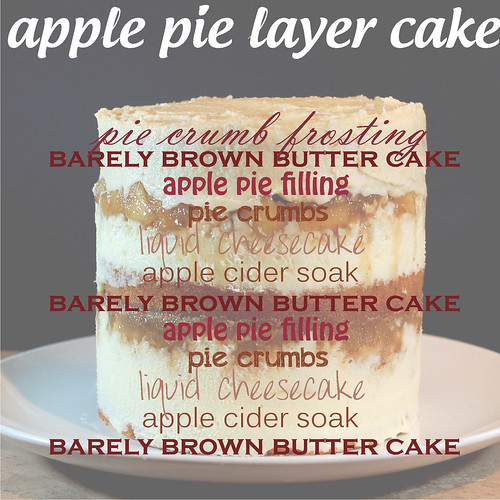
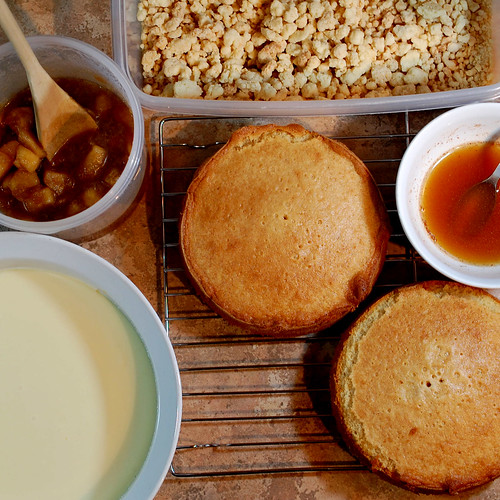
This Apple Pie Layer Cake recipe has 6 components. I made it over two days, then froze the cake overnight to serve the next night at dinner.
The Barely Brown Butter Cake gets mixed for 10 minutes total, but other than that, it's really easy to make. They bake it in a sheet pan and cut out layers later, but when I bake Milk Bar cakes, I always bake them in cake tins. The cake layers looked dry when I cut into them, but were far from it. They were flavorful, and moist, but dense.
The Apple Cider Soak is just a matter of adding sugar and cinnamon to apple cider, really nothing to it.
The recipe for the liquid cheesecake calls for lining the baking pan with plastic wrap before baking, but I never bothered the couple of times I made this. The only thing I did was decrease the salt a bit. The cookbook author likes her stuff really salty. I should have made a double batch of that, as it is delicious! A great dip for fruits, too!
The pie crumb is easy to make, and does add a nice crunchy component to the cake. I decreased the salt in this recipe as well. The apple pie filling was nice a sweet, and the combination of it with the pie crumbs reminded us of an apple crisp between layers of cake.
The only thing I would change is the frosting. It just didn't do it for me. Next time, I'll just frost the whole thing in whipped cream.
This cake was absolutely delicious! I would make it again, in a heartbeat. And even though it has many components, it's quite easy to make.
Apple Pie Layer Cake
recipe source: Milk Bar, by Christina Tosi via Sweet Peony
makes 1 (6 inch) layer cake, 5 to 6 inches tall; serves 6 to 8
1 recipe Barely Brown Butter Cake
1 recipe Apple Cider Soak
1 recipe Liquid Cheesecake
1 recipe Pie Crumb
1 recipe Apple Pie Filling
1 recipe Pie Crumb Frosting
1 6-inch cake ring
2 strips acetate (3” x 20”)
To assemble the cake:
Put a piece of parchment or a Silpat on the counter. Invert the cake onto it and peel off the parchment or Silpat from the bottom of the cake. Use the cake ring to stamp out 2 circles from the cake. These are your top 2 cake layers. The remaining cake “scrap” will come together to make the bottom layer.
For Layer 1, the bottom: Clean the cake ring and place it in the center of a sheet pan lined with clean parchment or a Silpat. Use 1 strip of acetate to line the inside of the cake ring. Put the cake scraps inside the ring and use the back of your hand to tamp the scraps together into a flat even layer.
Dunk a pastry brush in the apple cider soak and give the layer of cake a good bath of half of the soak.
Use the back of a spoon to spread half of the liquid cheesecake in an even layer over the cake.
Sprinkle one-third of the remaining half recipe of pie crumbs evenly over the liquid cheesecake. Use the back of your hand to anchor them in place.
Use the back of a spoon to spread one-half of the apple pie filling as evenly as possible over the crumbs.
For Layer 2, the middle: With your index finger, gently tuck the second strip of acetate between the cake ring and the top ¼ inch of the first strip of acetate, so that you have a clear ring of acetate 5 to 6 inches tall – high enough to support the height of the finished cake. Set a cake round on top of the filling and repeat the process for layer 1 (if 1 of your 2 cake rounds is jankier than the other, use it here in the middle and save the prettier one for the top).
For Layer 3, the top: Nestle the remaining cake round into the apple pie filling. Cover the top of the cake with all of the pie crumb frosting. Give it volume and swirls, or do as we do and opt for a perfectly flat top. Garnish the frosting with the remaining pie crumbs.
Transfer the sheet pan to the freezer and freeze for a minimum of 12 hours to set the cake and filling. The cake will keep in the freezer for up to 2 weeks.
At least 3 hours before you are ready to serve the cake, pull the sheet pan out of the freezer and, using your fingers and thumbs, pop the cake out of the cake ring. Gently peel off the acetate and transfer the cake to a platter or cake stand. Let it defrost in the fridge for a minimum of 3 hours (wrapped well in plastic, it can be refrigerated for up to 5 days).
Slice the cake into wedges and serve.
Barely Brown Butter Cake
makes 1 Quarter Sheet Pan
40 g Brown Butter (2 tablespoons)
55 g Butter (4 tablespoons, 1/2 stick)
250 g Granulated Sugar (1 1/4 cups)
60 g Light Brown Sugar (1/4 cup tightly packed)
3 Eggs
110 g Buttermilk (1/2 cup)
65 g Grapeseed Oil (1/3 cup)
2 g Vanilla Extract (1/2 teaspoon)
185 g Cake Flour (1 1/2 cups)
4 g Baking Powder (1 teaspoon)
4 g Kosher Salt (1 teaspoon)
Heat the oven to 350 degrees F.
To make the brown butter, place 2 tablespoons of butter in a microwave-safe bowl and top with a microwave-safe plate. Microwave for 3-5 minutes. The butter will pop while browning. Check the butter, and if not browned enough, microwave again in 1 minute increments. While the brown butter is cooling, stir periodically to incorporate the caramelized bits of butter. Cool completely.
Combine the butters and sugars in the bowl of a stand mixer fitted with the paddle attachment and cream together on medium-high for 2 to 3 minutes. Scrape down the sides of the bowl, add the eggs, and mix on medium high for 2 to 3 minutes. Scrape down the sides of the bowl once more.
Stream in the buttermilk, oil, and vanilla while the paddle swirls on low speed. Increase the speed to medium-high and paddle 5 to 6 minutes, until the mixture is practically white, twice the size of your original fluffy butter-and-sugar mixture, and completely homogenous. You’re basically forcing too much liquid into an already fatty mixture that doesn’t want to make room for it, so if it doesn’t look right after 6 minutes, keep mixing. Stop the mixer and scraped down the sides of the bowl.
On very low speed, add the cake flour, baking powder, and salt. Mix for 45 to 60 seconds, just until your batter comes together and any remnants of dry ingredients have been incorporated. Scrape down the sides of the bowl. Mix on low speed for another 45 seconds to ensure that any little lumps of cake flour are incorporated.
Pam-spray a quarter sheet pan and line it with parchment, or just line the pan with a Silpat. Using a spatula, spread the cake batter in an even layer in the pan. Bake for 30 to 35 minutes. The cake will rise and puff, doubling in size, but will remain slightly buttery and dense. At 30 minutes, gently poke the edge of the cake with your finger: the cake should bounce back slightly and the center should no longer be jiggly. Leave the cake in the oven for an extra 3 to 5 minutes if it doesn’t pass these tests.
Take the cake out of the oven and cool on a wire rack, or, in a pinch, in the fridge or freezer. The cooled cake can be stored in the fridge, wrapped in plastic wrap, for up to 5 days.
Apple Cider Soak
makes about 60 g (1/4 cup)
55 g Apple Cider (1/4 cup)
5 g Light Brown Sugar (1 teaspoon tightly packed)
0.25 g Ground Cinnamon (pinch)
Whisk together all of the ingredients in a small bowl until the sugar is completely dissolved.
Liquid Cheesecake
makes one 6” baking dish
227 g Cream Cheese (8 ounces)
150 g Sugar (3/4 cup)
15 g Cornstarch (1 tablespoon)
2 g Kosher Salt (1/2 teaspoon)
25 g Milk (2 tablespoons)
1 Egg
Heat oven to 300 degrees F. Put cream cheese into the bowl of a stand mixer fitted with the paddle, and beat on medium speed for 2 minutes. Scrape down the sides of the bowl. Add the sugar and mix for 1-2 minutes, until the sugar has been completely incorporated. Scrape down the sides of the bowl.
Whisk together the cornstarch and salt in a medium bowl. Whisk in the milk in a slow, steady stream, then whisk in the egg until the slurry is homogenous.
With the mixer on a medium low speed stream in the egg slurry. Paddle for 3 or 4 minutes, until the mixture is smooth and loose. Scrape down the sides of the bowl.
Line the sides and bottom of a 6” x 6” baking pan with plastic wrap. Pour the cheesecake batter into the pan and bake for 15 minutes. It is done when it is set on the edges but still jiggly in the center. If the edges aren't quite set, bake for 5 minute increments until it's done- no more than 25 minutes.
Cool completely to finish the baking process and allow the cheesecake to set. It will be creamy, and spreadable and can be stored in the fridge in an air-tight container for up to a week.
Pie Crumb
makes about 350 g (2 3/4 cups)
240 g Flour (1 1/2 cups)
18 g Sugar (2 tablespoons)
3 g Kosher Salt (3/4 teaspoon)
115 g Butter, melted (8 tablespoons, 1 stick)
20 g Water (1 1/2 tablespoons)
Heat the oven to 350 degrees F
Combine the flour, sugar, and salt in the bowl of a stand mixer fitted with the paddle attachment and paddle on low speed until well mixed.
Add the butter and water and paddle on low speed until the mixture starts to come together in small clusters.
Spread the clusters on a parchment – or Silpat-lined sheet pan. Bake for 25 minutes, breaking them up occasionally. The crumbs should be golden brown and still slightly moist to the touch at that point; they will dry and harden as they cool.
Let the crumbs cool completely. Stored in an airtight container, the crumbs will keep fresh for 1 week at room temperature or 1 month in the fridge or freezer.
Apple Pie Filling
makes about 400 g (1 3/4 cups)
1 Lemon
300 g Granny Smith Apples (2 medium )
14 g Butter (1 tablespoon)
150 g Light Brown Sugar (2/3 cup tightly packed)
1 g Ground Cinnamon (1/2 teaspoon)
1 g Kosher Salt (1/4 teaspoon)
Fill a medium bowl halfway with cold tap water. Juice the lemon into it. Fish out and discard any seeds. You will use this lemon water to keep your apple pieces looking fresh and pert.
Peel the apples, then halve and quarter them. Put each apple quarter on its side and cut a small slice down the length of the apple to remove the seeds and core. Cut each apple quarter lengthwise into thirds and then crosswise into fourths, leaving you with 12 small pieces from every apple quarter. Transfer these pieces to the lemon water as you go.
When you’re ready to cook, drain the apples (discard the lemon water) and combine them in a medium pot with the remaining ingredients. Slowly bring to a boil over medium heat, using a spoon to gently stir the mixture as it heats up and the apples begin to release liquid. Reduce the heat and simmer the apples gently for 3 to 5 minutes. Be careful not to cook the apples so much that they turn into applesauce.
Transfer to a container and put in the fridge to cool down. Once completely cooled, the filling can be stored in the fridge in an airtight container for up to 1 week; do not freeze.
Pie Crumb Frosting
makes about 220 g (3/4 cup), or enough for 2 Apple Pie Layer Cakes, or 1 generously frosted cake
1/2 recipe Pie Crumb
110 g Milk (1/2 cup)
2 g Kosher Salt (1/2 teaspoon)
40 g Butter, at room temperature (3 tablespoons)
40 g Confectioners’ Sugar (1/4 cup)
Combine the pie crumbs, milk, and salt in a blender, turn the speed to medium-high, and puree until smooth and homogenous. It will take 1 to 3 minutes (depending on the awesomeness of your blender). If the mixture does not catch on your blender blade, turn off the blender, take a small teaspoon, and scrape down the sides of the canister, remembering to scraped under the blade, then try again.
Combine the butter and confectioners’ sugar in the bowl of a stand mixer fitted with the paddle attachment and cream together on medium-high for 2 to 3 minutes, until fluffy and pale yellow. Scrape down the sides of the bowl with a spatula.
On low speed, paddle in the contents of the blender. After 1 minute, crank the speed up to medium-high and let her rip for another 2 minutes. Scrape down the sides of the bowl. If the mixture is not a uniform, very pale, barely tan color, give the bowl another scrape and mix for one more minute.
Use the frosting immediately, or store it in an airtight container in the fridge for up to 1 week.
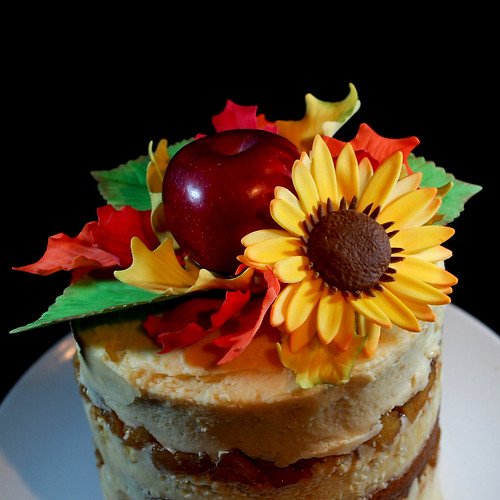
The sunflower and the leaves were made of fondant and gumpaste. Only the apple is real.
Sunday, October 14, 2012
oatmeal peanut butter chocolate scones
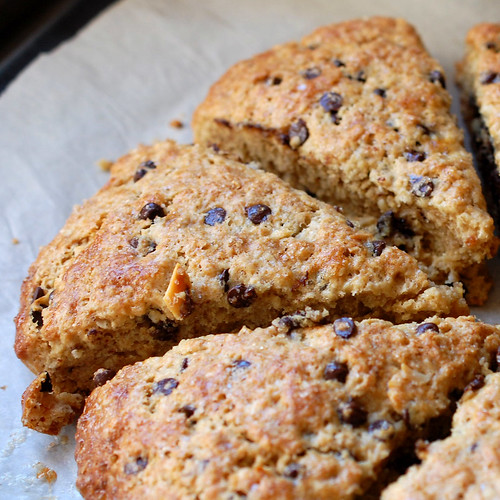
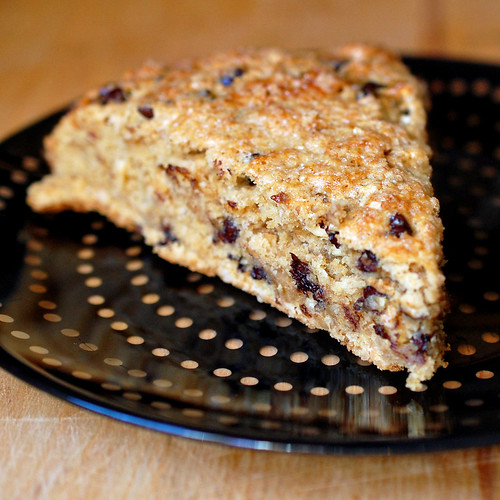
I was very excited to get the third Baked book, as I've been baking from the first two for years. As we were headed for the cottage for the long weekend, I quickly baked the oatmeal peanut butter chocolate scones for breakfast, and to bring along with us on the car trip.
I like to bake scones because they take no time at all, and no advanced prep. Butter, buttermilk and egg straight out of the fridge, one bowl, minimal handling, and no standing mixer to wake up the sleeping husband.
In this recipe, the flour, dark brown sugar, salt, baking powder and baking soda are mixed together, then the butter gets cut in. You make a well in the middle of the dry ingredients, and pour in buttermilk, an egg yolk and peanut butter. The mixture gets lightly combined, then chocolate chips get folded in. I also added chopped peanuts, because the Baked guys recommended chunky peanut butter for texture, and I didn't have any. So I used about 1/3 cup of chopped peanuts, and 2/3 cups of mini chocolates chips.
The resulting dough is then turned out on a baking sheet lined with parchment paper and quickly shaped into a circle, and brushed with egg white, and sprinkled with raw sugar. The scones are cut before baking, and after they come out of the oven, so their edges are nice and soft.
1/8 of this recipe make for a filling breakfast, and I would totally serve mini versions of these to my girls for breakfast, with a glass of milk and a banana. Yum!
I really enjoyed making, and eating these! I'm sure it's not the last time this recipe gets used!
I baked these, mainly because I wanted to eat them, but also as part of Baked Sunday Mornings' quest to bake all the recipes in all three BAKED cookbooks. For the recipe, and to see how the other members of this group liked this recipe, click on through to the Baked Sunday Mornings website! And feel free to buy the book and join us! We bake out of Explorations every second Sunday.
Saturday, October 13, 2012
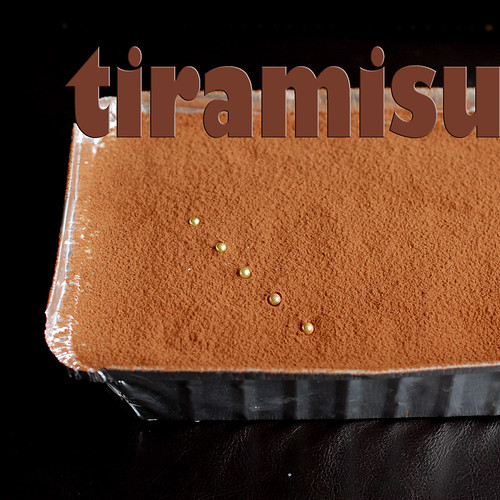
tiramisu
I traded a cardboard house for dessert last summer. I was working at a fair with a colleague I rarely see. We both wanted the cardboard houses on display at one of the booths and she ended up getting the last one at the end of the day, but gave it to me instead of keeping it for her own daughter. I said I'd make her whatever dessert she wanted the next time I saw her. She picked tiramisu. Kinda took me off guard since I've never had tiramisu, let alone made it, but whatever. I'm up for a challenge!
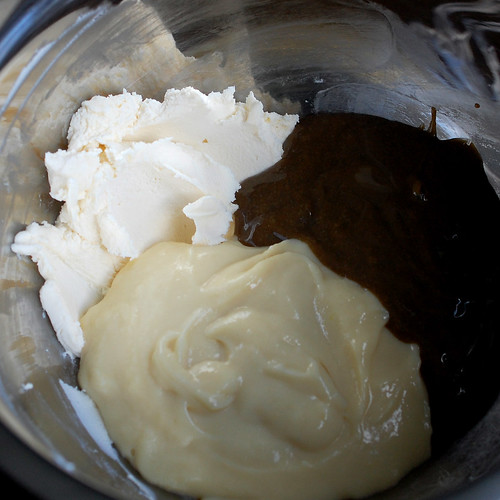
So tiramisu is layers of cookies (savoiardi or ladyfingers or langues de chat) dipped in sweetened espresso, and creamy filling, this one made by combining mascarpone, vanilla pastry cream, zabaglione and whipped cream. Then the whole thing is dusted in cocoa powder.
I picked the recipe the Daring Bakers had made back in February 2010, a full year before I joined.
In the challenge, they were supposed to make the mascarpone from scratch, but I ran out of time and didn't plan ahead properly, so I bought it. And the zabaglione was supposed to be flavored with marsala wine, but there was an option to use coffee, so that's what I did. I don't know my colleague very well, and didn't know if she liked wine. What I do know is that she's trying to get pregnant, so I chose to go with coffee in case she's avoiding alcohol. Now I don't know if coffee zabaglione is even a thing, since I think zabaglione is a custard made with alcohol. But whatever, I'm going with zabaglione anyways.
I made the zabaglione and the pastry cream the first day, let the mixtures chill overnight. Felt really fancy flavoring the zabaglione with coffee and lemon zest. Felt European. Although I don't drink coffee, I love the smell of it. And this mixture smelled so good! The next morning, I made the savoiardi, whipped the cream and combined the four components of the creamy filling. I made the required 2 cups of sweet espresso (which was a cup too many) and layered the dessert.
Dipping the cookies in coffee before layering them with the creamy filling seemed wrong. Soggy cookies are gross, unless it's because oreos were dipped in milk. And even at that, they need to be dipped quickly, and consumed immediately. But then again, the cookies by themselves were not that delicious either. They had a crispy meringue-like shell, but a dry cookie texture inside. And I was surprised that they kept their shape in the oven, just puffing up a bit, just barely spreading.
I wish I could have prettied up the dessert a bit, but it needed to travel a couple of hours by car, then spend the day hanging out in a small fridge before travelling a couple more hours to it's final destination, so I played it safe, and left it in its throwaway container.
This dessert got rave reviews. I was told the flavors were perfect, and the sugar didn't overwhelmed the coffee. The cookies were not soggy and the final product could have been served in an Italian Piazza. Score 1 for the tiramisu.
LADYFINGERS/ SAVOIARDI BISCUITS
(Source: Recipe from Cordon Bleu At Home)
3 eggs, separated
6 tablespoons granulated sugar
3/4 cup cake flour, sifted
6 tablespoons confectioner's sugar
Preheat your oven to 350 F degrees, line 2 baking sheets with parchment paper.
Beat the egg whites using a hand held electric mixer until stiff peaks form. Gradually add the granulated sugar and continue beating until the egg whites become stiff again, glossy and smooth.
In a small bowl, beat the egg yolks lightly with a fork and fold them into the meringue. Sift the flour over this mixture and fold gently until just mixed.
Fit a pastry bag with a plain tip and fill with the batter. Pipe the batter into 5" long and 3/4" wide strips leaving about 1" space in between the strips.
Sprinkle half the confectioner's sugar over the ladyfingers and wait for 5 minutes. Sprinkle the remaining sugar.
Bake the ladyfingers for 10 minutes, then rotate the sheets and bake for another 5 minutes or so until the puff up, turn lightly golden brown and are still soft.
Allow them to cool slightly on the sheets for about 5 minutes and then remove the ladyfingers from the baking sheet with a metal spatula while still hot, and cool on a rack.
Store them in an airtight container till required. They should keep for 2 to 3 weeks.
TIRAMISU
(Recipe source: Carminantonio's Tiramisu from The Washington Post, July 11 2007 )
For the zabaglione:
2 large egg yolks
3 tablespoons sugar
1/4 cup Marsala wine (or port or coffee)
1/4 teaspoon vanilla extract
1/2 teaspoon finely grated lemon zest
For the vanilla pastry cream:
1/4 cup sugar
1 tablespoon all purpose flour
1/2 teaspoon finely grated lemon zest
1/2 teaspoon vanilla extract
1 large egg yolk
3/4 cup whole milk
For the whipped cream:
1 cup chilled heavy cream
1/4 cup sugar
1/2 teaspoon vanilla extract
To assemble the tiramisu:
2 cups brewed espresso, warmed
1 teaspoon rum extract (optional)
1/2 cup sugar
1/3 cup mascarpone cheese
1 recipe savoiardi/ladyfinger biscuits
2 tablespoons unsweetened cocoa powder
For the zabaglione:
Heat water in a double boiler. If you don’t have a double boiler, place a pot with about an inch of water in it on the stove. Place a heat-proof bowl in the pot making sure the bottom does not touch the water.
In a large mixing bowl (or stainless steel mixing bowl), mix together the egg yolks, sugar, the Marsala (or espresso/ coffee), vanilla extract and lemon zest. Whisk together until the yolks are fully blended and the mixture looks smooth.
Transfer the mixture to the top of a double boiler or place your bowl over the pan/ pot with simmering water. Cook the egg mixture over low heat, stirring constantly, for about 8 minutes or until it resembles thick custard. It may bubble a bit as it reaches that consistency. Strain into a bowl and let cool to room temperature. Cover and refrigerate at least 4 hours or overnight, until thoroughly chilled.
For the pastry cream:
Mix together the sugar, flour, lemon zest and vanilla extract in a medium heavy-bottomed saucepan. To this add the egg yolk and half the milk. Whisk until smooth.
Now place the saucepan over low heat and cook, stirring constantly to prevent the mixture from curdling.
Add the remaining milk a little at a time, still stirring constantly. After about 12 minutes the mixture will be thick, free of lumps and beginning to bubble. Strain the cream into a bowl and cool to room temperature. Cover with plastic film and refrigerate at least 4 hours or overnight, until thoroughly chilled.
For the whipped cream:
Combine the cream, sugar and vanilla extract in a mixing bowl. Beat with an electric hand mixer until the mixture holds stiff peaks. Set aside.
To assemble the tiramisu:
Have ready a 8" by 8" serving dish.
Mix together the warm espresso, rum extract and sugar in a shallow dish, whisking to mix well. Set aside to cool.
In a large bowl, beat the mascarpone cheese with a spoon to break down the lumps and make it smooth. This will make it easier to fold. Add the prepared and chilled zabaglione and pastry cream, blending until just combined. Gently fold in the whipped cream. Set this cream mixture aside.
Now to start assembling the tiramisu.
Workings quickly, dip 12 of the ladyfingers in the sweetened espresso, about 1 second per side. They should be moist but not soggy. Immediately transfer each ladyfinger to the platter, placing them side by side in a single row. You may break a lady finger into two, if necessary, to ensure the base of your dish is completely covered.
Spoon one-third of the cream mixture on top of the ladyfingers, then use a rubber spatula or spreading knife to cover the top evenly, all the way to the edges.
Repeat to create 2 more layers, using 12 ladyfingers and the cream mixture for each layer. Clean any spilled cream mixture; cover carefully with plastic wrap and refrigerate the tiramisu overnight.
To serve, carefully remove the plastic wrap and sprinkle the tiramisu with cocoa powder using a fine-mesh strainer or decorate as you please. Cut into individual portions and serve.
Sunday, October 7, 2012
pumpkin chocolate chip loaf
Another Baked Sunday Mornings, another recipe I didn't make. Bad blogger! The scheduled recipe was for a Burnt Sugar Bundt Cake with Caramel Rum Frosting. I didn't have a use for a huge Bundt cake, and couldn't justify making it just for us, especially since I'm 5 days late making my husband's birthday cake.
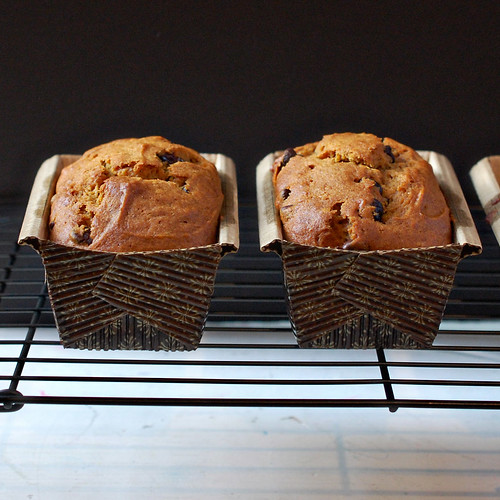
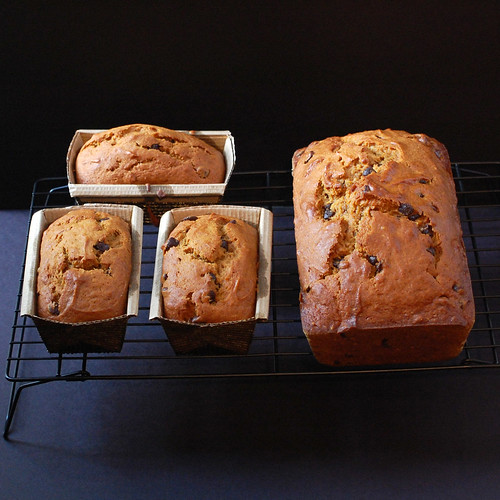
What I could justify though, was making this pumpkin chocolate chip loaf for Teacher's Appreciation Day.
The recipe is out of Baked's first cookbook. I'm sure I've made it before pre-blog but I was happy to make it again. I liked how simple is was to prepare, and the fact that I didn't need to use the stand mixer, especially since I made it at 5:30 am before school. Didn't want to wake up the girls with the mixer!
The resulting loaf tastes like fall, and is super moist! We love if for breakfast.
Pumpkin Chocolate Chip Loaf
from Baked: New Frontiers in Baking
3 1/4 cups all-purpose flour
2 teaspoons ground cinnamon
1/2 teaspoon ground nutmeg
1/2 teaspoon ground allspice
1/2 teaspoon ground ginger
2 teaspoons baking soda
2 teaspoons salt
1 3/4 cups pumpkin puree (a 15-ounce can)
1 cup vegetable oil
3 cup sugar
4 large eggs
1 teaspoon pure vanilla extract
1 1/2 cup (12 ounces) semi- or bittersweet chocolate chips
Preheat the oven to 350 degrees F. Butter and flour two 9-by-5-by-3-inch loaf pans.
In a large bowl, whisk together the flour, spices, baking soda and salt.
In another large bowl, whisk together the pumpkin puree and oil until combined. Add sugar and whisk again. Whisk in the eggs one at a time then the vanilla. Add 2/3 cup room-temperature water and whisk to until combined. Fold the chocolate chips into the wet ingredients with rubber spatula.
Fold the dry ingredients into the wet, being careful not to overmix the batter. Spread the batter into the prepared pans, and gently knock the bottom of the pan onto the countertop to even out the batter. Use a spatula to smooth the top.
Bake in the center of the oven until a toothpick comes out clean, about 75 to 90 minutes, rotating pans halfway through. Cool on a wire rack for 15 minutes before inverting the loaf onto the rack to cool completely before serving. The loaf will keep for 3 days or more wrapped in plastic wrap or in an airtight container at room temperature.
That's all that was left by the time I got around to taking a cross section picture! It was that good!
Subscribe to:
Comments (Atom)

