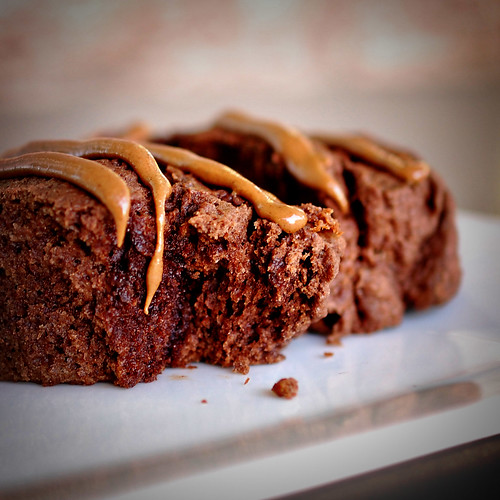
The recipe for this week's Baked Sunday Morning bakealong-blogalong is for Honey Corn Muffins. Yeah. Didn't feel like making that. So I made the first recipe the group posted about almost one year ago, way before I joined. Nutella Scones. Way more interesting than corn muffins!
Although I was never a big fan of recipes that called for cutting butter into flour, I've grown to like making scones and biscuits, even if I don't make them often. These came together pretty quickly, and were out of the oven by the time my husband got out of bed.
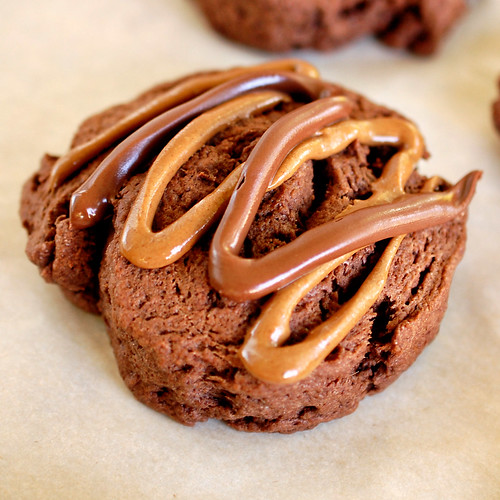
The recipe calls for toasted hazelnuts, but I couldn't find any in my pantry, so I just didn't add any nuts to these scones. I had read about other bloggers having trouble with the dough not coming together, so I added in a big spoonful of hazelnut praline that I had bought for something else, and never used. Although not as amazing as nutella, hazelnut praline is pretty delicious stuff. I drizzled most of my scones with both the praline and the nutella.
And for some reason, I didn't want triangle shaped scones that morning. So, just like the recipe instructed, I patted out the dough into a rectangle, spread nutella all over it, the rolled it into a cylinder (I feel like I'm in school learning about geometry writing this paragraph), and instead of flattening it and cutting it into wedges, I just sliced it in 8 pieces, to make round scones. I was hoping that I'd be able to see the nutella spiral on top of the scone...
They were a nice change from the usual weekend breakfasts. But I think the hazelnuts were definitively needed, to add some kind of texture to these scones. They were delicious, but very rich, and hard to eat almost. A tall glass of milk was needed to get these down! Certainly better than the corn muffins I was supposed to make, I'm sure!
If you'd like the recipe, hop over to the Baked Sunday Mornings blog. To see what other bloggers thought of the Honey Corn Muffins, check out the Baked Sunday Mornings facebook page where we've been posting while our BSM host is on a blogging break!
Looking forward to the Oatmeal Chocolate Chip Cake with Cream Cheese Frosting recipe in two weeks!
Sunday, September 25, 2011
nutella scones
Saturday, September 24, 2011
apple cinnamon waffles
My husband usually makes breakfast for the girls on the weekend, but today, he had to go to the garage and get the brakes on the car fixed, so he didn't have time. So I stepped up to the plate, and made waffles.
I've had my eye on these blueberries and sour cream waffles, but we were out of blueberries. So since we had a bunch of apples, it is still September after all, I changed the recipe a bit, and made apple cinnamon waffles, that we topped with leftover caramel sauce, or maple syrup. Looked like autumn outside, and breakfast tasted like fall.
Blueberry Sour Cream Waffles
recipe adapted from The Family Kitchen
1 cup all-purpose flour
1 cup whole-wheat all purpose flour
1 tbsp sugar
1 tsp cinnamon
pinch grated nutmeg
1 1/2 teaspoons baking powder
1 teaspoon baking soda
1/2 teaspoon salt
1 cup sour cream
1 cup whole milk
3 eggs
8 tablespoons butter melted and cooled
1 cup grated apples (2 apples)
Preheat your waffle iron on medium-high heat.
In a large bowl, combine the flours, sugar, cinnamon, nutmeg, baking powder, baking soda, and salt. In a smaller bowl, whisk together the milk and sour cream, and then whisk in the eggs. Pour the wet ingredients into the dry, and stir just until combined. Fold in the butter, and then the apples, stirring minimally.
Pour 1/4 cup of batter per waffle onto the iron and cook until the waffles are a light golden brown. Keep cooked waffles warm on a platter in the oven.
Serve waffles with maple syrup or caramel syrup.
Although they made an excellent second-official-day-of-fall breakfast, the texture was more reminiscent of pancakes than of waffles, probably due to the apples being high in moisture, compared to the original blueberries in the recipe. In my waffle iron, I used 1 cup batter and cooked them for a good 3 minutes 45 seconds. Made 6 huge waffles. A great start to my most favorite season! Can't wait to start baking with pumpkin next month!
Thursday, September 22, 2011
soft pretzels
The first picture of food I ever took was of a pretzel. It was my first time making them and I was impressed with the outcome. I was going to send the pic to a friend of mine, to brag about my accomplishment, but never did. Felt kinda silly writing, "hey, look what I just made". A little while after that, I decided to start up this blog. Figured I wouldn't have to push my foodstuff onto people, they could come here and see it if they wanted to. Still kinda feel silly writing "hey, look what I just made"!
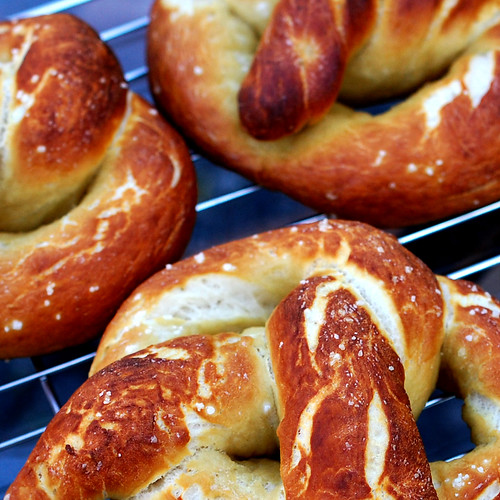
But these pretzels are worth writing about! We had them fresh from the oven, with leftover pizza sauce for dinner. They were amazing! The inside is so soft and yummy! And the crust is just salty enough. I sprinkled fleur de sel on top of four of them, and topped the other four with a mixture of sugar, chocolate and cinnamon in one of those grinders things. The sweeter ones were delicious with peanut butter the next day. Not as soft as the fresh ones, but still delicious nonetheless.
Soft Pretzels
recipe adapted from Alton Brown via FoodNetwork
1 1/2 cups warm (110 to 115 degrees F) water
1 tablespoon sugar
2 teaspoons kosher salt
1 package active dry yeast
22 ounces all-purpose flour, approximately 4 1/2 cups
2 ounces unsalted butter, melted
Vegetable oil, for pan
10 cups water
2/3 cup baking soda (I used a heaping 1/3 cup)
1 large egg yolk beaten with 1 tablespoon water (I used heavy cream)
Pretzel salt (I used fleur de sel)
Combine the water, sugar and kosher salt in the bowl of a stand mixer and sprinkle the yeast on top. Allow to sit for 5 minutes or until the mixture begins to foam. Add the flour and butter and mix until combined with a spatula. Using the dough hook, turn on the mixer at medium speed and knead until the dough is smooth and pulls away from the side of the bowl, approximately 4 to 5 minutes. Remove the dough from the bowl, clean the bowl and then oil it well with vegetable oil. Return the dough to the bowl, cover with plastic wrap and sit in a warm place for approximately 50 to 55 minutes or until the dough has doubled in size.
Preheat the oven to 450 degrees F. Line 2 half-sheet pans with parchment paper and lightly brush with the vegetable oil. Set aside.
Bring the 10 cups of water and the baking soda to a rolling boil in an 8-quart saucepan or roasting pan.
In the meantime, turn the dough out onto a slightly oiled work surface and divide into 8 equal pieces. Roll out each piece of dough into a 24-inch rope. Make a U-shape with the rope, holding the ends of the rope, cross them over each other and press onto the bottom of the U in order to form the shape of a pretzel. Place onto the parchment-lined half sheet pan.
Place the pretzels into the boiling water, 1 by 1, for 30 seconds. Remove them from the water using a large flat spatula. Return to the half sheet pan, brush the top of each pretzel with the heavy cream and sprinkle with the fleur de sel. Bake until dark golden brown in color, approximately 12 to 14 minutes. Transfer to a cooling rack for at least 5 minutes before serving.
The first time I made these, I measured the baking soda, but failed to measure to water. The results? Pretzels that tasted very strongly of baking soda. So I was careful this time around, and measured the water, and used much less soda than what the recipe called for. They tasted awesome.
For some reason I ran out of eggs (because of pancakes that call for half a dozen that my husband had made that morning). So I used heavy cream to brush on the pretzels before baking, and they turned out fine. The fleur de sel was also perfect for these, but the cinnamon sugar grinder thing didn't sweetened them as much as I would have liked.
I wish I had gotten a picture of the inside of one... next time!
Friday, September 16, 2011
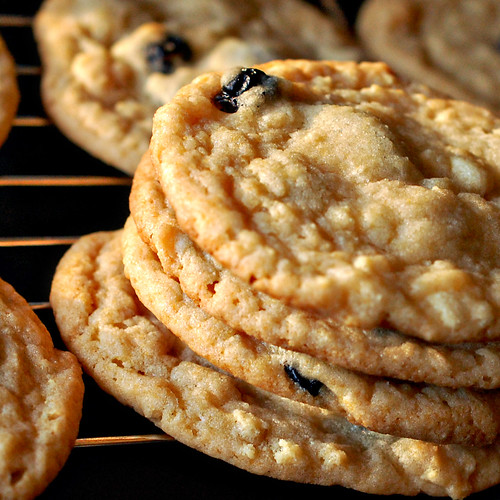
blueberry & cream cookie
I don't know why, but the momofuku empire fascinates me. I'll never eat in one of their restaurants, probably will never cook anything out of their cookbooks, but everytime I see one of their Milk Bar recipes, I get excited. They are usually over the top, complicated, out of the ordinary and cool. (I'm not sure what gives a recipe a cool factor, but for me, if it has Christina Tosi's name attached to it, it's cool.) And they are coming out with a baking cookbook this fall. I cannot wait! Wonder if anyone would be interested in doing a baking club for that one, like the ones for Baked, and Dorie's books... Anyone?
Anyways, out of the few recipes available online, I've tried the compost cookie, which was awesome. I still have the amazing sounding banana cake, the chocolate malt cake and the crack pie to try... and there's copycat versions of their cornflake cookie and their corn cookie on my list too. But for now, a simple enough cookie featuring dried blueberries and milk crumbs.
There are two components to the recipe, the milk crumbs, that have to be baked and cooled completely, and the cookie dough in which they get incorporated, that needs to chill 24 hours before being baked. On their website, the ingredients for the blueberry and cream cookie lists white chocolate, but the recipe off the bon appetit website didn't include white chocolate chips, so I left them out too, since we're not huge fans.
The raw dough is interesting, as I'm used to feeling the sugar as I bite into it, but in this case, the dough is completely smooth, but for the milk crumbs that are evenly dispersed in the batter. It's very interesting. The dough has some kind of aftertaste, that I can't quite place.
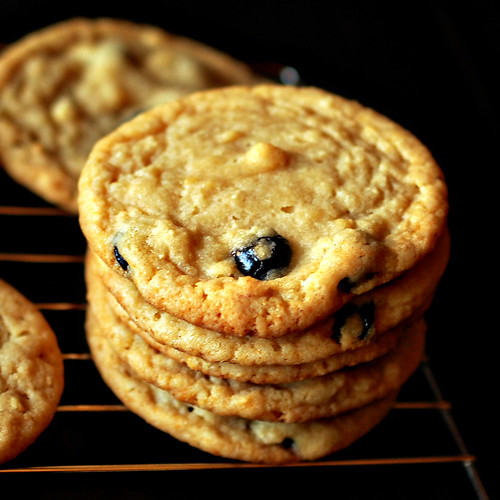
I used a 2-3 tbsp cookie scoop to portion out my cookies before chilling them for the requisite 24 hours. I baked them for 12 minutes, and they were just done. From what I can tell from the Milk Bar website, they are quite pale in color, and that's what I was trying to do as well, but the outside of the cookie is a bit golden. I managed to get 9 on a sheet nicely, but they did spread some.
Straight from the oven, you definitely taste the butter in those cookies, then you get the creaminess, the bites containing a blueberry are a very nice surprise of fruity chewiness. I was presently surprised that we could still make out the milk crumbs in them.
Completely cool, they taste less like butter, and they're pretty chewy, but not dry or cakey. It does make a lot of cookies, so I froze some of the baked cookies, as well as the raw dough. I cooked the frozen dough straight from the freezer, for about 15 minutes, and they turned out just as good as the fresh cookies. I brought a box of them to a work meeting, and they got rave reviews. In fact, I think they may have made me new friends.
Anyways, out of the few recipes available online, I've tried the compost cookie, which was awesome. I still have the amazing sounding banana cake, the chocolate malt cake and the crack pie to try... and there's copycat versions of their cornflake cookie and their corn cookie on my list too. But for now, a simple enough cookie featuring dried blueberries and milk crumbs.
There are two components to the recipe, the milk crumbs, that have to be baked and cooled completely, and the cookie dough in which they get incorporated, that needs to chill 24 hours before being baked. On their website, the ingredients for the blueberry and cream cookie lists white chocolate, but the recipe off the bon appetit website didn't include white chocolate chips, so I left them out too, since we're not huge fans.
blueberry & cream cookie
adapted from bonappetit
milk crumbs
3/4 cup nonfat dry milk powder
1/2 cup all purpose flour
3 tablespoons sugar
2 tablespoons cornstarch
3/4 teaspoon coarse kosher salt
6 tablespoons (3/4 stick) unsalted butter, melted
Preheat oven to 275°F. Line large rimmed baking sheet with parchment. Combine milk powder, flour, sugar, cornstarch, and coarse salt in medium bowl; toss to mix evenly. Add butter; stir with fork until clusters form. Spread mixture evenly on prepared sheet. Bake until crumbs are dry and crumbly but still pale, about 10 minutes. Cool Milk Crumbs completely on sheet. Can be made 1 week ahead. Store in airtight container at room temperature.
cookies
2 cups (4 sticks) unsalted butter, room temperature
1 1/2 cups sugar
1 1/2 cups plus 2 tablespoons (packed) golden brown sugar
1/2 cup plus 2 tablespoons light corn syrup
2 large eggs
5 1/4 cups all purpose flour
2 teaspoons baking powder
1 teaspoon baking soda
1 teaspoon coarse kosher salt
1 1/2 cups milk crumbs
1 1/2 cups dried blueberries
Combine butter, both sugars, and corn syrup in large bowl of stand mixer fitted with paddle attachment. Beat on medium-high speed until fluffy and pale, occasionally scraping down sides of bowl, about 3 minutes. Add eggs; beat on medium-high speed until mixture is very pale and sugar is completely dissolved, about 10 minutes. Add flour, baking powder, baking soda, and salt; beat on low speed just until blended, occasionally scraping down sides of bowl. Add Milk Crumbs; mix on low speed just until incorporated. Remove bowl from mixer. Stir in blueberries just until evenly distributed (dough will be very sticky).
Using 1/4-cup ice cream scoop for each cookie, drop dough onto 2 large rimmed baking sheets. Cover with plastic wrap and refrigerate at least 24 hours. DO AHEAD Can be made 2 days ahead. Keep chilled until baking time.
Position 1 rack in top third and 1 rack in bottom third of oven and preheat to 375°F. Line 2 large (18x12-inch) rimmed baking sheets with parchment. Transfer 6 chilled dough scoops to each sheet, spacing at least 4 inches apart (cookies will spread). Bake cookies, 2 sheets at a time, until golden, reversing sheets halfway through baking, 20 to 22 minutes total. Repeat with remaining chilled dough, cooling and relining sheets between batches. Transfer cookies to racks; cool completely. DO AHEAD Can be made 3 days ahead. Store in airtight containers at room temperature.
The raw dough is interesting, as I'm used to feeling the sugar as I bite into it, but in this case, the dough is completely smooth, but for the milk crumbs that are evenly dispersed in the batter. It's very interesting. The dough has some kind of aftertaste, that I can't quite place.
I used a 2-3 tbsp cookie scoop to portion out my cookies before chilling them for the requisite 24 hours. I baked them for 12 minutes, and they were just done. From what I can tell from the Milk Bar website, they are quite pale in color, and that's what I was trying to do as well, but the outside of the cookie is a bit golden. I managed to get 9 on a sheet nicely, but they did spread some.
Straight from the oven, you definitely taste the butter in those cookies, then you get the creaminess, the bites containing a blueberry are a very nice surprise of fruity chewiness. I was presently surprised that we could still make out the milk crumbs in them.
Completely cool, they taste less like butter, and they're pretty chewy, but not dry or cakey. It does make a lot of cookies, so I froze some of the baked cookies, as well as the raw dough. I cooked the frozen dough straight from the freezer, for about 15 minutes, and they turned out just as good as the fresh cookies. I brought a box of them to a work meeting, and they got rave reviews. In fact, I think they may have made me new friends.
Sunday, September 11, 2011
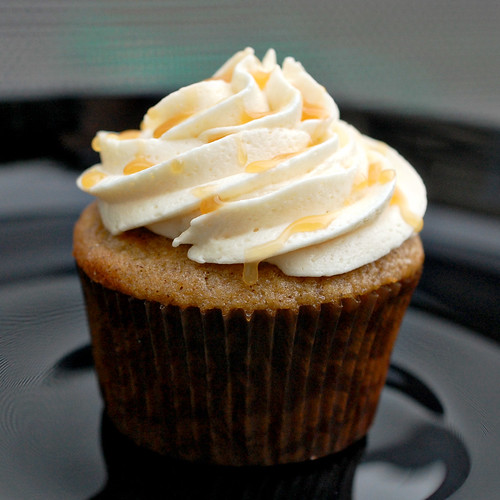
apple caramel cupcakes, and the best frosting ever
This weeks's Baked Sunday Mornings recipe was a 8-inch, three layer apple cake, with with a caramel frosting. Although I had absolutely no occasion to serve this at, I really wanted to make it, mainly because the picture in the book is just gorgeous, and the flavors are so accessible! I mean, who doesn't like apples and caramel?!
I decided to make them into cupcakes so I could easily bring them to work for my first day back in 14 months. I figured bringing in treats would increase the odds of people being happy to see me. So I halved the cake recipe, made 18 cupcakes with it, made a full batch of caramel and a full batch of frosting. It's a very good thing I halved the recipe, because these were the best cupcakes I've made in a long while. And if 18 more cupcakes were laying around, I would have eaten them all.
I decided to make them into cupcakes so I could easily bring them to work for my first day back in 14 months. I figured bringing in treats would increase the odds of people being happy to see me. So I halved the cake recipe, made 18 cupcakes with it, made a full batch of caramel and a full batch of frosting. It's a very good thing I halved the recipe, because these were the best cupcakes I've made in a long while. And if 18 more cupcakes were laying around, I would have eaten them all.
Apple Caramel Cupcakes
recipe adapted from Baked Explorations
makes 18 cupcakes
Preheat the oven to 350 degrees. Line a cupcake pan with paper liners.
2 cups all purpose flour
1 tsp baking soda
1/2 tsp baking powder
1/2 tsp salt
1 tsp cinnamon
1/2 tsp ground allspice
1/2 tsp ground cloves
Sift dry ingredients together. Set aside
3/4 cups unsalted butter, softened
1 1/4 cups sugar
1 large egg
In the bowl of standmixer fitted with the paddle attachment, beat the butter until creamy, about 4 minutes. Add the sugar, and beat until light and fluffy, about another 3 minutes. Add the egg and mix until combined.
2 cups applesauce
Add 1/3 of the flour to the butter mixture, then half the applesauce, another 1/3 of the flour, the rest of the applesauce, then the rest of the flour, mixing between each addition until combined. Scrape the sides of the bowl and mix on low speed for a few seconds.
Scoop 1/4 cup of the batter in each of the cupcake liners. Bake for about 20 minutes, until the tops spring back, and a toothpick inserted in the middle of a cupcake comes out clean.
While cupcakes are baking, make the caramel sauce. I made the frosting using the Classic Caramel Sauce recipe on page 191 of the Baked book, but I prefer this recipe, and will use it next time I make this cake. I found the recipe from the Baked book too buttery for my taste, and the instructions were not as clear as I obviously need them to be. My caramel came out way too pale, and a tad too thin. The last time I made this recipe though, perfection. So I recommend this one.
Caramel Sauce
Makes about 1 cup of caramel
1 cup (8 oz.) sugar
1/2 cup (4 fluid oz./ 120 ml.) water
1 cup (8 fluid oz./ 240 ml.) heavy cream
1/2 teaspoon salt
In a heavy-bottomed saucepan, combine the sugar and water on medium-high heat. Boil until the water completely evaporates and the sugar caramelizes to a dark mahogany color.
Working quickly, add the cream to the darkened caramel. It will bubble and pop vigorously, so add only as much cream as you can without overflowing the pot.
Return the pot to the stove on low heat and whisk gently to break up any hardened sugar. Add any remaining cream and continue stirring. Gradually, the hard sugar will dissolve and the caramel sauce will continue to darken. When the caramel has darkened to the point you want it, remove it from the heat. Add the salt and stir to combine.
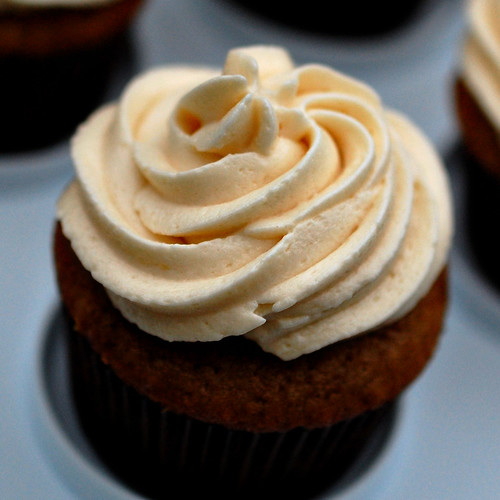
I had a bit of trouble with my frosting, but nothing that couldn't be fixed. I think my butter was way too soft, because after adding it to the cooled sugar mixture, the frosting was soupy and would not whip up. I stuck it in the fridge for a good while, and was not expecting much when I started whipping it again. I ignored it for a couple of minutes, and when I came back to it, I was pleasantly surprised to see how fluffy it was. I couldn't really taste the caramel, even though I added more than what the recipe called for, but I'm sure it's because I didn't let my sugar caramelize properly, and the caramel syrup was weak. Still, hands down, the best frosting I have ever made.
The texture was just right. It was not too sweet, it didn't taste like butter. Awesome!
Caramel Frosting
recipe source: Baked Explorations
In a medium heavy-bottomed saucepan, whisk:
1 1/2 cups sugar
1/3 cup all-purpose flour
Add:
1 1/2 cups whole milk
1/3 cup heavy cream
Cook over medium heat, whisking occasionally, until the mixture comes to a boil and has thickened, about 10-15 minutes.
Transfer the mixture to the bowl of a stand mixer, and beat with the paddle attachment until cool. Reduce speed to low, and add:
1 1/2 cups softened butter, cubed
1 tsp pure vanilla
Mix until thoroughly incorporated, the increase speed to medium-high and beat until the frosting is light and fluffy.
Add:
1/3 cup caramel sauce
Continue mixing until combined. If the frosting is too soft, chill in the refrigerator until it can be beat to proper consistency.
Pipe frosting on the cupcakes, and drizzle with added caramel if desired.
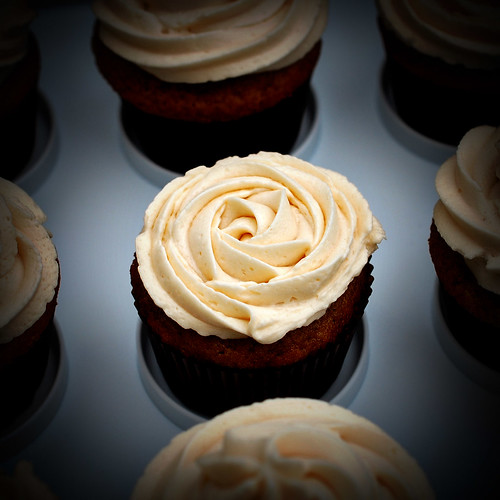
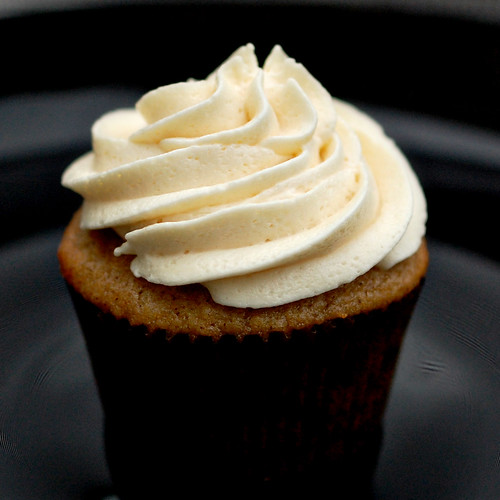
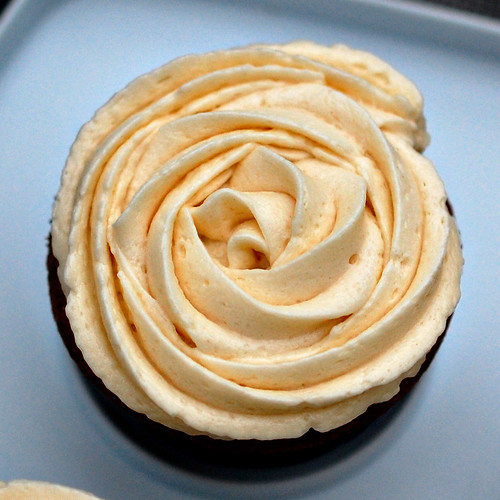
I bought a 1M piping tip just for these, so I had fun practicing the only two techniques I know, basically. I had been using cheapo giant tips, but was never able to get good results, so I'm very happy with how these turned out! And it was interesting to see which ones went first with my coworkers... By mid-morning on the second day, only one cupcake with the smaller amount of frosting remained. And it was quickly gobbled up. This frosting rocks! Pile it on!
Sunday, September 4, 2011
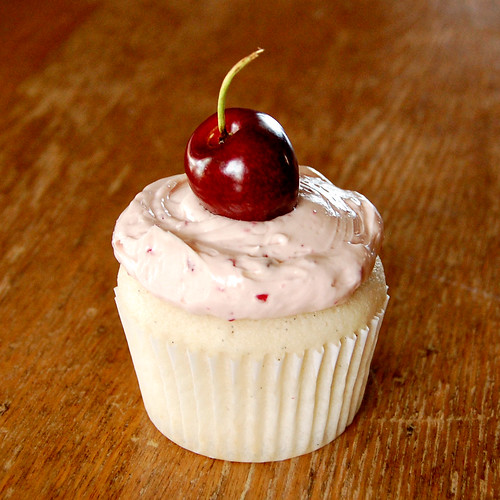
cherry cream vanilla bean cupcakes
This cupcake was supposed to be something else altogether. I had envisioned perfect squares of white cake, thick layers of pastry cream and bright red cherry jam, as inspired by this cake. Yeah, that didn't happen. My cake layers shrunk as they cooled, rendering my perfect squares impossible. (I need a new favorite white cake recipe... I'm never making that one again!) My pastry cream didn't set properly, and oozed out everywhere. Although awesome in itself, the cherry jam just mingled with the pastry cream instead of creating the perfect red layer I wanted. Fail! But someday this cake will see the light of day. And it will be amazing. But for now, it got reinvented into these cupcakes.
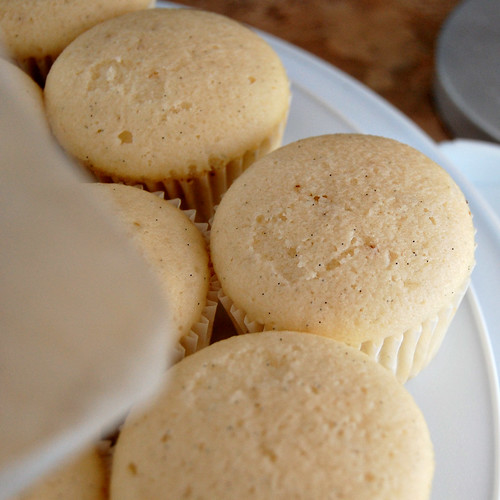
As I couldn't trust my regular white buttermilk cake recipe, I used a recipe I had used once before, about three years ago for my oldest daughter's first birthday. An adaptation of Dorie Greenspan's Perfect Party Cake. The batter is great to work with, as it can be neatly scooped into cupcake liners. It creates nicely domed cupcakes that are moist and flavorful, but on the dense side of the spectrum.
Perfect Party Cupcakes
recipe adapted from Baking: From My Home to Yours by Dorie Greenspan via Annie's Eats
makes 20 cupcakes
2 ¼ cups cake flour
1 tbsp. baking powder
½ tsp. salt
1 ¼ cups whole milk or buttermilk
4 large egg whites
1 ½ cups sugar
1 vanilla bean, seeds scraped
1 stick (8 tbsp.) unsalted butter, at room temperature
Center a rack in the oven and preheat the oven to 350°. Line a cupcake pan with cupcake liners.
Sift together the flour, baking powder and salt. In a medium bowl, whisk together the milk and egg whites. In the bowl of an electric mixer, combine the sugar and the seeds from a vanilla bean. Mix them with your fingers until the sugar is moist and fragrant. Add the butter to the sugar mixture and beat on medium speed for 3 minutes, until light and fluffy.
Add one third of the flour mixture, continuing to beat on medium speed. Beat in half of the egg mixture, then half of the remaining dry ingredients until incorporated. Add the rest of the milk and eggs, beating until the batter is homogenous, then add the last of the dry ingredients. Finally give the batter a good 2-minute beating to ensure that it is thoroughly mixed and well aerated. Using a 1/4 cup ice cream scoop, divide the batter between the cupcake liners. Bake for 18-20 minutes, or until the cakes are well-risen and springy to the touch – a thin knife inserted in the centers should come out clean.
Let the cupcakes cool in the pan for about 5 minutes, then transfer them to cooling racks and cool to room temperature.
Not sure it's the perfect white cake recipe, but it made a pretty good base for this new to me frosting, made by using egg yolks and a cooked syrup. I guess that's one of the many buttercreams out there, the French buttercream, that I flavored using my homemade cherry jam. It was only my second time making fancy buttercream (meaning, not the butter and powdered sugar kind) and I have to admit that it is quite a bit more complicated than the mix butter with powdered sugar kind.
First off, my mixer is too big to whip up a few eggs properly, so I had to take the hand mixer to it, and I don't think I got them light enough. Then I cooked the syrup which went fine. I poured the syrup on the side of the mixer bowl while whipping the eggs, but because the level of ingredients was still a bit low for my mixer, it didn't mix as fast as I had hoped. I could see tiny bits of cooked egg in my frosting which was worrisome, but when all the syrup was added and had whipped forever until it was cool, I couldn't see, feel or taste the cooked eggs, so I proceded with the recipe and added the butter. My butter was really, really soft. Too soft. After I added it all to the eggs-sugar mixture, I put the whole thing in the fridge for a little bit to let it firm up before whipping again, to get a nice piping consistency.
Cherry French Buttercream
adapted from Rose Levy Beranbaum's The Cake Bible via Delish
Makes 4 cups
6 large egg yolks
3/4 cup sugar
1/2 cup liquid corn syrup
2 cups (4 sticks) unsalted butter, room temperature
about 1/2 cup cherry jam
In the bowl of an electric mixer, beat the egg yolks until they are pale in color and thick, 3-5 minutes.
Heat the sugar and corn syrup in a medium saucepan stirring constantly, until the mixture comes to a rolling boil.
Pour a small amount of the syrup over the eggs in the mixer, and beat until incorporated. Continue until all the syrup is used up, and the mixture is pale and sticky, like liquid taffy. Continue beating until the mixture is completely cool (or you will melt the butter and ruin the frosting).
Beat in the butter, one stick at a time, waiting until each is incorporated before adding in the next. When all the butter is added and the buttercream looks dreamy, add cherry jam, tasting and adding jam until it tastes just right to you.
My husband love store bought icing, so his opinion is no good, but I thought the buttercream was nice and light, not very sweet, so the added sweetness from the cherry jam worked really well. It absolutely has to be served at room temperature, or else it would be like eating butter. It sure is different than what we are used to, but still good. I think it's something your palate has to get used to before declaring your love for it.
Since I had made cherry jam to be used in my original cake, I decided to flavor my buttercream with it. I usually only eat cherries when they are in season and fresh, never cooked, despise the canned pie filling, don't like the jam. So I'm not sure why I decided that cherry jam had to be made, but I'm so glad I did! Fresh jam is so different than the grocery store variety! It tastes like cherries! It's not gloopy. Doesn't have great big chunks of weirdly textured fruit. It's awesome! And pretty easy, until you use a pot that's way too small, and it boils over and jam spills all over your stove top. Oh well. Lesson learned. When making jam, use a big pot!
Cherry Jam
Cherry Jam
recipe adapted from kraft
In a large saucepan, stir together 4 cups stemmed, pitted and chopped sweet cherries, 1/4 cup lemon juice, a one box certo pectin crystals. Bring to a boil over high heat, then add 5 cups sugar. Return to hard boil, and boil for one minute. Remove from heat, stir and skim for 5 minutes to prevent floating fruit. Pour into warm, sterilized jars.
Thursday, September 1, 2011
apple cider caramels
It was my daughter's first day at school today. She was ready. She's been counting down the days for a good while now. I was certainly ready. Yet, when she ran back to me for one last hug... Anyways. I warned her teachers that she can be a hard-headed handful at times and that she likes to do things her way, and have people do as she says. Her teacher said she had seen all sorts in her 22 years experience. Hopefully, my kid won't stand out too much!
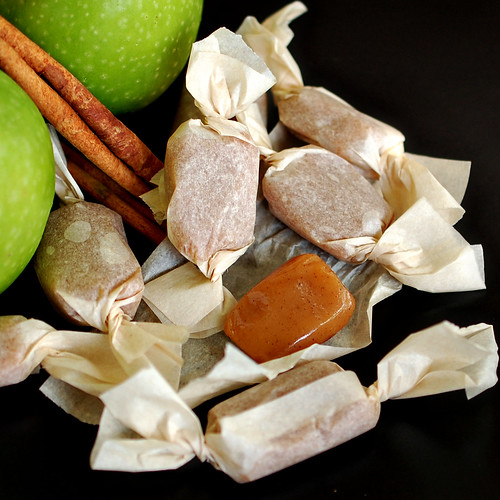
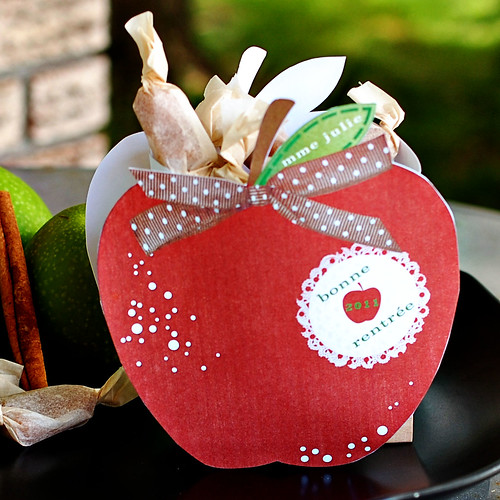
Still, to start the school year off on a good note, I made them a sweet treat. Apple cider caramels, packaged in a cute apple box. Yes. I need to go back to work. To much time on my hands.
I made fleur de sel caramels last week to top some cupcakes, but failed to get a picture, as they disappeared way too quickly. They were delicious, and I'll have to make some more soon. But I spotted these on pinterest, and thought that they would be appropriate for the start of the school year.
So I got a great big jug of apple cider, and set out to reduce 2 cups of it to 1/3 of a cup. Then made the caramels using a different method than the fleur de sel caramels, that took what it seems like way more time. But still. There's nothing difficult about making these candies, you just need to pay attention to what the thermometer says, and you'll be fine.
These things taste like the filling of a caramel apple pie. So freaking delicious!
Still, to start the school year off on a good note, I made them a sweet treat. Apple cider caramels, packaged in a cute apple box. Yes. I need to go back to work. To much time on my hands.
I made fleur de sel caramels last week to top some cupcakes, but failed to get a picture, as they disappeared way too quickly. They were delicious, and I'll have to make some more soon. But I spotted these on pinterest, and thought that they would be appropriate for the start of the school year.
So I got a great big jug of apple cider, and set out to reduce 2 cups of it to 1/3 of a cup. Then made the caramels using a different method than the fleur de sel caramels, that took what it seems like way more time. But still. There's nothing difficult about making these candies, you just need to pay attention to what the thermometer says, and you'll be fine.
Apple Cider Caramels
Recipe from America's Dairy Farmers via Blondie's Cakes
2 cups apple cider
1 cup heavy cream or whipping cream, divided
1 tsp ground cinnamon
Pinch nutmeg
1/4 tsp allspice
1 1/2 cup sugar
1/3 cup light corn syrup
1/2 cup real butter, cubed
Pour cider into a medium saucepan and boil on high for about 20 minutes or until the cider is reduced to 1/3 c. Set aside to cool.
Line an 8" square pan with parchment paper, making sure to leave about 1" hanging over the edges for easy removal. Coat with a bit of vegetable oil.
In a small bowl, combine 2/3 cup cream, cinnamon, nutmeg, allspice, and reduced apple cider.
In a large, heavy saucepan, combine the sugar and the corn syrup. Measure 1/3 cup whipping cream and add enough water to reach the 1/2 cup line on the measuring cup and add that to the sugar and corn syrup. Cook over low heat until the sugar dissolves. Insert the candy thermometer and simmer until the syrup reaches 234 degrees F.
Remove from heat and slowly whisk in the cream mixture. Add the cubed butter and stir until the cream and butter are fully incorporated. Return the pan to heat and re-insert the candy thermometer. Cook over low heat, stirring frequently, until the temperature reaches 248 degrees F.
Remove from heat and pour the caramel into the prepared pan. Let the mixture cool completely at room temperature or in the refrigerator.
Cut and wrap as desired. Store in an airtight container or in the refrigerator for up to 2 weeks.
These things taste like the filling of a caramel apple pie. So freaking delicious!
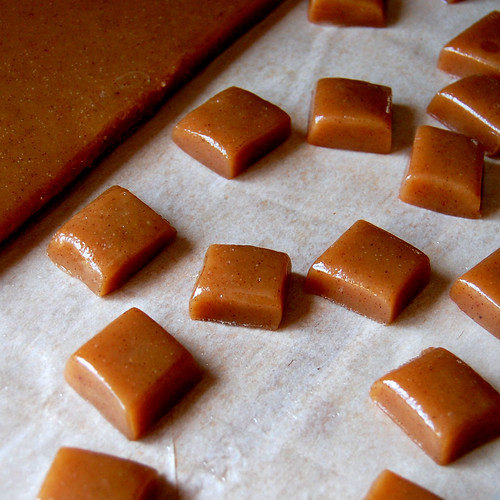
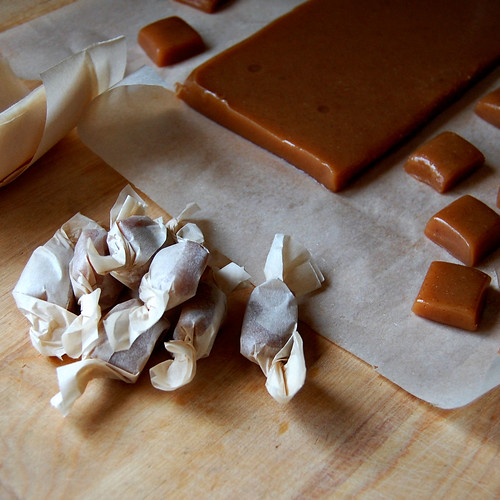
The most tedious part is probably cutting and wrapping the candies. These were soft and easy to cut after sitting on the counter overnight. Warming the knife over a flame or coating it with butter was unnecessary, and I managed to cleanly cut 64 pieces out of my 8x8 slab. Next time though, I think I might cut them a little smaller, even if it means wrapping even more of them.
The last time I wrapped candies, I used wax paper. And for some reason, the candy stuck to the wax paper like crazy. So this time around, I used parchment paper, and that worked way better. Absolutely no sticking. Just make sure to cut your paper big enough, so you don't have to start over!
While the caramels were setting, I searched the internet for cute packaging ideas, and came upon this one. With a little more browsing, I found this, and knew I had found my design. A couple of hours on photoshop, a trip to the store for a new ink cartridge and many wasted pages of cardstock later, I had cute little apples to contain my apple cider caramels.
Now I don't know Cha's new teachers, but really, who can resist caramels? Here's to a great school year!
Subscribe to:
Comments (Atom)

